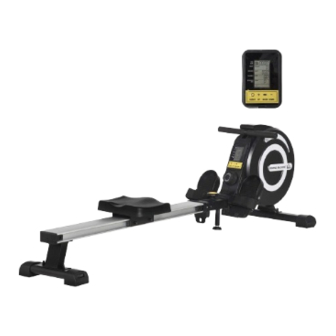
HOMCOM A90-243 User Manual
Hide thumbs
Also See for A90-243:
- Instruction manual (26 pages) ,
- Manual (24 pages) ,
- User manual (13 pages)

Related Manuals for HOMCOM A90-243


Summary of Contents for HOMCOM A90-243
- Page 1 IN230600347V01_ES A90-243 MANUAL DEL USUARIO DE LA MÁQUINA DE REMO IMPORTANTE - CONSERVE ESTA INFORMACIÓN PARA SU CONSULTA POSTERIOR: LEER DET ALLA DAMENTE MANUAL DEL USUARIO...
-
Page 2: Table Of Contents
CONTENIDO PRECAUCIÓN LISTA DE EMPAQUE VISTA EXPLOTADA INSTRUCCIONES DE MONTAJE REEMPLAZO DE BATERÍAS PLEGAR LA MÁQUINA DETALLES DEL MONITOR DE VISUALIZACIÓN... -
Page 3: Precaución
PRECAUCIÓN La carga máxima de la máquina de remo es de 264 libras. (120KG) Si no se siente bien al utilizar la máquina de remo, deténgase inmediatamente y consulte con su médico antes de utilizarla nuevamente. En el motivo de garantizar su seguridad, debe mantener una distancia de al menos 0,9 metros de los alrededores al hacer ejercicio. -
Page 4: Lista De Empaque
LISTA DE EMPAQUE COMPONENTES DE LA MÁQUINA DE REMO 1.Frame 2. Tubo de patas frontal 3. Riel 4. Conexión del marco 6.Juego de pernos de 7.Asiento 8.Soporte trasero 5.Cubierta del riel frontal bloqueo x 2 12. M12 flat washerx 2 12. - Page 5 DESSIN ÉCLATÉ...
-
Page 6: Instrucciones De Montaje
INSTRUCCIONES DE MONTAJE Paso 1: Montar el tubo de patas frontal Fije la barra estabilizadora de las patas frontales (No. 2) al marco (No. 1). Atención: Las ruedas de la barra frontal deben quedar hacia afuera. Utilice la llave Allen grande (No.32) para apretar los dos pernos de carro M8 *55 mm (No.24), las dos arandelas planas M10 (No. - Page 7 Paso 3: Montaje del asiento y la parte trasera del riel Para cumplir este paso, prepare un juego de pernos de bloqueo (No.6), el asiento (No.7), el soporte trasero (No.8), la chapa de conexión (No.9), la cubierta del riel trasero (No.10), los 4 pernos M8 * 16 mm (No.20), las 4 arandelas partidas (No.21), las 4 arandelas planas (No.22), el perno M5 * 16...
- Page 8 Paso 5: Montaje del riel Conecte el riel y el marco. Utilice las 2 llaves de boca abierta (No.33) para atornillar el perno hexago- nal M12 * 100 mm (No.26) y la contrat- uerca M12 (No.27) al orificio cerca del marco.
-
Page 9: Reemplazo De Baterías
REEMPLAZO DE BATERÍAS 1. Presione el botón y retire el monitor 2. Retire la tapa de la baterías. cuidadosamente. 3. Reemplace con las 2 baterías AA. 4. Coloque la tapa nuevamente e instale el monitor con mucho cuidado. -
Page 10: Plegar La Máquina
PLEGAR LA MÁQUINA Para plegar y almacenar la máquina de remo, en primer lugar, tire de la perilla de bloqueo (No. 29) y el pestillo rápido (No. 28), entonces doble el riel de aluminio hacia arriba. Inserte la perilla de bloqueo en la juntura del fuselaje y el riel de aluminio. Después de plegar la máquina de remo, usted puede mover la máquina de remo mediante las 2 ruedas en la barra de pies frontal. -
Page 11: Detalles Del Monitor De Visualización
DETALLES DEL MONITOR DE VISUALIZACIÓN Parámetros TIME 00:00-99:00 COUNT 0~9999 DISTANCE 0.0~99.9 ML CALORIES 0-9999 KCAL STROKES 0-999 SPM Operación Encender / apagar El monitor se encenderá de manera automática cuando empiece a hacer ejercicio. Además, también puede encender el monitor presionando esos botones con sus manos. - Page 12 MODO (Presione este botón para elegir entre 5 modos de acuerdo con sus necesidades.) Tiempo ------------------En este modo se muestra el tiempo que ha remado. Tiempo/500M---------A la velocidad actual, el tiempo que necesita por remar 500 metros. (El tiempo y el tiempo / 500M se cambian cada 6 segundos.) Contar ----------------- En este modo se muestra las cuentas que ha remado.
- Page 13 ROWING MACHINE IMPORTANT, RETAIN FOR FUTURE REFERENCE: READ CAREFULLY...
- Page 14 CONTENTS Safety Notice Parts List Exploded View Assembly Instructions Battery replacemen Folding the machine Details of Display Monitor...
- Page 15 CAUTION!
- Page 16 PACKING LIST 1.Frame 12. M12 flat washerx 2 13.M12 circlip 17.stop lever...
-
Page 17: Exploded View
EXPLODED VIEW... -
Page 18: Assembly Instructions
ASSEMBLY INSTRUCTIONS Step 1: Assemble the front foot pipe Attach the front foot stabliliser bar (Na.2) to the frame (No.1). Attention: the wheels of the front bar should be facing outward. Screw two M8*55mm carriage bolt(No.24). two M10 flat washers (No.18), two M8 acorn nut (No.25) using the big Allen wrench (No.32) to tighten. - Page 19 Step 3: Assemble the seat and rear of the rail For the step, please prepare a lock bolt set (No.6), the seat (No.7), rear support(No.8). connecting shect (No.9), rear rail cover (No.10), four M8*16mm bolts (No.20), four split washers (Nc.21), four flat washers (No.22), M5*16 bolt (No.23), and two Allen wrenches (No.32).
- Page 20 Step 5: Assembling the rail Connect the rail and the frame. Screw the M10*100mm hex bolt (No.26) and the M10 lock nut (No.27) to the hole near to the frame by using two open end wrenches (No.33). lnsert the detent pin (No.28) to the hole near to the rail.
-
Page 21: Battery Replacemen
BATTERY REPLACEMENT 1. Press the button and the remove 2. Remove the battery cover. the monitor carefully. 3. Replace with two AA batteries. 4. Place the cover back on and install the monitor carefully. -
Page 22: Folding The Machine
FOLDING THE MACHINE When folding and storing the rowing machine, first pull out the locking knob (No.29) and the quick latch (No. 28), then fold the aluminium rail upwards. Insert the locking knob at the junction of the fuselage and the aluminium rail. After folding, you can move the machine with the aid of the two wheels on the front foot bar. -
Page 23: Details Of Display Monitor
DETAILS OF DISPLAY MONITOR Parameters TIME 00:00-99:00 COUNT 0~9999 DISTANCE 0.0~99.9 ML CALORIES 0-9999 KCAL STROKES 0-999 SPM Operation Turn on/off The monitor will automatically turn on when you start to exercise, and you can also turn on it manually by pressing those buttons. The monitor will automatically turn off after 2 minutes when you stop exercise. - Page 24 -12-...
Need help?
Do you have a question about the A90-243 and is the answer not in the manual?
Questions and answers
Hiya the handle bar slipped out and the belt went in to the machine. I've taken off the side but I don't know how to place the belt. I keep placing it and it pulls but won't retract all the way in.
How to change km to miles