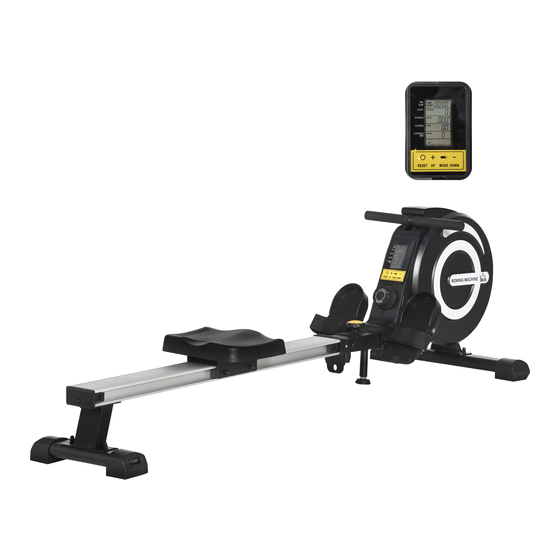
HOMCOM A90-243 Manual
Hide thumbs
Also See for A90-243:
- Instruction manual (26 pages) ,
- User manual (24 pages) ,
- Manual (24 pages)

Related Manuals for HOMCOM A90-243


Summary of Contents for HOMCOM A90-243
- Page 1 INapa001V02_IT A90-243 MANUALE D’USO DEL VOGATORE IMPORTANTE - CONSERVARE QUESTE INFORMAZIONI PER CONSULTARLE IN SEGUITO: LEGGERE ATTENTAMENTE MANUAL DEL USUARIO...
-
Page 2: Table Of Contents
CONTENUTI PRECAUZIONI LISTA PARTI VISTA ESPLOSA ISTRUZIONI PER ASSEMBLAGGIO SOSTITUZIONE DELLE BATTERIE PIEGATURA DELL’APPARECCHIO DETTAGLI DEL MONITOR... -
Page 3: Precauzioni
PRECAUZIONI Il peso massimo portato è di 264 libbre. (120 kg) In caso che non si sentisse bene durante l'utilizzo dell’apparecchio, interrompere immediatamente e consultare un medico prima dell'utilizzo successivo. Per la tua sicurezza, devi mantenere una distanza di almeno 0,9 metri dall'ambiente circostante durante l’allenamento. -
Page 4: Lista Parti
LISTA PARTI COMPONENTI DEL VOGATORE 1.Frame 2. Tubo piede anteriore 3. Guida 4. Connettore telaio 7.Sedile 8.Supporto posteriore 5.Cover guida anteriore 6.Set dadi x 2 12. M12 flat washerx 2 12. M12 rondella pietta * 2 10.Cover guida posteriore 11 .Tubo piede posteriore 9.Piastra di connessione 13.M12 circlip 13.M12 Anello di sicurezza... -
Page 5: Vista Esplosa
VISTA ESPLOSA... -
Page 6: Istruzioni Per Assemblaggio
ISTRUZONI DI ASSEMBLAGGIO Passo 1: assemblare il tubo del piede anteriore. Fissare la barra stabilizzatrice del piede anteriore (n. 2) al telaio (n. 1). Attenzione: rivolgere le ruote della barra anteriore verso l'esterno. Avvitare due bulloni a testa di supporto M8 * 55 mm (n. - Page 7 Passaggio 3: Assemblare il sedile e la parte posteriore del binario Secondo le procedure, si prega di preparare un set di bulloni di bloccaggio (n. 6), il sedile (n. 7), supporto posteriore (n. 8), foglio di collegamento (n. 9), copertura del binario posteriore (n.
- Page 8 Passaggio 5: Assemblaggio del binario Collegare il binario e il telaio. Avvitare il bullone esagonale da M12*100mm (n. 26) e il dado di bloccag- gio da M12 (n. 27) al foro vicino al telaio utilizzando due chiavi fissi (n. 33). Inserire il perno di arresto (n.
-
Page 9: Sostituzione Delle Batterie
SOSTITUZIONE DELLE BATTERIE 1. Premere il pulsante e rimuovere il 2. Rimuovere il coperchio del vano di monitor con attenzione batteria 3. Sostituire con due batterie da AA. 4. Ricoprire il coperchio e installare il monitor con attenzione... -
Page 10: Piegatura Dell'apparecchio
PIEGATURA DELL’APPARECCHIO Quando si ripiega il vogatore per conservarlo, estrarre prima la manopola di bloccaggio (n. 29) e la chiusura rapida (n. 28), e poi piegare verso l'alto il binario di alluminio. Inserire la manopola di bloccaggio all'incrocio tra la fusoliera e la binario in allumixnio. Dopo la piegatura si può... -
Page 11: Dettagli Del Monitor
DETTAGLI DEL MONITOR Parametri TIME 00:00-99:00 COUNT 0~9999 DISTANCE 0.0~99.9 ML CALORIES 0-9999 KCAL STROKES 0-999 SPM Funzionamento Accensione e Spegnimento Il monitor si accende automaticamente quando inizi ad allenarti e puoi anche accenderlo manualmente premendo i pulsanti. Il monitor si spegne automaticamente dopo 2 minuti dal momento che hai interrotto l'allenamento. - Page 12 MODE (Questo pulsante viene utilizzato per scegliere tra le 5 modalità in base alle proprie esigenze.) Time --------------------- Questa modalità mostra il tempo che hai vogato. Time/500M-------------------- Il tempo necessario per 500 metri alla velocità attuale. (Time e Time/500 M vengono visualizzati alternativamente ogni 6 secondi.) Count ----------------- Questa modalità...
- Page 13 ROWING MACHINE IMPORTANT, RETAIN FOR FUTURE REFERENCE: READ CAREFULLY...
- Page 14 CONTENTS Safety Notice Parts List Exploded View Assembly Instructions Battery replacemen Folding the machine Details of Display Monitor...
-
Page 15: Safety Notice
CAUTION! -
Page 16: Parts List
PACKING LIST 1.Frame 12. M12 flat washerx 2 13.M12 circlip 17.stop lever... -
Page 17: Exploded View
EXPLODED VIEW... -
Page 18: Assembly Instructions
ASSEMBLY INSTRUCTIONS Step 1: Assemble the front foot pipe Attach the front foot stabliliser bar (Na.2) to the frame (No.1). Attention: the wheels of the front bar should be facing outward. Screw two M8*55mm carriage bolt(No.24). two M10 flat washers (No.18), two M8 acorn nut (No.25) using the big Allen wrench (No.32) to tighten. - Page 19 Step 3: Assemble the seat and rear of the rail For the step, please prepare a lock bolt set (No.6), the seat (No.7), rear support(No.8). connecting shect (No.9), rear rail cover (No.10), four M8*16mm bolts (No.20), four split washers (Nc.21), four flat washers (No.22), M5*16 bolt (No.23), and two Allen wrenches (No.32).
- Page 20 Step 5: Assembling the rail Connect the rail and the frame. Screw the M10*100mm hex bolt (No.26) and the M10 lock nut (No.27) to the hole near to the frame by using two open end wrenches (No.33). lnsert the detent pin (No.28) to the hole near to the rail.
-
Page 21: Battery Replacemen
BATTERY REPLACEMENT 1. Press the button and the remove 2. Remove the battery cover. the monitor carefully. 3. Replace with two AA batteries. 4. Place the cover back on and install the monitor carefully. -
Page 22: Folding The Machine
FOLDING THE MACHINE Pour plier et ranger le rameur, il faut d'abord sortir le bouton de verrouillage (n° 29) et le loquet rapide (n° 28), puis replier le rail en aluminium vers le haut. Insérez le bouton de verrouillage à la jonction du fuselage et du rail en aluminium. -
Page 23: Details Of Display Monitor
DETAILS OF DISPLAY MONITOR Parameters TIME 00:00-99:00 COUNT 0~9999 DISTANCE 0.0~99.9 ML CALORIES 0-9999 KCAL STROKES 0-999 SPM Operation Turn on/off The monitor will automatically turn on when you start to exercise, and you can also turn on it manually by pressing those buttons. The monitor will automatically turn off after 2 minutes when you stop exercise. - Page 24 -12-...
Need help?
Do you have a question about the A90-243 and is the answer not in the manual?
Questions and answers