
Related Manuals for AVANT A36505


Summary of Contents for AVANT A36505
- Page 1 English Tilt adapter 90° 2018 1 Operator's Manual for Attachment Tilt adapter 90° Product number: A36505 www.avanttecno.com A432535 2018 1 EN 2017-...
- Page 2 Tilt adapter 90° 2018 1...
-
Page 3: Table Of Contents
Tilt adapter 90° 2018 1 CONTENTS 1. FOREWORD ............................4 Warning symbols used in this manual ..........................5 2. DESIGNED PURPOSE OF USE ......................6 3. SAFETY INSTRUCTIONS FOR USING THE ATTACHMENT ............7 4. TECHNICAL SPECIFICATIONS ......................11 Safety labels and main components of the attachment.................. 11 5. -
Page 4: Foreword
If you sell or transfer the equipment, be sure to hand over this manual to the new owner. If the manual is lost or damaged, you can request a new one from your Avant dealer or from the manufacturer. -
Page 5: Warning Symbols Used In This Manual
5 (32) Warning symbols used in this manual The following warning symbols are used throughout this manual. They indicate factors that must be taken into account to reduce the risk of personal injury or damage to property: WARNING SAFETY ALERT SYMBOL This symbol means: “Warning, be alert! Your safety is involved!”... -
Page 6: Designed Purpose Of Use
2. Designed purpose of use The AVANT Tilt adapter 90° is an attachment suitable for use with AVANT multi purpose loaders shown in Table 1. A tilt adapter makes it possible to tilt an attachment sideways in both directions. The tilt adapter adds flexibility and accuracy to work for example in landscaping work, or when working on uneven surfaces with a bucket or leveller, and when using the pallet forks in inclined terrains. -
Page 7: Safety Instructions For Using The Attachment
7 (32) 3. Safety instructions for using the attachment Please bear in mind that safety is the result of several factors. The loader-attachment combination is highly powerful and improper or careless use or maintenance may cause serious personal injury or property damage. - Page 8 8 (32) Risk of dropping of load or parts of attachments - Make sure load is secured on the attachment, and that the attachment is set up properly. Make sure that a load will not fall uncontrollably off from the attachment. Secure moving parts of the attachment before using them with a tilt adapter.
- Page 9 9 (32) Wrong, improper, or careless use of the attachment causes serious risk of severe injuries or death. Familiarise yourself with the controls of the loader in a safe area. Pay particular attention to the safe stopping of the attachment and the loader; follow the safe stopping procedure shown in this manual before leaving the driver's seat.
- Page 10 10 (32) Remember to wear proper personal protective equipment: The noise level at the driver's seat may exceed 85 dB(A) depending on loader model and operating cycle. Extended exposure to loud noise can cause hearing impairment. Wear hearing protection while working with the loader. ...
-
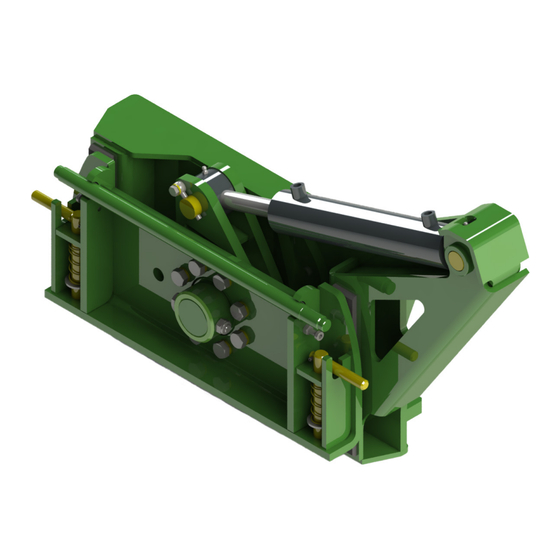
Page 11: Technical Specifications
147 mm Maximum load: 1200 kg Compatible Avant loaders: See Table 1 on page 2 4.1 Safety labels and main components of the attachment Listed below are the labels and markings on the attachment. They must be visible and readable on the equipment. - Page 12 12 (32) Table 3 - Decal locations and warning messages Decal Warning message Misuse hazard - Read instructions before 1 A36771 use. Crushing hazard - Do not go under a 2 A36772 raised attachment; stay away from raised equipment. Pinching and cutting hazard, keep clear of moving parts, do not leave the 3 A36803 equipment running.
-
Page 13: Assembling The Attachment
Do not stay in the area between the attachment and the loader. Mount the attachment only on level surface. WARNING Never move or lift an attachment that has not been locked. Avant quick coupling system: Step 1: Lift the quick attach plate locking pins up and turn them backwards into the slot so that they are locked in the upper position. - Page 14 If your loader is not listed in Table 1 on page , ask your Avant dealer before using this attachment.
-
Page 15: Assembling An Attachment To The Tilt Adapter
The extra outlet is available as an option for most loader models. Contact your Avant dealer or nearest Avant service point for more information about the extra hydraulics outlet. See page 24 and the operator's manual of your loader for more information about using the optional extra hydraulics outlet. -
Page 16: Connecting The Multiconnector System
16 (32) 5.2.1 Connecting the multiconnector system Connecting the multiconnector system: 1. Align the pins of the attachment connector with corresponding holes of the loader connector. The multiconnector will not connect if the attachment connector is upside down. 2. Connect and lock the multiconnector by turning the lever towards the loader. -
Page 17: Disconnecting Hydraulic Couplings
17 (32) 5.2.3 Disconnecting hydraulic couplings Disconnect the hydraulic hoses of the tilt adapter and the attachment from the loader, before unlocking the quick coupling plate of the loader or the tilt adapter. When uncoupling the attachment, always disconnect the hydraulic couplings before unlocking the quick attach plate, to prevent hose damage and any oil spills. -
Page 18: Instructions For Use
18 (32) 6. Instructions for use Check the attachment and the operating environment once more before starting to work, and that all obstacles have been removed from the operating area. Quick inspection of the equipment and the operating area before use are parts of ensuring safety and the best performance of the equipment. -
Page 19: Checks Before Use
19 (32) 6.1 Checks before use Drive carefully on uneven terrain and note the effect of heavy load at the front of the loader to the stability and handling of the loader. Practise the use of the attachment and the controls of the loader in a safe area. If you are unfamiliar ... -
Page 20: Using The Tilt Adapter
20 (32) 6.2 Using the tilt adapter Move the auxiliary hydraulics control lever of the loader towards its locking position turn attachment to right. Stop by releasing the lever to neutral position. Move the auxiliary hydraulics control lever of the loader to reverse direction to turn the attachment to left. -
Page 21: Maximum Load
21 (32) The figure below shows the tilting of a leveller attachment with the tilt adapter. 6.3 Maximum load Maximum load for the tilt adapter is 1200 kg when handling a load on standard pallet forks (with the centre of the load at 500 mm front from the vertical part of fork arms). -
Page 22: Vertical Adjustment
22 (32) 6.4 Vertical adjustment It is possible to set the tilt adapter so, that the quick coupling plate tilts the attachments to vertical position towards the right side. After the position is set as described below, it is not possible to tilt the attachment towards left, as seen from the driver's seat of the loader. - Page 23 23 (32) The vertical position is especially useful in narrow sites where the working width is limited. When using the tilt adapter with an attachment, which is equipped with a floating system, pay special attention when setting the attachment to correct operating position. Never turn the attachment equipped with the floating system sideways or upside down in order to avoid material damage.
-
Page 24: Extra Auxiliary Hydraulics Outlet (Optional Extra For Loaders)
24 (32) 6.5 Extra auxiliary hydraulics outlet (optional extra for loaders) The tilt adapter can also be used with an attachment with hydraulic functions, in which case the loader must be equipped with an extra double acting hydraulic outlet at the front. First, replace the faster multiconnector of the attachment with conventional quick couplings. -
Page 25: Transport Position
25 (32) 6.6 Transport position Keep the loader stable. Always transport the attachment as low and close to the ground as possible, and keep the hydraulic boom completely retracted. Also keep the tilt adapter in straight (middle) position during transport drive, as shown in adjacent figure. 6.7 Uncoupling and storage The tilt adapter can be uncoupled from the loader for short period storage with an attachment fitted. -
Page 26: Storage
26 (32) 6.7.1 Storage When storing the tilt adapter for longer periods than temporary uncoupling from the loader, the attachment should be disconnected from the tilt adapter and stored separately. Avoid leaving the tilt adapter laying directly on the ground. Place it on blocks of wood or on a pallet, for example. -
Page 27: Maintenance And Service
Finding any fault means that the hydraulic hose or component must be replaced and the equipment must not be used until it is repaired. Spare parts are available from your nearest AVANT retailer or authorised service point. Leave the repair work to professional service technicians, if you don’t have adequate knowledge and experience about hydraulic assemblies and how to perform the repairing safely. -
Page 28: Cleaning The Attachment
28 (32) 7.2 Cleaning the attachment Clean the attachment regularly to prevent accumulation of dirt which is more difficult to remove. A pressure washer and mild detergent can be used for cleaning. Do not use strong solvents, and do not spray directly at the hydraulic components, or at the labels on the attachment. -
Page 29: Warranty Terms
29 (32) 8. Warranty terms Avant Tecno Oy grants a warranty of one year (12 months) from the date of purchase for the attachment it manufactures. The warranty covers repair costs as follows: Work costs are covered, if the repair is not performed at the factory. - Page 30 SFS-EN ISO 12100, SFS-EN ISO 4413 Mallit / Modeller / Models Avant Hydraulitoiminen kallistusadapteri; Avant-kuormaajan työlaite Hydraulisk tiltadapter; arbetsredskap för Avant lastare A36505 Hydraulic Tilt adapter; attachment for Avant loaders 12.10.2018 Ylöjärvi, Finland Risto Käkelä, Toimitusjohtaja / Verkställande direktör / Managing Director...
Need help?
Do you have a question about the A36505 and is the answer not in the manual?
Questions and answers