Advertisement
Quick Links
Y
Parts Included:
Adjustable Arm Casting
Tools Required:
Ratchet Wrench
Steps:
1. Remove the back bolts
using 5mm Hex bit.
Z
© 2016 Herman Miller, Inc. Zeeland, Michigan. Printed in the U.S.A.
® Y, Z, Aeron are among the registered trademarks of Herman Miller, Inc.
Sense, Setu, and Tu are among the trademarks of Herman Miller, Inc.
TM
Illustrations and specifications are based on the latest product information available at the time of publication.
The right is reserved to make changes in design and specifications at any time, without notice, and also to discontinue products.
Steel Strip
Lever Assembly
M5 Hex Bit
T27 Torx Bit
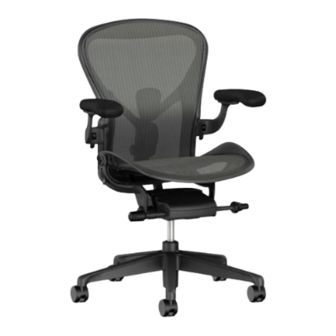
New Aeron
Adjustable Arm Casting Replacement
®
Bushing
Torque Wrench
2. Remove four bolts.
Adjustable Arm
Attachment Hard-
ware Assembly
T27 and T25 Torx
Driver
Part no. 1BH1VT rev B.
1
Advertisement

Subscribe to Our Youtube Channel
Related Manuals for HermanMiller New Aeron


Summary of Contents for HermanMiller New Aeron
- Page 1 New Aeron Adjustable Arm Casting Replacement ® Parts Included: Steel Strip Bushing Adjustable Arm Attachment Hard- ware Assembly Adjustable Arm Casting Tools Required: Lever Assembly Ratchet Wrench M5 Hex Bit T27 Torx Bit Torque Wrench T27 and T25 Torx Driver Steps: 1.
- Page 2 3. Detach the back from the 4. Remove the screw to chair. detach the arm pad for ad- justable arm. Use T25 Torx bit to remove the screw. 5. Lift the pad on the front and slide backwards as shown above to disengage it from the arm support.
- Page 3 6. Detach the arm pad. 7. Note that the filler plate will get detached while re- moving the arm pad. 8. Slide the slide bar out of the arm support hardware assembly. Part no. 1BH1VT rev B. © 2016 Herman Miller, Inc. Zeeland, Michigan. Printed in the U.S.A. ®...
- Page 4 9. Insert the flat screw driver between the middle plate and the plastic housing and lift the plate up on both sides to detach the cover. 10. After releasing the metal 11. Detach the metal plate. plate, rotate the font part and pull out the metal plate outwards to disengage.
- Page 5 12. Remove the friction plate from the hardware assem- bly. 13. Remove the screw to 14. Use T27 Torx bit to re- detach the hardware assem- move the screws. bly. Part no. 1BH1VT rev B. © 2016 Herman Miller, Inc. Zeeland, Michigan. Printed in the U.S.A. ®...
- Page 6 15. Remove the pivot plate. 16. Detach the bottom cover. Part no. 1BH1VT rev B. © 2016 Herman Miller, Inc. Zeeland, Michigan. Printed in the U.S.A. ® Y, Z, Aeron are among the registered trademarks of Herman Miller, Inc. Sense, Setu, and Tu are among the trademarks of Herman Miller, Inc. Illustrations and specifications are based on the latest product information available at the time of publication.
- Page 7 17. Detach the friction pad. 18. Detaching adjustable arm casting form the swing arm. Part no. 1BH1VT rev B. © 2016 Herman Miller, Inc. Zeeland, Michigan. Printed in the U.S.A. ® Y, Z, Aeron are among the registered trademarks of Herman Miller, Inc. Sense, Setu, and Tu are among the trademarks of Herman Miller, Inc.
- Page 8 19. Remove the bolt from 20. Detach the arm and the swing arm using T27 hardware attachment as- torx driver. sembly. Note: Right hand arm shown has RH threads and a yellow bolt. The left hand arm has LH threads and a black bolt.
-
Page 9: Re-Assembly Steps
Re-Assembly Steps: 23. Place the lever assem- 24. Attention: Lever should bly into the socket. be in fully locked position during installation. 25. Attach the clip in the arm slot as shown. Part no. 1BH1VT rev B. © 2016 Herman Miller, Inc. Zeeland, Michigan. Printed in the U.S.A. ®... - Page 10 26. Place the steel strip in 27. Install the arm assembly place. into the swing arm. Attention: Keep the arm in vertically centre with the swing arm. 28. Install the hardware 29. Install the bolt with 35 in- lbs torque using T27 torxbit. assembly as received.
- Page 11 30. Follow previous steps to 31. Replace the friction pad install left hand arm. in place. Attention: Left hand arm has LH threads and a black bolt. 32. Replace the hardware 33. Place the pivot plate in casing in place. place.
- Page 12 34. Tighten the screws using 35. Replace the friction the T27 torx wrench. Torque plate. each screw to 110 in-lbs. 36. Hook the rear legs under the back on the plate and push down the front until it snaps. Part no. 1BH1VT rev B. ©...
- Page 13 37. Slide the slide bar inside 38. Slide the filler plate in the slot. place. Note: The curve end has to face downwards. 39. Slide the rear of the arm 40. Align the filler plate hole pad pocket over tab on arm with the slider bar.
- Page 14 41. Install back assembly. 42. Install four back bolts using a torque wrench and a 5 mm hex bit. Torque each bolt to 150 in-lbs. Part no. 1BH1VT rev B. © 2016 Herman Miller, Inc. Zeeland, Michigan. Printed in the U.S.A. ®...
Need help?
Do you have a question about the New Aeron and is the answer not in the manual?
Questions and answers