
Related Manuals for TCS QWL4.1


Summary of Contents for TCS QWL4.1
- Page 1 Installation Manual Building Automation Systems QWL4.1 Integrated Building Manager Panel 2800 Laura Lane • Middleton, WI 53562 800.288.9383 www.tcsbasys.com 202311 Building Automation Systems...
-
Page 2: Table Of Contents
Appendix D: Configuring Local Management Port as a Fail-Over Port ........40 Fail-Over Port Configuration Via Internal Gateway ....................40 Fail-Over Port Configuration Via CLI .........................42 Appendix E: Installing and Using TCS Insight Software .............. 44 2800 Laura Lane • Middleton, WI 53562 800.288.9383 www.tcsbasys.com... -
Page 3: Introduction
SLQ218 Lighting Controller, and an SEQ100 Pulse Meter for continuous monitoring of electrical, gas, and water usage. This manual includes all the information you will need to properly install and set up your QWL4.1 . It is divided into four sections: •... -
Page 4: Installation
Installation Glossary of Terms Astronomical Time Clock/Time: Timekeeping settings based on the sunrise and sunset at the geographical location of the unit. Baud Rate: The speed with which a device communicates over a network connection. BTU: British Thermal Unit. A measure of the quantity heat required to raise the temperature of one pound of liquid water one degree Fahrenheit. - Page 5 Installation RS-485: A networking standard which defines he electrical characteristics of drivers and receivers for use in serial communications systems. TCP: Transmission Control Protocol. A standard that defines how to establish and maintain a network conversation through which application programs can exchange data. TCP/IP: Transmission Control Protocol/Internet Protocol.
-
Page 6: Material List
When selecting a location to mount the QWL4.1 , be sure to allow space for cable connections. Locate the QWL4.1 away from excessive dust, heat sources, moisture or direct sunlight. The ideal environment is a server room. The temperature of the room should not exceed 77ºF (25ºC); good ventilation is mandatory to provide sufficient air cooling. -
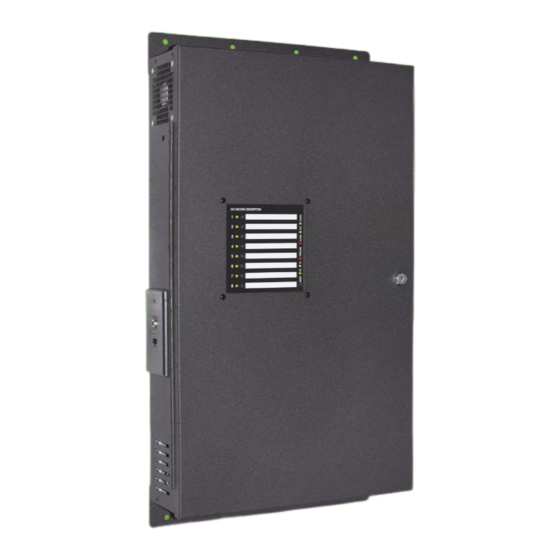
Page 7: Power And Communication Connections
Exterior views Cloud Connectivity Ethernet Port: Connect an Ethernet cable to the Ethernet port on the side of the QWL4.1 . Connect the other end of the cable to your network switch port as determined by your local network administrator or IT department. -
Page 8: Input Wiring
The Local Management Ethernet Port (L) on the side of the Ubiquity Cloud Gateway is used only for local onsite management of the QWL4.1 device. Optionally, this port can be configured as secondary Internet fail-over port (see Appendix D: Configuring Local Management Port as a Fail-Over Port on page 40 COM Ports (RS-485 Network): Connect up to two RS-485 Networks to the inputs on Com Port panel or on the Serial Board adjacent to the Gateway. - Page 9 Installation NOTE: Do not install line voltage devices (120VAC or greater) within this panel. The QWL4.1 is comprised of the following components: • Ubiquity Cloud Gatewayr • SLQ218 Lighting Controller • SLQ100 Electrical Pulse Meter These components accept the following inputs: •...
-
Page 10: Rs-485 Controller Network Wiring & Setup
2). TCS Technical Support can access the QWL4.1 online and change the address of a controller. Network Wiring The QWL4.1 has a serial board with two RS-485 ports that will accept Modbus and TCSbus Connections. These are the recommended ports to use for your controller networks. -
Page 11: Three-Wire Network Wiring
A 120 Ω terminating resistor should be placed at each of the two ends of the network directly across the “A” and “B” wires. • If the QWL4.1 will be at one end of the network, hard-wire a 120 Ω terminating resistor across the “A” and “B” terminals of the QWL4.1 (See... -
Page 12: Two-Wire Network Wiring
Earth Ground Only at one end Two-wire diagram Shielded, twisted two-conductor NOTES: QWL4.1 at end of the network. communications wiring with one end If using more than 64 control- earth grounded. (120 Ω balancing lers, use the second RS-485 port resistors provided.) -
Page 13: Startup
RS-485 address. 3. Connect one end of the Ethernet cable to the Ethernet port 1 (C) on the QWL4.1 , and the other end to the network port provided by the customer, or to a cell modem (if utilized). -
Page 14: Troubleshooting
Power LED Does Not Light Up Be sure that the power supply module, included with the QWL4.1 , is plugged in to an outlet that has power. This is a 12V, 7A, tip positive power supply. If the power supply is plugged in to a live outlet and there is still no power, press the Reset button located on the front panel until the CPU light is out to turn off the unit, and then press the Reset button once and let go to restart the unit. - Page 15 There also could be a bad connection, a bad cable, a bad ground, or a bad component. Contact TCS Technical Support (800.288.9383, ext. 2) for assistance. 2800 Laura Lane • Middleton, WI 53562 800.288.9383...
-
Page 16: Gateway Configuration
The Software Status section contains software/application-related information that identifies the level of patching of the unit. The Site Time is used by the local network and the QWL4.1 until the Ubiquity Cloud Server performs a time synchronization with the site. - Page 17 Application Options You must select a Network Polling Cycle Time for the QWL4.1 . This is the time interval that the unit will poll the entire network of controllers on all ports. You must select whether to allow caching the host name via DNS. Typically, this is left unchecked.
- Page 18 Both RS-485 communication (COM) ports are configured using this interface. While the COM ports are automatically detected once the QWL4.1 is powered on, each active port will need to be configured to ensure proper functioning of the network. Ports can be enabled or disabled from the drop-down menu as well.
- Page 19 When you are finished entering information in this section, click the Update Communication Info button. Security Information This section contains settings which control the security of the device within the QWL4.1 and whether it can be accessed through the web interface.
- Page 20 You can access a separate page containing various commissioning tools by clicking the “Commissioning Tools” button at the bottom of the Security Information page. These tools provide you with access to managing the communication status of the QWL4.1 and the controller network connected to it. Commissioning tools 2800 Laura Lane •...
-
Page 21: Gateway Configuration Via Cli
System Commands This section describes how to set up system flags for the QWL4.1 . “Reboot Unit” sets a flag which will shut off and restart the QWL4.1 within a five-minute cycle. “Check for Update” contacts the Ubiquity Cloud Server for any updates relevant to its particular model number and software version. - Page 22 Gateway Configuration Command Line Interface Screens Gateway configuration Application options 2800 Laura Lane • Middleton, WI 53562 800.288.9383 www.tcsbasys.com Building Automation Systems...
- Page 23 Gateway Configuration Proxy options Extended application options 2800 Laura Lane • Middleton, WI 53562 800.288.9383 www.tcsbasys.com Building Automation Systems...
-
Page 24: Lighting/Pulse Meter Programming
Introduction to Lighting/Pulse Meter Programming The Lighting Module of the QWL4.1 is an SLQ218, which is equivalent to the SL2108. The Meter Module of the QWL4.1 is an SEQ100, which equivalent to the SE1000. Both modules can be programmed remotely via Ubiquity Cloud (www. - Page 25 External Override Mode: The digital input acts the same as the override button on the front of the QWL4.1 panel. The switch used for this type of digital input must be a momentary N.O. switch.
- Page 26 Lighting/Pulse Meter Programming Momentary Override: The digital input acts like a toggle switch. This must also be a momentary N.O. switch. If the time clock is on, pressing the switch turns it off, If the time clock is off, pressing the switch turns it on. Monitor mode: the digital input acts as a monitor for the DI and has no other function.
-
Page 27: Pulse Meter Module Programming
+ week and the ending month + week. Scheduling Via TCS Insight When scheduling via TCS Insight, click on the Channel Schedules tab to display additional tabs for each channel (1 – 8). Each channel tab has subtab for all available functions. - Page 28 Lighting/Pulse Meter Programming If you have a Type C device (three terminals KYZ), you will need to double the multiplier. This is because the SEQ100 only counts the contact closures for the K and Z terminals. Programming the Meter Constants CT Value: The value of the CT wired to the meter.
-
Page 29: Appendices
Appendices Appendices Appendix A: Local Management Port The QWL4.1 can be configured locally at the device using a laptop computer. If using this method of configuration, you will need: 1. Laptop with a hardwired Network Interface Card (NIC). 2. Ethernet cable. - Page 30 Appendices Change adapter options 3. On the Network Connections panel locate the Ethernet interface that is connected to the cable. Right click on the item and select “Properties.” Properties 4. On the Ethernet Properties panel locate the “Internet Protocol Version 4 (TCP/IPv4)”. Select that option, then click on the “Properties”...
- Page 31 Appendices TCP/IPv4 2800 Laura Lane • Middleton, WI 53562 800.288.9383 www.tcsbasys.com Building Automation Systems...
- Page 32 Appendices 5. On the Internet Protocol Version 4 (TCP/IPv4) Properties change the IP schema to: • IP Address: 10.248.248.2 • Subnet Mask: 255.0.0.0 • Default Gateway: 10.248.248.2 • DNS: Blank 6. Click on the “OK” button and close the window. Port to static settings 2800 Laura Lane •...
- Page 33 Appendices 7. Launch any web browser and type in the following address: https://10.248.248.1. Device address 8. Depending on your browser’s configuration, you may get the following screen: Privacy error warning screen 9. Click on the “Advanced” button in the Privacy Error Warning screen. 2800 Laura Lane •...
- Page 34 Appendices 10. Click on the “Proceed” link to take you to the next screen. Proceed screen 11. Enter the Login user name and password. Login screen 12. Configure the Gateway as needed. (See Gateway Configuration Via Laptop on page 16). 2800 Laura Lane •...
-
Page 35: Appendix B: Revert Back To Dhcp Settings
Appendices Appendix B: Revert Back to DHCP Settings If you have changed your laptop’s network configuration (See Appendix A: Local Management Port on page 29) and wish to revert back to its previous configuration, follow the steps below: Windows 10 or Later: 1. - Page 36 Appendices Properties 4. On the Ethernet Properties panel locate the “Internet Protocol Version 4 (TCP/IPv4)”. Select that option, then click on the “Properties” button. 2800 Laura Lane • Middleton, WI 53562 800.288.9383 www.tcsbasys.com Building Automation Systems...
- Page 37 Appendices TCP/IPv4 2800 Laura Lane • Middleton, WI 53562 800.288.9383 www.tcsbasys.com Building Automation Systems...
- Page 38 Appendices 5. On the Internet Protocol Version 4 (TCP/IPv4) Properties “General” tab: 6. Click on the “Obtain an IP address automatically” radio button. 7. Click on the “Obtain DNS server automatically” radio button. 8. Click on the “OK” button. Revert back to DHCP settings 2800 Laura Lane •...
-
Page 39: Appendix C: Monitor And Keyboard
7.) Power on the monitor and switch to the proper input, based on the cable used. 2. Plug the USB cable into a free USB port on the QWL4.1 . Test keyboard connectivity by pressing Caps Lock to see if the LED on the keyboard illuminates. -
Page 40: Appendix D: Configuring Local Management Port As A Fail-Over Port
Appendix D: Configuring Local Management Port as a Fail-Over Port The QWL4.1 Gateway has two Ethernet ports: Cloud Ethernet 1 and Local Ethernet 2. By default, Cloud Ethernet 1 is used to connect the QWL4.1 to the Ethernet, and Local Ethernet 2 is configured as a local management port; however, Local Ethernet 2 can be configured as a fail-over Ethernet port in the event of an Internet interruption on Cloud Ethernet 1. - Page 41 Failover options section Failover Options Section The Failover Options section contains several default settings that should be adequate in most situations. TCS strongly recommends contacting your IT department before making any changes to the default settings. Click on the green Update Application Info button beneath the RS485 Network Port Configuration section to save the failover server location and other settings.
-
Page 42: Fail-Over Port Configuration Via Cli
6. Skip to the Local Ethernet 2 fields. Enter the failover network information provided by your IT department. 7. Exit the CLI to save settings. Disconnect the monitor and keyboard. Do not reboot the QWL4.1. Changes made via the CLI will take about five minutes to execute. - Page 43 Appendices Failover URL Settings E-port 2 mode settings 2800 Laura Lane • Middleton, WI 53562 800.288.9383 www.tcsbasys.com Building Automation Systems...
-
Page 44: Appendix E: Installing And Using Tcs Insight Software
TCS Insight is a free software tool for the initial installation, programming, and verification of the lighting and pulse meter modules built into the QWL4.1. It is meant to be used in those instances when you may not have access to Ubiquity Cloud. - Page 45 Appendices TCS Insight network tab NOTE: If the laptop does not detect the converter, you will need to install an FTDI driver. Click on the Help tab in the Insight software and select Install FTDI Driver. Follow the installation instructions.
Need help?
Do you have a question about the QWL4.1 and is the answer not in the manual?
Questions and answers