Table of Contents
Advertisement
Quick Links
Owner's Manual
INCLUDES
User, Maintenance, Service, and Installation
Instructions
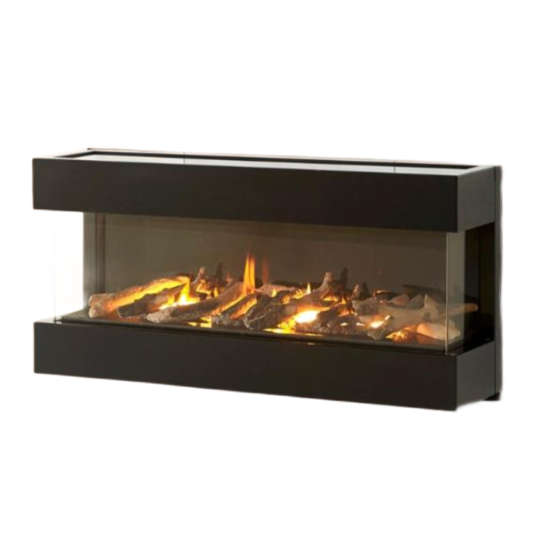
890 PC & 890 PC TRIMLESS
Keep this booklet for service log and future reference
IMPORTANT
This appliance is guaranteed for 12 months subject to conditions. The 5 year extended parts
warranty will only be valid if the annual service recommended in this manual has been
completed and appliance has been registered online.
For use in Great Britain and Ireland.
Literature NO 6352 (ISS 4)
Advertisement
Table of Contents

Subscribe to Our Youtube Channel
Related Manuals for Infinity 890 PC


Summary of Contents for Infinity 890 PC
- Page 1 Owner’s Manual INCLUDES User, Maintenance, Service, and Installation Instructions 890 PC & 890 PC TRIMLESS Keep this booklet for service log and future reference IMPORTANT This appliance is guaranteed for 12 months subject to conditions. The 5 year extended parts warranty will only be valid if the annual service recommended in this manual has been completed and appliance has been registered online.
-
Page 2: Table Of Contents
Contents EXTENDED FIVE YEAR PARTS WARRANTY ....2 Benchmark Scheme ............. 3 SECTION ONE Introduction (user instructions) ..5 SECTION TWO Operating the Appliance (user EXTENDED FIVE YEAR PARTS instructions) ..............7 WARRANTY SECTION THREE Cleaning (user instructions) .... 10 SECTION FOUR Fuel Bed Cleaning and Layout (user In order to validate your extended 5 years parts instructions) ............... -
Page 3: Benchmark Scheme
Benchmark Scheme Charlton and Jenrick Ltd is a licensed member of the Benchmark Scheme which aims to improve the standards of installation and commissioning of domestic heating and hot water systems in the UK and to encourage regular servicing to optimise safety, efficiency and performance. Benchmark is managed and promoted by the Heating and Hotwater Industry Council. - Page 4 For future reference we suggest you record the following details here, and keep the receipt as proof of purchase. This information may be asked for when you contact the helpdesk. MODEL: INFINITY 660 PC Serial No. This information can be found on the label attached to the packaging and on the data badge, which is located on the base of the appliance behind the control cover.
-
Page 5: Section One Introduction (User Instructions)
INTRODUCTION The 890 PC as been designed and tested to the requirements of EN 613 and is suitable for use in GB (Great Britain) and IE (Ireland). ... - Page 6 The 890 PC is battery operated; therefore no mains electrical supply is required. Power to the appliance is provided by 6 high power alkaline 1.5V batteries (“C” size) (a spare set of 6 “C” batteries is supplied with the appliance An audible repeated bleep warning indicates that the appliance batteries need changing or charging (if rechargeable batteries have been used).
-
Page 7: Section Two Operating The Appliance (User Instructions)
Combustible material i.e. wall panelling or wallpaper must be removed from behind the fire and fire fascia. When the 890 PC is fitted with the false chimney breast , it is strongly recommended that any proposed wall covering intended for use immediately above the appliance should be tested in the hottest position (immediately above) first. - Page 8 The icon “PILOT” will appear on the LCD display. As soon as the actual room temperature falls below the SET room temperature, the system will move from standby to the high flame level. From this point it will proceed again the modulation process.
- Page 9 LOW BATTERY INDICATION (APPLIANCE) If you hear a repeated ‘bleep’ sound come from the appliance this indicates the appliance battery pack is low and should be changed. If this is ignored the system will go into a lock out mode, which will not allow the appliance to be used until a new set of batteries are loaded.
-
Page 10: Section Three Cleaning (User Instructions)
GLASS CLEANING From time to time, it will be necessary to clean the glass panel of your 890 PC fire. We recommend you use a Ceramic hob cleaner these are available for all leading super markets: - i.e. ASDA, TESCO, SAINSBURY’S Etc. -
Page 11: Section Four Fuel Bed Cleaning And Layout (User Instructions)
REMOVING GLASS PANEL Remove the five 7mm nuts holding the front glass panel retaining bracket and slide the bracket clear of the studs. Lift the glass panel out of the bottom retaining bracket. Before refitting the glass panel, loosen the side clamps retaining the side glass panels. ... -
Page 12: Section Four Fuel Bed Cleaning And Layout Continued (User Instructions)
Use only the fuel bed components provided and no additional parts must added. Incorrect positioning of the fuel bed components could result in the staining of the glass panel. Important: - Refer to the ‘Health & Safety Notice located on page 3 of this booklet before cleaning or replacing any refractory material. - Page 13 Place three shapes shown within the burner top plate and air tray as shown. Place three shapes as shown. Place a single layer of bark chippings on the burner top plate as shown. Bridge three of the shapes as shown. www.charltonandjenrick.co.uk LT6352 (ISS 5)24/10/2016...
-
Page 14: Section Five Appliance Data (Installation Instructions)
Bridge three of the shapes as shown. Bridge Four of the shapes as shown. SECTION FIVE Appliance Data (installation instructions) NATURAL GAS Gas Type: CATEGORY I 2 H Gas Pressure: 20 mbar +/- 1.0mbar Pressure Test Point Location: Gas inlet elbow Gas Input: 5.5 kW Gross (Max.) -
Page 15: Section Six Regulations And Warnings (Installation Instructions)
SECTION SIX Regulations and Warnings (installation instructions) This appliance must only be installed in Great Britain or Ireland. The appliance is suitable for use on natural gas only. GB (Great Britain) This fire does not normally require purpose build ventilation. ... -
Page 16: Section Seven Siting The Appliance (Installation Instruction)
SECTION SEVEN Siting the Appliance (installation instruction) Please note on 125mm diameter flue system the Spigot restrictor plate MUST be removed Class 1 Conventional Flue. The chimney must have a minimum effective height of at least 3 metres. Any permanent flue restriction or variable dampers are to be removed or locked fully open. -
Page 17: Section Eight To Install The Appliance (Installation Instructions)
CHECKING THE FLUE AND FIRE OPENING Check that the chimney conforms to the required specifications as previously stated. Examine the condition and carry out any remedial work including removing any debris from the base. If the flue has been used for solid fuel it should be swept prior to the installation ... - Page 18 CONNECTING THE GAS SUPPLY Note: - An isolation valve may be fitted in the gas supply adjacent to inlet pipe. Please Note that the restrictor plate should be angled so that access via the gas inlet cover can be obtained. For a concealed connection: - ...
- Page 19 FITTING THE GLASS PANELS Slide the LH and RH glass panels within the bottom location slots. Fit the top retaining brackets over the two fixing studs LH & RH and finger tighten using the four off 7mm nuts. (DO NOT TIGHTEN AT THIS STAGE). ...
-
Page 20: Section Nine Checking Operation Of Fire (Installation Instructions)
SECTION NINE Checking Operation of Fire (installation instructions) CHECKING GAS SOUNDNESS *Batteries must be connected before proceeding with any soundness testing* Turn on the gas supply to the appliance and check for soundness in accordance with current codes of practice. - Page 21 CHECKING FOR COMBUSTION PRODUCTS CLEARENCE IMPORTANT:-The smoke test must be carried out with the fire starting from cold. Light the fire and leave at maximum input. Close all the doors and windows. After five minutes fit the smoke match in a holder and position as illustrated with the head of the match just inside the test opening (Within the downdraft...
- Page 22 FALSE CHIMNEY FASCIA Two additional 10mm thick heat resistant boards will be required. The sizes of the board are 956mm x 258mm. Insert a piece of 10mm heat resistant board within the top of the chimney fascia metal work as shown. ...
- Page 23 With the EDB board in place, Offer the fascia up squarely and centrally. The back face of the fascia will have cut out to give clearance for glass retaining brackets. Use these slots as guide, slide the fascia over the firebox. ...
- Page 24 Using suitable wooden studding or one of the metal stud systems available on the market such as Speed Line partitioning system. Construct a false chimney breast. Retain the frame work using the fixing holes provided within the fascia metal work as shown below. Further fixing will be required to retain the stud work against the Chimney front face.
- Page 25 Using a 70mm core drill bit. Cut out four holes 2 left hand and right hand in the top section of the false chimney construction. The bottom hole should be positioned 265mm from the top return edge of the fascia. The top holes should be positioned 150mm down from the top edge of the false chimney breast.
- Page 26 Connect and insert battery holder within the front section of frame assembly. Finally locate the inlet cover within the frame assembly. ADVISE CUSTOMER THAT: The glass front of this fire acts as a dress guard, conforming to BS 1945 (1997) and satisfies the heating appliance regulations (1991) however;...
- Page 27 GENERAL Servicing should be carried out annually by a competent person such as a GAS SAFE-registered person in accordance with the relevant regulations, to ensure the safe and correct operation of the appliance. Before commencing any service or replacement of parts, turn off the gas supply to the fire. After servicing check for gas soundness.
- Page 28 REPLACEMENT OF OXY-PILOT ASSEMBLY NOTE: If the pilot assembly is replaced it must be replaced by an identical unit from the same manufacturer and replaced as a complete unit. Follow the burner tray removal sequence. Undo the compression nut on the supply pipe at the pilot. ...
-
Page 29: Section Eleven Wiring Diagram (Maintenance Instructions)
SECTION ELEVEN Wiring Diagram (maintenance instructions) Attach to the valve www.charltonandjenrick.co.uk LT6352 (ISS 5)24/10/2016... - Page 30 LT6352 (ISS 4)
- Page 31 www.charltonandjenrick.co.uk LT6352 (ISS 5)24/10/2016...
- Page 32 LT6352 (ISS 4)
- Page 33 Register your appliance online today to active your warranty www.charltonandjenrick.co.uk LT6352 (ISS 5)24/10/2016...
-
Page 34: Gas Fire Commissioning Checklist
GAS FIRE COMMISSIONING CHECKLIST This Commissioning Checklist is to be completed in full by the competent person who commissioned the gas fire as a means of demonstrating compliance with the appropriate Building Regulations and then handed to the customer to keep for future reference. -
Page 35: Service Record
SERVICE RECORD It is essential that your gas fire is serviced regularly and that the appropriate Service Interval Record is completed. Service Provider Before completing the appropriate Service Record below, please ensure you have carried out the service as described in the manufacturer’s instructions. - Page 36 890 PC TRIMLESS 890 PC Prefix Product Serial No Prefix ( NF ) A-0475 Product Serial No ID Label Prefix ( NF ) A-0431 (Ng) ID Label Prefix (Ng) Burner Tray / Box Assembly Burner Tray / Box Assembly Back spigot Fitted / Restrictor Label...
Need help?
Do you have a question about the 890 PC and is the answer not in the manual?
Questions and answers