Strobel 560-21 Series Operating Instructions Manual
Hide thumbs
Also See for 560-21 Series:
- Operating instructions manual (32 pages) ,
- Mechanic's instructions (40 pages)

Related Manuals for Strobel 560-21 Series


Summary of Contents for Strobel 560-21 Series
- Page 1 For the professional user Operating Instructions Für den professionellen Anwender Betriebsanleitung Class: 560-21 Klasse: Model: Ausführung: Dated: Stand: S p e z i a l m a s c h i n e n G m b H...
- Page 2 The sign of quality ou find the Strobel trademark on every Strobel machine leaving our works. And with good reason. This symbol is a guarantee of the high quality of our products. Quality which creates trust – trust in our technology, our service and, not least of all, in our good name.
- Page 3 We wish you lots of success in your work with your new Strobel machine. S p e z i a l m a s c h i n e n G m b H...
- Page 4 Boschstraße 16 D-82178 Puchheim Tel.: 089/80096-0 Fax: 089/80096-190 info@strobel.biz Maschinenklasse/Machine class: Serien-Nr./Serial No: Auftrags-Nr./Order Confirmation No: Lieferdatum/Delivery Date: Rechnungs-Nr./Invoice No: Rechnungsdatum/Invoice Date: Beanstandung/Complaint: Datum/Date Unterschrift/Signature: Bitte nicht vom Kunden ausfüllen/To be filled out by Strobel: Datum Bemerkung EXA: ETA: PROD: EXA:...
-
Page 5: Table Of Contents
Operating instructions STROBEL series 560-21 C o n t e n t s General notes on safety ......................6 General ............................8 Operating instructions ....................8 Class description, serial number and initial basis for description ........8 Range of application and intended use ................8 Technical Data ......................... - Page 6 Optional extras ......................... 28 Special version for lapel points ..................28 Operating the control and programming ................. 29 General ............................. 29 10.1 Technical data ....................... 29 Power supply ..........................30 11.1 General notes ........................ 30 11.2 Mains connection of the machine ................30 11.2.1 Mains structure ....................
- Page 7 Operation in sewing mode “Automatic tack” ................48 15.1 General .......................... 48 15.2 Button functions in the sewing mode “Autom. tack ............ 49 15.2.1 General ......................49 15.2.2 Assignment of the button functions on the control panel V850 ....50 15.2.3 Changing the displayed plunger value with the “+/-”...
- Page 8 Display of the needle positions ..................96 20.2 Display of the program number ..................97 20.2.1 Display of the Efka program number .............. 97 20.2.2 Display of the Strobel program number ............97 20.3 Signal test ........................97 20.3.1 General ......................98 20.3.2 Test of the signal outputs ................
- Page 9 Cables............................106 21.1 Hall sensor connection cable 296.0667 ..............106 21.2 Step motor connection cable 296.0668 ..............106 21.3 Extension cable 296.0643 ................... 106 21.4 Extension cable 296.0644 ................... 106 21.5 Connection cable machine 296.0662 ................. 107 Schaltpläne ..........................108 22.1 Mains connection plan –...
-
Page 10: General Notes On Safety
General notes on safety Manuals and additional information can be found on the STROBEL website at: http://www.strobel.biz Every person in charge of setting up, operating, servicing and repairing the machine must first read and understand the operating instructions and particularly the safety instructions before starting up the machine. - Page 11 It is forbidden to operate the sewing head until it is determined that the entire sewing unit complies with EU provisions. It is essential that you observe and follow these instructions as well as the generally valid safety regulations. Warning instructions given in the operating instructions that pertain to especially dangerous parts of the machine must be indicated at these positions using a safety symbol.
-
Page 12: General
General Operating instructions Any person involved in the installation, operation, maintenance and repair of the machine must have read and understood the operating instructions and mainly the safety instructions before starting the machine. Class description, serial number and initial basis for description For side-referenced descriptions, the operating side of the machine is the starting base. -
Page 13: Technical Data
Technical Data Empfohlene Nennstichzahl / 1200 min-1 Recommended rated speed Stichzahl je Riegel / stitches per tack 6 - 14 Auslieferzustand 8 tiche pro Riegel / delivery condition 8 stitches per tack Stichplattenöffnung / needle plate opening 8,0 mm 4,5 mm optional 6,0 mm optional 10,0 mm optional Zusatzausstattung für Schulterpolster,... - Page 14 Technischer Auslieferzustand / delivery condition: Anzahl der Riegelstiche / number of stitches 6, 8, 10, 12, 14 Motor-Leistung min. / min. motor power 400 W Zahnriemenscheibe Maschine / Z = 38 toothed belt pulley/machine Zahnriemenprofil / toothed belt profile HTD 5M-9 Stichart / stitch type Einfaden-Blindstich- Punktriegel Typ 101 single thread blind stitch spot tacking type 101...
-
Page 15: Installation And Putting Into Service
Installation and putting into service Unpacking the machine The machines of series 560-11 and -21 are supplied as complete units with stands only. The Reel stand and another machine accessories located into the packaging. Make sure that all accessories have been unpacked before throwing away any packing material. - Page 16 Fig. 1 BA_560-21_A5_230522_en.doc...
-
Page 17: Sense Of Rotation
Sense of rotation The correct sense of rotation of the hand wheel is clockwise in line of vision on the hand wheel. Motor drive via Toothed belts 3.4.1 Mounting the toothed belt (Fig. 2) C A U T I O N ! Danger of injury! To mount the tooth-belt, switch off the machine electrically and pull out the power plug. -
Page 18: Tensioning The V-Belt (Fig. 3)
3.4.2 Tensioning the V-belt (Fig. 3) C A U T I O N ! Danger of injury! To check the tooth-belt's tension, switch off the machine electrically and pull out the power plug. Press the motor pedal then to make sure that the machine is really at stand still. -
Page 19: Positioning The Machine (Fig. 4)
3.4.3 Positioning the machine (Fig. 4) C A U T I O N ! Danger of injury! Danger of pulling in parts of clothing and of hair and danger of crushing fingers and stitching fingers with needles! When checking positions with switched-on machine keep fingers and hands away from moving parts. -
Page 20: Instructions For Use
Instructions for use Needles and threads The sewing quality can be influenced to a considerable extent by choosing the most suitable needles and threads for the material to be sewn. It is recommended to use checked GROZ-BECKERT needles system 1717 VRUE only. The machine is supplied with size 90/14 needles. -
Page 21: Threading And Thread Course
Fig. 5 Threading and thread course C A U T I O N ! Danger of injury! Switch off machine electrically and confirm that the machine is really in standstill position by operating the treadle for the motor control before threading. Fig. -
Page 22: Thread Tension (Upper Thread Tension)
Fig. 7 Thread tension (upper thread tension) Depending on thread quality, nature and thickness of the thread and the fabric the thread tension is set by means of upper tension nut (1) (Fig. 7). 4.4.1 Setting the thread length at the beginning of the seam (lower thread tension) By turning lower tension nut (1) (Fig. -
Page 23: Stitch Depth
Stitch depth The plunger presses the material to be sewn towards the stitch plate opening to enable the needle to penetrate the fabric layers in the desired depth. 4.5.1 Setting the stitch depth Refer for this to the operating instructions of the respective sewing drive. Sewing drive The machine is equipped with a sewing drive. -
Page 24: Operating The Machine
Operating the machine The machine is lifted pneumatically. The sewing program is executed automatically. C A U T I O N ! Danger of injury! Please observe the sewing range carefully during sewing. Otherwise there is a danger of injury from crushing and needle punctures. -
Page 25: Sewing
Sewing 5.3.1 Sewing process (Fig. 8) By means of the treadle the sewing program is controlled in two steps. 1st step: plunger moves upwards to the stitch plate (can be lowered again by heeling the treadle) 2nd step: automatic sewing program as follows: A spot tack with the number of stitches shown on the LCD display is sewn. -
Page 26: Failures
Failures C A U T I O N ! Danger of injury! Switch off machine electrically and confirm that the machine is really in standstill position by operating the treadle for the motor control. Remove the needle. Otherwise there is a danger of injury from crushing and needle punctures. - Page 27 Unsufficient knotting of the threads may happen when: Possible Reasons: the needle has reached its lower cusp point but the loop is still on the looper back Solutions: repolish the looper back by means of a diamond file and an abrasive cloth ...
-
Page 28: Machine Maintenance
Machine maintenance C A U T I O N ! Danger of injury! Switch off the machine electrically, and depress the motor switch pedal to make sure that the machine is truly switched off. Otherwise there is a danger of injury from crushing and needle punctures. - Page 29 Cl. 560-21 Standard Optional 380.0271 380.0270 Stitch plate 8,0 mm opening 6,0 mm opening Standard Optional 181.0129 181.0130 for leather only Plunger under 300 grams 250 – 700 grams Fabric quality Stitch formation BA_560-21_A5_230522_en.doc...
- Page 30 Cl. 560-21 Optional Optional 280.0279 380.0272 for woven labels Stitch plate 10,0 mm opening 4,5 mm opening Optional Standard 181.0130 181.0129 for leather only Plunger over 500 grams Fabric quality Stitch formation BA_560-21_A5_230522_en.doc...
- Page 31 Cl. 560-21 - Kit for lapel points (Optional) 380.0269 Stitch plate 4,5 mm opening 181.0144 Plunger 182.0343 Front cup 161.0187 Pressure spring Stitch formation BA_560-21_A5_230522_en.doc...
-
Page 32: Optional Extras
Optional extras 213.0104 Round working plate Ø130 mm Special version for lapel points 00000.3517 Kit for lapel points BA_560-21_A5_230522_en.doc... -
Page 33: Operating The Control And Programming
Operating the control and programming General 10.1 Technical data Sewing drive motor DC1500: Maximum speed: 9000 rpm Maximum torque: 3 Nm Output P1: 400 W Output max. 1000 W Insulation class: System of protection: IP 40 Length: 145.5 mm Flange size: 80 x 75 mm Weight: 2.125 kg... -
Page 34: Power Supply
Power supply 11.1 General notes C A U T I O N ! Work on the sewing machine's electrical equipment or sewing drive may only be done by electricians! There is the DANGER of a fatal electrical shock. When working on the electrical equipment, the machine with the power switch S1 has to be switched off and the power plug pulled out! The operating instructions (including safety instructions) of the... -
Page 35: Mains Voltage And Frequency
11.2.2 Mains voltage and frequency C A U T I O N ! The range of the rated voltage and frequency for the sewing drive is 190–240 V 50/60 Hz. The mains voltage and frequency have to lie within this range! 11.2.3 Mains connection C A U T I O N ! The sewing machine must be connected to the mains power... -
Page 36: Connection Of Machine Components
11.3 Connection of machine components 11.3.1 General notes C A U T I O N ! Before plugging in or pulling a connector plug, it is necessary to switch off the drive with the power switch S1 and to disconnect the power plug. -
Page 37: Control Sockets Sewing Drive (Ab425S)
11.3.2 Control sockets sewing drive (AB425S) Fig. 9 Motor sensors connection Step motor connection 1 Supply cable connection Motor supply connection Set-point adjuster connection Operating controls B776 V850 connection Sewing machine connection ST20 Hall sensor connection 11.3.3 Connection cables motor sewing drive (DC1500) Fig. -
Page 38: Step Motor Connection Cables
11.3.4 Step motor connection cables Fig. 11 Cable 1 Step motor Cable 2 Hall sensor BA_560-21_A5_230522_en.doc... -
Page 39: Sewing Lamp
11.4 Sewing lamp 11.4.1 General notes C A U T I O N ! Switch off the machine electrically! If you switch off the control, the sewing light will light up at least 10 minutes further. Fig. 12 BA_560-21_A5_230522_en.doc... - Page 40 Fig. 13 BA_560-21_A5_230522_en.doc...
-
Page 41: Function Sequence, Machine Class, And Operating Concept
In case of questions or when ordering spare parts concerning a control, the machine class, machine number, Efka program number (20.2.1 Display of the Efka program number) and the Strobel program number (20.2.2 Display of the Strobel program number) must be given completely. -
Page 42: Machine Class - Hardware Functions
12.3 Machine class – Hardware functions Sewing drive control AB425S / socket ST2: Function Outputs: Inputs: Machine class 560-21 from version 4 Sewing drive control AB425S / socket ST20: Function Outputs: Inputs: Machine class 560-21 from version 4 BA_560-21_A5_230522_en.doc... -
Page 43: Operating Concept
12.4 Operating concept 12.4.1 General The machine is programmed and operated only by the V850 control panel, which is part of the standard delivery and plugged to the AB425S control. The display texts in the V850 operating control are given in German or English. Refer to chapter "18.2 Language selection"... -
Page 44: Operation The Control
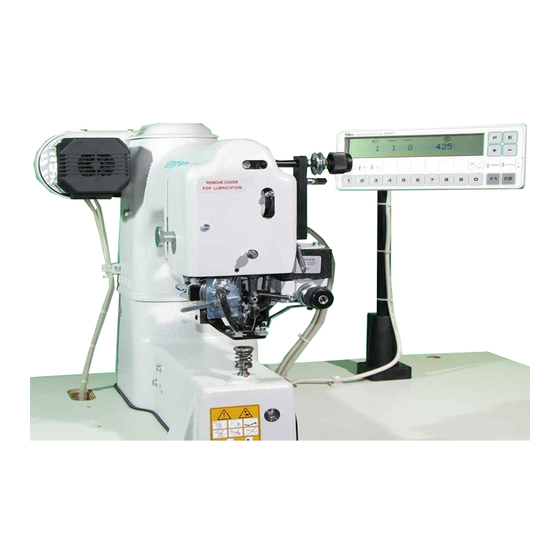
Operation the control 13.1 General The controls are switched on and off by the power switch S1, which is located on the right side of the machine, below the tabletop (Fig. 14). Fig. 14 power switch 13.2 Control panel The controls is programmed and operated only by the V850 control panel (Fig. 15). Fig. -
Page 45: Operation In Sewing Mode "Manual Tack
Operation in sewing mode “Manual tack” 14.1 General In sewing mode “Manual tack”, the button functions can be selected. In sewing mode, programming is not possible however. Only the displayed plunger value can be changed by the “+/-” buttons. The number of stitches of the tack can be programmed in the "Manual tack" tack programming. -
Page 46: Assignment Of The Button Functions On The Control Panel V850
14.2.2 Assignment of the button functions on the control panel V850 Kl. 560-21 Button Plug-in strip 5 Call "P" "Programming mode" Save "E" plunger value Increase "+" plunger value Reduce "-" plunger value Favorite buttons "4-8" tack Arrow P7-16 = on/off Pedalstep "9"... - Page 47 Function with operating control Button (V850) Increase plunger value This function increases the displayed plunger value. Function with operating control Button (V850) Reduce plunger value This function decreases the displayed plunger value. Function with operating control Button (V850) Save plunger value The changed plunger value is saved and set with this function after letting go of the "+/-"...
- Page 48 Example: The plunger value be changed from 100 to 200. (Automatic save is switched on). 1. Maschine is away from the stitch. The display shows: 2. Press the “+/-“ button; in this case the “+“button. Plunger value is changed: After releasing the "+" button, the changed plunger value flashes for about two seconds.
-
Page 49: Favorite Buttons
14.2.4 Favorite buttons Function with operating control Button (V850) Favorite button In "Manual tack" sewing mode, the 5 favorite buttons can each be assigned a plunger value. This makes it possible to directly call up five selected plunger values at the push of a button. - Page 50 Example: The favorite button 5 should be assigned the current plunger value of 100. 1. Maschine is away from the stitch. The display shows: Press button "5" and keep it pressed. The display starts to flash after the button is pressed for approx.
-
Page 51: Pedal Step "Sewing Start
Valid for the setting: Sewing start is done via the standard pedal evaluation. 1 - 11 Sewing start is done via the strobel specific pedal evaluation. The number value indicates the pedal step, from the sewing start is triggered. -
Page 52: Operation In Sewing Mode "Automatic Tack
Operation in sewing mode “Automatic tack” 15.1 General In sewing mode, the button functions and the stitch programs created in the “Autom. tack” can be selected and run. In sewing mode no stitch programs can be created or changed. Only the displayed plunger value can be changed by the “+/-” buttons and then saved by the “E”... -
Page 53: Button Functions In The Sewing Mode "Autom. Tack
After completion of a tack with the “Switch-off of the automatic tack advancing” function switched off, the next tack is displayed automatically or approached. As soon as the pedal is briefly in the “0, -1, -2” pedal position, this new tack can be run. Upon completion of the last tack in a stitch program a “reference run”... -
Page 54: Assignment Of The Button Functions On The Control Panel V850
15.2.2 Assignment of the button functions on the control panel V850 Kl. 560-21 Button Plug-in strip 5 Direct input seam program number” "P" Call "Programming mode" Save "E" plunger value Increase "+" plunger value Reduce "-" plunger value Advance "F1" tack Retract "F2"... -
Page 55: Changing The Displayed Plunger Value With The "+/-" Buttons
15.2.3 Changing the displayed plunger value with the “+/-” buttons Changing the plunger value is only possible outside of the stitch with open airing. Valid for the button activation is: Press button briefly. Value is modified by “1”. Press button longer. - Page 56 Description: Automatic save is switched off (parameter F-641 = 0): After releasing the "+/-" buttons, the changed plunger value flashes for about four seconds. The value can be corrected during the flashing time by pressing the "+/-" buttons. Alternatively, the changed plunger value can be immediately saved and set by pressing the "E"...
-
Page 57: Selection Of A Tack With The "F1/F2" Buttons
After this, the changed plunger value is saved and approached. The following is displayed: The display then shows: 15.2.4 Selection of a tack with the “F1/F2” buttons Function with operating control Button (V850) Advance tack This function advances to the next tack. Function with operating control Button (V850) Retract tack... - Page 58 Example: In the current stitch program there should be a retraction or switch back from tack 5 to tack 4. 1. Machine is in stitch program 1, in tack 5, out of the stitch. The display shows: 2. Press the “F1/F2” button; in this case the “F2”...
-
Page 59: Automatic Tack Advancing
15.2.5 Automatic tack advancing Function with operating control Button (V850) automatic tack advancing On/Off This function switches the automatic tack advance on or off. Automatic tack advance On Arrow P1 = Arrow P2 = If the function is switched on, advancing to the next tack occurs automatically after a tack has been processed. -
Page 60: Selecting A Stitch Program
15.2.6 Selecting a stitch program 15.2.6.1 General The selection of a stitch program can be done either by the “2/3” buttons or directly by entering the stitch program number. 15.2.6.2 Selecting a stitch program by the “2/3” buttons Function with operating control Button (V850) Increase stitch program This function increases the displayed stitch program. - Page 61 2. Press the “2/3” button; in this case twice the “2” button. There is a switch to stitch program 3 and the plunger value of tack 1 is approached: 15.2.6.3 Selecting a stitch program by entering the stitch program number Example: From the current stitch program 1 the stitch program 3 should be selected.
-
Page 62: Favorite Buttons
15.2.7 Favorite buttons Function with operating control Button (V850) Favorite button In "Automatic tack" sewing mode, the 5 favorite buttons can each be assigned a stitch program. This makes it possible to directly call up five selected stitch programs at the push of a button. - Page 63 Example: The favorite button 6 should be assigned to the current stitch program 2. 1. Machine is in stitch program out of the stitch. The display shows: Press button "5" and keep it pressed. The display starts to flash after the button is pressed for approx.
-
Page 64: Pedal Step "Sewing Start
Valid for the setting: Sewing start is done via the standard pedal evaluation. 1 - 11 Sewing start is done via the strobel specific pedal evaluation. The number value indicates the pedal step, from the sewing start is triggered... -
Page 65: Tack Programming "Manual Tack
Tack Programming “Manual tack” 16.1 General For the manual tack, the number of tack stitches can be set or programmed separately. The programming is called up by the “P” button. 16.2 Changing the number of tack stitches The following values can be entered as the number of tack stitches: 6, 8, 10, 12, 14. Example: The number of tack stitches in the manual tack should be programmed from 8 to 10. - Page 66 5. Press the “P” button. The display shows: 6. Press the “P” button. The display shows: BA_560-21_A5_230522_en.doc...
-
Page 67: Tack Programming "Autom. Tack
Tack programming “Autom. tack” 17.1 General Up to 99 stitch programs can be programmed. A stitch program can contain up to 50 tacks. For each tack a plunger value can be entered in a range from 0 (plunger all the way up) to 1600 (plunger all the way down). Valid for entering the plunger value is: ... - Page 68 Example: A new stitch programs with 5 tacks should be inserted. 1. Machine is in stitch program 1, out of the stitch. The display shows: 2. Press the “P” button. The display shows: 3. Press the “+” button. The program number of the new stitch program to be inserted is displayed briefly;...
- Page 69 6. Press the “P” button. The new stitch program is inserted and the following is displayed: A stitch program – in this case stitch program 15, is created with 5 tacks and saved. The preset value of 8 stitches was used for the number of tack stitches. The preset value of 100 stitches was used for the plunger value for the individual tacks.
-
Page 70: Deleting A Stitch Program
17.3 Deleting a stitch program Any programmed stitch program can be deleted with the exception of stitch program 1. If you attempt to delete stitch program number 1, then the “Delete Error” message appears briefly in the “Delete mode” and the procedure is cancelled. After the successful deletion of a stitch program there is an automatic switch to stitch program 1, which is always available. - Page 71 4. Press the “0” button. The display shows: 5. Press the “-” button. The stitch program to be deleted is displayed briefly; in this case stitch program 3: 6. Press the “-” button again (during active delete display). The stitch program is deleted and the following is displayed: Now the displayed stitch program is displayed;...
-
Page 72: Changing A Stitch Program
17.4 Changing a stitch program 17.4.1 Changing the number of tack stitches In a stitch program all tacks feature the same number of tack stitches. The following values can be entered as the number of tack stitches: 6, 8, 10, 12, 14. Example: The value of tack stitches in stitch program 1 should be programmed from 8 to 10. - Page 73 5. Press the “+/-” button; in this case the “+” button. The number of tacks is changed; in this case from 8 to 10: 6. Press the “P” button. The display shows: 7. Press the “P” button. The changed values are saved and the following is displayed briefly: The display then shows:...
-
Page 74: Changing The Plunger Value Of A Tack
17.4.2 Changing the plunger value of a tack In a stitch program the plunger value of each tack can be changed. The values between 0 and 1600 can be programmed as plunger values. Example: The plunger value of tack 2 should be changed from 200 to 300. - Page 75 6. Press the “+/-” button; in this case the “+” button. Plunger value is changed: 7. Press the “P” button. The display shows: If desired, further plunger values can be changed here; then return to step 4. In this example no further plunger values are changed, therefore proceed as follows: 8.
-
Page 76: Inserting A New Tack
17.4.3 Inserting a new tack Additional tacks can be inserted in any position in a stitch program. If a tack is inserted, then the following higher tacks are “pushed up” by one, i.e.: If for instance, a new tack is inserted between tack 2 and tack 3, then the “old” tack 3 becomes tack 4, the “old”... - Page 77 5. Press the “+” button. The display briefly shows: 6. Press the “+” button again (during active insert display). The new tack is inserted and the following is displayed: 7. The newly inserted tack is displayed then; in this case tack 4: All following tacks –...
- Page 78 10. Press the “P” button. The display shows: 11. Press the “P” button. The changed values are saved and the following is displayed: The display then shows: 13. Press the “P” button. There is a switch back to tack 1 and the respective plunger value is approached: BA_560-21_A5_230522_en.doc...
-
Page 79: Deleting A Tack
17.4.4 Deleting a tack All programmed tacks can be deleted in a stitch program with the exception of tack 1 if it is the only tack in the stitch program, i.e.: A stitch program consists of at least one programmed tack. If you attempt to delete this only tack of a stitch program, then the “Delete Error”... - Page 80 4. Press the “F1/F2” button; in this case 5 times the “F1” button. Selection of tack 5: 5. Press the “-” button. The display briefly shows: 6. Press the “-” button again (during active delete display). The selected tack is deleted and the following is displayed: The display then shows again:...
- Page 81 The display then shows: 10. Press the “P” button. There is a switch back to tack 1 and the respective plunger value is approached: BA_560-21_A5_230522_en.doc...
-
Page 82: Functions
Functions 18.1 Basic function sequence (mode) Function with or without operating control Parameter Basic function sequence (machine mode) F-290 The individual basic function sequences of the control can be selected by this function. C A U T I O N ! A setting should be done only during the installation of the sewing machine (refer to chapter "20.4 Installation or replacement of the sewing drive's control box")! -
Page 83: Language Selection
Display texts in English 18.3 Motor's direction of rotation The rotational direction of all Strobel machine classes is to the right, i.e. the correct rotation of the of the machine hand wheel is clockwise when looking at it. The rotational direction is independently regulated by the control software and may therefore not be programmed. -
Page 84: Positions
18.6 Positions Function with or without operating control Parameter Setting the reference position F-170 This function sets the reference position. Function with or without operating control Parameter Setting positions 1 and 2 F-171 This function sets the two positions. The AB425S control has two positions. The positions are set exclusively by programming the control. -
Page 85: Machine Speed
18.7 Machine speed 18.7.1 Positioning speed Function with or without operating control Parameter Positioning speed n1 F-110 The positioning speed is the speed of the machine during a positioning process. 18.7.2 Machine speed Function with or without operating control Parameter Machine speed F-118 The machine speed is the speed the sewing machine that is can be reached during... -
Page 86: Lifting In General
18.8 Lifting in general The following functions have an influence on lifting: Function with or without operating control Parameter Starting delay after the lifting signal (LÜ) F-202 switches off This function sets a delay before starting the sewing machine that becomes active when the sewing machine starts up (with pedal position “>0”/ lifting open). -
Page 87: Acceleration Characteristics
18.9 Acceleration characteristics The following functions have an influence on the acceleration or starting characteristics: Function with or without operating control Parameter Accelerating power of the drive F-220 This function sets the acceleration characteristics of the drive. The dynamics of the drive's acceleration can be adapted to the sewing machine's characteristics (easy/heavy). -
Page 88: Holding Force During Standstill
18.11 Holding force during standstill The following functions have an influence on the holding force during standstill: Function with or without operating control Parameter Holding force during machine standstill F-153 This function sets holding force of the machine when it is at a standstill. This function prevents the undesirable “wandering”... -
Page 89: Thread Trimmer
18.12 Thread trimmer The following functions have an influence on the thread trimmer: Function with or without operating control Parameter Delay time thread trimmer (FA) F-280 This function sets a delay time for the thread trimmer that becomes active after the sewing machine is positioned at the stitch end. -
Page 90: Automatic Saving Of The Plunger Value
18.14 Automatic saving of the plunger value The following functions influence the saving of the plunger value: Function with or without operating control Parameter Automatic save on/off F-641 This function switches on automatically saving of the plunger value during adjustment. This means there is a choice between "Manual save"... -
Page 91: Deleting The Favorite Buttons In "Manual Tack" Sewing Mode
18.15 Deleting the favorite buttons in "Manual tack" sewing mode Function with or without operating control Parameter Delete favorite buttons in "Man. tack" F-766 This function deletes the favorite buttons in the "Manual tack" sewing mode. The function is activated by entering a parameter value that is "unequal to 4711". 18.16 Deleting the favorite buttons in "Automatic tack"... -
Page 92: Parameter Programming Of The Control
C A U T I O N ! The precise parameter values can be found in the Strobel parameter list. Parameters that are not described in the Strobel parameter list have to be reset according to the Efka parameter list on the reset values. -
Page 93: Programming At The Technician Or Installer Level
19.3 Programming at the technician or installer level 19.3.1 General The parameter values can be changed at the technician or installer level only when a code number has been entered. Code number at the technician level => 1907 Code number at the installer level =>... - Page 94 2. Press the “1” button. Second digit blinks: 3. Press the “9” button. Third digit blinks: 4. Press the “0” button. Forth digit blinks: 5. Press the “7” button. First digit blinks: 6. Press the “E” button. The first parameter at the technician level is displayed: BA_560-21_A5_230522_en.doc...
-
Page 95: Calling Up And Changing Parameters Directly
19.3.3 Calling up and changing parameters directly Using the example of the F-118 parameter whose value is changed from 1600 to 1500. Comment: Pressing the series of buttons to select the parameters needs to be done uninterrupted (in this case 1 – 1 – 8) 1. - Page 96 6. Press the “+/-” button; in this case the “-” button. Parameter value is changed: 7. Press the “P” button. Parameter is displayed: In this way all parameters can be called up at will and changed at the programming level. After changing the last parameter value the programming at the programming level has to be exited as follows: 8.
-
Page 97: Setting The Positions
19.4 Setting the positions 19.4.1 General The individual positions of the sewing machine (machine positions) can be found in the operating manual of the sewing machine. The setting of the positions can be easily checked using the F-172 function. Refer to chapter "20.1 Display of the needle positions". -
Page 98: Setting Positions 1 And 2
19.4.3 Setting positions 1 and 2 After entering the code number “1907” for the technician level: Select parameter F-171. Display shows: F 171 Servicerou.… Press the “E” button. F 171 “F2” blinks Press the “F2” button. P1E xxx Press the “E” button. P2E xxx Turn the handwheel in the machine's direction of rotation until the position value in the display changes. -
Page 99: Deleting Favorite Buttons
19.5 Deleting favorite buttons Using as example the favorite buttons in the "Manual tack" sewing mode After entering the code number “3112” at the installer level: Select parameter F-766 Display shows: F 766 Press the “E” button F 766 004711 Press the buttons “+/-”to change the value F 766 004712... -
Page 100: Service
Service 20.1 Display of the needle positions Function with V850 operating control Parameter Display of the positions 1 and 2 (down/up) F-172 The setting of the positions can be easily checked using this function. After entering the code number “1907” for the technician level: Select parameter F-172. -
Page 101: Display Of The Program Number
Function with operating control Parameter Display of the Strobel program number F-762 This function displays of the Strobel program number of the control with index and identification number. Example: Program number: 000101 After entering the code number “1907” for the technician level: Select parameter F-762. -
Page 102: General
20.3.1 General Function with operating control Parameter Test of the signal in- and outputs F-173 The external inputs and the transistor power outputs with the connected actuators (e.g. magnetic valves) can easily be checked by this function. The sewing machine cannot be started during the test. 20.3.2 Test of the signal outputs The signal outputs can be tested as follows: After entering the code number “1907”... -
Page 103: Installation Or Replacement Of The Sewing Drive's Control Box
Installation or replacement of the sewing drive's control box Installation of the control box has been taken care of by the Strobel company already at delivery. An installation of the control box therefore needs to be done only after a replacement. - Page 104 Check the proper assembly of the motor and any accessories used. Screw the bonding function of the control box back (if any) back. Connect all plug-in outlets on the back of the control box. Plug in power plug, switch machine on with the power switch S1, and enter the code number “3112”.
-
Page 105: Replacement Of The Sewing Drive Motor
20.5 Replacement of the sewing drive motor C A U T I O N ! The replacement of the motor may be done only by an electrician. When replacing the motor ensure, check and set the following: C A U T I O N ! Switch the machine off electrically by the power switch S1 and pull the power plug. -
Page 106: Replacement Of The Step Motor Unit (Incl. Hall Sensor)
20.6 Replacement of the step motor unit (incl. Hall sensor) When replacing the step motor unit ensure, check and set the following: C A U T I O N ! Switch the machine off electrically by the power switch S1 and pull the power plug! Switch the machine off electrically by the power switch S1 and pull the power plug (Fig. -
Page 107: Fault Messages
20.7 Fault messages 20.7.1 Fault messages of the tack programming On the V850 operating control Description Max Program The maximum number of stitch programs has been exceeded. The desired stitch program cannot be created. Max Tack The maximum number of tacks has been exceeded. The desired tack cannot be inserted. -
Page 108: Fault Messages Of The Sewing Drive Ab425S
20.7.3 Fault messages of the sewing drive AB425S 20.7.3.1 General information On the V850 On the control Description operating control Info A1: Pedal Pedal is not in pedal position “0” when the machine is switched on -StoP- blinking Run inhibition active Info A3: Refer…... -
Page 109: Hardware Fault
20.7.3.5 Hardware fault On the V850 On the control Description operating control INF H1 Commutation transmitter in-line or converter faulty INF H2 Defective processor BA_560-21_A5_230522_en.doc... -
Page 110: Cables
Cables 21.1 Hall sensor connection cable 296.0667 Control unit - machine cover 21.2 Step motor connection cable 296.0668 Control unit - machine cover 21.3 Extension cable 296.0643 For mains DC... 21.4 Extension cable 296.0644 For commutation encoder DC... BA_560-21_A5_230522_en.doc... -
Page 111: Connection Cable Machine 296.0662
21.5 Connection cable machine 296.0662 Lifting - thread wiper - Thread trimmer BA_560-21_A5_230522_en.doc... -
Page 112: Schaltpläne
Schaltpläne 22.1 Mains connection plan – DC1500-AB425S with/without sewing light BA_560-21_A5_230522_en.doc... -
Page 113: Electrical Wiring Diagram Ab425S
22.2 Electrical wiring diagram AB425S BA_560-21_A5_230522_en.doc... -
Page 114: Assembly Plan Ab425S
22.3 Assembly plan AB425S BA_560-21_A5_230522_en.doc... -
Page 115: Pneumatic Circuit Diagram
22.4 Pneumatic circuit diagram BA_560-21_A5_230522_en.doc... -
Page 116: Pneumatic Construction Circuit Diagram
22.5 Pneumatic construction circuit diagram BA_560-21_A5_230522_en.doc... -
Page 117: Switchable Functions
Switchable Functions Strobel- Switchable Functions - DC1500-AB425S Machine class Explanation: 0 = Off 1 = On F-290 Mode Plug-in strip number for F-292 V850 operating control left arrow Button "1" Autom. Tack advancing "ON" right arrow Button "9" Pedal step sewing start left arrow Button "0"... -
Page 118: Parameter List
Parameter list Strobel-Parameter list - DC1500-AB425S Machine class F-290 Mode Plug-in strip number for F-292 V850 operating control F-110 Positioning speed n1 min-1 0400 F-118 Machine speed min-1 1600 1800 Holding force during F-153 machine standstill F-174 Language selection Starting delay after... - Page 119 Und wir können noch mehr für Sie tun! Unser Lieferprogramm bietet für jede Branche und jegliche Anforderung genau die richtige Problemlösung. And we can do a lot more for you! Our range offers the correct problem solution for every branch and for all requirements. Für die Bekleidungs- Für die Schuh- Für die Polster-...
- Page 120 Then phone, write or simply come and see us. You can have further information about our products at any time, or experience the Strobel machines live in our show room. We’re looking forward to meeting you! S p e z i a l m a s c h i n e n G m b H...
Need help?
Do you have a question about the 560-21 Series and is the answer not in the manual?
Questions and answers