Table of Contents
Advertisement
Quick Links
Advertisement
Table of Contents

Related Manuals for Ametek JOFRA MTC-650 A MKII


Summary of Contents for Ametek JOFRA MTC-650 A MKII
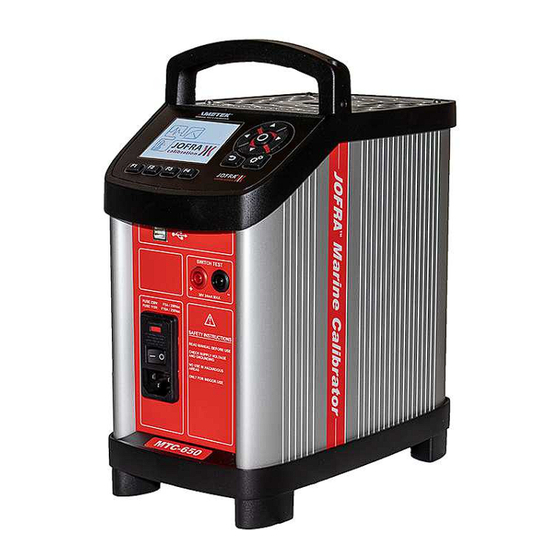
- Page 1 Reference Manual Marine Temperature Calibrator JOFRA MTC-650 A MKII...
- Page 2 Reference Manual Marine Temperature Calibrator JOFRA MTC-650 A MKII Copyright 2019 AMETEK Denmark A/S...
- Page 3 About this manual…. • The structure of the manual This reference manual is aimed at users who are familiar with AMETEK calibrators, as well as those who are not. The manual is divided into 11 sections which describe how to set up, operate, service and maintain the calibrator.
- Page 4 Caution… Conditions and actions that may compromise the safe use of the instrument and result in slight personal or material damage. Note… Special situations which demand the user’s attention. 130067 03 2023-07-06 page 3...
-
Page 5: Table Of Contents
List of contents Introduction ..........................6 1.1 Warranty ..............................7 1.2 Receiving the Marine Temperature Calibrator ..................8 1.3 Dimensioning drawing ........................... 9 Safety instructions ........................10 Setting up the calibrator for use ....................13 3.1 Preparing the calibrator ........................13 3.2 Choosing an insertion tube ......................... 14 3.2.1 Standard insertion tubes ...................... -
Page 7: Introduction
• Protective carrying case with compartments for inserts, cables, manuals, plugs etc. ISO-9001 certified AMETEK Denmark A/S was ISO -9001 certified in September 1994 by Bureau Veritas Certification Denmark. CE-labels Your new temperature calibrator bears the CE label and conforms to the... -
Page 8: Warranty
This instrument is warranted against defects in workmanship, material and design for two (2) years from date of delivery to the extent that AMETEK will, at its sole option, repair or replace the instrument or any part thereof which is defective, provided, however, that this warranty shall not apply to instruments subjected to tampering or, abuse, or exposed to highly corrosive conditions. -
Page 9: Receiving The Marine Temperature Calibrator
Receiving the Marine Temperature Calibrator When you receive the instrument… 1) Unpack and check the calibrator and the accessories carefully. 2) Check the parts according to the list shown below. If any of the parts are missing or damaged, please contact the dealer who sold you the calibrator. -
Page 10: Dimensioning Drawing
Dimensioning drawing 130067 03 2023-07-06 page 9... -
Page 11: Safety Instructions
Safety instructions Read this manual carefully before using the instrument! Please follow the instructions and procedures described in this manual. They are designed to allow you to get the most out of your calibrator and avoid any personal injuries and/or damage to the instrument. Disposal –... - Page 12 • Remember to use appropriate protective equipment or get help when carrying the calibrator (for a longer distance) in order to prevent injuries from dropping the calibrator. About the frontpanel: • The connectors, on the front panel of the calibrator, must NEVER be connected to a voltage source.
- Page 13 About the well, insertion tube and grid plate: • The well and the insertion tube must be clean and dry before use. • Do not pour any form of liquids into the well. It might damage the well or cause a hazard.
-
Page 14: Setting Up The Calibrator For Use
Setting up the calibrator for use Preparing the calibrator Warning • The calibrator has been designed for indoor use only and is not to be used in wet locations. • The calibrator is not to be used in hazardous areas, where vapour or gas leaks, etc. -
Page 15: Choosing An Insertion Tube
Warning The two main fuses must have the specified current and voltage rating and be of the specified type. The use of makeshift fuses and the short-circuiting of fuse holders are prohibited and may cause a hazard. Fig. 1 Changing fuses A. -
Page 16: Standard Insertion Tubes
Caution… Before using new insertion tubes for the calibration in the MTC-650 instrument the insertion tubes must be heated up to maximum temperature 650°C (1202°F) for a period of minimum 30 minutes. Insertion tubes are selected on the basis of the diameter of the sensor to be calibrated. Use the table for insertion tubes in section 3.2.1 to find the correct parts number. -
Page 17: Inserting The Sensor
These fluids may penetrate the calibrator and cause electrical hazard, damage or create poisonous fumes. • Never try to modify the insulation plugs to make them fit the sensor. Use only insulation plugs supplied by AMETEK Denmark A/S. Insert the sensor as shown below in fig. 2. Fig. 2... - Page 18 Caution – Hot surface • Do not touch the grid plate, the well or the insertion tube as the calibrator is heating up – they may be very hot and cause burns. • Do not touch the tip of the sensor when it is removed from the insertion tube/well –...
-
Page 19: Calibrator Interface
Calibrator Interface Arrow Keys Keypad - Functions Serve different functions depending on the mode of operation. Navigation mode: Use the four keys to move the cursor in the desired direction. Edit mode: The Up and Down Arrow keys scroll through the lists of options. If entering a number, the Left and Right Arrow keys move the cursor one... -
Page 20: Stability Of Temperature Values
4.2.1 Main screen temperature values Two temperatures are always displayed: • TRUE temperature: This is the reference temperature of the calibrator. • SET temperature: This is the target temperature for the well. SET temperature displays the last value entered. If no value has been entered previously, "---,--" is displayed. 4.2.2 Stability of temperature values The stability of the TRUE temperature is indicated by the following messages:... -
Page 21: Input/Output Connections
Input/Output Connections Warning • The input terminals must NEVER be connected to voltage exceeding 30V with reference to ground. Fig. 3 Input and Output Device Switch Test USB 2.0 Device Port, 1 x Connection for USB. thermostat switch test. Note that this connection is for voltage free switches. -
Page 22: Operating The Calibrator
Operating the calibrator Warning Caution… Please inspect the Safety Instructions in section 2.0 before using the instrument. Operating principle The calibrator is operated using the Functions keys, the Arrow keys and the Action/Enter key. 1. Press the Functions keys to operate the horizontal menu bar. 2. -
Page 23: System Menu
5.1.1 System menu The System menu can be accessed at any stage of operation: 1. Press the (System) key to display the System menu. 2. Use the (Up) and (Down) Arrow keys to scroll in the list. System Settings menu 1. - Page 24 Note… Temperature range is limited by Min. SET Temp. and Max. SET Temp. settings editable in the System Settings menu. System Info menu In the System Info menu important information such as serial numbers and calibration dates of the instrument are given. It is not possible to edit any fields in this menu.
-
Page 25: Starting The Calibrator
1. Use the (Up) and (Down) Arrow keys to to scroll in the setup-list. 2. Select the requested setup, and press (Enter). The name of the setup will appear in the upper-left corner of the display. If selecting the Factory default function the active setup will be reset and change to the initial setting. -
Page 26: Selecting The Set-Temperature
Selecting the set-temperature Note… Temperature range is limited by Min. SET Temp. and Max. SET Temp. settings editable in the System Settings menu. The set-temperature can be entered both manually and by selecting a preset temperature. 1. For manually use press (Set) 2. -
Page 27: Editing The Preset Set-Temperature
When the calibrator is stable the display will show a green checkmark symbol and the instrument will emit an audible alarm. The instrument will indicate in minutes and seconds for how long the instrument has been stable. 5.4.1 Editing the preset set-temperature It is possible to change the preset set temperature to whatever value desired. -
Page 28: Auto Step Function
Auto Step function Auto Step is used to step automatically between a range of different calibration temperatures. This is useful when calibrating sensors in places which are hard to reach, and when calibrating sensors for which the output is displayed in a different location. -
Page 29: The Calibrator's Auto Step Procedure
2. Press one of the (Arrow) keys to access the editable fields for new values: • No of steps: the number of temperature steps per direction (T T ) can be set using integers from 2 to 12. You must select minimum 2 steps, maximum 12 steps. - Page 30 130067 03 2023-07-06 page 29...
-
Page 31: Switch Test Function
Switch Test function Switch Test automatically locates the switch temperature of a thermostat. Three parameters are required: • Start temperature (T • End temperature (T • Rate of change in temperature pr. minute (Rate). Dead band of a thermostat can also be determined here. Where the dead band determines the tolerance between the upper switch temperature and the lower switch temperature of the thermostat. - Page 32 1. Press (Switch) to access the Switch Test setup. If you wish to return to the Main screen press (Main). The small graph illustrates the current T and dead band selections. Note that T can be greater than T 2. Press one of the (Arrow) keys to access the editable fields for new values: •...
-
Page 33: The Calibrator's Switch Test Procedure
.... • Results : Press ..(F3) to display the current Switch Test result. The results change as the test progresses. The results list is also accessible from the Switch Test menu screen. 5.6.2 The calibrator's Switch Test procedure 1) Once the Switch Test is started, the calibrator starts working towards T as quickly as possible. -
Page 34: Storing And Transporting The Calibrator
Storing and transporting the calibrator Caution… The following guidelines should always be observed when storing and transporting the calibrator. This will ensure that the instrument and the sensor remain in good working order. Warning • The calibrator must be switched off before any attempt to service the instrument is made. - Page 35 Caution – Hot surface Do not remove the insert from the calibrator before the insert has cooled down to less than 50°C/122°F Caution… • The insertion tube must always be removed from the calibrator after use. The humidity in the air may cause corrosion oxidation on the insertion tube inside the instrument.
-
Page 36: Error Messages (List Of Alarms)
• non-original parts are used in any way when operating the instrument. AMETEK Denmark’s liability is restricted to errors which originated from the factory. If the calibrator detects an error during operation, the instrument will terminate all functions and display a list of alarms. Make a note of the error message and contact your distributor or AMETEK Denmark’s service department. - Page 37 Check Ambient temperature too high fan inlet. If the error still occurs, please report the error to your local distributor or to AMETEK Denmark’s service department Please report the error to your local distributor Well temperature too high or to AMETEK Denmark’s service department...
- Page 38 Internal reference temperature has measured a value outside the temperature calibrator Internal ref. temperature too high temperature range. Please report the error to your local distributor or to AMETEK Denmark’s service department Internal reference temperature has measured a value outside the temperature calibrator Internal ref.
-
Page 39: Returning The Calibrator For Service
Returning the calibrator for service When returning the calibrator to the manufacturer for service, please enclose a fully completed service information form. Simply copy/print out the form on the following page and fill in the required information. The calibrator should be returned in the original packing. Furthermore please follow the guidelines for transportation described in section 6.0 –... - Page 40 Safety precautions : if the product has been exposed to any hazardous substances, it must be thoroughly decontaminated before it is returned to AMETEK Denmark A/S. Details of the hazardous substances and any precautions to be taken must be enclosed.
-
Page 41: Maintenance
Maintenance Replacing the main fuses Warning • The calibrator must be switched off before any attempt to service the instrument is made. There are no user serviceable parts inside the calibrator. • The fuse box must not be removed from the power control switch until the mains cable has been disconnected. -
Page 42: Maintenance Mode
Maintenance mode The user can change the configuration of the instrument by accessing the Maintenance mode. 1. Press (Enter) while switching on the calibrator using the ON/OFF switch. 2. Wait a few seconds and press the (System) key to access the Maintenance System menu. - Page 43 3. Select a new main frequency from the Main Frequency variant list 4. Press (Save) to save the configuration set up. Calibration date 1. Select the Calibration date mode. 2. Use the (Up) and (Down) keys to enter a new date. 3.
-
Page 44: Cleaning
6. Press (Enter) to accept the value. 7. Press Continue (F3) to activate the heating up/cooling down process and wait for the stability indication. 8. Once the temperature is stable, press Continue (F3) again. 9. Continue pressing the (Continue) key until the adjusting process is completed. -
Page 45: Adjusting And Calibrating The Instrument
Dust and textile fibres should be removed from the well using e.g. compressed air. Warning REMEMBER! Wear goggles when using compressed air! Adjusting and calibrating the instrument You are advised to return the calibrator to AMETEK Denmark A/S or another accredited laboratory at least once a year for calibration. 130067 03 2023-07-06... -
Page 46: 10.0 Technical Specifications
10.0 Technical specifications All specifications are given with an ambient temperature of 23°C/73.4°F ± 3°C/5.4°F MECHANICAL SPECIFICATIONS MTC-650 A MKII Dimensions l × w × h 248 x 148 x 305 mm / 9.76 x 5.83 x 12.01 inch Weight 6.1 kg / 13.4 lbs (without insertion tube) Bore diameter/depth of well Ø26 mm / 120 mm –... - Page 47 THERMAL SPECIFICATIONS MTC-650 A MKII Cooling time incl. insertion tube 650°C / 1202°F to 100°C / 212°F: 39 min. (52 min. silent mode) 100°C / 212°F to 50°C / 122°F: 18 min. (26 min. silent mode) STANDARDS The following standards are observed EN 61326-1: 2013: according to the EMC-Directive Electrical equipment for measurement, control and...
-
Page 48: 11.0 List Of Accessories
11.0 List of accessories All parts listed in the list of accessories can be obtained from the factory through our dealers. Please contact your dealer for assistance if you require parts which do not appear on the list. List of accessories Accessories Part no. - Page 49 - Florida Tel +49 (0)2159 9136 510 Tel +86 10 8526 2111 ext. 19 Tel +1 (800) 527 9999 info.mct-de@ametek.de stc.china@ametek.com cal.info@ametek.com Information in this document is subject to change without notice. ©2023, by AMETEK, Inc., www.ametek.com. All rights reserved.
Need help?
Do you have a question about the JOFRA MTC-650 A MKII and is the answer not in the manual?
Questions and answers