Table of Contents
Advertisement
Advertisement
Chapters
Table of Contents

Related Manuals for Ametek TAYLOR HOBSON Surtronic S-100 Series


Summary of Contents for Ametek TAYLOR HOBSON Surtronic S-100 Series
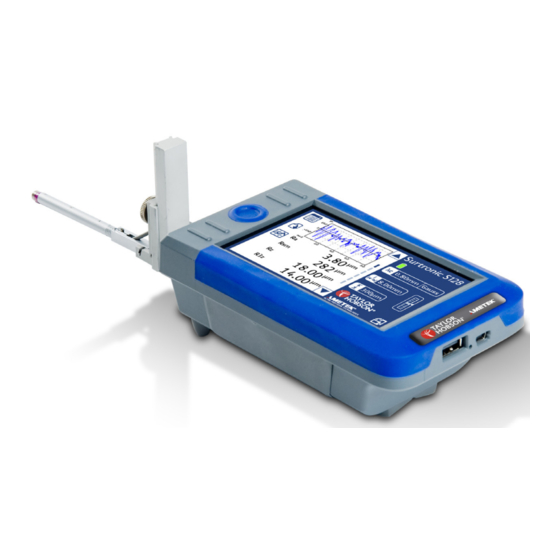
- Page 1 Surtronic ® S-100 Series User Guide...
- Page 2 Surtronic S -100 Series ® User Guide This is Taylor Hobson’s User Guide for the Surtronic ® S-100 Series. All the specifications in this document are correct at time of production and are subject to change. Please contact Taylor Hobson for further information. K505-366...
-
Page 3: Table Of Contents
Contents Surtronic S-100 series overview..........4 ® Instrument overview ..............6 TalyProfile ..................8 Surtronic accessories ...............14 Pick-ups ..................19 System & safety information ...........22 General system information ..............22 CE marking ......................24 Declaration of conformity .................25 Environmental legislation ................26 Surtronic S-100 series dimensions ........27 ®... -
Page 4: Surtronic ® S-100 Series Overview
Surtronic S -100 series overview ® This new edition of the long-standing Surtronic range brings a large display with the simplest of menu structures and the most up-to-date parameters. Its mechanical rigidity and styli have a firm reputation for reliable and repeatable surface finish measurements across a wide range of applications. - Page 5 Standards and traceability The reference standard supplied can be used both to calibrate the instrument and check for stylus wear to ensure the most accurate results are always being achieved. Measurement Best capability Roughness standards (Ra) ±(2% + 0.004 µm) Workpiece or component ±3% of measured value per trace surface texture (Ra)
-
Page 6: Instrument Overview
Instrument overview Lift/lower Measure Profile graph Supplied as standard Tactile measurement Detailed graph shows providing 50 mm button, great when device measured area to help height adjustment, right is being used overhead or identify problem areas angle measurement inside pipes and 70 mm reach into Simple set up bores... - Page 7 Fast and reliable Simply press the measurement button and in a few seconds a full set of traceable measurement results including a detailed profile graph will be displayed or printed automatically, printer optional. Built to last, by design Impact resistant rubberised mouldings surround a recessed, Mylar protected high durability touch screen and a solid stainless steel drive mechanism with anti-wear gears and bearings.
-
Page 8: Talyprofile
TalyProfile Advanced surface finish analysis TalyProfile is a dedicated PC based software package designed for use with Surtronic S-100 series instruments. Three versions are available. ® TalyProfile “Lite” has all functions typically used for a shopfloor inspection, TalyProfile “Silver“ has enhanced features for R&W parameters, a statistics module and full report printing and TalyProfile “Gold“... - Page 9 Lite Silver Gold Multiple file format reports ✓ ✓ Report printing ✓ ✓ Form Talysurf data import ✓ ✓ Tolerance limits (pass/fail) ✓ ✓ Data file explorer ✓ ✓ ISO 13565 Automotive ✓ ✓ Interactive MR curve ✓ ✓ Step height measurement ✓...
- Page 10 Advanced time-saving analysis templates A ‘template’ can be created whereby a sequence of analysis functions can be saved and applied to future measurements, turning detailed reporting tasks into routine documents. Desktop publishing facility TalyProfile offers a comprehensive desk top publishing function which allows clear presentation of measurements, results and profiles.
- Page 11 Outstanding graphics The software is visually advanced and provides clear on screen profile images. TalyProfile allows the user to take a basic measurement and create a full measurement report using the software’s detailed analysis options and desktop publishing function. In depth analysis Profiles can be levelled and zoomed to remove unwanted features or defects from the analysis.
- Page 12 TalyProfile parameters ISO 4287 Lite Silver Gold Rz, Rp, Rv, Rz, Rc, Rt, Ra, Rq, Rsk, Rku, ü ü ü RSm, Rdq, Rmr, Rdc, RPc Pp, Pv, Pz, Pc, Pt, Pa, Pq, Psk, Pku, PSm, ü ü ü Pdq, Pmr, Pdc, PPc Wp, Wv, Wz, Wc, Wt, Wa, Wq, Wsk, ü...
- Page 13 Other 2D parameters Lite Silver Gold PLq, Pda, PLa, PLo, PzJIS, P3z, Pmax, ü Ptm, Py, PH, PHSC, PD, PS, Pvo, Prms, PTp, PHTp, Pfd, Ppm RLq, Rda, RLa, RLo, RzJIS, R3z, Rmax, ü Rtm, Ry, RH, RHSC, RD, RS, Rvo, Rrms, RTp, RHTp, Rfd, Rpm WLq, Wda, WLa, WLo, WzJIS, W3z, Wmax, Wtm, Wy, WH, WHSC, WD,...
-
Page 14: Surtronic Accessories
Surtronic accessories ® Column and stand - Code SA-80 • Granite base (400 x 250 mm) with manually operated column providing adjustment height of 260 mm. USB thermal printer - Code PR-60 • Compact & highspeed 60 mm (24 in) / second. Includes USB lead and International Power Supply Outputs settings, results, and high resolution graph. - Page 15 Support stand - Code SA-85 • With 4 degrees of freedom. Max measuring height of 430 mm and a range of 115 mm at a horizontal reach of 305–420 mm. Portable base - Code SA-40 • This provides a support when used on machine tool applications. Datum support stand - Code SA-90 • Provides an independent straight datum requires pick-up to be fitted with the detachable skid,...
- Page 16 Detachable skid - Code SA-91 • For use with Datum Support Stand, clamped to the pick up body, this accessory is required for use with the Datum Support Stand. Precision vice - Code SA-31 • High quality precision vice ideal for holding small components. Jaw width 63 mm, jaw depth 32 mm, jaw opening 85 mm.
- Page 17 Pick-up lift - Code SA-20 • For controlled lifting and lowering of the pickup to aid measurement setup. S-Series mains adaptor - Code SC-10 • International USB charger 5V 1A 110-240VAC 50/60Hz. Recharges S116 / S128 in 4 hours. Calibration standard - Code SC-20 • Ra 6.0µm (236 µin)
- Page 18 Deep bore extension rods • Provides extension to pick-up for measurements in deep holes • (100 mm extension) reach 160mm - Code SA-25 • (200 mm extension) reach 260mm - Code SA-28 Dot Matrix printer - Code PR-40 • Robust, high speed, high performance, easy-to-use printer with USB connection.
-
Page 19: Pick-Ups
Pick-ups Taylor Hobson has developed an extensive range of pick-ups to suit the varied measurement needs of our customers. In addition to the pick-ups shown below our applications department regularly design and manufacture pick-ups for specific requirements. Standard pick-up For general surface roughness measurement. •... - Page 20 Right angle pick-up - Code PK-05 • For measurement at right angles to the direction of traverse. 60.8 Recess pick-up • For measuring into deep recesses. • Code PK-06 recess 5.7 mm (0.23 in) with 5µm tip radius • Code PK-08 recess 25 mm (0.23 in) with 5µm tip radius (Other depths and tip radii available) 62.9 Chisel edge pick-up - Code PK-24...
- Page 21 Side skid pick-up - Code PK-31 • For use on curved surfaces such as gear teeth. 60.7 Shoe pick-up - Code PK-99 • For measuring rougher surfaces, particularly with the 2.5mm (0.1in) cut-off. 66.1...
-
Page 22: System & Safety Information
System & safety informatio n General system information Technical S-116 S-128 Basic English, French, German, Italian, Spanish Czech, Portuguese, Romanian, Languages Extended Hungarian, Swedish, Russian Asian Japanese up to 7 results per page, selectable On-screen on-screen graph with XZ axis Data output Output settings, results and high Printer... - Page 23 Component capacity S-116 S-128 Weight including 0.5 Kg (1.1 lbs) Physical pickup specifications Power source Li Poly rechargable battery Temperature 5 - 40°C (41 - 104°F) Operating conditions Humidity 0 - 80% non-condensing Temperature 0 - 50°C (32 - 122°F) Storage conditions Humidity...
-
Page 24: Ce Marking
Measurement capability S-116 S-128 200 µm / 100 µm / 400 µm / 100 µm / Range 10 µm 10 µm 100 nm / 20 nm / 50 nm / 10 nm / Resolution 10 nm 5 nm 250 nm / 150 nm / 150 nm / 100 nm / Noise floor (Ra) 100 nm... -
Page 25: Declaration Of Conformity
Declaration of conformity... -
Page 26: Environmental Legislation
Environmental legislation Waste Electrical and Electronic Equipment (WEEE) - Directive 2012/19/EU Taylor Hobson equipment is marked with the “wheelie bin” symbol indicating that it must NOT be disposed of in landfill or with general waste. The symbol indicates that a product is not to be disposed of with household waste, according to the Directive and each country’s national law. -
Page 27: Surtronic
Surtronic S-100 series dimensions ® 303 mm (with standard 112-1502 pick-up attached) 237 mm (without pick-up) 81 mm 57 mm 36 mm 25.5 mm max. travel 2.5 mm 30 mm 25 mm 4 fixturing holes 4.3” 152 mm 87 mm... -
Page 28: Quick Start Guide
Surtronic S125 Taylor Hobson UK Taylor Hobson Korea Tel: +44 116 276 3771 Tel: +82 31 888 5255 © DiskArt™ 198 taylor-hobson.korea@ametek.com taylor-hobson.uk@ametek.com Taylor Hobson China Beijing Office Taylor Hobson France λc 0.80 mm Gaus Tel: +33 130 68 89 30... - Page 29 Taylor Hobson UK 62.9 60.8 Tel: +82 31 888 5255 Tel: +44 116 276 3771 part no. 112-1502 part no. 112-1506 © DiskArt™ 198 taylor-hobson.korea@ametek.com taylor-hobson.uk@ametek.com 62.9 60.8 Taylor Hobson France Taylor Hobson China Beijing Office t alyp rofile .com 60.2 60.7...
-
Page 30: Using The Instrument
Using the instrument Basic operation ................32 Overview ......................32 Menu ........................33 Device icons.......................33 Shortcuts ......................34 Rotate ........................35 Screen shot ......................35 Graph ........................36 Battery ........................36 Memory ........................36 Filter .....................37 Filter λc type ......................37 λc Cut-off ......................37 Evaluation length ...............38 Parameters ..................38 Parameters ......................38 Parameter settings ..................40 Range ...................42 Units .....................43... - Page 31 Storage..................47 New batch ......................48 Keyboard ......................49 View batch ......................49 Delete batch ......................50 Print batch ......................50 Print settings ................51 Model ........................51 V. Scale ........................51 Advanced ..................52 Language ......................52 Auto print ......................52 Power saving ......................53 Stylus return .......................55 Test mode ......................55 Set zero ........................56 Licence # ......................56 Device Lock .......................57...
-
Page 32: Basic Operation
Basic operation Overview Power / Measure Button • On / Off - Hold for 3 seconds • Measure - Press for < 3 Seconds Icon Battery Instrument Profile level type Shortcuts showing current settings Gauge indicator Page Rotate Results indicators icon... -
Page 33: Menu
Menu 1. Tap the menu icon in the left-hand corner. 2. Tap the down arrow to scroll down through the menu. Device Icons Tap the arrow icon to move down to the next item in a list. Tap the tick icon to confirm your selection or data input. -
Page 34: Shortcuts
Shortcuts λc Cut-off Tap the λc Cut-off icon to edit the length. See page 37 for more information. Filter λc type Tap the ‘Filter’ icon to edit the type. See page 37 for more information. Evaluation length Tap the ‘measurement’ icon to edit the length. See page 38 for more information. -
Page 35: Rotate
Rotate Tap the Rotate icon to rotate the screen between landscape and portrait mode in 4 different orientations. Screen shot 1. Tap the ‘Taylor Hobson’ icon to take a screen shot of what is shown on the device screen at that time. 2. -
Page 36: Graph
Graph Tap the Graph icon on the left-hand side of the screen to toggle between displaying and not displaying a graph of your measurement. Battery This icon indicates the Surtronic S-Series current battery life. This icon indicates the Surtronic S-Series battery is charging Memory Internal memory This icon indicates the activated mode... -
Page 37: Filter
Filter Filter λc type Tap menu and ‘Filter’. Then select λc Type to select the filter type. λc Cut-off Tap menu and ‘Filter’. Then select λc Cut-off to select the λc Cut-off size. -
Page 38: Evaluation Length
Evaluation length Tap menu and ‘Eval Length’ to select the evaluation length. Select required N (number of cut- offs) and the new length (λc x N) will be calculated automatically Parameters Tap ‘Parameters in menu to select parameters based on different standards as given below. - Page 39 ISO 13565 Tap ‘ISO 13565’ to select parameters. ASME B46.1 / JIS B 0601 Tap ‘ASME B46.1’ or ‘JIS B 0601’ to select parameters. Others Tap ‘Others’ to select parameters.
-
Page 40: Parameter Settings
Parameter settings Tap ‘Parameters in ‘Menu’ then ‘ISO 4287’(R) and then the first ‘settings’ icon to open the ‘Rmr’ Settings. Tap ‘Mr%’ and then the box where the number is displayed to adjust the setting. Tap on the Up/Down arrows to edit the number in the Mr% box. - Page 41 Rmr settings – ‘Mr%’ (offset) 1. Tap ‘Mr%’ and then the ‘offset’ box to adjust the setting. 2. Tap ‘+/-’ icon to toggle between positive and negative. Tap Up/ Down arrows to change the number in the offset box. Rmr settings – ‘Meanline’ • Tap ‘Meanline’...
-
Page 42: Range
Tap ‘ISO 4287(R)’ and then the ‘Settings’ icon next to Rpc to adjust the ‘Rpc Bandwidth’. Tap Up/Down arrows to cadjust the value of the bandwidth. Range Tap menu and ‘Range’ to select the range. -
Page 43: Units
Units In ‘Menu’ tap ‘Units’ to select between ‘Metric’ and ‘English’. Calibration Calibration settings Tap ‘Calibration’ on the main menu and then the ‘settings’ icon to see a list of calibration options. -
Page 44: Calibration Value
Calibration value Tap ‘Calib. Value’ and enter the value you require using the numeric keypad. Tap the save icon to save the calibration Ra value. You can also access the calibration value screen by tapping the calibration value box on the main calibration screen. Calibration filter Type Tap ‘Filter’... -
Page 45: Λc Settings
Cut off Tap ‘Filter’ and then ‘λc Cut-off ’ to select your required cut-off option. Tap the back arrow icon to accept and go back to the previous menu. Default value is ‘0.80mm’. λc settings Tap ‘λc Settings’ to set the required calibration evaluation length and adjust the λc Cut-off if necessary. -
Page 46: Calibration Procedure
Calibration procedure When all the necessary calibration settings have been made, return to the main calibration screen. Press the measure button to initiate the calibration measurement. When the measurement is complete, the measured Ra value will be displayed as well as the calculated error (%). -
Page 47: Storage
Storage Tap ‘Store’ and then ‘Store Mode’ to select which storage option you require. Disables any storage function. Internal Allows subsequent measurement results to be stored internally in the unit. Allows subsequent measurement results to be stored on an external data stick. -
Page 48: New Batch
New batch 1. Tap ‘Store’ and then ‘New Batch’ to create a new batch of stored measurements. 2. Enter batch name using alpha-numeric keyboard and tap ‘\save’. • The name must be 5 characters or less. • All subsequent measurements will be saved using this batch name with auto-numeric increments. -
Page 49: Keyboard
Keyboard 1. The main alphabet keyboard is split into two. The alphabet characters that have the bigger font are the characters that are active at the time. To switch between the top left and bottom right characters, tap the ‘Keyboard’ icon 2. -
Page 50: Delete Batch
Delete batch 1. Tap ‘Store’ then ‘Delete Batch’ and then select a batch to be deleted. 2. Tap the ‘trash’ icon to delete the selected batch. Tap the ‘trash’ icon again to confirm the deletion of the batch. Tap ‘All’ to select all batch files. -
Page 51: Print Settings
Print settings 1. In ‘Menu’ tap ‘Print Settings’ to select your required printing options. 2. Tick / Untick the ‘Graph’ box to add or exclude profile graph from the print out When this icon is in bold, it shows that a printer is detected & connected to the device. -
Page 52: Advanced
Advanced Language Tap ‘Advanced’ and then ‘Language’ to select which language you require. Auto print Allows the unit to send measurement results automatically to the printer with each measurement if switched on. Tap ‘Advanced’ and then ‘Auto Print’ to select Auto print. -
Page 53: Power Saving
Power Saving Sleep timer Power Saving settings control how long the unit display should stay on. Settings can be made in ‘Battery’ mode, when the unit is not charging or ‘Changing’ mode when the unit is plugged in. The unit can be set to go to sleep from a minimum of 30 seconds up to a maximum of 6 hours in pre-set increments. - Page 54 Brightness 1. Tap ‘Advanced’ then ‘Power Saving’ and then select ‘Brightness’. 2. Set the brightness of the screen to the percentage you require by using the Up / Down arrows. Battery level Tap ‘Advanced’ then ‘Power Saving’ and then select ‘Battery Level’ to view the current battery level of the unit.
-
Page 55: Stylus Return
Stylus return Tap ‘Advanced’ and then ‘Stylus Return’ to select which option you require. Auto Allows the stylus automatically to return it’s home position after each measurement. Prompt Allows the user to control when the stylus returns after each measurement. Test mode Test mode initiates a series of internal tests and checks the unit for diagnostic purposes. -
Page 56: Set Zero
Set zero Set Zero allows the user to reset the pick up gauge indicator. To set this, a glass or optical flat is required or a very flat and smooth surface. Place the pick up parallel to the surface and make sure the stylus tip is in contact. -
Page 57: Device Lock
To unlock, press the locked menu icon and re-enter the PIN and then the tick icon. Help Desk If you have any questions or require further help please contact our help desk. Tel: +44 116 276 3000 Email: thhelp@ametek.com... - Page 58 Tel: +886 3 575 0099 Ext 59 taylor-hobson.korea@ametek.com Fax: +886 3 575 0799 Taylor Hobson Singapore taylor-hobson.taiwan@ametek.com AMETEK singapore, 10 Ang Mo Kio Street Taylor Hobson USA 65, No. 05-12 Techpoint, Singapore 569059 1725 Western Drive West Chicago, Tel: +65 6484 2388 Ext 120...
Need help?
Do you have a question about the TAYLOR HOBSON Surtronic S-100 Series and is the answer not in the manual?
Questions and answers