Table of Contents
Advertisement
Quick Links
Advertisement
Table of Contents

Related Manuals for Ametek Mocon Dansensor LeakPointer 3


Summary of Contents for Ametek Mocon Dansensor LeakPointer 3
- Page 1 User Guide P/N 380064-F 06/2021...
- Page 2 This blank page has been inserted to enable double sided printing of the document!
- Page 3 Dansensor LeakPointer 3/3 User Guide ® User Guide Published by: MOCON Europe A/S Rønnedevej 18 4100 Ringsted, Denmark Tel +45 57 66 00 88 info.dk.mocon@ametek.com www.ametekmocon.com P/N 380064-F 06/2021...
- Page 4 User Guide Dansensor LeakPointer 3/3 ® P/N 380064-F 06/2021...
-
Page 5: Table Of Contents
Dansensor LeakPointer 3/3 User Guide ® Table of Contents 1. Introduction..........7 General description . - Page 6 User Guide Dansensor LeakPointer 3/3 ® Measuring........... 47 CO2 levels .
- Page 7 Dansensor LeakPointer 3/3 User Guide ® 5. Technical Information........87 Technical specifications .
- Page 8 User Guide Dansensor LeakPointer 3/3 ® P/N 380064-F 06/2021...
-
Page 9: Introduction
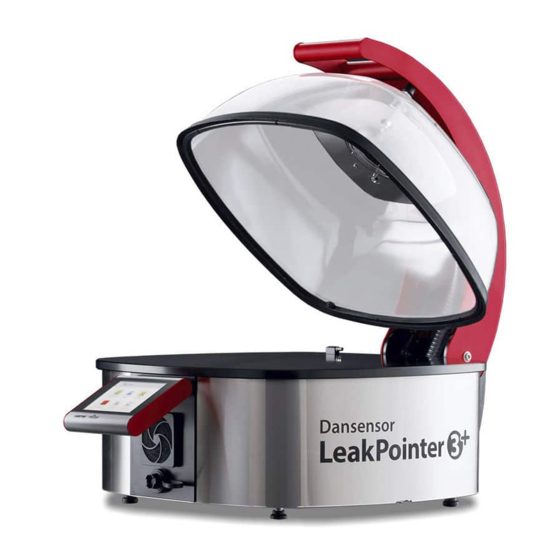
Dansensor LeakPointer 3/3 User Guide ® 1. Introduction General description Dansensor® LeakPointer 3 and Dansensor® LeakPointer 3 are table top off-line leak testers for Modified Atmosphere Packages (MAP). The devices can fast and easily discover seal integrity problems on most types of modified atmosphere packages with a minimum of 10% CO in the gas mix. -
Page 10: Important
User Guide Dansensor LeakPointer 3/3 ® Important! Safety and Use WARNING! Personnel operating and maintaining the device must be familiar with all aspects of its operation and be proficient in maintenance. Such personnel should review the information in "Safety and handling instructions"... -
Page 11: Notes, Cautions And Warnings
Dansensor LeakPointer 3/3 User Guide ® Notes, cautions and warnings! Throughout the manual notes, cautions, and warnings are indicated with various icons and written in bold like the example below: CAUTION! Never use hard tools or abrasive materials when cleaning any part of the device.... -
Page 12: Overview
User Guide Dansensor LeakPointer 3/3 ® Overview Vacuum Chamber Inside the vacuum chamber the actual leak testing is performed. PackFix (either built-in as standard or as retrofitted option) The PackFix mechanism helps creating a positive pressure (Delta P) inside the package, making it possible to determine the actual leak size. - Page 13 Dansensor LeakPointer 3/3 User Guide ® LAN/Ethernet port For connection to local computer network for external data collection (LAN Data dump). The connector is fitted with a water-proof cover. The port has 2 built-in status indicator LED’s. Connector for compressed air (LeakPointer 3 models only) ...
-
Page 14: Accessories
User Guide Dansensor LeakPointer 3/3 ® Accessories The following accessories are included: Power supply cable For connecting the device to a power outlet - the appropriate connector for the wall outlet is not included in the delivery. Septa (100 pcs.) When performing pressure measurements in a package for product setup purposes, a septum should be applied to the package in order to ensure a leak free gas extraction and to protect the package from tearing at the piercing point - see... -
Page 15: Measuring Principle
Dansensor LeakPointer 3/3 User Guide ® Measuring principle The actual leak testing takes place inside the vacuum chamber. The procedure is as follows: Without PackFix (Single Package or Multi Package) 1. The package is placed in the chamber and the measurement sequence starts when the chamber is closed. - Page 16 User Guide Dansensor LeakPointer 3/3 ® 3. The measurement result is converted to a fictive hole size (in μm) corresponding to a standard round hole in a 0.13 mm thick foil (if device is calibrated using the optional “Leak Simulation Kit” accessory - see "Options/Accessories"...
-
Page 17: Setting Up
Dansensor LeakPointer 3/3 User Guide ® 2. Setting up Moving/lifting CAUTION! When lifting or moving the device, this should be done by 2 persons grabbing the device underneath the bottom in each side. CAUTION! Never tilt the LeakPointer 3 device more than 45 degrees in any direction relative to the horizontal, as this may cause the oil in the vacuum pump to enter the pump’s vacuum chamber, which can cause serious damage to the pump impeller. -
Page 18: Connections
User Guide Dansensor LeakPointer 3/3 ® Connections Main power supply cable CAUTION! The main power supply cable must be prepared by authorized personnel. The enclosed main power supply cable is provided “open-ended” (i.e. without mains plug). Install a mains plug that meets the local requirements. WARNING! The ground wire (green/yellow) must always be connected to the local safety ground system in accordance with the local requirements.... -
Page 19: Compressed Air
Dansensor LeakPointer 3/3 User Guide ® Compressed air (LeakPointer 3 only) Connect a compressed air supply hose to the “COMPRESSED AIR” inlet. Make sure - that the hose between the device and the pressure regulator is max. 1m, otherwise you must compensate for the pressure drop in the hose. - Page 20 User Guide Dansensor LeakPointer 3/3 ® P/N 380064-F 06/2021...
-
Page 21: Operating
Dansensor LeakPointer 3/3 User Guide ® 3. Operating Basics CAUTION! If the device is operated in a cold and high humidity environment it is advisable to let it heat up for 5-10 minutes after it has been switched on. Switching on/off 1. - Page 22 User Guide Dansensor LeakPointer 3/3 ® 5. Select User Login and then either select a user from the User Login list or enter a valid User ID whatever is required. 6. When the device is ready, the display will show: Current user is as selected during login with the access level as specified for this user Standard Test Operator or Operator).
-
Page 23: Touch Screen
Dansensor LeakPointer 3/3 User Guide ® Touch screen Except for the ON/OFF button on the back of the device, all the buttons you use are virtual ones on the touch screen. CAUTION! The touch screen should only be finger touch operated. Pencils or metal tools can damage the touch sensitive film. -
Page 24: The Measuring Screen
User Guide Dansensor LeakPointer 3/3 ® The Measuring screen Active product Currently selected product. To select another product, tap Products icon Products icon Pressing this icon will take you to the Products menu for quick selection of a product. "Selecting a product for measuring"... - Page 25 Dansensor LeakPointer 3/3 User Guide ® Statistics counter The counter shows the number of completed tests ( ) for the current product as well as the number of leaks found ( ). The counter is only displayed when the device is in Ready mode....
-
Page 26: Pop-Up Messages
User Guide Dansensor LeakPointer 3/3 ® Pop-up messages Three types of messages may occur: Info Warning Error Generally the Info and Warning messages are self explanatory and relates to user interface interaction. They must be acknowledged by tapping or by tapping to decide how to proceed. -
Page 27: Menu Navigation
Dansensor LeakPointer 3/3 User Guide ® Menu navigation The graphic interface offers various elements for navigating through the menu structure: Submenu Open the associated submenu. Open product Select and open the product record. Return icon Return to the previous menu level. ... - Page 28 User Guide Dansensor LeakPointer 3/3 ® Parameters Setting up of products and various device settings involves the following parameter types: Alphanumeric E.g. product- and user names. Tap item to open an alphanumeric keyboard to edit/enter text. "Typing" on page 27 for details.
-
Page 29: Typing
Dansensor LeakPointer 3/3 User Guide ® Typing An onscreen keyboard appears automatically anytime you need to type. An alphanumeric keyboard appears when you must enter text, such as product- or user names while a numeric keyboard appears when typing numerical values only, such as PIN-codes. In the alphanumeric keyboard you can switch between upper- and lowercase characters, special characters, numbers or symbols, by tapping the appropriate keyboard selection key to the left of the... -
Page 30: Bar-Code Scanner
User Guide Dansensor LeakPointer 3/3 ® Bar-code scanner If a bar-code scanner is connected to the device, it can be used to scan bar-codes for product and user creation. The scanner can also be used to scan predefined text strings converted to bar-codes, e.g. for custom field inputs or invalid measurement notes. -
Page 31: Get Started
Dansensor LeakPointer 3/3 User Guide ® Get started When you start the device for the first time and before you start making measurements, it is recommended that you perform some basic device settings. NOTE! To be able to change device settings you must change the device to “Administrator”... -
Page 32: Product Setup
User Guide Dansensor LeakPointer 3/3 ® Product setup Before you start testing a specific product in the device, it is important that the various test parameters are adapted to the specific product so that the best possible measurement results are obtained. For the product setup we recommend that you - use packages taken directly from the packing line to ensure proper package size, type and gas content. - Page 33 Dansensor LeakPointer 3/3 User Guide ® Determination of vacuum setting The below procedure requires that the necessary height adjustment has been performed as described in "Height adjustment" on page 30 and that the package is positioned accordingly. 1. Connect the Delta P measuring hose to the quick connector in the chamber.
- Page 34 User Guide Dansensor LeakPointer 3/3 ® 6. The chamber will be evacuated to the set value and the measured values are continuously displayed on the screen. NOTE! If the currently measured “CO2” value increases when vacuum is applied, then the package is most likely leaking and you should thus use another package to perform the test.
- Page 35 Dansensor LeakPointer 3/3 User Guide ® NOTE! A Package pressure (ΔP) value of 25 mbar or higher is a good indicator that the device can measure leaks in the package. Values between 15 and 25 mbar will work on some types of packages, whereas values below 15 mbar can be critical....
- Page 36 User Guide Dansensor LeakPointer 3/3 ® Determination of the Leak Correction Factor To ensure that measurements are as uniform and correct as possible, the leak correction factor should be adjusted individually for each product. This is done by testing the packages with a known hole size, and therefor the testing should be performed using the leak simulation kit, that comes with the device....
- Page 37 Dansensor LeakPointer 3/3 User Guide ® 6. In the appearing window... ...enter 100 as the current test hole size and press key. 7. As you can see in the appearing Leak Correction Factor window, it takes 5 measurements to calculate a valid correction factor. 8.
- Page 38 User Guide Dansensor LeakPointer 3/3 ® 11. If you find that a measurement for some reason deviates so much that it cannot be considered as valid (f.ex. caused by a clogged needle or an odd package)... ...you can delete it by pressing the button below the measurement result....
- Page 39 Dansensor LeakPointer 3/3 User Guide ® ...and then press the button to update the Leak Correction Factor. The final Test hole size, Average, and Leak Correction Factor values are added to the Error/Event Log. 14. When Leak Correction Factor has been updated, prepare one more package and make a control measurement using the test measurement function to confirm that the measured hole size is approx.
- Page 40 User Guide Dansensor LeakPointer 3/3 ® Adjusting the height of the PackBase The PackBase consists of a wire mesh and 4 adjustable feet. It comes with a selection of parts that allow for different height adjustments. Adjustment ranges are 15.5 to 76.5 mm for LeakPointer 3 and 15.5 to 116.5 mm for LeakPointer 3 ...
- Page 41 Dansensor LeakPointer 3/3 User Guide ® Fig. 1. PackBase height overview P/N 380064-F 06/2021...
- Page 42 User Guide Dansensor LeakPointer 3/3 ® Removing the PackFix If for some reason the PackFix prevents you from testing a particular type of package, it may be temporarily removed form the device as described below: 1. Use a Torx 20 screwdriver to loosen the screws 2.
- Page 43 Dansensor LeakPointer 3/3 User Guide ® Installing the PackFix If for some reason the PackFix has been removed from the device, it can be installed again as described below: 1. If screws and washers have been removed earlier, use a Torx 20 screwdriver to ...
- Page 44 User Guide Dansensor LeakPointer 3/3 ® Adjusting the PackFix pressure From the factory the PackFix is delivered in a 100N version for a LeakPointer 3 and a 200N version for a LeakPointer 3 . If for some reason it is considered that the standard PackFix is too hard to achieve the desired compression and thereby an appropriate delta pressure in the package, it is possible to convert it to a lighter compression pressure by removing a number of springs: 1.
- Page 45 Dansensor LeakPointer 3/3 User Guide ® NOTE! To avoid twisting of the PackFix during compression, it is important that the springs are positioned exactly as shown in Fig. 2. Even though the drawing shows it, it is not necessary to remove the bearings on the LeakPointer 3 PackFix when removing the springs.
-
Page 46: Setting Up Products For "Multi Package" Testing
User Guide Dansensor LeakPointer 3/3 ® Setting up products for “Multi Package” testing The setup procedure for Multi Package products includes the following: Create product - see "New" on page Determination of vacuum setting 1. Prepare the test package for DeltaP measuring as described in "Determination of vacuum setting"... - Page 47 Dansensor LeakPointer 3/3 User Guide ® Δ 7. During the measurement, observe the Package pressure ( P) value. Δ NOTE! A Package pressure ( P) value of 25 mbar or higher is a good indicator that the device can measure leaks in the package. Values between 15 and 25 mbar will work on some types of packages, whereas values below 15 mbar can be critical....
- Page 48 User Guide Dansensor LeakPointer 3/3 ® 11. Tap the yellow icon to open the test measurement function.. ...then close the chamber to start the measurement. 12. When the test is completed... Δ ...verify that the measured P is very close to the values as obtained earlier. 13.
-
Page 49: Measuring
Dansensor LeakPointer 3/3 User Guide ® Measuring levels High or unstable background CO levels can affect the function of the device as well as the measurements made in the device. The device responds as follows in the situations described below: If the CO level in the chamber exceeds a certain value (default = 7500 ppm) before a ... - Page 50 User Guide Dansensor LeakPointer 3/3 ® Select Product screen lists all products in last used order with the currently selected product at the top (in orange). 2. Use keys to scroll through the list to find the appropriate product. NOTE! If you have a large number of products, scrolling through the list may be quite time consuming.
- Page 51 Dansensor LeakPointer 3/3 User Guide ® Select product using a bar-code scanner 1. The device must be ready and show the measuring screen. 2. Use the bar-code scanner to scan the product’s bar-code 3. If the bar-code matches the Product ID of a valid product, this product will now be selected as the active product.
-
Page 52: Performing A Workflow/Measurement
User Guide Dansensor LeakPointer 3/3 ® Performing a workflow/measurement For Single Package testing with PackFix: Place the test package in the center of the base plate . If the current measurement requires the use of a PackBase , this is placed in the middle of the base plate, after which the package is placed in the middle and on top of it. - Page 53 Dansensor LeakPointer 3/3 User Guide ® For package testing without PackFix: Place the test package in the center of the base plate . If testing multiple packages using a PackTray , place the PackTray’s corners up against the ...
- Page 54 User Guide Dansensor LeakPointer 3/3 ® 5. If the first custom field requires entering of, for example, Batch no., a keyboard will appear. Enter appropriate information and press key. 6. If another custom field is required, this could, for example, be selection between 2 predefined options, e.g.
- Page 55 Dansensor LeakPointer 3/3 User Guide ® 8. When the measurement is complete, the result is displayed on the screen. Results for Single Package mode measurements are read out as the calculated hole size in μm, while Multi Package mode results are read out as the measured increase in the level in the chamber in ppm/s....
-
Page 56: Cleaning
User Guide Dansensor LeakPointer 3/3 ® Cleaning General Performing cleaning and maintenance regularly reduces the chances of equipment failure. CAUTION! Personnel performing any maintenance or cleaning must familiarize themselves with the information in "Safety and handling instructions" on page 93 before attempting any of these procedures. -
Page 57: Menus And Settings
Dansensor LeakPointer 3/3 User Guide ® 4. Menus and Settings Main menu Tapping the icon in the lower right corner of the measuring screen takes you to the Main Menu. Please note that the access level of the current user determines which features and menus are available - see "Access levels"... -
Page 58: Workflow
User Guide Dansensor LeakPointer 3/3 ® Workflow A workflow is set up as a combination of a product, the actual measurement and a number of predefined custom fields. During the workflow the custom fields allow the user to enter optional texts or numbers and/or to select from a list of predefined text strings. All data entries are saved together with the measurement result in Collected Data in the Data menu - see... - Page 59 Dansensor LeakPointer 3/3 User Guide ® Edit Edit an existing product. Product settings are described in "New" on page Most of the product parameters can only be edited if no measurements have been performed using the product or if the parameter Settings ->...
- Page 60 User Guide Dansensor LeakPointer 3/3 ® Select (as active) This function allows you to select the product, you wish to perform measurements on. 1. Select Select (as active) (or tap the icon in the top left corner of the measuring screen)....
- Page 61 Dansensor LeakPointer 3/3 User Guide ® State Only used if Use State Mark is enabled in Settings -> Device. Can be used by a Supervisor to categorize the various products in the product list: Automatically assigned to new products. Can for example be used for products where settings are still being considered/tested.
- Page 62 User Guide Dansensor LeakPointer 3/3 ® Leak Correction Factor * To ensure that measurements are as uniform and correct as possible, the correction factor should be adjusted individually for each product. "Product setup" on page 30 for a detailed description of the procedure of determining the correct setting for specific products.
- Page 63 Dansensor LeakPointer 3/3 User Guide ® Find and Filter Find and Filter functions can be helpful if you have a large number of products thus making scrolling through the list quite time consuming. The functions can be used separately, or combined as described below: 1.
- Page 64 User Guide Dansensor LeakPointer 3/3 ® 5. Now tap the icon to bring up the Filter screen. 6. Select the required filtering parameter, e.g. Mode. Make required setting, then press the key. 7. Now you can see the selected Mode filter setting. Select another filtering parameter or press the key to return to the list of products that meet the search- and filter criteria.
-
Page 65: Custom Fields
Dansensor LeakPointer 3/3 User Guide ® Custom Fields Use the custom fields to add various information about a specific measurement during a measurement workflow. The data entries are saved together with the measurement result. 4 custom fields are available, each of which can be individually defined with a name and an input type. - Page 66 User Guide Dansensor LeakPointer 3/3 ® When type is set to Presets you have the possibility to define up to 4 different text fields. When prompted during the measuring workflow, you must select either of the preset text fields from the list. Use Previous Value If enabled, the previous entered value will already be filled in, when the appropriate entry keyboard appears....
-
Page 67: Access
Dansensor LeakPointer 3/3 User Guide ® Access From the Access menu the various users and their access levels are created and managed. This is also where the Administrator can log in and also change the login PIN-code. "Access levels" on page 66 for details about the various access levels and the associated rights. -
Page 68: Access Levels
User Guide Dansensor LeakPointer 3/3 ® Access levels The various access levels and the associated rights are described below: NOTE! A higher level of access always has all rights from lower access levels. Standard Test Basic user. Operator Can only perform tests on workflows/products marked as ... -
Page 69: User Administration
Dansensor LeakPointer 3/3 User Guide ® User Administration From here the user database is maintained. You can edit the settings for an existing user, create new users or delete users. Edit Edit an existing user. User settings are described in "New"... - Page 70 User Guide Dansensor LeakPointer 3/3 ® Creates a new, blank user. The total number of users that can be created is 50. The following parameters can be set for a user: User Name A unique user name (up to 25 characters). User ID Unique user identification code (up to 25 characters).
-
Page 71: Change Administrator Pin-Code
Dansensor LeakPointer 3/3 User Guide ® Change Administrator PIN-code (Administrator only) Use this function to change the PIN-code required for logging in as Administrator. To change the PIN-code do the following: 1. From the Access menu select Change Administrator PIN-code. This screen appears: 2. -
Page 72: Data
User Guide Dansensor LeakPointer 3/3 ® Data From the Data menu you can read out and manage measurement data for selected products and error and event log data. The system can store log data for more than 1,000,000 tests. Data menu holds the following items: Collected Data Opens the Collected Data screen... -
Page 73: Collected Data
Dansensor LeakPointer 3/3 User Guide ® Collected Data From the Collected Data screen you can read out and manage the measurement log data for selected products. Collected Data menu holds the following items: Active product The product currently selected for data management. The field also shows the current number of data logs for the product.... -
Page 74: Collected Data
User Guide Dansensor LeakPointer 3/3 ® Collected data Selecting Collected data from the Collected Data menu will display a list of the logged measurement data for the selected product. The list shows the following information about each log: Number of log entries for the selected product ... -
Page 75: Export
Dansensor LeakPointer 3/3 User Guide ® Export Selecting Export from the Data menu will display a screen showing the available export functions. NOTE! The export functions requires that you insert a USB-stick in one of the device’s USB-ports (labelled Export Measurement Log Exports all measurement data logs (as text file). -
Page 76: Service
User Guide Dansensor LeakPointer 3/3 ® Service Service menu holds the following items: Service Point Info Displays the company information for your appointed service provider. (Can be changed by a Service Technician). Information Opens the Information screen. "Information" on page 75 for details. -
Page 77: Information
Dansensor LeakPointer 3/3 User Guide ® Information Information screen holds general information about the device. Serial no. Shows the device’s serial number. Firmware Version Shows the firmware version currently installed on the device. Number of tests Shows the total number of tests performed. Next calibration Shows the number of days left until the device should be calibrated. -
Page 78: Test & Adjustments
User Guide Dansensor LeakPointer 3/3 ® Package pressure (U1) Shows the pressure difference between the chamber and inside a package when package is connected to the DeltaP connector in the chamber. Sensor Pump pressure Shows the pressure difference between the exhaust of the sensor (U2) pump and the surrounding area. - Page 79 Dansensor LeakPointer 3/3 User Guide ® 1. Close chamber to start the test. The test checks the following: Ambient pressure: The current ambient pressure. The limits for the test changes with the ambient pressure. System vacuum, 250 mbar: A delta pressure of 250 mbar should be established in the chamber within the time limit.
- Page 80 User Guide Dansensor LeakPointer 3/3 ® 3. If one of the tests fails, the entire test procedure stops and an error message arrives. Press the button to close the error message. On the screen you can see which test has failed and the measured value for it. Create Test Vacuum The Create Test Vacuum function can be used to create a specific vacuum in the chamber in order to find leaks or to determine a proper test pressure for a package....
-
Page 81: Settings
Dansensor LeakPointer 3/3 User Guide ® Settings Selecting Settings from the Main Menu will display a menu with available set-up parameters. The menu holds the following items: Export Opens the Export screen "Export" on page 80 for details. Import Opens the Import screen... -
Page 82: Export
User Guide Dansensor LeakPointer 3/3 ® Export Selecting Export from the Settings menu will display a screen showing the various export functions. NOTE! The export functions requires that you insert a USB-stick in one of the device’s USB-ports (labelled NOTE! We recommend to use the various export functions to make backups regularly so that files can be restored in case of a PCB breakdown.... -
Page 83: Import
Dansensor LeakPointer 3/3 User Guide ® Import Selecting Import from the Settings menu will display a screen showing the various import functions. NOTE! The import functions requires that you insert a USB-stick with the required files in one of the device’s USB-ports (labelled ).... -
Page 84: Network
User Guide Dansensor LeakPointer 3/3 ® Network Network screen holds the parameters for the Ethernet/LAN connection. DHCP It is possible to choose between a fixed (static) IP-address or a DHCP (dynamic) IP- address, where the device’s network settings are assigned from a DHCP server on the network. -
Page 85: Network Logging
Dansensor LeakPointer 3/3 User Guide ® Network Logging Network Logging screen holds the parameters for the network logging function. If enabled, the function sends a data string through a LAN connection for each measurement. NOTE! Always consult your network administrator before making network settings, as incorrect settings can result in reduced or no network activity.... -
Page 86: Login
User Guide Dansensor LeakPointer 3/3 ® Login Setting up of the login function. User Login You can choose between 3 types of user login: Not required At start-up the device initializes and when finished it changes to show the measuring screen, ready for measuring.... -
Page 87: Device
Dansensor LeakPointer 3/3 User Guide ® Device Device screen holds some basic device setup parameters. Language When selecting a language all text throughout the menus will be displayed in this language Use State Mark Select whether or not the State function should be used for products/workflows. -
Page 88: Date/Time
User Guide Dansensor LeakPointer 3/3 ® Date/Time Date/Time screen holds the time and date setup parameters. Time Setting of current time (hh:mm) Time format Setting of time format (12h or 24h) Date Setting of current date (using Date format) Date format Setting of date format (DD/MM/YYYY or MM/DD/YYYY) Time, Date and Date format are related to the real time clock setting in the device.... -
Page 89: Technical Information
Dansensor LeakPointer 3/3 User Guide ® 5. Technical Information Technical specifications Mechanical specifications Dimensions LeakPointer 3 400 mm 617 mm 543 mm 155 mm (15.7”) (24.3”) (21.4”) (6.1”) LeakPointer 3 555 mm 812 mm... -
Page 90: Electrical Specifications
User Guide Dansensor LeakPointer 3/3 ® Electrical specifications Power supply LeakPointer 3: 100 - 264 VAC + PE, 47- 63 Hz Fuse 5x20 mm, 2 AT LeakPointer 3 , 115V: 103 - 127 VAC + PE, 57- 63 Hz Fuse 5x20 mm, 10 AT LeakPointer 3 , 230V: 207 - 253 VAC + PE, 47- 53 Hz... -
Page 91: Leak Measuring
Dansensor LeakPointer 3/3 User Guide ® Leak measuring Flexible and rigid packages, single or multiple Package types Min. CO content of 10% Package Sizes ... -
Page 92: User Interface
User Guide Dansensor LeakPointer 3/3 ® Measuring cycle time 10 - 35 sec. 2 Test vacuum LeakPointer 3: 50 - 750 mbar LeakPointer 3 50 - 800 mbar 3 Leak size Down to 50 μm hole Read-out as μm or ppm/s ... -
Page 93: Consumable Parts And Options
Dansensor LeakPointer 3/3 User Guide ® Consumable parts and options Ordering items When ordering any of the below listed items please state carefully the item number, the item specification and the number of items wanted and send the order to your spare parts dealer. Available User Guides All user guides are available on: USB, User guides, LeakPointer 3, Cpl.. - Page 94 User Guide Dansensor LeakPointer 3/3 ® P/N 380064-F 06/2021...
-
Page 95: Appendix
Dansensor LeakPointer 3/3 User Guide ® Appendix Safety and handling instructions WARNING! Personnel operating and maintaining the device must be familiar with all aspects of its operation and be proficient in maintenance. Such personnel should review the following precautions to promote safety awareness.... -
Page 96: Explosive Atmospheres
User Guide Dansensor LeakPointer 3/3 ® Explosive atmospheres Using the device in any area with a potentially explosive atmosphere, such as areas where the air contains high levels of flammable chemicals, vapours, or particles, may be hazardous. Obey all signs and instructions. Cleaning Never use hard tools or abrasive materials when cleaning any part of the device. - Page 97 Dansensor LeakPointer 3/3 User Guide ® P/N 380064-F 06/2021...
- Page 98 User Guide Dansensor LeakPointer 3/3 ® P/N 380064-F 06/2021...
- Page 99 This blank page has been inserted to enable double sided printing of the document!
Need help?
Do you have a question about the Mocon Dansensor LeakPointer 3 and is the answer not in the manual?
Questions and answers