
Related Manuals for Daikin BRC1H519K


Summary of Contents for Daikin BRC1H519K
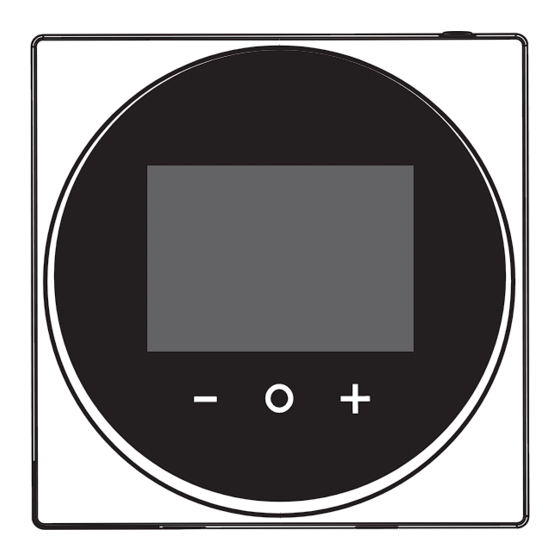
- Page 1 Installer and user reference guide Wired remote controller BRC1H519W Installer and user reference guide BRC1H519K English Wired remote controller BRC1H519S...
-
Page 2: Table Of Contents
Table of contents 12 Starting up the system Table of contents 12.1 Master and slave controller ............12 12.2 To designate a controller as slave..........12 13 Operation 1 General safety precautions 13.1 Buttons ..................13 For the user ................13.2 Screen .................. -
Page 3: General Safety Precautions
Only use accessories, optional equipment and spare parts made or WARNING approved by Daikin. Indicates a situation that could result in death or serious injury. WARNING... -
Page 4: About This Document
▪ The controller only allows for basic settings and operation. Advanced settings and operation are performed via the Madoka ▪ The full set of latest technical data is available on the Daikin Assistant app. For more information, see the app and its in-app extranet (authentication required). -
Page 5: Status Icons
The Bluetooth® word mark and logos are registered trademarks owned by the Bluetooth SIG, Inc. and use of such marks by Daikin Europe N.V. is under license. Other trademarks and trade names are those of their respective owners. BRC1H519W+K+S... -
Page 6: About The Operation Modes
6 Operation INFORMATION INFORMATION Depending on the indoor unit, more or less operation When the system is stopped while the indoor unit is modes are available. running in Heating operation mode, the fan will continue to operate for approximately 1 minute, this to get out any heat remaining in the indoor unit. -
Page 7: To Set The Setpoint
6 Operation Result: You set the date and the time. When … then … … the system is turned ON … the home screen displays the INFORMATION regular temperature setpoint. Confirming the value in a field will automatically bring you …... -
Page 8: Fan Speed
6 Operation 2 Use to adjust the fan speed. 3 Press to confirm. Result: The indoor unit changes its airflow direction and the 3 Press to confirm. controller returns to the home screen. Result: The indoor unit changes its fan speed and the controller returns to the home screen. -
Page 9: Ventilation Rate
7 Maintenance and service 6.5.2 Ventilation rate Maintenance screens Clean filter Replace filter Empty dust collector The ventilation rate is the fan speed during ventilation operation. To set the ventilation rate 1 Navigate to the ventilation rate menu. Troubleshooting 2 Use to adjust the ventilation rate. -
Page 10: Preparation
10 Preparation Preparation 10.1 Wiring requirements All wiring must comply with the following requirements: Wire specification Value Type Sheathed vinyl cord or cable (2 wires) Section 0.75~1.25 mm Maximum length 500 m 10.1.1 To prepare the wiring for installation 1 Peel the sheath of the part of the cable that needs to pass through the inside of the rear casing (L), according to the figure Wiring from the top and the table. -
Page 11: To Connect The Electrical Wiring
11 Installation CAUTION From the bottom When connecting the controller to the indoor unit, make sure the indoor unit switchbox and transmission wiring are not connected. NOTICE The wiring for connection is NOT included. NOTICE When wiring, run the wiring away from the power supply P1P2 wiring in order to avoid receiving electric noise (external noise). -
Page 12: Starting Up The System
12 Starting up the system INFORMATION If a slave controller does not display the home screen 2 minutes after its designation, turn off the power and check the wiring. INFORMATION After re-designating a controller, the system requires a power reset. INFORMATION The following functions are not available for slave controllers:... -
Page 13: Operation
13 Operation Backlight Operation The screen backlight has the following states: State Description 13.1 Buttons For the controller to be operable, the screen backlight needs to be ON (otherwise the controller does not detect any button presses). To turn ON the backlight, press shortly. -
Page 14: Information Menu
14 Configuration Information Description Category Icon Settings Status icons Depending on operation status, Field settings Indoor unit field settings the information screen can contain various status icons. For the meaning of those icons, see Remote controller field "5 Status icons" on page 5. settings When the information screen has information to convey,... -
Page 15: Status Indicator Settings
14 Configuration 1 Navigate to the status indicator intensity menu. 3 Press to confirm. Result: The screen adjusts its brightness and the controller returns 2 Use to adjust status indicator brightness. to the installer menu. To set screen contrast Prerequisite: You are in the installer menu. 1 Navigate to the screen contrast menu. - Page 16 14 Configuration Level Description First level Mode (Mode) A mode is a group of settable parameters. In the field settings tables, find available mode numbers in the "Mode" column. Mode numbers that apply to individual indoor units are between brackets in the "Mode" column.
- Page 17 14 Configuration 2 Press to select a field setting component. 3 Use to change the value of that field setting component. 4 Press to confirm that value. 5 In the first level, select to move to the second level. 6 In the second level, navigate and select in the same way as you did in the first level.
- Page 18 14 Configuration Indoor unit field settings The setting procedure is different depending on whether you want to ▪ Define a value for that setting make settings for individual units, or for grouped units. Grouped indoor units Individual indoor units ▪ Define a mode by setting a Mode number (number NOT between ▪...
- Page 19 14 Configuration Remote controller field settings Mode SW description Value Default value Controller thermistor adjustment 0: –3.0°C, 1: –2.5°C, (Cooling) 2: –2.0°C, 3: –1.5°C, 4: –1.0°C, 5: –0.5°C, 6: ±0°C, 7: +0.5°C, 8: +1.0°C, 9: +1.5°C, 10: +2.0°C, 11: +2.5°C, 12: +3.0°C Controller thermistor adjustment 0: –3.0°C, 1: –2.5°C,...
-
Page 20: Miscellaneous Settings
14 Configuration Operation state Status indicator behaviour 0 (Normal) 1 (Hotel setting 1) 2 (Hotel setting 2) Error Blinking (no change) (no change) Warning ON (when the backlight goes into faint state, the status indicator turns OFF) Setting of status indicator intensity Pairing with indoor unit Blinking Blinking... - Page 21 14 Configuration Address Description Second level Define an address for the indoor unit. To SET an address, make sure is selected. Apply settings. To RELEASE an address that was previously set, change and then apply settings. ▪ Outdoor units ("O/U") AirNet address The Group address and AirNet address menu has two levels.
- Page 22 14 Configuration Address Description First level Indoor unit (I/U) Define the indoor unit for which you want to set an AirNet address. Proceed to the next level. Outdoor unit (O/U) Define the outdoor unit for which you want to set an AirNet address. Proceed to the next level.
- Page 23 14 Configuration Address Description Second level Define an address for the indoor/outdoor unit. To SET an address, make sure is selected. Apply settings. To RELEASE an address that was previously set, change and then apply settings. 1 Navigate to the external input interlock menu. External input interlock About external input interlock External input interlock allows for the integration of key card and...
- Page 24 14 Configuration Parameter Description Possible values Default value B2 Reset Timer Timer that starts as soon as the 0-20 hours "20 hours" Delay Timer expires. When this timer expires, the previous state (i.e. regular setpoint) changes to the "Default Reset Setting" state. Reset ON/OFF "Default Reset Setting"...
- Page 25 14 Configuration Key card contact logic Window contact B1 Key card contact B2 Time Action Contact closed (window closed) Contact closed (key card IN) ▪ — ▪ The unit operates normally. ▪ Delay timer<Time<Reset timer ▪ If the reset timer has not expired, the unit returns to the ▪...
- Page 26 14 Configuration Heat pump system Force fan ON Heat recovery system Outdoor unit About Force fan ON Indoor unit Remote controller Force fan ON allows you to force fan operation of individual indoor BS unit units. In this way, you can check which indoor unit number was When multiple indoor units are connected to the same outdoor unit, assigned to which indoor unit.
- Page 27 14 Configuration Result: All slave controllers display the "changeover under centralised control" icon. To release Cooling/Heating masterhood Prerequisite: You are in the installer menu. Prerequisite: You are operating the controller of the indoor unit that you want to release from its masterhood. 1 Navigate to the Cooling/Heating masterhood menu.
-
Page 28: Remote Controller Software Update
15 About the app 15.2.2 To pair the app with a controller 14.2 Remote controller software update Prerequisite: You are close to the controller. 14.2.1 To update the software with Updater 1 In the app, tap the controller that you want to pair with. Prerequisite: PC with Updater (contact your dealer for the correct Result: The operating system of your mobile device sends out version of the software) -
Page 29: Demo Mode
15 About the app Installer mode settings Description Category Control Installer mode activation Enable or disable installer mode. Configuration and advanced Make controller and indoor unit operation settings: Installer mode duration timer Set the duration of installer mode. General ▪ 30 minutes: installer mode ▪... -
Page 30: Notifications
15 About the app INFORMATION If the controller is disconnected from the power for more than 48 hours, the date and the time need to be set again. INFORMATION The clock will maintain accuracy to within 30 seconds/ Result: After the download, the controller restarts to implement month. -
Page 31: Individual Airflow Direction
15 About the app Settings Result INFORMATION Cooling Setback 35°C If the room temperature rises This function cannot be used when the indoor units are operation setpoint above 35°C, the system controlled by a centralised controller. automatically starts cooling Recovery –2°C operation. -
Page 32: Errors And Warnings
15 About the app Action Description 15.5.21 Group address Setpoint adjustment Set setpoint adjustment Assign addresses to the indoor units, this to control the system with increments and intervals for both central control equipment. You can assign an address to the group heating and cooling operation. -
Page 33: Duty Rotation
15 About the app Default values Field setting default values are different depending on the indoor unit model. For more information, see the service manual of the indoor units. For the following field settings, the default values are the same for all indoor unit models: Field setting Default value... -
Page 34: Maintenance
16 Maintenance Precautions when performing a test operation Maintenance CAUTION 16.1 Maintenance safety precautions Before starting up the system, make sure: ▪ The indoor and outdoor unit wiring is completed. WARNING ▪ The switch box covers of the indoor and outdoor units Before carrying out any maintenance or repair activities, are closed. -
Page 35: To Clean The Controller
17 Troubleshooting Result: The controller returns to the home screen. If the cause of the warning was properly solved, has disappeared. 16.4 To clean the controller 1 Wipe the screen and other surface parts of the controller with a dry cloth. Troubleshooting 17.1 Error codes of the indoor unit... - Page 36 18 Technical data Technical data A subset of the latest technical data is available on the regional Daikin website (publicly accessible). The full set of latest technical data is available on the Daikin extranet (authentication required). 18.1 Connection diagram 18.1.1...
- Page 37 18 Technical data Group control: controller + digital inputs adapter BRP7A5 P1 P2 P1 P2 P1 P2 P1 P2 P1 P2 18.1.3 Controller + DIII central control equipment F1 F2 P1 P2 F1 F2 P1 P2 BRC1H519W+K+S Installer and user reference guide Wired remote controller 4P513689-1A –...
- Page 40 4P513689-1A 2018.03...
Need help?
Do you have a question about the BRC1H519K and is the answer not in the manual?
Questions and answers