Sign In
Upload
Download
Table of Contents
Contents
Add to my manuals
Delete from my manuals
Share
URL of this page:
HTML Link:
Bookmark this page
Add
Manual will be automatically added to "My Manuals"
Print this page
×
Bookmark added
×
Added to my manuals
Manuals
Brands
Daikin Manuals
Remote Control
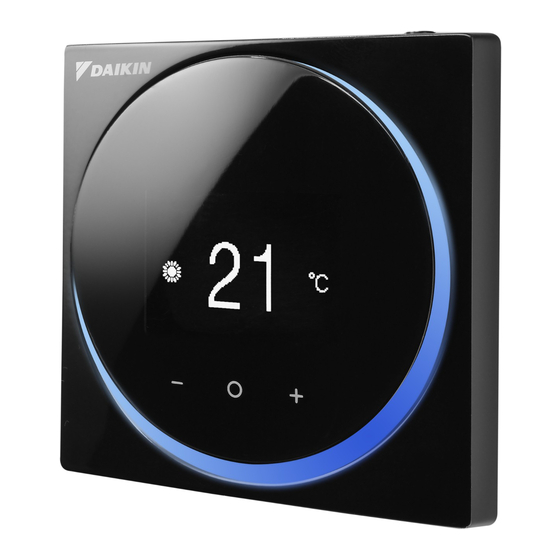
BRC1H519K7
Installer and user reference manual
Daikin BRC1H519K7 Installer And User Reference Manual
Wired remote controller
Hide thumbs
Also See for BRC1H519K7
:
Installer and user reference manual
(132 pages)
1
Table Of Contents
2
3
4
5
6
7
8
9
10
11
12
13
14
15
16
17
18
19
20
21
22
23
24
25
26
27
28
29
30
31
32
33
34
35
36
37
38
39
40
41
42
43
44
45
46
47
48
49
50
51
52
page
of
52
Go
/
52
Contents
Table of Contents
Troubleshooting
Bookmarks
Table of Contents
Table of Contents
1 General Safety Precautions
For the User
For the Installer
2 About this Document
For the User
3 Remote Controller: Overview
Buttons
Status Icons
Status Indicator
4 Operation
Basic Usage
Home Screen
Main Menu
Operation Mode
About the Operation Modes
To Set the Operation Mode
Setpoint
About the Setpoint
To Set the Setpoint
Date and Time
About Date and Time
To Set Date and Time
Airflow
Airflow Direction
Fan Speed
Ventilation
Ventilation Mode
Ventilation Rate
Advanced Usage
5 Maintenance and Service
Overview: Maintenance and Service
6 Troubleshooting
Overview: Troubleshooting
Refrigerant Leak Detection
To Stop the Leak Detection Alarm
For the Installer
7 About the Box
To Unpack the Controller
To Prepare the Wiring for Installation
9 Installation
Overview: Installation
Mounting the Controller
About Mounting the Controller
To Mount the Controller
Connecting the Electrical Wiring
Precautions When Connecting the Electrical Wiring
To Connect the Electrical Wiring
Closing the Controller
Precautions When Closing the Controller
To Close the Controller
Opening the Controller
Precautions When Opening the Controller
To Open the Controller
10 Starting up the System
Master and Slave Controller
To Designate a Controller as Slave
11 Remote Controller: Overview
Buttons
Status Icons
Status Indicator
Behaviour
12 Operation
Basic Usage
Screen Backlight
Home Screen
Information Screen
Main Menu
Operation Mode
About the Operation Modes
To Set the Operation Mode
Setpoint
About the Setpoint
To Set the Setpoint
Date and Time
About Date and Time
To Set Date and Time
Airflow
Airflow Direction
Fan Speed
Ventilation
Ventilation Mode
Ventilation Rate
Advanced Usage
13 Configuration
Installer Menu
About the Installer Menu
Screen Settings
Status Indicator Settings
Field Settings
Miscellaneous Settings
Software Update
About Software Updates
Software Update with App
Software Update with Updating Tool
14 About the App
Operation and Configuration Overview
Pairing
About Pairing
To Pair the App with a Controller
Installer Mode
About Installer Mode
To Activate Installer Mode
To Deactivate Installer Mode
To Make Installer Mode Settings
Demo Mode
About Demo Mode
To Launch Demo Mode
To Exit Demo Mode
Functions
Overview: Functions
Remote Controller Firmware Update
Notifications
Master/Slave Status
Screen
Status Indicator
Date and Time
About
Remove Bonding Information
Presence Detection
OFF Timer
Energy Consumption
Power Consumption Limit
Setpoint Auto Reset
Schedule
Holiday
Setpoint Logic
Setback
Individual Airflow Direction
Active Airflow Circulation
Setpoint Range
Cooling/Heating Masterhood
Airflow Direction Range
Draught Prevention
Quick Start
External Input Interlock
Defrost Operation
Function Lock
Quiet Mode
Errors and Warnings
Unit Number
Filter Auto Clean
Filter Notifications
Airnet Address
Group Address
Field Settings
Duty Rotation
Test Operation
Unit Status
Operating Hours
Contact Information
Active Airflow Circulation
15 Maintenance
Maintenance Safety Precautions
About Maintenance
To Remove a Warning Screen
To Clean the Controller
16 Troubleshooting
Error Codes of the Indoor Unit
17 Technical Data
Connection Diagram
Typical Layout
Typical Layout for Group Control
Controller + DIII Central Control Equipment
Advertisement
Quick Links
Download this manual
Installer and user
reference guide
Wired remote controller
BRC1H519W7
Installer and user reference guide
BRC1H519K7
English
Wired remote controller
BRC1H519S7
Table of
Contents
Previous
Page
Next
Page
1
2
3
4
5
Advertisement
Table of Contents
Troubleshooting
Advanced usage
11
About maintenance
45
Need help?
Do you have a question about the BRC1H519K7 and is the answer not in the manual?
Ask a question
Questions and answers
Related Manuals for Daikin BRC1H519K7
Remote Control Daikin Madoka BRC1H519W7 Installer And User Reference Manual
Wired remote controller (132 pages)
Remote Control Daikin BRC1H51W Installation And Operation Manual
Wired remote controller (13 pages)
Remote Control Daikin BRC1H51W Installer And User Reference Manual
Wired remote controller (32 pages)
Remote Control Daikin BRC1H519W Installation And Operation Manual
Wired remote controller (12 pages)
Remote Control Daikin BRC1H519K Installer And User Manual
Wired remote controller (40 pages)
Remote Control Daikin BRC1H519W7 Installer And User Reference Manual
Wired remote controller (52 pages)
Remote Control Daikin BRC1H52W Installation And Operation Manual
Wired (13 pages)
Remote Control Daikin BRC1H52K Installation And Operation Manual
Wired (13 pages)
Remote Control Daikin BRC1H52S Installation And Operation Manual
Wired (13 pages)
Remote Control Daikin DUK SE57 Madoka BRC1H519 Installation & Commissioning
(162 pages)
Remote Control Daikin Madoka BRC1H82K Installer And User Manual
Wired remote controller (136 pages)
Remote Control Daikin Madoka Installation And Operation Manual
Wired (12 pages)
Remote Control Daikin BRC1H71W Operation Manual
Wired remote controller (46 pages)
Remote Control Daikin BRC1H62W Operation Manual
(46 pages)
Remote Control Daikin BRC1H81W7 Installer And User Manual
Wired remote controller (52 pages)
Remote Control Daikin Madoka Installer And User Manual
Wired (96 pages)
This manual is also suitable for:
Brc1h519s7
Brc1h519w7
Table of Contents
Print
Rename the bookmark
Delete bookmark?
Delete from my manuals?
Login
Sign In
OR
Sign in with Facebook
Sign in with Google
Upload manual
Upload from disk
Upload from URL


Need help?
Do you have a question about the BRC1H519K7 and is the answer not in the manual?
Questions and answers