
Related Manuals for Altimium SCA42T-CODEC


Summary of Contents for Altimium SCA42T-CODEC
- Page 1 User Manual SCA42T-CODEC 4K Presentation Switcher with Soft Codec & Matrix Outputs All Rights Reserved Version: SCA42T-CODEC_2019V1.0...
- Page 2 Any changes or modifications not expressly approved by the manufacture would void the user’s authority to operate the equipment. Altimium www.altimium.com...
- Page 3 Unplug the power cord when left unused for a long period of time. ⚫ Information on disposal for scrapped devices: do not burn or mix with general ⚫ household waste, and please treat them as normal electrical wastes. Altimium www.altimium.com...
-
Page 4: Table Of Contents
5.2 Third-party display Devices Control ..............11 5.2.1 System On ..................... 11 5.2.2 System OFF ..................12 6. RS232 Control ......................13 6.1 RS232 Connection ..................13 6.2 RS232 Control Software .................. 14 6.3 RS232 Command .................... 15 Altimium www.altimium.com... - Page 5 7.8 Additional Tab ....................43 7.9 GUI Update ...................... 44 8. Firmware Upgrade ....................45 8.1 Transmitter ....................... 45 8.2 Receiver ......................45 9. Panel Drawing ......................47 10. Troubleshooting and Maintenance ................48 11. Customer Service ....................49 Altimium www.altimium.com...
-
Page 6: Product Introduction
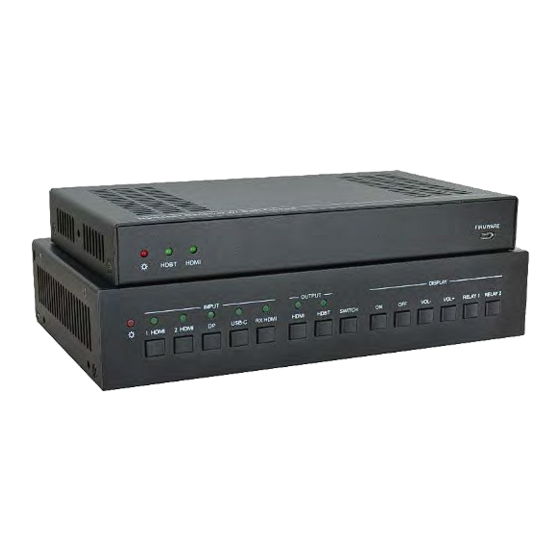
4K Presentation Switcher with Soft Codec & Matrix Outputs 1. Product Introduction The SCA42T-CODEC is a conferencing system codec kit supporting resolutions up to 4K@60Hz 4:4:4 8bit and HDCP 2.2. It includes Transmitter and Receiver, providing AV switching, audio de-embedded, and USB extension, plus system control. All video, audio, control, USB and Ethernet signals can be transmitted over a single CATx cable up to 70m. -
Page 7: Package List
4K Presentation Switcher with Soft Codec & Matrix Outputs 1.2 Package List 1 x SCA42T-CODEC-T Transmitter ▪ 2 x Mounting Ears with 4 Screws ▪ Transmitter 4 x Plastic Cushions ▪ 1 x 3-pin Terminal Blocks ▪ 1 x SCA42T-CODEC-R Receiver ▪... -
Page 8: Specification
--5 ~ +55℃ Storage Temperature -25 ~ +70℃ Relative Humidity 10% ~ 90% External Power Supply Powered via Receiver(PoC Tech) Type-C Power Consumption System Power Consumption 32w (Transmitter & Receiver) Dimension (W*H*D) 220 mm x 44 mm x 130mm Altimium www.altimium.com... -
Page 9: Receiver
> 70 dB, 10 kHz sine at 0 dBFS level (or max level Crosstalk isolation before clipping) < 0.3 dB, 1 kHz sine at 0 dBFS level (or max level L-R level deviation before clipping) 1k ohm and higher (supports 10x paralleled 10k ohm Output load capability loads) Noise -80dB Altimium www.altimium.com... - Page 10 -25 ~ +70℃ Relative Humidity 10% ~ 90% External Power Supply Input: AC 100~240V, 50/60Hz; Output: 24V DC 2.71A System Power Consumption 32w (Transmitter & Receiver) Dimension (W*H*D) 205 mm x 27.5 mm x 115 mm Net Weight 390g Altimium www.altimium.com...
-
Page 11: Panel Description
VOL-: Press this button to turn down the audio output volume. ▪ VOL+: Press this button to turn up the audio output volume. ▪ RELAY1: Press the button to trigger Relay1. ▪ RELAY2: Press the button to trigger Relay2. ▪ Altimium www.altimium.com... -
Page 12: Rear Panel
Note 1: Only when Transmitter powered by local, it can provide power 40W with Type-C. If Transmitter powered by the far-end, it can not provide power with USB-C. Note 2: Transmitter DC 24V only powers to Type-C port, not powers to itself. Altimium www.altimium.com... -
Page 13: Receiver
⑤ DEVICES: Two Type-A USB ports, connect with USB devices. ⑥ RS232: Serial port, 3-pin terminal connector, connect with the display device (such as projector). RELAY1 & RELAY2: Connect to device (such as projector screen) ⑦ DC 24V: DC barrel connector for connecting the included power adapter. Altimium www.altimium.com... -
Page 14: System Connection
System should be installed in a clean environment with proper temperature and ⚫ humidity. All the power switches, plugs, sockets and power cords should be insulated and ⚫ safe. All devices should be connected before power on. ⚫ 4.2 System Diagram Altimium www.altimium.com... -
Page 15: Display Control
If the last selected input source is still available, the Transmitter will switch to the input. Otherwise, it will switch to the first available active input source starting at 1-HDMI. Altimium www.altimium.com... -
Page 16: Signal Removing
When Switcher detects the TMDS or 5V input signal (default: 5V signal), it will perform the following operation steps: 1) Send CEC ON command to third-party display devices; 2) Send RS232 ON + Delay time (default: 3s) +RS232 Display Input selection command to third-party display devices; 3) Perform and control Relay1. Altimium www.altimium.com... -
Page 17: System Off
1) Send CEC ON command to third-party display devices; 2) Send RS232 OFF command to third-party display devices, this command can be set to send twice (default: 1 time), delay time default is 1s; 3) Perform and control Relay2. Altimium www.altimium.com... -
Page 18: Rs232 Control
Transmitter or the third-party device (such as projector) on the Receiver from local RS232 port on the transmitter. The baud rate supports 2400, 4800, 9600(default), 19200, 38400, 57600 or 115200. 6.1 RS232 Connection There are two RS232 control modes. ▪ Control Transmitter ▪ Control Display Altimium www.altimium.com... -
Page 19: Rs232 Control Software
PC which is installed with RS232 control software. Double-click the software icon to run this software. Here we take the software CommWatch.exe as example. The icon is showed as below: The interface of the control software is showed as below: Altimium www.altimium.com... -
Page 20: Rs232 Command
Command Sending Area. 6.3 RS232 Command Communication protocol: RS232 Communication Protocol Baud rate: 9600 Data bit: 8 Stop bit: 1 Parity bit: none The end mark of command is “<CR><LF>”. Altimium www.altimium.com... -
Page 21: System Setting
#GET_GUI_IP_ADDR @GUI_IP x.x.x.x #SET_RS232_BAUD 0 Set the communication baud #SET_RS232_BAUD 1 rate of RS232 port. #SET_RS232_BAUD 2 #SET_RS232_BAUD #SET_RS232_BAUD 3 param1 = 0, 1, 2, 3, 4, 5, 6 (param1) #SET_RS232_BAUD 4 0 - BAUD 115200 #SET_RS232_BAUD 5 Altimium www.altimium.com... - Page 22 TMDS Get signal detecting mode #GET_SIGNAL_DET @SIGNAL_DET_MODE #SET_KEYPAD_LOCK 0 Lock/unlock keypad @KEYPAD_LOCK 0 #SET_KEYPAD_LOCK param1 = 0,1 #SET_KEYPAD_LOCK 1 0 - KEYPAD UNLOCK (param1) @KEYPAD_LOCK 1 1 - KEYPAD LOCKED #GET_KKEYPAD_LOCK Get lock/unlock keypad #GET_KKEYPAD_LOCK status @KEYPAD_LOCK 0 Altimium www.altimium.com...
-
Page 23: Signal Switching
RXH - RXHDMI INPUT @HDMI_AV H2 @HDMI_AV DP @HDMI_AV C #GET_AV Get current Rx channel #GET_AV HDBT param1 = HDMI, HDBT. This #GET_AV #GET_AV HDMI param could be omitted. (param1) @HDBT_AV H1 HDMI - HDMI OUTPUT @HDBT_AV H2 Altimium www.altimium.com... - Page 24 HDMI and HDBT output ports.) #SET_USB_SWITCH_MODE 0 Set USB switching to AUTO/MANUAL switch mode #SET_USB_SWITCH_MODE 1 #SET_USB_S param1 = 0, 1, 2 #SET_USB_SWITCH_MODE 2 WITCH_MOD 0 - AUTO MODE @USB_SWITCH_MODE 0 E (param1) 1 - MANUAL MODE @USB_SWITCH_MODE 1 Altimium www.altimium.com...
- Page 25 PC2 - PC2 USB PORT @DP_USB_MAP PC1 @DP_USB_MAP PC2 #GET_USB_MAP Get the mapping relation of USB #GET_USB_ and video input channel. #GET_USB_MAP H1 param1 = H1, H2, DP. #GET_USB_MAP H2 (param1) This param could be omitted. #GET_USB_MAP DP Altimium www.altimium.com...
-
Page 26: Cec Control
HDBT - HDBT output (param1) (param2) @SET_HDBT_DISPLAY ON (If this param is omitted, which means HDMI and @SET_HDBT_DISPLAY HDBT output simultaneously.) @SET_HDMI_DISPLAY ON param2 = ON , OFF @SET_HDMI_DISPLAY ON – DISPLAY devices on OFF – DISPLAY device off Altimium www.altimium.com... - Page 27 HDMI and @HDBT_VOL + HDBT output @HDBT_VOL - simultaneously.) @HDBT_VOL MUTE param2 = + , - , MUTE @HDMI_VOL + + - VOL + @HDMI_VOL - - - VOL – @HDMI_VOL MUTE MUTE - MUTE (UNMUTE) Altimium www.altimium.com...
-
Page 28: Edid Management
8 - USER DEFINED1 9 - USER DEFINED2 Get EDID mode of Input port. #GET_EDID_MODE #GET_EDID_ param1 = H1, H2, DP, C, RXH. #GET_EDID_MODE H1 MODE #GET_EDID_MODE H2 This param could be omitted. (param1) #GET_EDID_MODE DP H1 - HDMI1 INPUT Altimium www.altimium.com... - Page 29 @USER_EDID_READY 1 (param1) 2 - UPLOAD USER-DEFINED 2 EDID @USER_EDID_READY 2 Note: Please send the EDID file of 256 or 128 bytes in 10s after sending the command #UPLOAD_USER_EDID (param1), it will show the feedback when uploading successfully. Altimium www.altimium.com...
-
Page 30: Key Setting
#SET_KEY_CEC ON param1 = ON, OFF @KEY_CEC_SENDING ON ON - ENABLE CEC SENDING (param1) OFF - DISABLE CEC SENDING Get the status of Enable/Disable #GET_KEY_CEC #GET_KEY send CEC command when press @KEY_CEC_SENDING ON _CEC display button. @KEY_CEC_SENDING OFF Altimium www.altimium.com... -
Page 31: Rs232 Setting
= 1, 2, 3, 4, 5, 6, 7 1 - BAUD 115200 #SEND_H_1:11 22 33 2 - BAUD 57600 #SEND_H_ @SEND_HEX_STRING 3 - BAUD 38400 (param1):(param2) 0xY1,0xY2,… 4 - BAUD 19200 5 - BAUD 9600 6 - BAUD 4800 7 - BAUD 2400 Altimium www.altimium.com... - Page 32 2 - BAUD 57600 param2)_(param3):(p 3 - BAUD 38400 aram4) @SET_OF_HEX 4 - BAUD 19200 (BAUD)x1 (REPEAT)x2 5 - BAUD 9600 6 - BAUD 4800 0xY1,0xY2,… 7 - BAUD 2400 param3 = (1 ~ 100) Repeat times of sending the Altimium www.altimium.com...
- Page 33 3 - BAUD 38400 aram3) 4 - BAUD 19200 @SET_I_VOL_HEX 5 - BAUD 9600 (BAUD)x1 0xY1,0xY2,... 6 - BAUD 4800 7 - BAUD 2400 Param3 = ASCII or HEX string Param settings are no more than 48 characters. Altimium www.altimium.com...
- Page 34 3 - BAUD 38400 (BAUD)x1 x2 1)_(param2) 4 - BAUD 19200 @SET_M_VOL_HEX 5 - BAUD 9600 (BAUD)x1 0xY1,0xY2,... 6 - BAUD 4800 7 - BAUD 2400 Param3 = ASCII or HEX string Param settings are no more than 48 characters. Altimium www.altimium.com...
- Page 35 LAY (param1) param1 = (1 ~ 100) and the unit AY x SECONDS is second. #GET_DIS_INPUT_DEL Get the delay time of sending RS232 command to DISPLAY #GET_DIS_INPUT_DE ON and DISPLAY INPUT @DISPLAY_INPUT_DEL SELECT when auto operation. AY x SECONDS Altimium www.altimium.com...
-
Page 36: Trigger Setting Command
= (0 ~10000), SOURCE DETECTED and the unit is minute. #GET_AUTO_CEC_PANEL_TIME Get the delay time of auto operation when @DELAY TIME TO %d MINUTES,TO #GET_AUTO_CEC_ detecting all input TURN OFF THE DISPLAY IF NO PANEL_TIME sources were moved. SOURCE DETECTED Altimium www.altimium.com... -
Page 37: Relay Setting Command
#GET_REL RELAY1 - RELAY1 CONTROL #GET_RELAY_AUTO_TIME AY_AUTO_ RELAY2 RELAY2 - RELAY2 CONTROL TIME @RELAY1_AUTO_TIME x (If this param is omitted, which (param1) SECONDS means getting duration of automatic closing from both @RELAY2_AUTO_TIME x RELAY1 and RELAY2 SECONDS simultaneously.) Altimium www.altimium.com... -
Page 38: Gui Control
This system divides into administrator and user mode. Administrator mode: User name: admin; Password: admin (default setting) ▪ Note: Log in as admin can access more configuration interfaces than user. Here is a brief introduction to the interfaces. Altimium www.altimium.com... -
Page 39: Control Tab
✓ RX HDMI OUT: Click the corresponding button (HDMI 1, HDMI 2, DP, USB-C and RX HDMI) to select input source for HDMI output on the receiver. Click Auto to enable auto switching mode. Power On: Click Power On to let the device to exit standby mode. ✓ Altimium www.altimium.com... - Page 40 ✓ Audio: The three buttons to turn down, turn up and mute/unmute the display. ✓ Click Manual button to control the relay device manually, and then click again to stop process. ✓ Click Auto button, the relay control will automatically stop within the setting time (1~180s). Altimium www.altimium.com...
-
Page 41: Display Setting Tab
✓ the two Display Off commands. ✓ Volume+: Enter the RS232 command to turn up the display volume, and then click Save. ✓ Volume-: Enter the RS232 command to turn down the display volume, and then click Save. Altimium www.altimium.com... - Page 42 4K Presentation Switcher with Soft Codec & Matrix Outputs ② Additional ✓ Click On button to enable Display Control of CEC and RS232. ✓ No Signal Timeout: Set the interval time before power off when where is no signals. Altimium www.altimium.com...
-
Page 43: Edid Tab
Step 1: Prepare the EDID file (.bin) on the control PC. Step 2: Select the user-defined 1 or user-defined 2. Step 3: Select the EDID file (.bin) according the tooltip. Step 4: Click Apply to upload the user-defined EDID. Altimium www.altimium.com... -
Page 44: Usb Host Tab
PC1, PC2 or USB-C as the Host PC to be controlled. ✓ Follow Video: In Follow Video mode, each video input can be assigned to PC 1 PC 2,or USB-C host ports. This mode locks the USB host device to the desired video port. Altimium www.altimium.com... -
Page 45: Tags Tab
4K Presentation Switcher with Soft Codec & Matrix Outputs 7.5 Tags Tab ✓ Modify the input button labels. Altimium www.altimium.com... -
Page 46: Network Tab
Click Network to enter the above menu to select the dynamic or static mode. ✓ Under static mode, then IP address, subnet mask and gateway can be reset. Telnet Access: Click On button to enter Telnet Access, click On button again ✓ to exit Telnet Access. Telnet Port: 23. ✓ Altimium www.altimium.com... -
Page 47: Password Tab
4K Presentation Switcher with Soft Codec & Matrix Outputs 7.7 Password Tab ✓ Reset the username and password. Altimium www.altimium.com... -
Page 48: Additional Tab
4K Presentation Switcher with Soft Codec & Matrix Outputs 7.8 Additional Tab ✓ Reset the device baud rate. ✓ Click Factory Default to restore the factory settings. ✓ Click Power Off to let the system to enter standby mode. Altimium www.altimium.com... -
Page 49: Gui Update
After that, click Administration in the source Tab to get to Upload Firmware as shown below: Select the update file and click Apply button, and then it will start upgrade process. Altimium www.altimium.com... -
Page 50: Firmware Upgrade
Prepare the latest upgrade file (.bin) and rename it as “FW_MERG. bin” on PC. Power off the switcher, and connect the FIRMWARE port of switcher to the PC with Micro USB cable. 3) Power on the switcher, and then the PC will automatically detect a U-disk named of “BOOTDISK”. Altimium www.altimium.com... - Page 51 (.bin) should be confirm again, and then follow the above steps to update again. 7) Remove the Micro USB cable after firmware upgrade. 8) After firmware upgrade, the switcher should be restored to factory default by sending command. Altimium www.altimium.com...
-
Page 52: Panel Drawing
2 HDMI USB-C RX HDMI HDMI HDBT SWITCH VOL- VOL+ RELAY 1 RELAY 2 205.00 mm Relay1 Relay2 HDBT IN HDMI IN HDMI OUT AUDIO OUT DEVICES CONTROL DC 24V w/ Soft Codec HDBaseT Receiver FIRMWARE HDBT HDMI Altimium www.altimium.com... -
Page 53: Troubleshooting And Maintenance
(e.g. a PC) through Send it to authorized RS232 port Broken RS232 port dealer for checking. If your problem still remaining after following the above troubleshooting steps, please find further assistance. Altimium www.altimium.com... -
Page 54: Customer Service
Altimium www.altimium.com... - Page 55 4K Presentation Switcher with Soft Codec & Matrix Outputs Remarks: For further assistance or solutions, please contact your local distributor. Altimium www.altimium.com...
- Page 56 ALTIMIUM 587 Avenue Blaise Pascal 77550 MOISSY-CRAMAYEL Tél : 01.64.13.31.00 Fax: 01.60.29.62.70 Mail: contact@tesca-audio.com Web: www.altimium.com...
Need help?
Do you have a question about the SCA42T-CODEC and is the answer not in the manual?
Questions and answers