
Related Manuals for Altimium SCA41-MV


Summary of Contents for Altimium SCA41-MV
- Page 1 User Manual SCA41-MV 4K 4X1 Seamless Switcher with Multi-view All Rights Reserved Version: SCA41-MV_2019V1.0...
- Page 2 Any changes or modifications not expressly approved by the manufacture would void the user’s authority to operate the equipment. www.altimium.com...
- Page 3 Unplug the power cord when left unused for a long period of time. Information on disposal for scrapped devices: do not burn or mix with general household waste, and please treat them as normal electrical wastes. www.altimium.com...
-
Page 4: Table Of Contents
7.2 Audio Tab ......................15 7.3 Resolution Tab ....................16 7.4 RS232 Tab ....................... 17 7.5 CEC Tab ......................18 7.6 EDID Tab ......................20 7.7 Network Tab ..................... 22 7.8 Tags Tab ......................23 7.9 Security Tab ..................... 23 www.altimium.com... - Page 5 8.2.3 Audio Switching ..................29 8.2.4 Function Setting ..................30 8.2.5 CEC Command ..................36 8.2.6 Special Commands ................41 9. Firmware Upgrade ....................43 10. Panel Drawing ......................44 11. Troubleshooting & Maintenance ................45 12. Customer Service ....................46 www.altimium.com...
-
Page 6: Product Introduction
Cycles through the windows from A to D by swap button. Base on FPGA Technology, layout and size of the windows can be customized. Resizes the windows in 3 different sizes. 16 pre-defined layouts for multi-view. Front buttons, IR, RS232 and GUI control. www.altimium.com... -
Page 7: Package List
4K 4x1 Seamless Switcher with Multi-view 1.2 Package List 1x SCA41-MV 4k 4x1 Seamless Switcher. 1x IR Remote 4x Plastic Cushions 2x Mounting Ears 4x Mounting Screws 1x 3-pin Terminal Block 1x RS232 Cable (3-pin terminal block to DB9) ... -
Page 8: Specification
< -70 dB, 10 kHz sine at 0 dBFS level (or max level Crosstalk isolation before clipping) Noise -90dB AUDIO OUT Audio Out (1) AUDIO Audio Out Connector (1) 3.5mm mini jack Frequency Response 20 Hz to 20 kHz, ±1dB www.altimium.com... - Page 9 Relative Humidity 10% ~ 90% Input: AC 100~240V, 50/60Hz; Output: 24V DC External Power Supply 1.25A. Power Consumption 13w(Max) Dimension (W*H*D) 285mm x 27mm x 172.5mm Net Weight 1.24kg Note: The resolution 1080i 60Hz and HDR are not supported www.altimium.com...
-
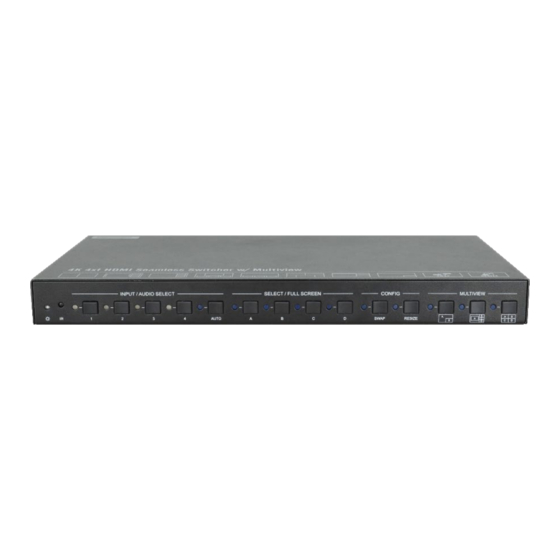
Page 10: Panel Description
Press the Resize button to readjust the windows size, its LED illuminates blue when it is resized. ⑥ THREE MULTI-VIEWS: Press the buttons to choose different available Multi-view modes, its LED illuminates blue when it is selected www.altimium.com... -
Page 11: Rear Panel
RS232 commands. ⑤ TCP/IP: RJ45 port to connect the control device (e.g. PC) to control the switcher by GUI. ⑥ FIREWARE: Type-A USB port for firmware upgrade. ⑦ DC 24V: DC connector for power adapter connection. www.altimium.com... -
Page 12: Ir Remote
Press RES button to adjust the output resolution. MULTIVIEW: The MULTIVIEW includes eight ④ buttons, the first four buttons to choose different multi-views mode, and USER1-4 button to enter user-defined multi-views mode via GUI control. www.altimium.com... -
Page 13: System Connection
All of the power switches, plugs, sockets, and power cords should be insulated and safe. All devices should be connected before power on. 5.2 System Diagram Laptop HDMI SPDIF AUDIO RS232 DC 24V Laptop Laptop Laptop Central Control System Laptop Amplifier 4K TV Layout HDMI: Audio: Audio Player RS232: Ethernet: www.altimium.com... -
Page 14: Front Panel Control
Windows in the four equal parts mode, the A, B, C and D LED keep blue, at this time, for example, press the button B and its LED is on and its corresponding input LED turns blue. However, the LED of A, B, and C are off. No operation within 3S restores the original state. www.altimium.com... -
Page 15: Select/Full Screen Button Control
6.5 RESIZE button control Press the Resize button to readjust the windows size. About the more detailed rules of it, please reference the Multi-view Tab on GUI control. 6.6 MULTI-VIEW button control Press the button to choose the available Multi-view mode. www.altimium.com... -
Page 16: Gui Control
Administrator mode: User name: admin; Password: admin (default setting) User mode: User name: user; Password: user (default setting) Note: Log in as admin can access more configuration interfaces than user. Here is a brief introduction to the interfaces. www.altimium.com... -
Page 17: Multiview Tab
5/8, window B is 3/8 * 3/8, press Resize button again, window A is 6/8 * 6/8, window B is 2/8 * 2/8. And then follow the above steps to resize another window again. No operation within 3S exits Resize mode. Second, when windows in the PIP mode, for instance, Layout5~8, window A and www.altimium.com... - Page 18 B, C and D are 4/16 * 4/16, press Resize button again, window A is 11/16 * 11/16, window B, C and D are 3/16 * 3/16. And then follow the above steps to resize another window again. No operation within 3S exits Resize mode. www.altimium.com...
- Page 19 Click corresponding input sources and ways of window presentations in Window Select. Click Save button to present the results above selected. Click OK button to exit the current interface and reselect User-defined if the Bandwidth limit exceeded. www.altimium.com...
-
Page 20: Audio Tab
Click On button to enter Mix mode, Click Off button to exit Mix mode. Click Unmute or Mute button to control Audio Output. Click Input1-4 button to select which HDMI input source. Click Line button to select which input Audio source will be replaced. www.altimium.com... -
Page 21: Resolution Tab
4K 4x1 Seamless Switcher with Multi-view 7.3 Resolution Tab Click any one of built-in resolutions for the selected input source device, click Auto button to select resolution automatically. Click Confirm button when the selection is completed. www.altimium.com... -
Page 22: Rs232 Tab
Command: Type the command in this box to control the third-party device which is connected to the RS232 port of the switcher. Display On: Send the Display ON via RS232 command. Display Off: Send the Display OFF via RS232 command. www.altimium.com... -
Page 23: Cec Tab
4K 4x1 Seamless Switcher with Multi-view 7.5 CEC Tab Source ① Click Source button to select HDMI input source, and click Function to enter the basic control. Display ② Click Display button to control the function of HDMI input source www.altimium.com... - Page 24 4K 4x1 Seamless Switcher with Multi-view User-defined ③ Select corresponding input source devices and display devices to control via commands. www.altimium.com...
-
Page 25: Edid Tab
User-defined EDID can be customized by the below steps: Step 1: Prepare the EDID file (.bin) on the control PC. Step 2: Select the EDID file (.bin) according the tooltip. Step 3: Click Apply to upload the user-defined EDID. www.altimium.com... - Page 26 4K 4x1 Seamless Switcher with Multi-view Setting ② Click Setting button to set built-in EDID. Click HDMI 1-4 button to select input source. Click any one of built-in EDIDs for the selected input source device. www.altimium.com...
-
Page 27: Network Tab
4K 4x1 Seamless Switcher with Multi-view 7.7 Network Tab Click Network to enter the above menu to select the dynamic or static mode. Under static mode, then IP address, subnet mask and gateway can be reset. www.altimium.com... -
Page 28: Tags Tab
4K 4x1 Seamless Switcher with Multi-view 7.8 Tags Tab Modify the input button labels. 7.9 Security Tab Security menu to reset the username and password. Click ON or OFF button to control Front Panel Lock or unlock. www.altimium.com... -
Page 29: Gui Update
Select the desired update file and press Apply, it will start upgrading then. Last, check whether where is a reminder named check ok, if yes, the GUI was updated successfully, otherwise, the GUI updating is fail, and then follow the above steps to update again. www.altimium.com... -
Page 30: Rs232 Control
Connect the switcher with all input devices and output devices needed, then to connect it with a PC which is installed with RS232 control software. Double-click the software icon to run this software. Here take the software CommWatch.exe as example: www.altimium.com... - Page 31 Monitoring area, show the commands and its feedback information. Command sending area Please set the parameters of COM number, bound rate, data bit, stop bit and the parity bit correctly, and then you are able to send command in command sending area. www.altimium.com...
-
Page 32: Rs232 Command
3 - HDMI 3 symbol “#”, it means the 4 - HDMI 4 feedback command is OUTPARAM = A ~ D described its usage) #GET_IP_ADDR @IP_ADDR: 192.168.0.178 Get the IP to access GUI @SUBNET_MASK: #GET_IP_ADDR 255.255.255.0 @GATEWAY: 192.168.0.1 www.altimium.com... -
Page 33: Signal Switching
PARAM1 = A ~ D @VIDEO 1 TO A Enable/disable auto switching mode #SET_AUTO_SWITCH 1 #SET_AUTO_SWITCH PARAM #SET_AUTO_SWITCH PARAM = 0 ~ 1 @AUTO_SWITCH 1 0 - DISABLED 1 - ENABLED #GET_AUTO_SWITCH Get the auto switching status #GET_AUTO_SWITCH @AUTO_SWITCH 1 www.altimium.com... -
Page 34: Audio Switching
Set audio switch by input when full mode is select. #SET_FULL_SWAUD PARAM #SET_FULL_SWAUD 1 #SET_FULL_SWAUD PARAM = 0 ~ 1 @FULL_SWAUD 1 0 - DISABLED 1 - ENABLED Get audio switch by input when #GET_FULL_SWAUD #GET_FULL_SWAUD full mode is select @FULL_SWAUD 1 www.altimium.com... -
Page 35: Function Setting
1920x1080 60HZ Set the HDCP mode for output port #SET_OUTPUT_HDCP #SET_OUTPUT_HDCP PARAM #SET_OUTPUT_HDCP PARAM = 1 ~ 3 @OUTPUT_HDCP 1 1 - HDCP1.4 2 - HDCP2.2 3 - OFF #GET_OUTPUT_HDC Get the HDCP mode of output #GET_OUTPUT_HDCP port @OUTPUT_HDCP 1 www.altimium.com... - Page 36 Upload the user defined EDID #UPLOAD_USER_EDID PLEASE SEND EDID DATA IN 10S Lock/unlock the keypad #SET_KEYPAD_LOCK #SET_KEYPAD_LOCK PARAM #SET_KEYPAD_LOCK PARAM = 0 ~ 1 @KEYPAD_LOCK 1 0 - DISABLED 1 - ENABLED #GET_KEYPAD_LOCK Get the keypad locking status #GET_KEYPAD_LOCK @KEYPAD_LOCK 1 www.altimium.com...
- Page 37 15 - 4 WINDOWS PIP 1F3U 16 - 4 WINDOWS PIP 1F3D 17 - USER CONFIG 1 18 - USER CONFIG 2 19 - USER CONFIG 3 20 - USER CONFIG 4 #GET_MV_MODE Get multiview mode #GET_MV_MODE @MV_MODE 1 www.altimium.com...
- Page 38 @SYNCACT_CEC 1 @SYNCACT_RS232 1 @AUTO_POWER 0 @DTIME 10:0 @IP_ADDR: 192.168.0.178 @SUBNET_MASK: 255.255.255.0 @GATEWAY: 192.168.0.1 #SET_SWAP_SRC @SWAP_SRC @VIDEO Swap input source #SET_SWAP_SRC OUT A B C D IN 1 2 3 4 @AUDIO_SRC 1 #SET_RESIZE_WIM Resize display windows #SET_RESIZE_WIM @RESIZE_WIM www.altimium.com...
- Page 39 (PS: All the time in 0s ~ 30m) @DTIME 30:0 #GET_DTIME Get the display off delay time @DISOFF_TIME 1M #GET_DTIME Enable/Disable auto power function #SET_AUTO_POWER #SET_AUTO_POWER PARAM #SET_AUTO_POWER PARAM = 0 ~ 1 @AUTO_POWER 1 0 - DISABLED 1 - ENABLED www.altimium.com...
- Page 40 @OFF_CNT 1 Set the DISPLAY OFF message loop delay time #SET_OFF_DELAY 5 #SET_OFF_DELAY #SET_OFF_DELAY PARAM @OFF_DELAY 5 PARAM = 5 ~ 100 (1=100ms) Get the DISPLAY OFF #GET_OFF_DELAY 5 #GET_OFF_DELAY message loop delay time @OFF_DELAY 5 www.altimium.com...
-
Page 41: Cec Command
3 - HDMI 3 4 - HDMI 4 Send CEC LEFT command to source #SET_SRC_LEFT PARAM PARAM1 = 1 ~ 4 #SET_SRC_LEFT 1 #SET_SRC_LEFT 1 - HDMI 1 @SRC_LEFT 1 2 - HDMI 2 3 - HDMI 3 4 - HDMI 4 www.altimium.com... - Page 42 3 - HDMI 3 4 - HDMI 4 Send CEC ON command to source #SET_SRC_ON PARAM PARAM1 = 1 ~ 4 #SET_SRC_ON 1 #SET_SRC_ON 1 - HDMI 1 @SRC_ON 1 2 - HDMI 2 3 - HDMI 3 4 - HDMI 4 www.altimium.com...
- Page 43 3 - HDMI 3 4 - HDMI 4 Send CEC PAUSE command to source #SET_SRC_PAUSE PARAM #SET_SRC_PAUSE PARAM1 = 1 ~ 4 #SET_SRC_PAUSE @SRC_PAUSE 1 1 - HDMI 1 2 - HDMI 2 3 - HDMI 3 4 - HDMI 4 www.altimium.com...
- Page 44 Send CEC fast-forward command to source #SET_SRC_FF PARAM #SET_SRC_FF 1 PARAM1 = 1 ~ 4 #SET_SRC_FF @SRC_MENU 1 1 - HDMI 1 2 - HDMI 2 3 - HDMI 3 4 - HDMI 4 #SET_DIS_ON Send CEC ON command to displayer #SET_DIS_ON @DIS_ON www.altimium.com...
- Page 45 @DIS_OFF Send CEC SOURCE command to #SET_DIS_SOURCE #SET_DIS_SOURCE displayer @DIS_SOURCE Send CEC MUTE command to #SET_DIS_MUTE #SET_DIS_MUTE displayer @DIS_MUTE Send CEC volume plus command to #SET_DIS_VOL+ #SET_DIS_VOL+ displayer @DIS_VOL+ Send CEC volume minus command to #SET_DIS_VOL- #SET_DIS_VOL- displayer @DIS_VOL- www.altimium.com...
-
Page 46: Special Commands
HEX: XX XX = ASCII characters of 30 31 32 33 34) meeting HEX standard. (X is one of 0~9 or A~F,and maximum is 20 XX There is a units. space is required between each unit of XX.) www.altimium.com... - Page 47 XX XX = ASCII characters of sends HEX:41 42 43 meeting HEX standard. (X is one of 44 45 46) 0~9 or A~F,and maximum is 20 XX There is a units. space is required between each unit of XX.) www.altimium.com...
-
Page 48: Firmware Upgrade
(.bin) should be confirm again, and then follow the above steps to update again. 6) Remove the Type-A USB cable after firmware upgrade. 7) After firmware upgrade, the switcher should be restored to factory default by sending command. www.altimium.com... -
Page 49: Panel Drawing
4K 4x1 Seamless Switcher with Multi-view Panel Drawing www.altimium.com... -
Page 50: Troubleshooting & Maintenance
(e.g. a PC) Send it to authorized dealer for through RS232 port Broken RS232 port. checking. Note: If your problem still remaining after following the above troubleshooting steps, please contact your local dealer or distributor for further assistance. www.altimium.com... -
Page 51: Customer Service
Remarks: Please contact your local distributor for further assistance or solutions. www.altimium.com... - Page 52 4K 4x1 Seamless Switcher with Multi-view ALTIMIUM 587 Avenue Blaise Pascal 77550 MOISSY-CRAMAYEL Tél : 01.64.13.31.00 Fax: 01.60.29.62.70 Mail: contact@tesca-audio.com Web: www.altimium.com www.altimium.com...
Need help?
Do you have a question about the SCA41-MV and is the answer not in the manual?
Questions and answers