
Related Manuals for Wilo Wilo-EMU TR/TRE 50-2


Summary of Contents for Wilo Wilo-EMU TR/TRE 50-2
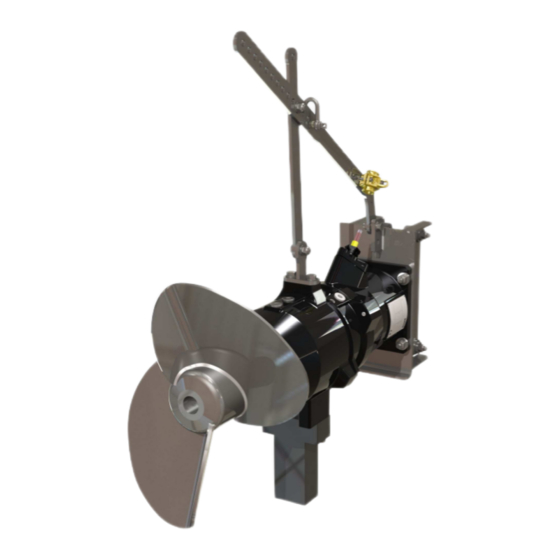
- Page 1 Pioneering for You Wilo-EMU TR/TRE 50-2 ... 120-1 en Installation and operating instructions · 6074714 • Ed.02/2021-10...
-
Page 3: Table Of Contents
Direction of rotation monitoring .................................. 26 Operation in an explosive atmosphere ................................ 26 Before switching on...................................... 27 Switch on and off...................................... 27 During operation ...................................... 28 8 Shut-down/dismantling................................. 28 Personnel qualifications.................................... 28 Operator responsibilities.................................... 29 Installation and operating instructions Wilo-EMU TR/TRE 50-2 ... 120-1... - Page 4 12.1 Oils and lubricants...................................... 42 12.2 Protective clothing ...................................... 42 12.3 Information on the collection of used electrical and electronic products.................... 42 13 Appendix.................................... 42 13.1 Tightening torques ...................................... 42 13.2 Frequency converter operation .................................. 43 13.3 Ex rating ........................................... 43 WILO SE 2021-10...
-
Page 5: General Information
Subject to change Wilo shall reserve the right to change the listed data without notice and shall not be li- able for technical inaccuracies and/or omissions. The illustrations used may differ from the original and are intended as an example representation of the device. - Page 6 Warning of high pressure Warning of suspended loads Personal protective equipment: wear a safety helmet Personal protective equipment: wear foot protection Personal protective equipment: wear hand protection Personal protective equipment: wear safety harness Personal protective equipment: wear mouth protection WILO SE 2021-10...
-
Page 7: Personnel Qualifications
Breathing protection mask (EN 149): Half mask 3M series 6000 with filter 6055 A2 Article recommendations The articles mentioned in brackets are recommendations. The articles can be replaced with an identical article according to the mentioned labellings! Installation and operating instructions Wilo-EMU TR/TRE 50-2 ... 120-1... -
Page 8: Electrical Work
Always attach the lifting gear to the attachment points. ƒ Ensure that the lifting gear is securely attached. ƒ Observe packaging instructions: – Impact-resistant – Ensure that the product is properly fixed in place. – Protect it against dust, oil and moisture. WILO SE 2021-10... -
Page 9: Installing/Dismantling
Skin contact: Rinse skin areas thoroughly with soap and water. If skin irritation oc- curs, consult a doctor. ƒ Contact with eyes: Remove the contact lenses. Rinse eye thoroughly with water. If eye irritation occurs, consult a doctor. Installation and operating instructions Wilo-EMU TR/TRE 50-2 ... 120-1... -
Page 10: Operator Responsibilities
Only remove the outer packaging at the site of use to ensure that the mixer is not damaged during transport. ƒ Use tear-proof plastic sacks of sufficient size to package used mixers for transport in a leak-proof manner. Fig. 1: Attachment point WILO SE 2021-10... -
Page 11: Use Of Lifting Equipment
Protect the connection cable against kinking and damage. Maintain a constant bend radius! ƒ Turn the propeller at regular intervals (twice a year). This prevents the bearings from jamming and renews the lubrication film on the mechanical seal. NOTICE! Wear pro- tective gloves! Installation and operating instructions Wilo-EMU TR/TRE 50-2 ... 120-1... -
Page 12: Application/Use
The submersible motor meets the IE3/IE4 motor efficiency class (according to IEC 60034-30). Motors of the motor efficiency class “IE4” have been specified as “E4” in the motor designation. Technical data Operating mode, immersed Operating mode, non-immersed Fluid temperature 3 … 40 °C (37 … 104 °F) WILO SE 2021-10... - Page 13 • • • • Seal, pre-/gear chamber FPM (FKM) • • • • • • • • • Seal, gear/sealing chamber SiC/SiC • • • • • • • • • Installation and operating instructions Wilo-EMU TR/TRE 50-2 ... 120-1...
-
Page 14: Monitoring Devices
With FM-/CSA-Ex rating Motor winding: Temperature limiter • • • • • • Motor winding: Temperature controller and lim- iter − = not possible, o = optional, • = standard All the monitoring devices fitted must always be connected! WILO SE 2021-10... -
Page 15: Operation With Frequency Converter
ƒ Protection class: Explosionproof ƒ Category: Class I, Division 1 Notice: If the cabling is carried out according to Division 1, installation in Class I, Di- vision 2 is also permitted. Installation and operating instructions Wilo-EMU TR/TRE 50-2 ... 120-1... -
Page 16: Rating Plate
ƒ JJJJ = year ƒ W = abbreviation for week ƒ ww = calendar week Type key Example: Wilo-EMU TRE 90-2.20-4/12Ex S00 Submersible mixer, horizontal Series: ƒ TR: Mixer with standard asynchronous motor ƒ TRE: Mixer with IE3/IE4 asynchronous motor... -
Page 17: Accessories
Work in chambers and narrow rooms as well as work involving risk of falling are dan- gerous work. Such work may not be carried out autonomously! • Only carry out work with another person! Installation and operating instructions Wilo-EMU TR/TRE 50-2 ... 120-1... - Page 18 After a storage period of more than 12 months, carry out the following maintenance tasks before installation: ƒ Rotate propeller. See section “Rotating the propeller [} 32]”. ƒ Oil change in sealing, gear and pre-chamber. See section “Oil change [} 34]”. WILO SE 2021-10...
- Page 19 - Sealing joint between mounting bracket and structure. - Fill holes in the baseplate of the mounting bracket. - Fill scratches in the mounting bracket. ▶ Mixer is installed. Make the electrical connection. Installation and operating instructions Wilo-EMU TR/TRE 50-2 ... 120-1...
- Page 20 2. Pivot the mixer over the basin. NOTICE! The frame must be perpendicular to the guide pipe. If the frame is not perpendicular to the guide pipe, adjust the reach of the hoisting gear. Fig. 6: Swivel the mixer over the basin WILO SE 2021-10...
- Page 21 6. Set the desired angle and install a screw to secure the lowering device against fur- ther adjustments. ▶ Installation is complete. Lay the connection cable and make the electrical connec- tion. Fig. 8: Mixer set down on the fixed limit stop Installation and operating instructions Wilo-EMU TR/TRE 50-2 ... 120-1...
-
Page 22: Electrical Connection
In case of sensitive mains, make provision for the installation on- site of other protective equipment (e.g. overvoltage, undervoltage or phase failure re- lay, etc.). WILO SE 2021-10... - Page 23 Refer to the attached connection diagram for more precise details regarding the ver- sion. ƒ The individual wires are designated according to the connection diagram. Do not cut the wires! There is no additional assignment between the wiring diagram and con- nection diagram. Installation and operating instructions Wilo-EMU TR/TRE 50-2 ... 120-1...
- Page 24 Temperature limiter 20, 21 Bimetallic strip connection Temperature controller and limiter High temperature connection Centre terminal Low temperature connection With PTC sensor Connect the PTC sensor via an evaluation relay. "CM-MSS" relay is recommended for this purpose. WILO SE 2021-10...
- Page 25 To avoid power dissipation, bypass the electronic starter (soft start) once normal op- eration is reached. 6.5.6 Operation with frequency con- Operation on the frequency converter is permitted. Refer to the appendix for the relev- verter ant requirements! Installation and operating instructions Wilo-EMU TR/TRE 50-2 ... 120-1...
-
Page 26: Commissioning
Direct starting: swap two phases. ƒ Star-delta starting: Swap connections of two windings (e.g. U1/V1 and U2/V2). NOTICE! After changing this connection, check the direction of rotation again! Operation in an explosive atmo- sphere Approval according to ATEX WILO SE 2021-10... -
Page 27: Before Switching On
During operation, do not exceed the rated current any more. CAUTION! Material damage! If the mixer does not start up, switch it off immediately. Motor failure! Remove the fault first before reactivation. Installation and operating instructions Wilo-EMU TR/TRE 50-2 ... 120-1... -
Page 28: During Operation
ƒ Installation/dismantling work: trained sewage technology professional Fixation to different construction parts, lifting equipment, wastewater facility basics ƒ Lifting work: trained specialist for the operation of lifting devices Lifting equipment, lifting gear, attachment points WILO SE 2021-10... -
Page 29: Operator Responsibilities
Risk of burns from hot surfaces! The motor can get hot during operation. It may cause burns. • Allow the motor to cool down to ambient temperature after switching it off. Installation and operating instructions Wilo-EMU TR/TRE 50-2 ... 120-1... - Page 30 Dispose of rinsing water in accordance with the local regulations, e.g. feed it into the sewer! ‡ Mixer removed. 1. Ensure that the bare cable ends are packed in a watertight manner! 2. Attach the lifting equipment to the attachment point. 3. Lift the mixer approximately 30 cm (10 in) above the ground. WILO SE 2021-10...
-
Page 31: Maintenance And Repair
Visual inspection of cable brackets and cable tensioning ƒ Visual inspection of the mixer ƒ Visual inspection of accessories ƒ Function test of monitoring devices ƒ Oil change 80000 operating hours or after 10 years ƒ Complete overhaul Installation and operating instructions Wilo-EMU TR/TRE 50-2 ... 120-1... -
Page 32: Maintenance Measures
1. Place mixer on a firm work surface in a horizontal position. CAUTION! Do not place the mixer on the propeller! Use an appropriate platform for the propeller diameter. 2. Secure the mixer against falling over or slipping! 3. Grip the propeller carefully and rotate the propeller. WILO SE 2021-10... - Page 33 Accessories must be checked for: ƒ Correct fixation ƒ Smooth function ƒ Signs of wear, e.g. cracks caused by frequencies Any defects detected must be repaired immediately or the accessories must be re- placed. Installation and operating instructions Wilo-EMU TR/TRE 50-2 ... 120-1...
- Page 34 2. Secure the mixer against falling over and slipping. 3. Position a suitable tank to collect the operating fluid. 4. Remove the screw plug from the filler hole: ⇒ 1 = pre-chamber ⇒ 2 = gear chamber ⇒ 3 = sealing chamber WILO SE 2021-10...
-
Page 35: Repairs
Clean, good lighting and ventilation. – Firm and stable work surface. – Secured against falling over and slipping. CAUTION! Do not set the mixer down on the propeller! Provide an appropriate plat- form. Installation and operating instructions Wilo-EMU TR/TRE 50-2 ... 120-1... - Page 36 Replacement of the mounting bracket for ground installation. 9.6.3 Propeller replacement (PUR) Fig. 12: Propeller replacement (plastic) Hub screw cap Propeller O-ring Mechanical seal Packing sleeve Propeller attachment: Interior hexagonal head screw and washer Retaining ring Pressure disc Shaft WILO SE 2021-10...
- Page 37 8. Tighten the propeller attachment. Max. tightening torque: see appendix. 9. Turn the propeller by hand and check that it rotates easily. 10.Insert a new sealing plug or seal the propeller attachment using Sikaflex. Installation and operating instructions Wilo-EMU TR/TRE 50-2 ... 120-1...
- Page 38 - Position the washer on the hexagon head screw. - Insert the hexagon head screw through the frame and handle grip. - Position the washer and screw on the hexagon nut. NOTICE! Only slightly tighten the fixation! Do not fully tighten the handle grip! WILO SE 2021-10...
- Page 39 - Position the washer on the hexagon head screw. - Coat the hexagon head screw with thread-locking fluid. - Screw on and fully tighten the hex nut. Max. tightening torque: see appendix. ▶ Frame is changed. Installation and operating instructions Wilo-EMU TR/TRE 50-2 ... 120-1...
-
Page 40: Faults, Causes And Remedies
⇒ Have the connection and the monitoring device checked by a qualified electri- cian and change it if necessary. ⇒ Have the motor protection switches and fuses installed and adjusted accord- ing to technical specifications by a qualified electrician and reset the monitor- ing devices. WILO SE 2021-10... - Page 41 4. Incorrect direction of rotation. ⇒ Have the connection corrected by a qualified electrician. 5. Signs of wear on propeller. ⇒ Inspect propeller and replace if necessary. 6. Motor bearings have worn. Installation and operating instructions Wilo-EMU TR/TRE 50-2 ... 120-1...
-
Page 42: Spare Parts
Observe the locally applicable regulations! Please consult your local municipality, the nearest waste disposal site, or the dealer who sold the product to you for information on proper disposal. Further recycling informa- tion can be found at www.wilo-recycling.com. Appendix 13.1... -
Page 43: Frequency Converter Operation
ƒ “Ex” symbol of the corresponding approval ƒ Ex classification ƒ Certification number (depending on the approval) The certification number, if required by the approval, is printed on the rating plate. Installation and operating instructions Wilo-EMU TR/TRE 50-2 ... 120-1... - Page 44 Overview of possible monitoring devices for submersible mixers with Ex rating: Motor compartment/sealing chamber − − − − − − Pre-chamber (external pencil electrode) With ATEX approval Motor winding: Temperature limiter Motor winding: Temperature controller and lim- • • • • • • iter WILO SE 2021-10...
- Page 45 Connect the external pencil electrode via an Ex-rated evaluation relay! Relay electrode) “XR-4…” is recommended for this. The threshold is 30 kOhm. ƒ The connection must be made using an intrinsically safe circuit! Installation and operating instructions Wilo-EMU TR/TRE 50-2 ... 120-1...
- Page 46 If the housing coating has to be repaired, the maximum coat thickness is 2 mm (0.08 in)! 13.3.6.2 Replacing the connection cable Changing the connection cable is strictly prohibited! 13.3.6.3 Changing the mechanical seal Changing the seal on the motor side is strictly prohibited! WILO SE 2021-10...
- Page 48 Local contact at www.wilo.com/contact WILO SE Wilopark 1 44263 Dortmund Germany T +49 (0)231 4102-0 F +49 (0)231 4102-7363 wilo@wilo.com Pioneering for You www.wilo.com...
Need help?
Do you have a question about the Wilo-EMU TR/TRE 50-2 and is the answer not in the manual?
Questions and answers