Table of Contents
Advertisement
Quick Links
Advertisement
Table of Contents

Subscribe to Our Youtube Channel
Related Manuals for Sunricher Azoula AZ220614A


Summary of Contents for Sunricher Azoula AZ220614A
-
Page 1: Azoula Smart Hub User Manual
Azoula Smart Hub User Manual... -
Page 2: Table Of Contents
Document Change Log Version Date Description Editor Review 2023-07-10 Contents Azoula Smart Hub User Manual ....................................1 Document Change Log ......................................... 2 Contents ............................................. 2 1.Introduction of Azoula Smart Hub ..................................3 2.Install the App ........................................3 iOS............................................3 Android ..........................................4 3.Login to Azoula Smart Hub .................................... -
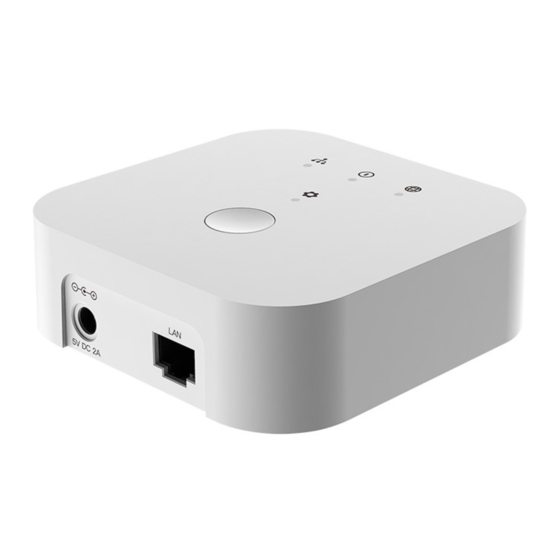
Page 3: Introduction Of Azoula Smart Hub
14.OTA ............................................80 14.1 Update Azoula Smart Hub ..................................80 14.2 Update a Sub-device ....................................82 15.Reset Azoula Smart Hub ....................................83 16.Gateway Integration ......................................86 17.Homekit ..........................................90 17.1 Add to the Home App ....................................90 17.1.1 Notes ......................................90 17.1.2 Add Azoula Smart Hub via QR Code ............................ -
Page 4: Android
Android For overseas users, please search for “Azoula Smart” in Google Play to install it. For domestic users, please install it from the following link. https://app-api.awsunny.com/app/downloads?app=android/azoulasmart Below is the QR code for the link. -
Page 5: Login To Azoula Smart Hub
3.Login to Azoula Smart Hub There are two methods: LAN(Local) and remote, which will be explained separately below. 3.1 LAN Login When logging into Azoula Smart Hub through the LAN, make sure your phone and the gateway are connected to the same LAN, usually the same router. - Page 6 At the same time, the LED indicator on the Smart Hub will flash to remind you to confirm the operation, as shown in the image below.
-
Page 7: Remote Login
Once you have pressed the button, you will successfully log in and enter the gateway system, as shown in the image below. If it’s not the first time logging into the gateway, when selecting the gateway from the search list, you will directly log into the gateway without the above confirmation operation. -
Page 8: Login To The Account And Bind A Gateway
Fill in the information as instructed by the app and tap “Sign Up” to complete the registration. A verification code will be sent to your Email box after tapping “Obtain”. 3.2.2 Login to the Account and Bind a Gateway Open the app, and tap “Sign In” to log in with your registered Email address and password. -
Page 9: Bind Multiple Gateways
Upon successful login, the app will display a page for you to select the gateway you want to connect to, as shown in the image below. Please tap the gateway icon that you want to connect to. If the gateway you want to connect to is not in the list, it means you have not bound that gateway yet. You can tap “+” in the upper right corner to search and add it. - Page 10 On the page that appears, tap “+”. Then, the app will search for gateways in the LAN, and you can select the gateway that is found here. The app will prompt you to press the button on the gateway to confirm.
- Page 11 At the same time, the LED indicator on the gateway will flash to remind you to press the button, as shown in the image below. Once you have pressed the button, the app will return to the gateway selection page. On this page, tap the newly bound gateway icon to switch to it, as shown in the image below.
-
Page 12: Switch Gateways
3.2.4 Switch Gateways The app can only connect to one gateway at a time(you can integrate multiple gateways, for more information please refer to section 16 “Gateway Integration”). When you have more than one gateway, you need to select one of them to connect. The steps are as follows: Open the app to enter the main page. -
Page 13: Share Gateways
On the Profile page that appears, tap “Sign Out” to exit. 3.2.6 Share Gateways When logging in to the gateway remotely, only one user can add and bind it. However, we can share the gateway with other family members or guests. The steps are as follows: In the app, tap “Me”- “Settings”, as shown in the image below. - Page 14 On the Settings page, tap “Family & Guests”, and then tap “+”, as shown in the image below.
-
Page 15: Unbind A Gateway
On the Add User page, fill in the user’s account and set the role, and then tap “Invite” to complete the operation. 3.2.7 Unbind a Gateway In the case of remote login to the gateway, each gateway can only be added and bound by one user, and it does not allow a second user to add and bind (but sharing the gateway is possible). - Page 16 Method 2: In the App, tap “Me”- “Setting”. On the page that appears, tap “Reset Gateway”.
- Page 17 On the pop-up menu, select one of the following options: “Reset Settings” or “Erase All Content and Settings”. Choosing “Reset Settings” will not delete sub-devices and configuration data, including created scenes, rooms, and automation, while choosing “Erase All Content and Settings” will clear all data and restore the device to its factory settings.
-
Page 18: Add Sub-Devices
4. Add Sub-devices There two ways to add sub-devices: via the app or via the button on the gateway. 4.1 Add a Sub-device via the App Open the app, log in to the gateway, select “Home” at the bottom, and then tap “+” in the upper right corner, as shown in the image below. -
Page 19: Add A Zigbee Device
4.1.1 Add a Zigbee Device Zigbee devices support two methods of adding. The first method is the regular searching method (Zigbee - Standard). For this method, any sub-device that is in the network pairing state can be added to the gateway. The second method is through the Install Code (Zigbee - Install Code). - Page 20 At this time, the sub-device to be added needs to be in pair mode, please refer to your device’s manual to learn how to set it to pair mode. The following image shows sub-devices that have been discovered and successfully added to the gateway.
-
Page 21: Add A Green Power Switch
Upon successful addition of all sub-devices, tap “Done”, and then added sub-devices will be displayed in the list of “Favorite Devices” on the Home page, as shown in the image below. 4.1.2 Add a Green Power Switch Select “Zigbee - Green Power”, select your Green Power Switch type(4 keys or 1 key), and then tap “Start”. -
Page 22: Add A Sub-Device Via Smart Hub Button
Next, follow the directions in the app to perform the key operation for your Green Power switch(the specific key to press depends on the channel used by the gateway, and the app will prompt you to press which key based on the gateway's channel). Once all the steps are completed, the Green Power device will be successfully added to the gateway. - Page 23 At this time, the sub-device to be added needs to be in pair mode, please refer to your device’s manual to learn how to set it to pair mode. Once the sub-device is added to the gateway, you can find it in the “My” - “Devices” list in the App, as shown in the image below.
-
Page 24: Add A Sub-Device To Favorite Devices
4.2.1 Add a Sub-device to Favorite Devices When adding Zigbee devices through the gateway button, they will be automatically added to the “My” - “Devices” list. If you want to add a sub-device to the “Home” - “Favorite Devices” list, please long-press the related device icon in the device list, and then tap in the upper right corner of the appearing device page. -
Page 25: Multi-Endpoint Sub-Devices
The device will be added to “Home” - “Favorite Devices” list, as shown in the image below. 4.3 Multi-endpoint Sub-devices When a sub-device has multiple endpoints, it will be displayed as multiple sub-devices in the gateway. For example, a socket with 5 outlets will be divided into 5 sub-devices, as shown in the image below. - Page 26 To determine which device represents each outlet, you can follow these steps to find the information on the device's edit page. Long-press the device icon and tap on the pop-up page to enter the device edit page. On this page, you can see “Device ID”. The last digit of the device ID represents the endpoint number.
-
Page 27: Delete Sub-Devices
5.Delete Sub-devices Long-press the device icon and tap on the pop-up page to enter the device edit page. On this page, tap “Remove Device” to delete the device from the gateway. 6.Control Sub-devices You can directly tap the device icon to perform basic control operations. For light devices, the basic control operations are “ON”and “OFF”. -
Page 28: Zones(Rooms)
If you want more detailed control of the device, you can long-press the device icon to enter its control page. The image below shows an example of a control page for a RGBCCT lamp. On this page, you can control the ON/OFF, brightness, color, and color temperature of the RGBCCT lamp. 7.Zones(Rooms) -
Page 29: Create A Zone
You can divide sub-devices by zones. Detailed information is explained below. 7.1 Create a Zone Tap “Zones” at the bottom of the app, and then tap “+” to add a zone. -
Page 30: Edit A Zone
Finally, tap “Save” to complete operation. 7.2 Edit a Zone Tap on the blank area of the zone(or long-press the Zone), and tap at the upper right corner of the pop-up page to enter the edit page where you can add or delete sub-devices in this zone. -
Page 31: Delete A Zone
7.3 Delete a Zone Enter the edit page of the zone as described in section 7.2, and then tap “Remove Zone” to delete the zone. 7.4 Control Sub-devices in the Zone... - Page 32 You can control the on/off state of all devices within a zone by tapping “ON” and “OFF”. Zone control is done through group control, which means all light devices within the zone can be turned on or off simultaneously. If you need more detailed control over the zone, please tap the blank area of the zone (or long-press the zone) to enter the zone page, as shown in the image below.
- Page 33 You can also control individual devices within the zone, as shown in the image below.
-
Page 34: Scenes
8.Scenes We can preset suitable lighting effects for various scenes (such as work, meetings, dinners, parties, etc.). For certain advanced venues, professional lighting designers may be needed for fine-tuning. Then, through the scene function, these lighting states (including on/off status, brightness, color, etc.) are saved. In this way, when needed, we can restore the lighting devices to their previous states by recalling the related scene. - Page 35 On the pop-up menu, select “Scene”.
-
Page 36: Recall A Scene
Enter the Add Scene page, as shown in the image below. Before creating a scene, you typically need to adjust the states of the sub-devices to the desired settings. Of course, you can also modify their states during the scene creation process. The specific method is to modify the device's state when adding the device to the scene, as shown in the image below. -
Page 37: Edit A Scene
8.3 Edit a Scene In the scene list, long-press the scene icon to enter the Edit Scene page. On this page, you can add and remove sub-devices, as well as delete the scene, as shown in the image below. 9.Automation Automation is an essential feature in smart homes. -
Page 38: Create Automation
For example, let's say you finish work and return home every day at 18:00. During the hot summer, you want the temperature at home to be cool and comfortable when you arrive. You can create an automation that automates the air conditioning device to fulfill this requirement. - Page 39 On the pop-up menu, select “Automation”, as shown in the image below. Next, enter the Add Automation page, as shown in the image below.
- Page 40 When you add an action to automation, the target of the action can be devices, zones, or scenes, as shown in the image below. When selecting Devices, you can only control a single device. When selecting Zones, you can control all devices within a specific zone.
-
Page 41: Edit Automation
9.2 Edit Automation In the Automation list, long-press the icon of a specific automation to enter the edit page. From there, you can modify or delete the trigger events, conditions, and actions of that automation, or delete the automation itself, as shown in the image below. 9.3 Favorite Automation 9.3.1 Create Automation Using Green Power Switch First, follow the directions described in section 4.1.2 “Add a Green Power Switch”... - Page 42 We want to use the button events of the Green Power switch to trigger automation. These button events include pressing the top-left button, pressing the bottom-left button, long-pressing the top-right button, long-pressing the bottom-right button, etc. When the user triggers the corresponding button event, it will automatically trigger and execute the respective automation actions. The following provides a detailed explanation.
- Page 43 Then select which button event to use as the trigger condition. In this case, we select “Top-left button pressed”, which means that when the user presses the top-left button of the Green Power switch, it will trigger the execution of this automation. Finally, tap “Done”.
- Page 44 The app will return to the previous Add Automation page. Now, let's add the action. Select “Add Action” and select “Devices” from the pop-up menu. Next, select a light device, as shown in the image below.
- Page 45 Next, select “Turn on” from the Actions list, as shown in the image below. Finally, tap “Done”. The app will return to the Add Automation page, and on this page, tap “Save”.
- Page 46 Now, when the user presses the top-left button of the Green Power switch, the lights in the action will be turned on. Similarly, we can add another automation where pressing the bottom-left button of the Green Power switch triggers the action of turning off the lights.
- Page 47 Next, select the Green Power switch that has been added to the gateway. Then select which button event to use as the trigger condition. In this case, we select “Top-right button hold”, which means that when the user long-presses the top-right button of the Green Power switch, it will trigger the execution of this automation.
- Page 48 Finally, tap “Done”. The app will return to the previous Add Automation page.
- Page 49 Now, let's add the action. Select “Add Action” and select “Devices” from the pop-up menu. Next, select a light device, as shown in the image below.
- Page 50 Next, select “Move brightness up” from the Actions list, which means to increase the light intensity, as shown in the image below. Finally, tap “Done”.
-
Page 51: Create Automation Using Sensors
The app will return to the Add Automation page, and on this page, tap “Save”. Now, when the user long-presses the top-right button of the Green Power switch, the light will be gradually brightened. Similarly, we can add another automation where long-pressing the bottom-right button of the Green Power switch triggers the action of dimming the light. - Page 52 Next, select the 4IN1 Sensor(which includes a motion sensor) that has been added to the gateway. Next, select “Motion Sensor” from the pop-up menu.
- Page 53 Next, select “Turned alarmed” to indicate that when movement is detected, the motion sensor will report an alert status, which we will use as the trigger event. Next, tap “Done” to return to the Add Automation page. On the Add Automation page, tap “Add Action” and select to turn on a light, as shown in the image below.
-
Page 54: Create Scheduled Automation
Finally, tap “Save”. Now, when the motion sensor detects movement, the light in the action will be turned on. 9.3.3 Create Scheduled Automation Let's create an automation that automatically turns on the lights every weekday at 9 AM. On the Add Automation page, select “Add Trigger”, and on the pop-up menu, select “Timer”, as shown in the image below. - Page 55 Next, select “Weekly”. Next, select Monday to Friday at 9:00, as shown in the image below.
-
Page 56: Create Automation To Simulate Being At Home
Tap “Done”, and a scheduled trigger event will be added. Then select “Add Action” to add a “Turn on” action to the “Show room”, as shown in the image below. Now, every weekday at 9 AM, the lights in the “Shown room” will be automatically turned on. 9.3.4 Create Automation to Simulate Being at Home When you’re away on a long trip, you may want to simulate being at home by controlling the lighting. - Page 57 Next, select “Weekly”. Next, select Monday to Sunday at 19:00, and set a random time of 1 hour (indicating that the automation will be triggered randomly between 19:00 and 20:00), as shown in the image below.
- Page 58 Tap “Done”, and a scheduled trigger event will be added. Since we set a random time of 1 hour, it means that we want to select a random time between 19:00 and 20:00 as the trigger time for the subsequent actions (this is designed because people cannot always return home at a fixed time, so a random time setting is added).
- Page 59 On the Add Automation page, select “Add Trigger”, and on the pop-up menu, select “Timer”, as shown in the image below. Next, select “Weekly”. Next, select Monday to Sunday at 22:00, and set a random time of 2 hours(indicating that the automation will be triggered randomly between 22:00 and 24:00), as shown in the image below.
- Page 60 Tap “Done”, and a scheduled trigger event will be added. Since we set a random time of 2 hour, it means that we want to select a random time between 22:00 and 24:00 as the trigger time for the subsequent actions (this is designed because people cannot always go to bed at a fixed time, so a random time setting is added).
-
Page 61: Disable Automation
9.4 Disable Automation When we want to disable a specific automation, for example, when we return home from a business trip and want to disable the previously created “Simulate being at home” automation, we can follow these steps: 1. Tap “Smart” - “Automation”. 2. - Page 62 Tap “Smart” at the bottom of the app and then tap “+” in the upper right corner, as shown in the image below. On the pop-up menu, select “Quick Control”.
- Page 63 On the page that appears, enter the mane “scrolling marquee”。 Tap “>” on the right side of “Repeat Count”, and on the page that appears, select “Keep repeating”, as shown in the image below. Tap “Done” to return to the previous page, and select “Add Action” to add an action. On the pop-up menu, select “Devices”.
- Page 64 Next, select a light as the first light in the marquee. Here we choose the front light, as shown in the image below. Then, select an action. Here we choose “Set a brightness”, as shown in the image below.
- Page 65 On the page that appears, set the brightness to 100% and the “Then Delay” to 500ms, and then tap “Done”, as shown in the image below. Then the app will return to the Add Quick Control page. Tap “+” on the right side of “Add Action” to add the second action. For the second action, select the same light as the first action, and also select “Set a brightness”.
- Page 66 Tap “Done” to return to the previous page where you can see that two actions have been added, as shown in the image below. The first action sets the brightness to 100% and then delays for 500ms before executing the second action. In the second action, the brightness is set to 0%, with a transition time of 0.5s (500ms), which means that the brightness gradually transitions from 100% to 0% within 500ms (i.e., turning off the light).
- Page 67 Finally, tap “Save”. Now, a marquee consisting of three lights has been created. This marquee starts with the first light being illuminated at 100% brightness and gradually dims to 0%. Then, the second light illuminates and also gradually dims until it is completely off. Subsequently, the third light illuminates and gradually dims to 0%.
- Page 68 At this point, this marquee button will be highlighted, indicating that it is running. How do we stop this marquee? Simply tap on “scrolling marquee” again to pause it. Below is a image after tapping “scrolling marquee” again, showing that the marquee has stopped running.
-
Page 69: Differences Between Quick Control And Scenes/Zones
10.2 Differences between Quick Control and Scenes/Zones Quick Control is essentially a shortcut for batch device control, achieved by adding multiple actions. These actions are executed in sequence, and you can set a delay time for each action to control the execution speed. Scenes and Zones are both forms of group control, meaning that devices within a Scene or a Zone are synchronized. - Page 70 After the remote is added to the gateway, we can use the binding function to add lighting devices to a specific group on the remote. This allows us to conveniently control the devices in that group using the remote. Most importantly, this control method is no longer dependent on the gateway.
- Page 71 Tap a specific group, here we select Group 1, to add bound devices to that group, as shown in the image below. Since we have not performed any device binding before, it will display “There are no bound devices”. Please tap “Bind Now” to enter the binding page, as shown in the image below.
- Page 72 Once the binding is successful, the bound devices will be highlighted, as shown in the image below. When we enter Group 1 again, we can see that a light has been bound, as shown in the image below.
-
Page 73: Circadian Rhythm
We can tap “Update Binding Devices” to go back to the binding device page to bind other devices or unbind devices that have already been bound (tap the device that has been bound and is highlighted to unbind it). The commonly used panel switch is also a type of remote, so it can also be bound to lighting devices, but we won't go into detail here. - Page 74 Enter the Edit Device page, as shown in the image below. On this page, tap “Circadian Rhythm” to enter its configuration page, as shown in the image below.
- Page 75 Since we have not configured the Circadian Rhythm before, it will display “This device is not set up yet”. Tap “Set Now” to enter the configuration page, as shown in the image below.
- Page 76 The system provides four default time points for the Circadian Rhythm, and their meanings are as follows: Name Time Point CCT Value DIM Value Description Wake Up 6:30 3229K Every day at 6:30, set the color temperature to 3229K and the brightness to 20%. Sunlight 10:30 6250K...
- Page 77 Please note that when we select the “Gradual Change” mode, the color temperature and brightness will transition gradually between the two time point. For example, at the first time point, 6:30, the color temperature and brightness of the lighting device will directly change to 3229K and 20%.
-
Page 78: Energy Consumption
and brightness of the lighting device will directly change to 3229K and 20%. After that, they will remain unchanged until 10:30. When it reaches 10:30, the color temperature will gradually change from 3229K to 6250K, and the brightness will increase from 20% to 100% over a period of 15 minutes. - Page 79 Then we can see the power of each device as shown in the image below.
-
Page 80: Ota
Tap on a device that shows 0W, and we can set its power as shown in the image below. 14.OTA Azoula Smart Hub provides an OTA function for remotely upgrading both the gateway itself and sub-devices added to it. 14.1 Update Azoula Smart Hub Tap “Me”... - Page 81 On the page that appears, tap “Gateways Updates”. On the Updates page, it displays the current version of the gateway and a new version for upgrading, as shown in the image below. Tap “Update Now” to update the gateway.
-
Page 82: Update A Sub-Device
14.2 Update a Sub-device Find the sub-device to be upgraded, and long-press its icon, as shown in the image below. On the page that appears, tap in the upper right corner. -
Page 83: Reset Azoula Smart Hub
Entering the Edit Device page, tap “Updates”, as shown in the image below. Entering the device update page, which is similar to the gateway update page, will display the current version of the device and the available version for updating. If there are no available updates, it will show “No updates available”. 15.Reset Azoula Smart Hub Sometimes it is necessary to reset the gateway. - Page 84 created scenes, zones, automations, and other information. Method 2: In the app, tap “Me” - “Settings”. On the page that appears, tap “Reset Gateway”.
- Page 85 On the pop-up menu, choose one of the following options: “Reset Settings” or “Erase All Content and Settings”. It is important to note that choosing “Reset Settings” will not delete sub-devices and configuration data, including created scenes, zones, automations, and other information, while selecting “Erase All Content and Settings” will clear all data, effectively restoring the device to its factory settings.
-
Page 86: Gateway Integration
16.Gateway Integration In applications such as home or commercial lighting, it may be necessary to use multiple gateways. Azoula Smart Hub supports gateway integration, allowing multiple gateways to be merged. Normally, the app can only connect to one gateway at a time. However, when we have multiple gateways and need to connect to another gateway, we need to switch gateways in the app. - Page 87 On the Settings page that appears, tap “Gateway Integration”, as shown in the image below. Enter the Gateway Integration page, as shown in the image below.
- Page 88 Tap “Add Sub-gateway” to enter the Add Sub-gateway page, and then the app will search for other gateways in the current LAN, as shown in the image below. Tap the discovered gateway icon to enter the next page, as shown in the image below.
- Page 89 Then tap “Add”. The image below shows a successful addition. At this point, the added gateway will be treated as a sub-gateway, and its sub-devices will be loaded and displayed in the app. Using the same method, you can add other sub-gateways as well. Now, back to the Gateway Integration page, the newly added gateway is displayed here, as shown in the image below.
-
Page 90: Homekit
17.Homekit We can integrate the Azoula Smart Hub into the HomeKit platform to control the sub-devices within the gateway using the Home app. The instructions are as follows. 17.1 Add to the Home App 17.1.1 Notes 1. When adding Smart Hub using the Home app, your phone, and the gateway must be connected to the same LAN, usually the same router. 2. -
Page 91: Add Azoula Smart Hub Via Qr Code
The Home app will enter the QR code scanning page, as shown in the image below. The Home app supports two methods to add accessories: scanning the QR code or manually entering the setup code. Each method is explained below. 17.1.2 Add Azoula Smart Hub via QR Code The Home app enters the QR code scanning mode by default. -
Page 92: Add Azoula Smart Hub Via Manual Setup Code
Please note that if you are unable to connect to the gateway for an extended period of time (stuck on the page shown below), it indicates that the gateway has already been added by someone else or the gateway has been powered on for more than 10 minutes. Please refer to the instructions in section 17.1.1 “Notes”... -
Page 93: Further Explanation
Tap the gateway that the Home app has found to enter the page for inputting the setup code. Enter the 8-digit setup code displayed above the QR code, and then tap “Continue” to add the gateway to the Home app, as shown in the image below. The setup code can be found above the QR code on the Smart Hub, as shown in the image below. -
Page 94: Add A Sub-Device
In addition, HomeKit does not support scene and group control. Although it is possible to create rooms in HomeKit and control the devices in the rooms, since HomeKit does not support group control,the lights in the room will be controlled one by one in sequence, not simultaneously. - Page 95 A list of home hubs and bridge accessories will appear (the gateway is a bridge-type accessory), and we select the gateway that needs to be removed from the list, as shown in the image below. Finally, tap “Remove Bridge from Home” to remove the gateway from the Home app, as shown in the image below.
Need help?
Do you have a question about the Azoula AZ220614A and is the answer not in the manual?
Questions and answers