Table of Contents
Advertisement
Quick Links
Advertisement
Table of Contents

Related Manuals for Rice Lake Performance Series


Summary of Contents for Rice Lake Performance Series
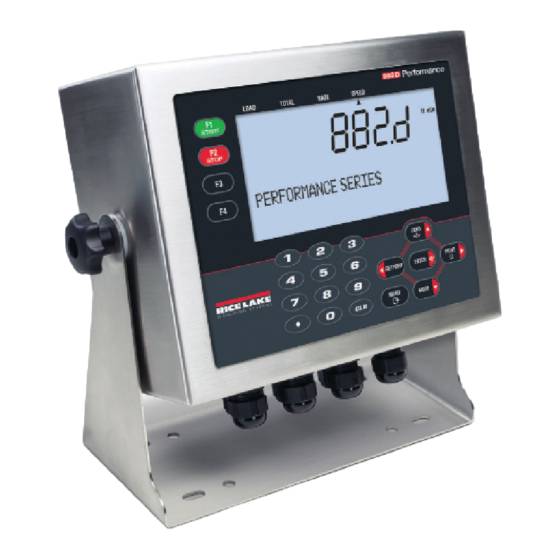
- Page 1 882D Belt Scale Integrator Technical Manual September 19, 2023 PN 184260 Rev G...
- Page 2 All information contained within this publication is, to the best of our knowledge, complete and accurate at the time of publication. Rice Lake Weighing Systems reserves the right to make changes to the technology, features, specifications and design of the equipment without notice.
- Page 3 2.04 September 19, 2023 Added power cord changes Table i. Revision Letter History Technical training seminars are available through Rice Lake Weighing Systems. Course descriptions and dates can be viewed at www.ricelake.com/training or obtained by calling 715-234-9171 and asking for the training department.
-
Page 4: Table Of Contents
Setup – Ports Menu ................37 Rice Lake continually offers web-based video training on a growing selection of product-related topics at no cost. - Page 5 RESETCONFIGURATION Command..............63 Technical training seminars are available through Rice Lake Weighing Systems.
- Page 6 12.2 Using the HARDWARE Command ..............91 Rice Lake continually offers web-based video training on a growing selection of product-related topics at no cost.
- Page 7 14.0 Specifications ............... . 101 Technical training seminars are available through Rice Lake Weighing Systems.
- Page 8 882D Belt Scale Integrator Rice Lake continually offers web-based video training on a growing selection of product-related topics at no cost. Visit www.ricelake.com/webinars www.RiceLake.com Visit our website...
-
Page 9: Introduction
Do not operate or work on this equipment unless this manual has been read and all instructions are understood. Failure to follow the instructions or heed the warnings could result in injury or death. Contact any Rice Lake Weighing Systems dealer for replacement manuals. -
Page 10: Fcc Compliance
Class A prescites dans le Règlement sur le brouillage radioélectrique edicté par le ministère des Communications du Canada. Options There are two option card slots, connectors J8 and J9, that can support Rice Lake option cards. Each option card kit includes instructions for installing and set up. 1.4.1 Available Option Cards Single Analog Output –... -
Page 11: Installation
The shipping carton should also contain the parts kit (Section 2.10 on page 20) and the manuals. If any parts were damaged in shipment, notify Rice Lake Weighing Systems and the shipper immediately. 2.1.1... -
Page 12: Mounting Instructions
The 882D includes a universal mount. The universal mount can be mounted on a wall, tabletop or any flat surface. NOTE:The universal mount comes attached to the 882D. Rice Lake Weighing Systems recommends removing the 882D from the universal mount prior to mounting. -
Page 13: Cable Connections
5. Wrap the shield wire around the cable so it contacts the foil where the cable passes through the clamp. 6. Torque the shielding clamp nut to 10 in-lb (1.13 N-m) so the clamp is around the cable and contacting the shield wire. © Rice Lake Weighing Systems ● All Rights Reserved... -
Page 14: Power Cable Grounding
882D Belt Scale Integrator Braid Shielded Cable Cut insulated jacket here Figure 2-5. Braid Shielded Cable 1. Strip the insulated jacket and braided shielding from a point just past the shielding clamp. 2. Strip another 1/2'' (15 mm) of the insulated jacket, leaving the braid exposed where the cable passes through the clamp. 3. -
Page 15: Power Cables
(Input 2). Connector Signal +12V, 100 mA max Ground Pulse Input #2 +12V, 100 mA max Ground Pulse Input #1 Table 2-4. J13 Pin Assignments (Speed Sensor) © Rice Lake Weighing Systems ● All Rights Reserved... -
Page 16: Digital I/O
USB cable from the PC to the micro USB connector (J4) on the 882D. The PC will recognize that a device has been connected, and attempt to install the driver needed to make it work. The driver can also be downloaded from the Rice Lake website. -
Page 17: Usb Host
IMPORTANT: The Ethernet port is not intended for use on Telecom Networks Circuits that are subject to lightning or power faults. For information on using the Ethernet port see Section 9.1 on page © Rice Lake Weighing Systems ● All Rights Reserved... -
Page 18: Cpu Board
882D Belt Scale Integrator CPU Board TPT58 RICE LAKE TPT66 TP45 TP44 ASSY PN/Rev TPT57 Setup Switch TPT69 TPT60 Header (JP3) R177 Watch TPS6 TPT54 TPT56 Audit Jumper (JP4) R175 R178 C105 LED1 LED2 TP42 LED4 R119 Remote Sense R300... -
Page 19: Backplate Attachment
2. Place the sealing wire through the drilled hex standoffs on the backplate, then through the fillister head screw at the bottom of the enclosure, as shown in Figure 2-11. 3. Seal the wire to secure. Figure 2-11. Sealing the 882D © Rice Lake Weighing Systems ● All Rights Reserved... -
Page 20: Parts Kits Components
882D Belt Scale Integrator 2.10 Parts Kits Components Parts Kit, AC Power (PN 180851) Parts Kit, DC Power (PN 187498) Part No Description Part No Description 153873 Connector, 3 Pos Screw Terminal 153873 Connector, 3 Pos Screw Terminal 153883 Connector, 6 Pos Screw Terminal 153883 Connector, 6 Pos Screw Terminal 15631... -
Page 21: Replacement Parts
Installation 2.11 Replacement Parts TO GROUND STUD ON BACKPLATE TO JP3 HEADER ON CPU BOARD GROUND DETAIL Figure 2-12. Replacement Parts Explosion © Rice Lake Weighing Systems ● All Rights Reserved... - Page 22 882D Belt Scale Integrator Item No. Part No. Description 177305 Enclosure, 882D Belt Scale 175214 Overlay, 882D Membrane Switch with Numeric Keys 30375 Seal Ring, PG9 Nylon 15626 Cord Grip, PG9 Plastic 15627 Lock Nut, PG9 Plastic 19538 Post, Slotted Black Seal 1/4 x 1, Cord Grip - Post Only 68599 Seal Ring, PG-11 68600...
-
Page 23: Operation
Setpoint key – navigates to top level setpoint menu at first defined setpoint; also used as the left key to navigate menus or to edit a value Messaging area – 121 x 24 dot-matrix display, has three lines of text with up to 20 characters per line Table 3-1. Front Panel Keys and Annunciator Descriptions © Rice Lake Weighing Systems ● All Rights Reserved... -
Page 24: Operating Modes
882D Belt Scale Integrator Operating Modes The three modes of operation for the 882D are described in the following sections. Weigh Mode In this mode, the 882D displays weight per conveyor belt distance, the amount of weight totalized, material flow rate, conveyor belt speed and annunciators to indicate status. -
Page 25: Audit Trail Information
EDP commands RT1 and RT2 immediately clear the respective totalizer. See Section 7.2 on page Triggering a CLRTOT1 or CLRTOT2 digital input immediately clears the respective totalizer. See Section 4.6.6 on page © Rice Lake Weighing Systems ● All Rights Reserved... -
Page 26: Master Totalizer
882D Belt Scale Integrator 3.4.2 Master Totalizer The master totalizer is a total of all the material that has gone across the scale. Master Totalizer Reset The Master Total can be cleared through the Test menu. The ability to reset the master totalizer can be limited by a password protecting the User menu. -
Page 27: Configuration
― Press again to access the Configuration parameters. MODE ― Or press to move to the Calibration menu. PRINT When configuration is complete, press to return to the weigh mode. MENU © Rice Lake Weighing Systems ● All Rights Reserved... -
Page 28: General Navigation
882D Belt Scale Integrator General Navigation The front panel keys are used to navigate through the menus. • move left and right (horizontally) in a menu level PRINT SETPOINT • move up and down (vertically) to different menu levels ZERO MODE •... -
Page 29: User Menu
Configure the analog output module (if installed); See Figure 4-20 on page 43 Version View the installed firmware version number or reset to factory settings; See Figure 4-21 on page 44 Table 4-3. Setup Menu Parameters © Rice Lake Weighing Systems ● All Rights Reserved... -
Page 30: Setup - Scale Menu
882D Belt Scale Integrator 4.6.1 Setup – Scale Menu Setup Scale Auto Zero Auto Zero Configuration Calibration Format Zero Band Zero Range Track Band Track Max Confirm Dead Display Sample Rate Negative A/D Filter Warmup Zero Band Rate Rate Dampening Totalizing Figure 4-5. - Page 31 The angle of the conveyor measured in degrees; used when 882D is used with weigh frames containing one or two load cells; Enter value: 0.0-89.0, 0.0 (default) Table 4-5. Scale – Configuration Menu Parameters © Rice Lake Weighing Systems ● All Rights Reserved...
- Page 32 882D Belt Scale Integrator 4.6.1.2 Scale – Calibration Menu Scale Calibration Speed Sensor Weigh Frame Pulse Input 1 Static Zero Dynamic Linearization Speed Cal Type Speed Cal Type Speed Cal Type Span Zero Point 1-5 CALCULATED REVOLUTIONS DISTANCE Pulse Per Test Percent Test Distance...
- Page 33 Pulse Width parameter; Select value: See Total Pulse – Pulse Width Defines how long the tons per pulse output stays on, in milliseconds; Enter value: 0-1000, 250 (default) Table 4-8. Scale – Format Menu Parameters © Rice Lake Weighing Systems ● All Rights Reserved...
- Page 34 882D Belt Scale Integrator 4.6.1.4 Scale – A/D Filter Menu Scale A/D Filter Digital Filter 1 Digital Filter 2 Digital Filter 3 Filter Sensitivity Filter Threshold RattleTrap Figure 4-9. Scale – A/D Filter Menu Parameter Description Digital Filter 1-3 Select the digital filtering rate used to reduce the effects of mechanical vibration from the immediate area of the scale;...
-
Page 35: Setup - Features Menu
Settings: MMDDY4 (default), DDMMY4, Y4MMDD, Y4DDMM, MMDDY2, DDMMY2, Y2MMDD, Y2DDMM Date Separator – specify date separator; Settings: SLASH (default), DASH, SEMI Set – enter the current date Table 4-12. Features – Region Menu Parameters © Rice Lake Weighing Systems ● All Rights Reserved... - Page 36 The configuration reset password is also a valid password for a customer to configure. If the customer forgets this password and calls Rice Lake (or looks it up in the manual) and is instructed to enter the configuration reset password, the configuration reset password allows them access without performing a reset of configuration.
-
Page 37: Setup - Ports Menu
Displays a message when a print is transmitted on this port; Settings: ON (default), OFF Stream Format Specifies the stream format used for streaming output of scale data (Trigger=STRLFT or STRIND); <R><NL>(default) Table 4-15. Ports – COM and USBCOM Parameters © Rice Lake Weighing Systems ● All Rights Reserved... - Page 38 882D Belt Scale Integrator 4.6.3.2 Ports – Ethernet and Fieldbus Menus Ports Ethernet Fieldbus Swap DeviceNet Profibus Address Address Default DHCP IP Address Netmask DNS Primary Gateway Secondary Server Client MAC Address Remote Termination Stream Format Timeout Port IP Address End of Line Echo Trigger...
-
Page 39: Setup - Print Format Menu
OFF by default When a Print Format is requested, it will be sent simultaneously out all of the ports configured as ON Table 4-18. Setup – Print Format Parameters © Rice Lake Weighing Systems ● All Rights Reserved... -
Page 40: Setup - Setpoints Menu
882D Belt Scale Integrator 4.6.5 Setup – Setpoints Menu Setup Setpoints Setpoint Config Batching Setpoint 1 Setpoint 2-20 RATE % RATE LOAD SPEED TOTAL CELL MV PAUSE DELAY Value Name Value Push Print Value Name Access Value Trip Slot Source Access Trip Slot... - Page 41 Digital output sense; Specifies whether the value of the digital output associated with this setpoint is inverted when the setpoint is satisfied; Settings: NORMAL (default), INVERT Table 4-21. Setpoint Parameter Settings © Rice Lake Weighing Systems ● All Rights Reserved...
-
Page 42: Setup - Digital I/O Menu
882D Belt Scale Integrator 4.6.6 Setup – Digital I/O Menu Setup Digital I/O Slot 0 Slot 1 Slot 2 Bit 1 - 4 Bit 1 - 24 Bit 1 - 24 Figure 4-19. Setup – Digital I/O Menu NOTE: When using a fixed speed, make sure to set the Digital I/O to BELTRUNNING and use the J2 connector to wire that Digital I/O to ground. -
Page 43: Setup - Analog Output Menu
Adjust the analog output span calibration; See Section 12.5 on page 96 Edit the value to match reading on multimeter to perform calibration Table 4-23. Setup – Analog Output Menu Parameters © Rice Lake Weighing Systems ● All Rights Reserved... -
Page 44: Setup - Version Menu
882D Belt Scale Integrator 4.6.8 Setup – Version Menu Setup Version Software Regulation Default Figure 4-21. Setup – Version Menu Parameter Description Software Displays firmware version number (read only); VX.XX.XX 882D CCCC NOTE: The CCCC is the 4-digit firmware checksum Regulation Displays the Legally Relevant firmware version number (read only);... -
Page 45: Test Menu
Time Set the current time Date Set the current date Table 4-26. Time & Date Menu Parameters NOTE: Refer to Section 4.6.2.1 on page 35 for time and date formatting options. © Rice Lake Weighing Systems ● All Rights Reserved... -
Page 46: Calibration
882D Belt Scale Integrator Calibration The 882D Belt Scale Integrator must calibrate inputs from the speed sensor and weigh frame for the system to work. NOTE: The speed sensor calibration must be done prior to the weigh frame calibration. Speed Sensor Calibration A belt conveyor scale must be equipped with a belt speed sensor that accurately senses the belt speed when the belt is empty or loaded. -
Page 47: Revolutions
Be sure to configure the conveyor belt length before performing a Revolutions calibration. 2. Navigate to Calibration within the Setup menu (Section 4.6.1 on page 30). © Rice Lake Weighing Systems ● All Rights Reserved... - Page 48 882D Belt Scale Integrator 3. Press . Speed Sensor displays. MODE 4. Press . Pulse Input 1 displays. MODE 5. Press . Speed Cal Type CALCULATED displays. MODE 6. Press to scroll to REVOLUTIONS. PRINT 7. Press . Test Revolutions displays. MODE 8.
-
Page 49: Distance
. Calibrating... briefly displays. The 882D determines the pulses per unit of measure to be used for ENTER displaying the speed of the belt and totalizing the weight during operation. 16. Press to return to the weigh mode. MENU © Rice Lake Weighing Systems ● All Rights Reserved... -
Page 50: Weigh Frame Calibration
882D Belt Scale Integrator Weigh Frame Calibration Calibration Weigh Frame Static Zero Dynamic Linearization Span Zero Point 1-5 Percent Correction Zero Counts Calibrate Capacity 1-5 Factor 1-5 Test Weight Chain Material Test Weight Calibrate Chain Weight Calibrate Material Weight Calibrate Value Figure 5-3. - Page 51 . Test Weight displays. MODE 8. Press to scroll to Material. SETPOINT 9. Press . Material Weight displays. MODE NOTE: The pre or post weighed material weight is entered in Step © Rice Lake Weighing Systems ● All Rights Reserved...
-
Page 52: Dynamic Zero
882D Belt Scale Integrator 10. Press . Calibrate displays. PRINT 11. Press . Press Start to Begin displays. MODE 12. Press . The 882D starts recording span averages. START • Displays: Calibrating... Run Time: XX:XX • The weight being totalized during calibration displays in the numeric area at x10 resolution. •... -
Page 53: Linearization
(Section 5.2.4.1 on page 14. Press . Percent Capacity X displays again. ENTER 15. Repeat steps through for additional points as needed or press to return to the weigh mode. MENU © Rice Lake Weighing Systems ● All Rights Reserved... - Page 54 882D Belt Scale Integrator 5.2.4.1 Correction Factor The Correction Factor adjusts the span value to correct for dynamic loading at the weigh frame. After completing a zero and span calibration, material tests as a percentage of Max Capacity can be run to calculate correction factor values for each linearization point.
-
Page 55: Using Revolution
If the download fails, try performing a complete download using the Send Configuration to Device function. © Rice Lake Weighing Systems ● All Rights Reserved... -
Page 56: Updating The 882D Cpu Firmware
When the download is complete, the program indicates if it was successful or not. NOTE: If it was not successful, turn off the power to the 882D, return to Step 4, and try the entire procedure again. If problems persist, contact Rice Lake Weighing Systems for technical assistance. www.RiceLake.com Visit our website... -
Page 57: Edp Commands
A response of OK indicates the jumper is in the ON position; A response of indicates the jumper is in the position. 7.1.2 BUILD Returns the date and time of the software build. Response: BUILD=MMM DD YYYY HH:MM:SS © Rice Lake Weighing Systems ● All Rights Reserved... -
Page 58: Din#S - Digital Input State
882D Belt Scale Integrator 7.1.3 DIN#s - Digital Input State A value is returned that is the sum of all active bits, no matter how they are configured, for the specified slot. Value Value Value 65536 131072 1024 262144 2048 524288 4096 1048576... -
Page 59: Hardware
P1 – Returns the text from line 3 of the message area (bottom) The response will always be verbatim with the text from the display and fixed at 20 characters, any unused locations are padded with spaces. © Rice Lake Weighing Systems ● All Rights Reserved... -
Page 60: Weigh Mode Commands
882D Belt Scale Integrator Weigh Mode Commands The weigh mode commands transmit data to a data communications port on demand. All commands are valid in both weigh and setup modes unless noted otherwise. Command Function CONSNUM Set or query the consecutive number DISPLAYMODE Set or query the current weigh mode display screen Set or query the unit ID;... -
Page 61: Totalizer Value Reporting
XEH command returns the value as a hexadecimal representation. XE Error Code XEH Error Code (decimal) Description (hexadecimal) no errors 0x00000000 VIRGERR 0x00000001 PARMCHKERR 0x00000002 LOADCHKERR 0x00000004 PRINTCHKERR 0x00000008 Table 7-4. XE and XEH Error Codes © Rice Lake Weighing Systems ● All Rights Reserved... -
Page 62: Key Press Commands
882D Belt Scale Integrator XE Error Code XEH Error Code (decimal) Description (hexadecimal) ENVRAMERR 0x00000010 ENVCRCERR 0x00000020 BATTERYERR 0x00000040 TCPERR 0x00000080 65536 ADPHYSICALERR 0x00010000 262144 EACCOVER 0x00040000 524288 STRINGERR 0x00080000 1048576 RESERVED_PF 0x00100000 2097152 RTCERR 0x00200000 4194304 MISSINGHWERR 0x00400000 8388608 CFGCONFLICTERR 0x00800000 16777216... -
Page 63: Batching Control Commands
This command is equivalent to using the Default function under the Version menu in the Configuration mode. NOTE: Totalizer 1 and 2 are reset and load cell calibration settings are lost when RESETCONFIGURATION command is run. © Rice Lake Weighing Systems ● All Rights Reserved... -
Page 64: Parameter Setting Commands
882D Belt Scale Integrator Parameter Setting Commands Parameter setting commands allow to query or change the current value for a particular configuration parameter. Current configuration parameter settings can be queried in either configuration mode or weigh mode using the following syntax: command<CR>... - Page 65 Enter value: 0.0 - 99999.0, 0.0 (default) Test Revolutions SPEED.TESTREVOLUTIONS#x The user provided number of revolutions the belt made during a speed calibration; Enter value: 0.0 - 99999.0, 1.0 (default) Table 7-9. Scales Commands (Continued) © Rice Lake Weighing Systems ● All Rights Reserved...
-
Page 66: Time And Date Menu
882D Belt Scale Integrator Menu Command Description Test Weight SC.MCAL.TWp#n The amount of test weight used for a test weight based dynamic span calibration (lb or kg); Enter value: 0.0 - 99999.0, 0.0 (default) Totalizer Resolution SC.TOTALIZERRESOLUTION#n The resolution for the totalizer value; Select value: see Figure 4-8 on page 33 Total Loadcell Build SC.TOTALLOADCELLBUILD#n... -
Page 67: Features Menu
EDP commands; the 882D will not stream if port type is set for 485 PROGIN – programmable input; for use with an iRite user program Table 7-13. PORTS (COM) Commands © Rice Lake Weighing Systems ● All Rights Reserved... -
Page 68: Ports - Usbcom Menu
882D Belt Scale Integrator 7.7.6 Ports – USBCOM Menu Menu Command Description Echo EDP.ECHO#2 Specifies whether characters received by the port are echoed back to the sending unit; Settings: ON (default), OFF End of Line Delay EDP.EOLDLY#2 Port end-of-line delay, in 0.1 second intervals; Enter value: 0-255, 0 (default) Print Message EDP.PRNMSG#2 Displays print message;... -
Page 69: Ports - Fieldbus Menu
(low) when the condition is met; for batch setpoints, the digital output is active until the setpoint condition is met; Settings: BIT1 (default), BIT2 - BIT24 Table 7-18. Setpoints Commands © Rice Lake Weighing Systems ● All Rights Reserved... - Page 70 882D Belt Scale Integrator Menu Command Description Enable* SP.ENABLE#n Enables (ON) or disables (OFF) the setpoints; Settings: ON (default), OFF NOTE: The Enable menu item is only available in the top level setpoint menu Selection made SP.KIND#n Supported setpoint kinds; Settings: directly after OFF (default) –...
-
Page 71: Print Format Menu
Print Format x | Port | ETH-C PFMTx.PORT.ETH-C Settings: OFF (default), ON Table 7-19. Print Format Commands NOTE: “x” represents the print format number (1-4). Section 8.0 on page 77 for detailed information on print formatting. © Rice Lake Weighing Systems ● All Rights Reserved... -
Page 72: Digital I/O Configuration Menu
882D Belt Scale Integrator 7.7.12 Digital I/O Configuration Menu Menu Command Description BIT x DIO.b#s OFF (default) – the digital I/O has no assigned function BATRUN – allows a batch routine to be started and run; with BATRUN active (low), the BATSTRT input starts the batch; if BATRUN is inactive (high), BATSTRT resets the batch BATSTR –... -
Page 73: Database Commands
To clear the contents of a database, send the following command: DB.CLEAR.n#x<CR> Where: is the database number within the memory is the slot number 0 The 882D responds with OK<CR> if the command is successful, ??<CR> if unsuccessful. © Rice Lake Weighing Systems ● All Rights Reserved... - Page 74 882D Belt Scale Integrator DB.DATA The DB.DATA command can be used to send data to or retrieve data from the 882D. Data can be sent to the 882D using the following command: DB.DATA.n#x = data{ | }<CR> Where: is the database number within the memory is the slot number 0 data represents a single cell of a row of data...
- Page 75 Table 7-24. Data Size Field Codes The DB.SCHEMA command can also be used to modify the schema, but only when the 882D is in setup mode and only if the database does not contain any data. © Rice Lake Weighing Systems ● All Rights Reserved...
-
Page 76: Analog Output Menu
882D Belt Scale Integrator 7.7.14 Analog Output Menu Menu Command Description Source ALG.SOURCE#s Specifies the source of the analog output control; Settings: SCALE (default) indicates that the analog output will follow the configured Mode based on scale data PROG indicates that the analog output is under iRite program control Mode ALG.MODE#s Specifies the data tracked by the analog output;... -
Page 77: Print Formatting
NOTE: A print format will ignore a token that would print itself Example: PFMT1.FMT=<R><PFMT1><CR> would literally print <PFMT1> when that token was encountered <CR> Carriage return character – hexadecimal 0x0D Table 8-1. Print Tokens © Rice Lake Weighing Systems ● All Rights Reserved... -
Page 78: Default Print Formats
882D Belt Scale Integrator Token Description <LF> Line feed character – hexadecimal 0x0A <FF> Form feed character – hexadecimal 0x0C <NLnn> New line (nn = number of termination (<CR/LF> or <CR>) characters); If nn is not specified, 1 is assumed; Value must be in the range 1–99 <SPnn>... -
Page 79: Customizing Print Formats
For example, to add the name and address of a company to the print format, send the following EDP command: PFMT1.FMT=RICE LAKE WEIGHING SYSTEMS<NL>230 W COLEMAN ST<NL>RICE LAKE WI 54868<NL2><T1> TOTAL<NL> A ticket printed using this format might look like the following:... -
Page 80: Ethernet
882D Belt Scale Integrator Ethernet Ethernet Server/Client Connections The 882D supports two simultaneous TCP connections, one as a server and the other as a client. This section details the functions of the Server and Client connections, including some examples on how they may be used. Refer to Section 4.6.3 on page 37 for configuration. -
Page 81: Pc Connection To The 882D Ethernet Server Through A Network Switch Or Router
Through a Network Switch or Router (recommended) or obtain its IP address using a DHCP (if supported on the network). Rice Lake Weighing Systems does not recommended using a DHCP because the scale IP address can change and communication will be lost. -
Page 82: Connection To A Remote Server - Demand Print To An Ethernet Printer
TCP port of the remote display. 3. Configure the trigger setting for the Client to either Stream Industrial (STRIND), or Stream Legal-for-Trade (STRLFT). 4. Rice Lake Weighing Systems recommends that the Client’s End-of-Line Delay be set to 1 (10 frames per Network... -
Page 83: Connecting To A Remote Server, Stream/Demand Data To Remote Ethernet-To-Rs-232 Device Server
If the connection was unsuccessful, re-check all network settings on the computer and in the 882D. Attempt to ping the IP address of the 882D to verify the computer and 882D are both able to communicate on the network. © Rice Lake Weighing Systems ● All Rights Reserved... -
Page 84: Setpoints
882D Belt Scale Integrator 10.0 Setpoints The 882D provides 20 configurable setpoints for control of both 882D and external equipment functions. Setpoints can be configured to perform actions or functions based on specified parameter conditions. Parameters associated with various setpoint kinds can, for example, be configured to perform functions (print and total), to change the state of a digital output to control external equipment functions, or to make conditional decisions. -
Page 85: Batch Operations
(Section 4.6.6 on page 42) to configure digital input and output functions. ABORT/RUN/START SWITCH BLACK CPU BOARD DIGITAL I/O BLACK WHITE EMERGENCY START/STOP SWITCH Figure 10-1. Batching Switch and Wiring Diagram Example © Rice Lake Weighing Systems ● All Rights Reserved... -
Page 86: Batching Example
882D Belt Scale Integrator Exit configuration mode when configuration is complete. Initialize the batch by turning the 3-way switch to ABORT, then unlock the STOP button (the STOP button must be in the OUT position to allow the batch process to run). The batching switch is now ready to use. -
Page 87: Maintenance
The maintenance information in this manual is designed to cover aspects of maintaining and troubleshooting the 882D. Contact Rice Lake Weighing Systems if a problem requires technical assistance. NOTE: Have the scale model number and serial number available when calling for assistance. -
Page 88: Battery Replacement
882D Belt Scale Integrator 11.4 Battery Replacement The 882D display shows low bat when battery voltage depletes to 2.9 VDC. Replace the battery when this warning is displayed to prevent data loss in the event of a power failure. The battery life varies depending on use. It is recommended to replace the battery every three years, or sooner, if left powered off for extended periods of time. -
Page 89: Cpu Board Excitation Fuses
C101 C236 TVS203 D206 R223 TVS6 R213 R224 R226 R225 TVS5 TPX1 R230 C106 D203 D204 C107 F201 D200 R234 D202 D201 R156 R157 C237 Figure 11-2. Backside of CPU Board © Rice Lake Weighing Systems ● All Rights Reserved... -
Page 90: Permanent Field Record
882D Belt Scale Integrator 11.7 882D Permanent Field Record Keep this as a record of maintenance performed on the belt scale system. Conveyor Number Date Scale Capacity (Tons per Hour) Load Cell mV/V (Average) Number of Load Cells (NLC) Load Cell Capacity (LCC) Total Load Cell Build = NLC x LCC Number of Weigh Idlers Idler Spacing... -
Page 91: Appendix
The HARDWARE command returns code of 000 if an installed card is not recognized. Ensure card is seated properly. Reinstall the card, if necessary, then cycle the power to read the configuration again. Try a different option card if the card is still not recognized. © Rice Lake Weighing Systems ● All Rights Reserved... -
Page 92: Ascii Character Chart
882D Belt Scale Integrator 12.3 ASCII Character Chart Use the decimal values for ASCII characters when specifying print format strings on the PFORMT menu. The actual character printed depends on the character mapping used by the output device. The indicator can send or receive any ASCII character value (decimal 0–255), but due to limitations of the indicator display, some characters cannot be shown. - Page 93 æ Æ ô ö ò û ù ÿ Ö Ü ¢ £ ¥ ² ƒ Table 12-4. ASCII Character Chart (Part 2) © Rice Lake Weighing Systems ● All Rights Reserved...
-
Page 94: Data Formats
882D Belt Scale Integrator 12.4 Data Formats 12.4.1 Stream Serial Data Format If stream data transmission is configured for the communication ports (STRLFT or STRIND), by default the 882D sends data using the serial data format shown in Figure 12-1. RS-422 is also available and uses the same serial data format. <R>... -
Page 95: Print Output Serial Data Format
* A multi-line response, e.g. from a DUMPALL command, is wrapped in the header and footer as a total but each individual line is not <STX><ADDRESS><first line> <EOL> <additional lines> <EOL> <last line> <EOL><ETX><CR> © Rice Lake Weighing Systems ● All Rights Reserved... -
Page 96: Analog Output Calibration
882D Belt Scale Integrator Where: - <CR> or <CR><LF> (set by the TERMIN parameter for the port) Example: To send the LD command from an ASCII terminal to an indicator at address 65 (decimal) on the RS-485 network, use the format in Figure 12-2 on page •... -
Page 97: Cable Specifications
Table 12-6. Recommended Wire Gauge Specifications Cord Grip Diameter Range PG9 (PN 15626) 0.138 - 0.315'' (3.5 - 8 mm) PG11 (PN 68600) 0.197 - 0.394'' (5 - 10 mm) Table 12-7. Cord Grip Specifications © Rice Lake Weighing Systems ● All Rights Reserved... -
Page 98: Cpu Board Components
882D Belt Scale Integrator 12.7 CPU Board Components TPT58 RICE LAKE TPT66 TP45 TP44 ASSY PN/Rev TPT57 TPT69 TPT60 R177 Watch TPS6 TPT54 TPT56 R175 R178 C105 LED1 LED2 TP42 LED4 R119 R300 TP34 TP43 R123 R148 TPT67 R125 TPT70... -
Page 99: Compliance
Notified Body involved with module B: / Benannte Stelle, die an Modul B beteiligt ist: / Organisme notifié impliqué dans les modules B: UL International Demko A/S - 0539 __________________________ ____ ____ ____ ____ __________________________ Brandi Harder April 16, 2021 __________________________ Quality Manager © Rice Lake Weighing Systems ● All Rights Reserved... - Page 100 882D Belt Scale Integrator DECLARATION OFCONFORMITY 2016/1101 Low Voltage : EN 62368-1:2014 + A11:2017 EN 61326-1:2013, EN 61000-3-3:2013, EN 61000-6-2, EN 61000-6-4, 2016/1091 EMC EN55011:2009/A1:2010 2012/3032 RoHS EN 50581:2012 Rice Lake, WI USA Brandi Harder , 2022 Quality manager www.RiceLake.com Visit our website...
-
Page 101: Specifications
3 × 20 pixelated prompt area Annunciators: Load, total, rate, speed, zero Keys/Buttons: Flat membrane panel, tactile feel Operating Temperature: Industrial: 14 °F to 122 °F (-10 °C to 50 °C) © Rice Lake Weighing Systems ● All Rights Reserved... - Page 102 882D Belt Scale Integrator www.RiceLake.com Visit our website...
- Page 104 © Rice Lake Weighing Systems Content subject to change without notice. 230 W. Coleman St. • Rice Lake, WI 54868 • USA USA: 800-472-6703 • International: +1-715-234-9171 September 19, 2023 PN 184260 Rev G www.ricelake.com...
Need help?
Do you have a question about the Performance Series and is the answer not in the manual?
Questions and answers