
Related Manuals for Polytron PCU 4141


Summary of Contents for Polytron PCU 4141
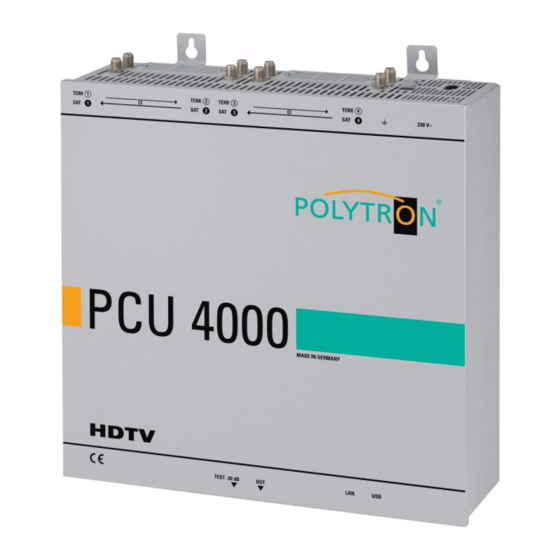
- Page 1 PCU 4141 Kompakt-Kopfstelle Compact headend Bedienungsanleitung Manual MADE IN GERMANY 0901787 V4...
-
Page 2: Table Of Contents
Inhaltsverzeichnis 1. Montage- und Sicherheitshinweise .................... 2. Allgemeines ..........................3. Beschreibung ..........................4. Lieferumfang ..........................5. Eingangsbeschaltung ......................... 6. Montage ................................. 6 6.1. Erdung ..............................6 7. Installation ........................... 7.1. Eingangspegel ............................8 7.2. Ausgangspegel ............................. 8 8. Programmierung allgemein ......................8.1. -
Page 3: Montage- Und Sicherheitshinweise
Informationen zur Installation, Umgebungsbedingungen sowie Wartung und Service am Gerät! Bewahren Sie die Bedienungsanleitung für den späteren Gebrauch auf. Alle Bedienungsanleitungen finden sie auf unserer Website unter: https://polytron.de/index.php/de/service/bedienungsanleitungen Bestimmungsgemäßer Gebrauch Verwenden Sie das Gerät nur an den zulässigen Betriebsorten, unter den zulässigen Umgebungs-bedingungen sowie zu den in der Bedienungsanleitung beschriebenen Zweck. - Page 4 Direttiva RAEE (2012/19/UE) Raccolta carta Garantiebedingungen § Es gelten die allgemeinen Geschäftsbedingungen der Polytron-Vertrieb GmbH. Diese finden Sie auf unserer Website unter: https://polytron.de/index.php/de/unternehmen/agbs ALLGEMEINE HINWEISE ZUR BEDIENUNGSANLEITUNG Alle Parameterangaben sind lediglich beispielhaft. Technisch realisierbare Parameter sind frei wählbar.
-
Page 5: Allgemeines
Eingangssignale inklusive der Zusatzdienste Teletext, EPG etc. um. Der Ausgang ist nachbarkanaltauglich und hat einen Pegel von 90 dBμV. Die PCU 4141 verfügt über ein energiesparendes Schaltnetzteil, das auch die Versorgung für das LNB (Tuner 1 und Tuner 2) übernimmt. Am Tuner 4 steht am terrestrischen Eingang eine 12 V Versorgung zur Verfügung. -
Page 6: Montage
J3 > 12V on/off Tuner 4 terr. J1 > 12V on/off SAT-Tuner 1 J2 > 12V on/off SAT-Tuner 2 6. Montage Die Montage der Kompaktkopfstelle muss in einem gut belüfteten Raum vorgenommen werden. Die Umgebungstemperatur darf maximal 45 °C betragen. Es muss gewährleistet werden, dass die Luft frei durch die Lüftungslöcher zirkulieren kann, dies gilt besonders auch bei waagerechter 19“-Montage. -
Page 7: Installation
7. Installation Anschließen der Eingangssignale SAT-Signale direkt oder über Verteiler an die SAT-Tuner-Eingänge anschließen. Am SAT-Eingang Tuner 1 und Tuner 2 liegt eine 12 V Gleichspannung zur LNB-Speisung an. DVB-T und DVB-C werden über den Ter.-Eingang angeschlossen. Am Tuner 4 steht am terrestrischen Eingang eine 12 V-Versorgung zur Verfügung Bitte darauf achten, dass je Eingang die Stromaufnahme von 250 mA nicht überschritten wird. -
Page 8: Eingangspegel
7.1. Eingangspegel Um einen einwandfreien Empfang zu gewährleisten ist darauf zu achten, dass der Pegel an den Eingängen 80 dBµV zwischen liegt. Beim Empfang von digitalen Signalen ist ein niedriger Pegel eher vorteilhafter als ein zu hoher Pegel. Bei zu hohem Eingangspegel ist ein Dämpfungsglied zu verwenden. 7.2. -
Page 9: Programmierung Allgemein
Nach dem Anschluss durchläuft das Gerät eine interne Routine und alle 4 Kanäle werden auf die bisher gespeicherten Daten eingestellt. In dieser Zeit blinkt die Status-LED neben der USB-Buchse grün. Erst nachdem die Status-LED dauerhaft grün oder orange leuchtet ist eine Verbindungsaufnahme zwischen PCU 4141 und Laptop/PC möglich. 8.1. Programmier-Software- Installation auf dem PC (SATC12_Vxxx.zip) Das Software-Paket von der Homepage www.polytron.de... -
Page 10: Installation Der Programmier-Software
Programms in den gewünschten Ordner installieren. Den Anweisungen auf dem Bildschirm folgen. Mit Beendigung der Installation Bildschirmanzeigen schließen. Die PCU 4141 darf erst nach der Installation der Programmier-Software auf dem PC mit dem USB-Kabel an diesen angeschlossen werden. Das Gerät erst nach... -
Page 11: Programmierung Der Geräteparameter
8.2. Programmierung der Geräteparameter Das Programm – – starten SATC12 Menü Links oben anklicken es stehen folgende Menüpunkte zur Verfügung: Program-Menu Diagnostic Firmware-Update Exit Program-Menu wählen: Hier werden alle Einstellungen der Eingangs- und Ausgangsparameter vorgenommen. Nach dem Aufrufen des Menüs werden alle 4 Kanäle abgefragt und die jeweils eingestellten Parameter angezeigt. -
Page 12: Eingangsparameter Für Den Sat-Empfang
8.2.1. Eingangsparameter für den SAT-Empfang DVB > Eingangssignal TP > Transponderfrequenz Art des Transponderfrequenz Eingangssignals wählen eingeben Wird DVB-T/T2 oder DVB-C gewählt, bei Eingangsparameter TER. Empfang weiterlesen. > Symbolrate Auto > LO - Frequenz Die benötigte Frequenz wird autom. eingestellt, kann aber 09750 , 10600 oder eine Symbolrate eingeben... -
Page 13: Eingangsparameter Für Den Terrestrischen Bereich
Beim Signal-Rauschabstand SNR gelten die abgebildeten Richtlinien. Die sehr gut entsprechenden Werte der FEC (Vorwärtsfehlerkorrektur) sind aus Tabellen der Satelliten-Betreiber zu entnehmen. Hat z.B. der Transponder eine FEC von 5/6, 5-7dB 8-11dB muss die SNR- Anzeige min. 9 dB betragen, um einen guten Empfang zu gewährleisten. -
Page 14: Ausgangsparameter Dvb-S
8.2.3. Ausgangsparameter DVB-S TP > SAT-Ausgangsfrequenz OP > Operating Mode Frequenz ist zwischen Normal > Normalbetrieb 950 und 1110 MHz frei wählbar. Es wird empfohlen Single > Einzelträger zur sich an das entsprechende Pegelmessung mit Transponder Frequenzraster einem analogen zu halten. Eingestellt wird die Antennenmessgerät Frequenz der Transponder- Mitte z.B.10720 (voreingestellt) - Page 15 SP > Spectrum OFF > Abschaltung Ausgangskanal Falls nicht alle 4 Ausgangs- Normal >Normalbetrieb kanäle belegt werden sollen, kann jeder Kanal einzeln mit Invers > Nutzsignal kann in OFF abgeschaltet werden. seiner Spektrallage invertiert werden. Eine Invertierung ist nur in Ausnahmefällen notwendig.
-
Page 16: Funktion „Serviceliste" (Programmliste)
8.3. Funktion „Serviceliste“ (Programmliste) Falls bestimmte Services innerhalb eines Transponders am Ausgang nicht erwünscht sind, können diese entfernt werden. Weiterhin können über diese Funktion verschlüsselte Services zur Entschlüsselung ausgewählt werden. 8.3.1. Löschen und Hinzufügen von Services (Programmen) Neben dem Search-Button wird ein weiterer Button Servicelist angezeigt. -
Page 17: Auswahl Der Zu Entschlüsselnden Programme
Durch Anklicken eines Service in der Eingangsliste und Anklicken des Befehls Add wird dieser Service der Ausgangsliste hinzugefügt. (Durch einen Doppelklick auf einen Service in der Eingangsliste wird dieser automatisch der Ausgangsliste hinzugefügt) Durch Anklicken eines Service in der Ausgangsliste und Anklicken des Befehls Remove wird dieser Service aus der Ausgangsliste entfernt. - Page 18 In der Ausgangsliste jetzt die gewünschten zu entschlüsselnden Services durch Setzen eines Hakens anwählen. Es können verschlüsselte und unverschlüsselte Services zusammen ausgegeben werden. Mit einem Klick auf den Save/Back-Button wird die Ausgangsliste gespeichert und das Fenster automatisch geschlossen. Das Stecken der CAM-Module sollte immer im ausgeschalteten Zustand erfolgen.
-
Page 19: Nit-Funktion (Network Information Table)
8.3.3. NIT-Funktion (Network Information Table) Um Kollisionen oder Doppelt-Vergabe mit der Original-ONID zu vermeiden, wird empfohlen, die TSID der umgesetzten Transponder umzubenennen. Empfohlen werden Werte von F001 - FFFE, da die Wahrscheinlichkeit von Kollisionen gering ist. Nach Auswahl von Device NIT erscheint folgende Maske, über die weitere Eingaben möglich sind: PCU 414 Kann vom Nutzer vergeben werden. -
Page 20: Speicherung Der Programmierung
Der Dateiname muss die Endung .c12 beibehalten!! Zusätzlich werden die Einstellungen in einer *.rtf-Datei abgespeichert. Diese befindet sich dann im selben Ordner wie die PCU 4141 Software. Dieses Dateiformat kann z.B. mit Microsoft Word, Open Office oder WordPad geöffnet, bearbeitet und ausgedruckt werden. -
Page 21: Lan-Funktion
Der im Netzwerk betriebene PC hat folgende Einstellungen: IP-Adresse: 192.168.001.068 Netzanteil Hostanteil Die IP-Adresse der PCU 4141 darf sich nur im letzten Block (Hostanteil) im Vergleich zu dem angeschlossenen PC unterscheiden. Nicht erlaubt sind die Ziffern 0, 255 und alle bereits verwendeten! Beispielhafte IP-Adresse: 192.168.001.100... -
Page 22: Anlegen Der Kopfstellen
8.5.1. Anlegen der Kopfstellen Das Programm – – starten SATC12 Im Control-Menü den Menüpunkt LAN-Control aktivieren Zur Verbindungseinstellung der PCU 4141 Edit Headends auswählen Im Untermenü den Menüpunkt Add New auswählen Folgende Menüfelder werden nun zur Dateneingabe freigegeben: Name des Gerätes eingeben (frei wählbar) Polytron ... -
Page 23: Diagnose
8.6. Diagnose Das „Diagnose“ Menü dient zu Servicezwecken und kann bei der telefonischen Fehleranalyse über die Hotline +49(0)7081-1702-0 hilfreich sein. Mit REFRESH können die angezeigten Daten aktualisiert werden. CAM-Plugged: zeigt an, ob das CAM-Modul eingesteckt ist. CAM-Initialized: zeigt an, ob das CAM-Modul erkannt wird Descrambling: zeigt an, ob das Programm entschlüsselt wird Menükopf- Anzeige: Actual Operating Temperature:... -
Page 24: Firmware-Update
Die Felder der Firmware Übersicht sind farbig hinterlegt. Grün bedeutet: Software ist auf dem neuesten Stand. Gelb bedeutet: es gibt eine neuere Software. PCU 4141 Nach einem Doppelklick auf das Feld, dass die Firmware anzeigt, wird man automatisch zum Download Menu weitergeleitet. -
Page 25: Teletext Ein / Aus
8.8.2. Teletext EIN / AUS PCU 4141 Teletext ein- / ausschalten: Menüpunkt Extras aufrufen Menüpunkt Teletext Mode auswählen Teletext je nach Bedarf ein- oder ausschalten und danach durch Klicken auf Save speichern. Hinweis: Werkseinstellung -> Der Teletext ist eingeschaltet! -
Page 26: Funktion „Passwort
Ab Werk ist der Passwortschutz nicht aktiviert und kann ab µC-SW-Version 1.31 wie folgt eingeschaltet werden: Das Programm – SATC12 – starten. In der oberen Auswahlzeile Extras anklicken. PCU 4141 Klicken Sie auf Password Settings. Es erscheint folgendes Eingabefenster, bitte notieren Sie sich unbedingt die Seriennummer, denn diese wird benötigt, um das Passwort ggf. - Page 27 Seite erwähnt. Die Seriennummer finden Sie auch auf dem Aufkleber, welcher außen auf dem Gerätegehäuse angebracht ist. Die generelle Passwortrücksetzung kann nur durch POLYTRON vorgenommen werden, Sie erhalten im Zuge dessen ein neues Passwort, mit dem Sie die Bedienung wieder freischalten können.
-
Page 28: Anwendung Mit Filter Pcu-F001
Das Filter PCU-F001 realisiert den benötigten freien Frequenzbereich von 950 MHz bis 1110 MHz und kann in jede beliebige SAT-Ebene zwischengeschaltet werden. Um die Pegelverhältnisse zwischen der PCU 4141, dem Filter PCU-F001 und dem Ausgangspegel des LNBs anzugleichen, kann ein zusätzlicher Inline-Verstärker notwendig sein. - Page 29 Contents 1. Mounting and safety instructions .................... 2. General information ........................3. Description ..........................4. Scope of delivery ........................5. Input circuit ..........................6. Assembly ..............................33 6.1. Grounding ............................33 7. Installation ..........................7.1. Input level ............................35 7.2. Output level ............................35 8.
-
Page 30: Mounting And Safety Instructions
Save the operating instructions for later use. All operating instructions can be found on our website at: https://polytron.de/index.php/en/services/operating-manuals Approved use Use the device only at the permissible operating locations, under the permissible environmental conditions and for the purpose described in the operating instructions. - Page 31 Raccolta carta Guarantee conditions § The general terms and conditions of Polytron-Vertrieb GmbH apply. The general terms and conditions can be found on our website at: https://polytron.de/index.php/en/company/general-terms-and-conditions GENERAL INFORMATION ON THE OPERATING INSTRUCTIONS All parameter data are examples only.
-
Page 32: General Information
Input circuit In the PCU 4141, signals are directly fed to the input tuners. Due to the triple tuner, there are 4 ports for SAT signals and 4 ports for terrestrial signals (DVB-T/T2 or DVB-C). As factory default, there is an additional 12V DC input for LNB supply on the SAT input tuner 1 and tuner 2. -
Page 33: Assembly
J3 > 12V on/off Tuner 4 terr. J1 > 12V on/off SAT-Tuner 1 J2 > 12V on/off SAT-Tuner 2 Assembly The compact headend must be mounted in a well-ventilated room. The ambient temperature must not exceed 45 °C. It must be ensured that the air can circulate freely through the ventilation holes, especially in horizontal 19"... -
Page 34: Installation
Installation Connection of the input signals Connect SAT signals directly or via splitter to the SAT tuner inputs. At input 1 and 2 there are 12 V DC for the supplying of the LNB. DVB-T and DVB-C need to be connected to the terrestrial inputs. At the terrestrial input 4 there are 12 V DC for a terrestrial pre-amplifier. -
Page 35: Input Level
7.1. Input level 80 dBµV In order to ensure flawless reception, make sure that the level at the inputs is between When receiving digital signals it is advantageous to have a lower input level instead of an excessively high one. If the input level is too high, an attenuator is to be used. -
Page 36: General Programming
After the mains cable is connected, the device runs through an internal routine and all 4 channels are set with the previously stored data. During this, the status LED next to the USB socket flashes green. Only after the status LED is continuously green or orange, contact is possible between PCU 4141 and Laptop/PC. -
Page 37: Installation Of The Programming Software
Close the screen displays once the installation has ended. After the installation of the programming software on the PC, the PCU 4141 can be connected to the PC with the USB cable. Only connect the device to the PC once the software... -
Page 38: Programming Of The Device Parameters
8.2. Programming of the device parameters Start the program – – SATC12 Menu Click on at the top left The following menu points are available: Program Menu Diagnostic Firmware Update Exit Select Program Menu: All adjustments of the input and output parameters are carried out here. After calling up the menu, all 4 channels are queried and the set parameters are displayed. -
Page 39: Input Parameters Sat Reception
8.2.1. Input parameters SAT reception DVB > Input signal TP > Transponder frequency Choose the kind of signal Enter transponder frequency If DVB-T/T2 or DVB-C is chosen, go further in the passage TER. reception > Symbolrate Auto > LO frequency AUTO sets the required frequency automatically. -
Page 40: Input Parameters For The Terrestrial Range
sehr gut The guidelines shown apply to the signal-to-noise ratio SNR. The corresponding values of the FEC (forward error correction) have to 5-7dB 8-11dB be taken from the tables of the satellite operators. If e.g. the transponder has an FEC of 5/6, the SNR display must be at least 9 dB 7-9dB 10-13dB to guarantee good signals. -
Page 41: Output Parameters Dvb-S
8.2.3. Output parameters DVB-S TP > SAT output frequency OP > Operating Mode Frequency is freely adjustable Normal > Normal operation between 950 and 1100MHz We recommend to adhere to Single > individual carrier for the corresponding transponder level measurement frequency spacing. - Page 42 SP > Spectrum OFF > Switching off the output channel If not all 4 output channels are Normal >Normal operation to be used, each channel can be switched off by selecting Invers > The spectral position OFF. of the useful signal can be inverted.
-
Page 43: Function „Service List" (Program List)
8.3. Function "Service List" If certain services within a transponder are not desired at the output, they can be removed. Encoded services can still be selected for decoding via this function. 8.3.1. Delete and add services (programs) The button Service List is only active if the tuner is locked. If the data rate at the input is higher than the data rate that is possible at the output due to the set parameters an error message appears and the button for the Service List turns red. -
Page 44: Selection Of The Channels To Be Encoded
By clicking on a service in the input list and clicking on the command Add, this service is added to the output list (also double-clicking on a service in the input list automatically adds it to the output list). Clicking on a service in the output list and clicking on the command Remove removes this service from the output list (also double-clicking on a service in the output list removes the service automatically). - Page 45 Selection of desired services which should be encoded by applying a check mark. Note: If the CAM module is not detected not any service can be decoded! Encoded as well as non-encoded services can be selected and processed together. With a click on the Save/Back button the output list is saved and the window is automatically closed. The CAM modules should be only inserted in power-off mode of the unit.
-
Page 46: Nit-Processing (Network Information Table)
8.3.3. NIT-processing (Network Information Table) In order to avoid collisions or double allocation with the original ONID, we recommend to change the TSID of the converted transponders. We recommend values of F001 - FFFE because there is only a low probability of collisions. ... -
Page 47: Storage Of The Programming
The file name must retain the ending .c12!! The settings are also saved in an rtf-file. This is located in the same folder as the PCU 4141 software. This file format can be opened, edited and printed with e.g. Microsoft Word, Open Office or WordPad. -
Page 48: Lan Function
IP address: 192.168.001.068 network share host share The IP address of the PCU 4141 may differ only in the last block (host share) compared to the connected PC. The figures 0, 255 and all figures already used are not permitted! Example IP address: 192.168.001.100... -
Page 49: Creating The Headends
SATC12 Activate the menu item LAN-Control in the Control menu Edit Headends Select to set the connection of the PCU 4141 Add New Select from the submenu The following menu fields are now enabled for data input: Enter the name of the device (freely selectable) Polytron ... -
Page 50: Diagnostic
8.6. Diagnostics The "Diagnostic“ menu is for service purposes and can be helpful during error analysis by telephone on the Hotline+49(0)7081-1702-0. The displayed data can be updated with REFRESH. CAM-Plugged: Shows whether the CAM module has been inserted. CAM-Initialized: Shows whether the CAM module was detected. Descrambling: Shows whether the program has been decrypted. -
Page 51: Firmware Update
Green indicates that the firmware is up to date. Yellow indicates that a new firmware is available. PCU 4141 Double click on the display box which shows the firmware, opens automatically the update menu. If the firmware is up-to-date, following picture appears:... -
Page 52: Teletext On / Off
8.8.2. Teletext ON / OFF PCU 4141 Switch teletext on / off: Call up the Extras menu item Select Teletext Mode menu item Switch teletext on or off as required and then save it by clicking Save. -
Page 53: Password" Function
Start program [SATC12] Klick on Extras in the upper row. PCU 4141 Klick on Password Settings. It appears following pop-up window, please urgently note the serial- number, because this will be needed to reset the password, if required. - Page 54 The serial-number you can also find on the label which is affixed on the outer side of the housing. The generally password-reset can only be applied by POLYTRON, for this procedure you will get a new password to reactivate the access to the device again.
-
Page 55: Application With Filter Pcu-F001
The PCU-F001 filter realizes the required free frequency range of 950 MHz to 1110 MHz and can be inserted in any desired SAT level. In order to adjust the level rations between the PCU 4141, the PCU-F001 and the output level of the LNB, an additional inline amplifier may be necessary. This amplifier is included in the accessories of the PCU 4141. -
Page 56: Technische Daten
10. Technische Daten/ Technical data Typ/ Type PCU 4141 Artikel-Nr./ Art. No. 5552170 Eingänge / Inputs CI-Schnittstellen/ CI slots 950 … 2150 MHz (1 MHz Schritte/ steps) Frequenz/ Frequency 110 … 862 MHz (250 kHz Schritte/ steps) Frequenz/ Frequency Terr. - Page 57 Notizen/ Notices...
- Page 58 Notizen/ Notices...
- Page 59 Notizen/ Notices...
- Page 60 Technische Hotline Technical hotline + 49 (0) 70 81 / 1702 - 0 Telefax + 49 (0) 70 81 / 1702 - 50 Internet http://www.polytron.de Email info@polytron.de Technische Änderungen vorbehalten. Subject to change without prior notice. Copyright © Polytron-Vertrieb GmbH...
Need help?
Do you have a question about the PCU 4141 and is the answer not in the manual?
Questions and answers