
Related Manuals for Midea 7NM20M1


Summary of Contents for Midea 7NM20M1
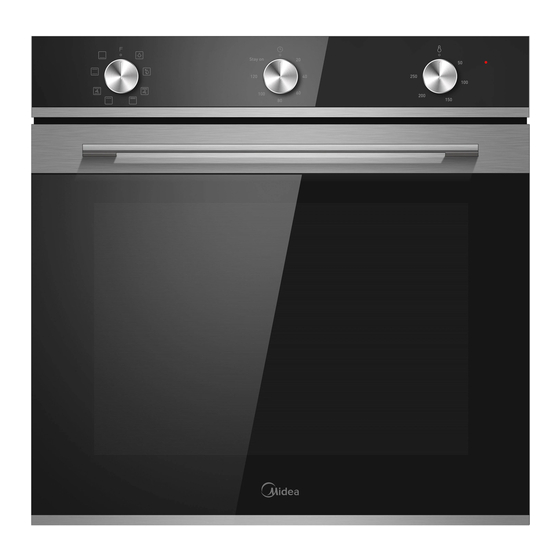
- Page 1 INSTRUCTION MANUAL Build In Oven 7NM20M1 Read these instructions carefully before using your oven, and keep it carefully. Oven photo is only for reference, there might little difference for different models.
-
Page 2: Safety Information
SAFETY INFORMATION ▲ intended Use Thank you for buying Midea Built-in Oven. Before unpacking it, please read these instructions carefully. Only then will you be able to operate your appliance safely and correctly. Warmly recommend retain the instruction manual and installation instructions for future use or for subsequent owners. - Page 3 ▲ WARNING Risk of electric shock! 1. Incorrect repairs are dangerous. Repairs may only be carried out and damaged power cables replaced by one of our trained after-sales technicians. If the appliance is defective, unplug the appliance from the mains or switch off the circuit breaker in the fuse box. Contact the aftersales service.
- Page 4 Risk of scalding! 1. The accessible parts become hot during operation. Never touch the hot parts. Keep children at a safe distance. 2. When you open the appliance door, hot steam can escape. Steam may not be visible, depending on its temperature.
- Page 5 Hazard due to magnetism! Permanent magnets are used in the control panel or in the control elements. They may affect electronic implants, e.g. heart pacemakers or insulin pumps. Wearers of electronic implants must stay at least 10 cm away from the control panel. Causes of Damage 1.
- Page 6 Do not trap anything in the appliance door. Even if the door is only left open a crack, the front of nearby furniture may become damaged over time. Only leave the appliance to dry with the door open if a lot of moisture was produced while the oven was operating.
-
Page 7: Installation
INSTALLATION min.35 min. min. min. min. min.35 min.35 min.585 max.595 min. min. min.35 +8 8 To operate this appliance safe, please be sure that it has been installed to a professional standard respecting the installation instructions. Damages occur because of incorrect installation are not within the warranty. -
Page 8: Know Your Appliance
KNOW YOUR APPLIANCE ▲ IDENTIFYING THE APPLIANCE In this chapter, we will explain the control panel and accessories. At the same time you will also find out about the various functions of your appliance. Note: Depending on the appliance model, individual details and colors may different. - Page 9 ▲ OPERATING MODES Your appliance has various operating modes which make your appliance easier to use. To enable you to find the correct type of heating for your dish, we have explained the differences and scopes of application here. The symbols for each type help you to remember them. ▲...
- Page 10 ▲ Notes 1. To defrost big portions of food, it is possible to remove the side-racks and place the container on the cavity floor. 2. To warming tableware, it is beneficial to remove the side-racks and the heating modes “Hot Air Grilling” and “Fan Heating” with temperature setting of 50°C are useful.
- Page 11 ACCESSORIES Your appliance is accompanied by a range of accessories. Here, you can find an overview of the accessories included and information on how to use them correctly. ▲ Accessories included Your appliance is equipped with the following accessories: Wire Rack Baking Tray For ovenware, cake tins and For tray bakes and small...
- Page 12 ▲ Locking function The accessories can be pulled out approximately halfway until they lock in place. The locking function prevents the accessories from tilting when they are pulled out. The accessories must be inserted into the cavity correctly for the tilt protection to work properly. When inserting the wire rack, ensure the wire rack is onto the right facing direction like the picture When inserting the backing tray, ensure the backing tray is onto the right facing direction like the picture...
- Page 13 → "Customer Service" on page 28 Optional accessories Order number Wire Rack For ovenware, cake tins and ovenproof dishes. 7NM20M1 For roasts and grilled food Baking Tray 7NM20M1 For tray bakes and small baked products. Universal pan...
- Page 14 OPERATE YOUR APPLIANCE ▲ First use Before using the appliance to prepare food for the first time, you must clean the cavity and accessories. Remove all stickers, surface protection foils and transport protection parts. Remove all accessories and the side-racks from the cavity. Clean the accessories and the side-racks thoroughly using soapy water and a dish cloth or soft brush.
- Page 15 ▲ Selecting Modes The default operating mode is switching off. If you would like to select a cooking operating mode, you can do so using left mode-control knob. There is a pointer on the knob, turn this knob to make the pointer to point to the mode which you would like to choose.
- Page 16 ▲ Switching On As now you already finished the setting of the operating mode and temperature. If you would like to turn the appliance on, you can do so using time-control knob. There is a pointer on the knob, turn this knob to make the pointer to point to the cooking time which you would like to choose.
- Page 17 Changing During the period of appliance operating, knobs on the control panel can be turned again to meet your needs or changing. Turn the mode-control knob from the present mode to another one while the appliance is operating means to get the mode changed while food is being cooked.
- Page 18 5. Use “Fan Heating”, whenever possible. You can reduce the temperature by 20°C to 30°C. 6. You can cook and bake using “Fan Heating” on more than one level at the same time. 7. If it is not possible to cook and bake different dishes at the same time, you can heat one after the other to use the preheat status of the oven.
- Page 19 MAINTENANCE YOUR APPLIANCE ▲ Cleaning Agent With good care and cleaning, your appliance will retain its appearance and remain fully functioning for a long time to come. We will explain here how you should correctly care for and clean your appliance. To ensure that the di°erent surfaces are not damaged by using the wrong cleaning agent, observe the information in the table.
- Page 20 Area Appliance Cleaning exterior Hot soapy water: Clean with a dish cloth and then dry with a soft cloth. Remove flecks of limescale, grease, starch and Appliance exterior albumin (e.g. egg white) immediately. Stainless steel Corrosion can form under such flecks.Special stainless front steel cleaning products suitable for hot surfaces are available from our after-sales service or from specialist...
- Page 21 Area Appliance Cleaning exterior Hot soapy water: Soak and clean with a dish cloth or brush. Accessories If there are heavy deposits of dirt, use a stainless steel scouring pad. Hot soapy water: Rails Soak and clean with a dish cloth or brush. Hot soapy water: Clean with a dish cloth or a brush.
-
Page 22: Appliance Door
APPLIANCE DOOR With good care and cleaning, your appliance will retain its appearance and remain fully functional for a long time to come. This will tell you how to remove the appliance door and clean it. For cleaning purposes and to remove the door panels, you can detach the appliance door. - Page 23 ▲ Fitting the appliance door Reattach the appliance door in the opposite sequence to removal. 1. When attaching the appliance door, ensure that both hinges are placed right onto the installing holes of the front panel of the cavity. Ensure that the hinges are inserted into the correct position. You must be able to insert them easily and without resistance.
- Page 24 ▲ Change the power cord (only for some models) Position A show the terminal box position on the back of the back outer case and it’s closed. Steps: a. cut off the power, use small flat screwdriver to open two snap 1,2.
- Page 25 CURE YOUR APPLIANCE WHEN NEEDED If a fault occurs, before calling the after-sales service, please ensure that is not because of incorrect operations and refer to the fault table, attempt to correct the fault yourself. You can often easily rectify technical faults on the appliance yourself.
- Page 26 Fan does not work all the time in This is a normal operation due the mode: “Fan Heating” to the best possible heat distribution and best possible performance of the oven. After a cooking process a noise The cooling fan is still working, can be heard and a air flow in the to prevent high moisture conditions near of the control panel can be...
- Page 27 ▲ Replacing the lamp on the corner of the cavity If the cavity lamp fails, it must be replaced. Heat-resistant, 25 watt, 230 V halogen lamps are available from the after-sales service or specialist retailers. When handling the halogen lamp, use a dry cloth. This will increase the service life of the lamp.
-
Page 28: Customer Service
Above, thank you again for buying Midea Built-in Oven, and we wish that our appliance will bring you delicious food and happy life. -
Page 29: Tips And Tricks
TIPS AND TRICKS Try to use settings of similar recipes first You want to cook your nd optimize the cooking process due own recipe to the result. Put a wooden stick inside the cake about 10 minutes before the given baking time Is the cake baked ready? is reached. - Page 30 Steam is part of baking and cooking and moves normally out of the oven together with the cooling air flow. This steam may Condensing water condensate at different surfaces at the during baking oven or near to the oven and build water droplets.
- Page 31 TYPICAL PECIPES Temp. Duration CAKE Form Level Mode in minutes in °C Sponge Cake (simple) Conventional in a Box shape with Fan Sponge Cake (simple) Conventional in a Box shape Sponge Cake with Round form Conventional Fruits in a round Form with Fan Sponge Cake with Tray...
- Page 32 Duration CAKE Temp.in °C Form Level Mode in minutes Hefezopf (Callah) Tray Conventional with Fan p.h.t.: 8:00 Butter Yeast Cake Tray Conventional b.t.: 30:00 p.h.t.: 8:00 Shortbread Tray Conventional b.t.: 13:00 Tray Conventional p.h.t:8:20 Shortbread 2 Trays with Fan b.t.: 12:00 p.h.t.: 8:00 Vanilla Cookies Tray...
- Page 33 TEST FOOD ACCORDING TO EN 60350-1 RECIPESA Accessories °C Level Time(min) Pre-heat Sponge cake Springform Φ26cm 35-45 Sponge cake Springform Φ26cm 35-45 Small cake 1 tray 40-50 Cheese cake Springform Φ26cm 70-80 Apple pie Springform 20cm 70-80 Φ Apple pie Springform Φ20cm 70-80 Bread...
- Page 34 6. The determination of the cavity volume carried out for the usage “Defrost” as described on page 12. To ensure an e˝cient use of the oven, all accessories including DATASHEET (EU 65/2014 & EU 66/2014) Midea 7NM20M1 No of Cavities Heat Source Electric Usable Volume...
Need help?
Do you have a question about the 7NM20M1 and is the answer not in the manual?
Questions and answers