Table of Contents
Advertisement
Quick Links
BUILT-IN OVEN
USER MANUAL
7NM30T0
Warning notices: Before using this product, please read this manual carefully and keep it for future reference.
The design and specifications are subject to change without prior notice for product improvement. Consult
with your dealer or manufacturer for details.
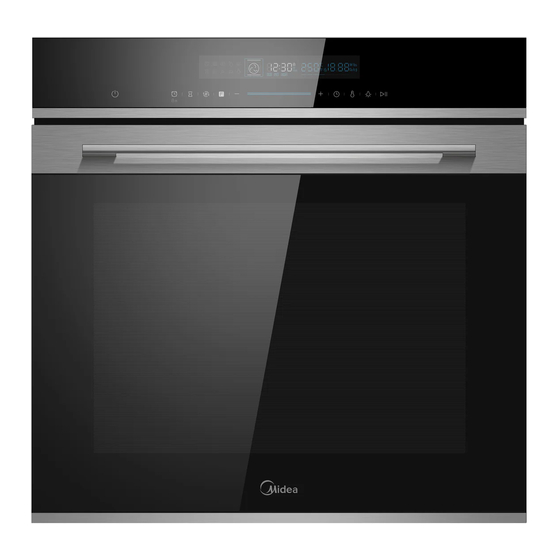
The diagram above is just for reference. Please take the appearance of the actual product as the standard.
Advertisement
Table of Contents

Subscribe to Our Youtube Channel
Related Manuals for Midea 7NM30T0


Summary of Contents for Midea 7NM30T0
- Page 1 BUILT-IN OVEN USER MANUAL 7NM30T0 Warning notices: Before using this product, please read this manual carefully and keep it for future reference. The design and specifications are subject to change without prior notice for product improvement. Consult with your dealer or manufacturer for details.
-
Page 2: Table Of Contents
THANK YOU LETTER THANK YOU LETTER Thank you for choosing Midea! Before using your new Midea product, please read this manual thoroughly to ensure that you know how to operate the features and functions that your new appliance offers in a safe way. -
Page 3: Safety Instructions
SAFETY INSTRUCTIONS SAFETY INSTRUCTIONS Intended Use The following safety guidelines are intended to prevent unforeseen risks or damage from unsafe or incorrect operation of the appliance. Please check the packaging and appliance on arrival to make sure everything is intact to ensure safe operation. If you find any damage, please contact the retailer or dealer. - Page 4 Safety Information Intended Use • Thank you for buying Midea Built-in Oven. Before unpacking it, please read these instructions carefully. Only then will you be able to operate your appliance safely and correctly. Warmly recommend retain the instruction manual and installation instructions for future use or for subsequent owners.
- Page 5 • Keep children below the age of 8 years old at a safe distance from the appliance and power cable. And please always slide accessories into the cavity the right way round. Warning Risk of electric shock • Incorrect repairs are dangerous. Repairs may only becarried out and damaged power cables replaced by one of our trained after-sales technicians.
- Page 6 • Accessories and ovenware become very hot. Always use oven gloves to remove acces sories or ovenware from the cavity. • Alcoholic vapors may catch fire in the hot cooking compartment. Never prepare food containing large quantities of drinks with high alcohol content. Only use small quanti ties of drinks with high alcohol content.
- Page 7 Risk of fire • Combustible items stored in the cavity may catch fire.Never store combustible items inthe cavity. Never open the appliance door if there is smoke inside. Switch off the appliance and unplug it from the circuit breaker in the fuse box. •...
- Page 8 • Silicone pans: Do not use any silicone pans, or any mats, covers or accessories that contain silicone. The oven sensor may be damaged. • Water in a hot cooking compartment: do not pour water into the cavity when it is hot. This will cause steam.
- Page 9 • Appliance door as a seat, shelf or worktop: Do not sit on the appliance door or place or hang anything on it. Do not place any cookware or accessories on the appliance door. • Inserting accessories: depending on the appliance model, accessories can scratch the door panel when closing the appliance door.
-
Page 10: Specification
SPECIFICATION Model 7NM30T0 Rated Voltage: 220-240V~ 10A Rated Frequency: -60Hz Electric Power: 2.9 kW DATASHEET (EU 65/2014 & EU 66/2014) No of Cavities Heat Source Electric Usable Volume EC electric, cavity (Conventional) 1.06kWh/cycle EC electric, cavity (Forced Air) 0.69kWh/cycle EEICavity 81.9... -
Page 11: Product Overview 1
PRODUCT OVERVIEW Identifying The Appliance Cancel the current state and enter standby 1 Cancel mode. Use child-proof lock with 3s press. 2. Child-Proof Lock Use timer function. 3. Timer 4. Quick preheat Use this to have a quick preheat. Press this symbol to change heating mode, hold 5. - Page 12 Accessories Your appliance is accompanied by a range of accessories. Here, you can find an overview of the accessories included and information on how to use them correctly. Accessories included Your appliance is equipped with the following accessories: Wire Rack Wire Rack For ovenware, cake tins For ovenware, cake tins...
- Page 13 NOTE 1. Ensure that you always insert the accessories into the cavity the right way round. 2. Always insert the accessories fully into the cavity so that they do not touch the appliance door. Tilt protection Accessories can be approximately pulled halfway out until they lock in place. The locking function prevents accessories from tilting with the gravity of food and accessories themselves while they get pulled out.
-
Page 14: Product Installation 1
PRODUCT INSTALLATION Cupboard Diagram (Standing Cupboard) Air vents 6 0 0 5 6 0 M i n . 5 0 ≥ Minimum bottom ventilation area: 250 mm 2 Native appliance ≥ Reserve 5 mm for the door panel at the top and bottom respectively. - Page 15 Cupboard Diagram (Ground Cupboard) Air vents . 5 0 M i n 5 6 0 Minimum bottom ventilation area: 250 mm ≥ Native appliance Reserve 5 mm for the door panel at the top and bottom respectively. ≥ Reserve 20 mm for the door panel on the left and right respectively.
- Page 16 Fix The Telescopic Runners ( take the left side for example, same for right side) • Put the point A and B of the telescopic runners horizontally on the outer wire. • Rotate the telescopic runners anti-clockwise ( clockwise for right side ) by 90 degrees.
- Page 17 Remove The Telescopic Runners ( take the left side for example, same for right side) • Lift up one end of the telescopic runners hard. • Lift up the whole telescopic runners and remove backward. Change The Power Cord Position A show the terminal box position on the back of the back outer case and it’s closed.
-
Page 18: Operation Instructions 1
OPERATION INSTRUCTIONS Before Using The Appliance First using for the first time Before using the appliance to prepare food for the first time, you must clean the cavity and accessories. 1. Remove all stickers, surface protection foils and transport protection parts. 2. - Page 19 Types Of Heating Your appliance has various operating modes which make your appliance easier to use. To enable you to find the correct type of heating for your dish, we have explained the differences and scopes of application here. Types of Heating Temperature For traditional baking and roasting on one Conventional...
- Page 20 Caution If you open the appliance door during an on-going operation, the operation will not be paused. Please be especially careful with the risk of burns. NOTE 1. To defrost big portions of food, it is possible to remove the side-racks and place the container on the cavity floor.
- Page 21 Using Your Appliance: Change During Cooking During the period of appliance operating, you can change the heating type setting and temperature setting by oven-function or slider. After the change, if there no other action after 6 seconds, the oven will heat as what you changed. If you want change cooking duration time in the cooking process, please touch change it by slider or "</>"...
- Page 22 Demo With Sabbat Mode:Demo Mode Demonstration mode, with power-off saving data function. Power off saving function: for example, when the demo mode is set to on, power off and then on is still on. After the demonstration mode is turned on, the heating pipe does not work. 1.
- Page 23 Tips And Tricks Try to use settings of similar recipes first and You want to cook your own recipe optimize the cooking process due to the result. Put a wooden stick inside the cake about 10 minutes before the given baking time is reached. Is the cake baked ready? If there is no raw dough at the stick after pulling out, the cake is ready.
- Page 24 Use the tray filled with 2 liter of water in at level 1. How to keep clean the oven during Nearly all fluids drip down from the food placed grilling ? on the rack will captured by the tray. The heating element in all grilling It is a normal operation and depends on the modes are switching on and off over temperature setting.
- Page 25 Gugelhupf (with p.h.t.:11:00 Tray Conventional Yeast) b.t.:60:00 p.h.t.: 8:30 Muffins Muffin form Conventional b.t.: 30:00 Conventional p.h.t.: 8:30 Muffins Muffin form with Fan b.t.: 30:00 Apple Yeast Cake Conventional p.h.t.: 10:00 Tray on a Tray with Fan b.t.: 42:30 Water Sponge p.h.t.: 9:30 Spring form Conventional...
- Page 26 NOTE p.h.t means preheat time, b.t. means baking time. Duration in MEAT Form Level Mode Temp.in °C minutes Beef Tender Loin Double Grill Tray 1,6 kg with fan Meatloaf 1 kg Meat Tray Conventional L2:Rack Double Grill Chicken 1 kg Tray L1:Tray with fan...
- Page 27 Energy E ciency According To En 60350-1 Please note the following information: 1. The measurement is carried out in the “ECO” mode to determine the data regarding the forced air mode and the label-class. 2. The measurement is carried out in the “Top & Bottom Heating” mode to determine the data regarding the conventional mode.
- Page 28 Energy E cient Use 1. Remove all accessories, which are not necessary during the cooking & baking process. 2. Do not open the door during the cooking & baking process. 3. If you open the door during cooking & baking, switch the mode to “Lamp”. (Without change the temperature setting) 4.
-
Page 29: Cleaning And Maintenance 2
CLEANING AND MAINTENANCE Maintenance Your Appliance Cleaning Agent • With good care and cleaning, your appliance will retain its appearance and remain fully functioning for a long time to come. We will explain here how you should correctly care for and clean your appliance. To ensure that the different surfaces are not damaged by using the wrong cleaning agent, observe the information in the table. - Page 30 Hot soapy water: Clean with a dish cloth and then dry with a soft cloth. Door handle If descaler comes into contact with the door handle, wipe it off immediately. Otherwise, any stains will not be able to be removed. Enamel surfaces and self- Observe the instructions for the surfaces of the cooking cleaning surfaces...
- Page 31 • Remove flecks of food with sugar content immediately, if possible, when the fleck is still warm. • Use suitable ovenware for roasting, e.g. a roasting dish. Appliance Door • With good care and cleaning, your appliance will retain its appearance and remain fully functional for a long time to come.
- Page 32 Removing The Appliance Door • Open the appliance door fully. • Fold open the two locking levers on the left and right. • Close the appliance door as far as the limit stop. • With both hands, grip the door on the left- and right-hand side, and pull it out upwards.
- Page 33 Fitting The Appliance Door Reattach the appliance door in the opposite sequence to removal. • When attaching the appliance door, ensure that both hinges are placed right onto the installing holes of the front panel of the cavity. Ensure that the hinges are inserted into the correct position. You must be able to insert them easily and without resistance.
- Page 34 Removing The Door Cover The plastic inlay in the door cover may become discolored. To carry out thorough cleaning, you can remove the cover. Remove the appliance door like instructed above. • Press on the right and left side of the cover. •...
- Page 35 Rails When you want have a good cleaning for the rails and cavity, you can remove the shelves and clean it. In this way your appliance will retain its appearance and remain fully functional for a long time to come. •...
-
Page 36: Trouble Shooting
TROUBLE SHOOTING Cure Your Appliance When Needed If a fault occurs, before calling the after-sales service, please ensure that is not because of incorrect operations and refer to the fault table, attempt to correct the fault yourself. You can often easily rectify technical faults on the appliance yourself. If a dish does not turn out exactly as you wanted, you can find many tips and instruc tions for preparation at the end of the operating manual. - Page 37 • A temperature different from the recipe is used. Double check the • The food is not suffcient cooked in the temperatures. The ingredient quantities time given by the recipe . are different to the recipe. Double check the recipe. •...
- Page 38 • Place a towel in the cold cavity to prevent damage. • Turn the glass cover anti-clockwise to remove it (Corner lamp); Pull the lateral grid out and then pry the glass cover off slightly by a tool with a flat head (Lateral lamp) •...
-
Page 39: Appliances Warranty Card
APPLIANCES WARRANTY CARD Please Keep Your Receipt as This Will Authenticate Your Warranty WARRANTY PERIOD For the period of T hree years from the date of original Retail purchase (the warranty period), we will warrant following “ ” appliances (Oven, Cooktop, Rangehood, Dishwasher) that fail to function properly under normal domestic use (single family use only) due to the manufacturers defect when installed and operated according to the “Instruction”... - Page 40 APPLIANCES WARRANTY CARD Please Keep Your Receipt as This Will Authenticate Your Warranty What’s not covered: This warranty • Does not cover any products used in multi families or outdoor or commercial or industrial applications. • Does not cover the cabinet, the floor or user attached things, any damage to the product resulting from alterations, neglect, accidents, shipping accident, incorrect installation, misuse or abuse, damage due to lightning or power surges, or work carried out by anyone other than an authorized Service Agent which list in this card.
- Page 41 APPLIANCES WARRANTY CARD Please Keep Your Receipt as This Will Authenticate Your Warranty 24MONTH WARRANTY REGISTRATION CARD MODEL NUMBER: SERIAL NUMBER: RECIEPT NUMBER: PURCHASE DATE: PURCHASE FROM: OWNERS NAME & PHONE NUMBER: ADDRESS: TO REGISTER YOUR PRODUCT FOR ITS 24 MONTHS WARRANTY, PLEASE COMPLETEAND KEEP THIS DOCUMENT IN AND YOUR RECIEPT IN A SAFE PLACE.
-
Page 42: Trademarks, Copyrights And Legal Statement
Midea may constitute trademark infringement or unfair competition in violation of relevant laws. This manual is created by Midea and Midea reserves all copyrights thereof. No entity or individual may use, duplicate, modify, distribute in whole or in part this manual, or bundle or sell with other products without the prior written consent of Midea. -
Page 43: Data Protection Notice
European Economic Area. Further information are provided on request. You can contact our Data Protection info@midea.net.au To exercise your rights such as right to object your personal date being processed for direct marketing purposes, please contact us via info@midea.net.au... - Page 44 PN:16171100A40304...
Need help?
Do you have a question about the 7NM30T0 and is the answer not in the manual?
Questions and answers