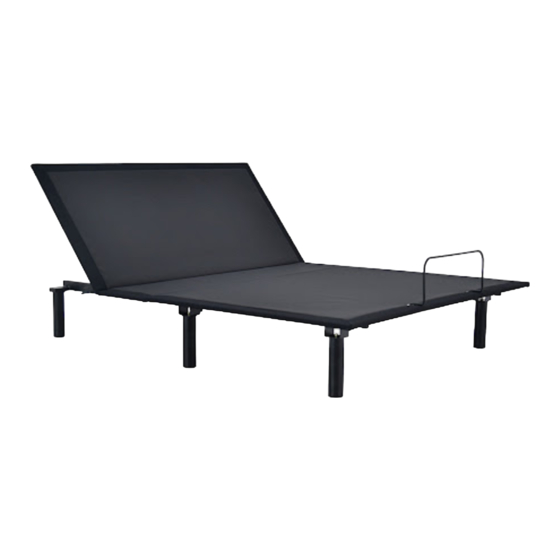
Summary of Contents for Ergomotion Rio 1.0
- Page 1 Rio 1.0 ADJUSTABLE BASE | OWNER’S MANUAL Customer Service : 1-888-550-3746 Actual product appearance and functionality may vary from photographs, illustrations and descriptions included in this manual.
-
Page 2: Table Of Contents
Table of contents Safety Precautions and Usage Statements ................1-3 Parts List . -
Page 3: Safety Precautions And Usage Statements
Safety precautions and usage statements Attention: Important Safety Disclaimers Read the following information before using this product. Failure to use a surge protection device could compromise safety or cause product malfunction and could void the electrical portion of your warranty. TO REDUCE THE RISK OF SHOCK, BURNS, FIRE OR INJURY: to play on or under the bed. - Page 4 Safety precautions and usage statements minimum level. If excessive noise or vibration is experienced, reverse the movement THAT “NEW PRODUCT” SMELL: action (up or down) of the base with the remote control. This should realign the base’s Some people notice a slight odor to their new adjustable base—this can come from activating mechanisms to the proper operational position.
- Page 5 Safety precautions and usage statements PRODUCT RATINGS: The lift motors are not designed to operate continuously for more than [2] minutes in an [18] minute time period or approximately 10% duty cycle. Attempting to circumvent or exceed this rating will shorten the life expectancy of the product and may void the warranty.
-
Page 6: Parts List
Parts list Before discarding the packing materials - ensure all the parts are accounted for. All electronics and components that need to be installed are located in boxes under the base or attached to the frame. Wired Remote Control Mattress Retainer Bar * Legs (6) Power Cord Power Supply... -
Page 7: Base And Remote Overview
Base and remote overview Head Motor Lift the Head Section Lower the Head Section... -
Page 8: Quick Reference Guide
Quick reference guide Not to scale. For illustration purposes only. Read all instructions before beginning installation. ELECTRONICS OVERVIEW Twin Long Overview Queen/Full Overview Remote Remote Power Cord Power Supply Power Cord Power Supply Splitter Cable Splitter Cable Sync Cord Head Motor Head Motor If installing a split unit, see pages 9-10. -
Page 9: Installation Guide
Ensure that the power supply and all attached cords are directed toward To install the legs, thread the leg into frame, and tighten by hand. Do not over the desired surge protector. tighten. For customer support, visit www.ergomotion.com or call: 1-888-550-3746... - Page 10 Setup is now complete! Test all functions on remote. STEP 8 Quickly test functions to verify proper setup before placing mattress on base. Return the base to a flat position before placing the mattress on top. For customer support, visit www.ergomotion.com or call: 1-888-550-3746...
-
Page 11: Connecting Strap
Connecting strap (optional) If a split setup is being installed, optional plastic connecting straps can be used to help secure the bases together. To purchase optional accessories, please call 1-888-550-3746. STEP 1 STEP 3 With the bases in their desired location, Re-tighten legs. -
Page 12: Syncing Two Bases
Syncing two bases (optional) A Sync Cord is included with the base. Not available on Queen, Full or Full-Long size bases. The Sync Cord connects the two control boxes to a single remote for the synchronization of two bases. This process is most commonly used for syncing two connected TXL bases. STEP 1 STEP 4 Plug bases back into the power source. -
Page 13: Headboard Brackets (Not Included)
Headboard bracket installation guide (optional) Headboard Brackets are an optional accessory and are not included. See parts list on page 4. STEP 1 STEP 2 a. Align the holes of the headboard bracket with the holes of the T-bracket a. Align the holes on the headboard bracket with the holes of t he sides of (the notch of the T-bracket with the holes on the backrest, and pan left the bed frame. -
Page 14: Troubleshooting
Plug bed base into a different electrical outlet, or test current outlet with another working appliance (a grounded, electrical surge protector is recommended). If issue is not resolved by following the instructions above, locate serial number on warranty card or back of remote and call Ergomotion Customer Service: US 1-888-550-3746... - Page 15 Notes...
- Page 16 Nationwide Customer Service ©2023 Ergomotion Inc V003_8/2023 Phone 1.888.550.3746 Email info@ergomotion.com www.ergomotion.com Serial Number:...


Need help?
Do you have a question about the Rio 1.0 and is the answer not in the manual?
Questions and answers