Table of Contents
Advertisement
Quick Links
Advertisement
Table of Contents

Related Manuals for Ergomotion RIO 1.0


Summary of Contents for Ergomotion RIO 1.0
- Page 1 A dju s t a b l e B a se O w n er 's Ma n u a l...
-
Page 2: Table Of Contents
Parts List Base Overview Electronic Overview Installation Guide 10 Remote Control 11 Connecting Strap (Optional) 12 Syncing Two Bases (Optional) 13 Headboard Bracket Installation (Not Included) 14 Troubleshooting 15 10 Year Limited Warranty View Setup Video Contact 1-888-550-3746 info@ergomotion.com ergomotion.com... -
Page 3: Important Safety & Usage Information
Important Safety & Usage Information consult your physician before using the massage feature. Read all instructions before using your adjustable base. Save these instructions. ADJUSTABLE BASE WEIGHT LIMITS: This product is not rated to support weights exceeding 750 TO REDUCE THE RISK OF SHOCK, BURNS, FIRE OR lbs (340 kg). - Page 4 IN-HOME USE AND HOSPITAL STANDARDS: Manual operation – If something gets caught in the platform Ergomotion adjustable bed bases are designed solely for when flattened, you can manually raise the platform up by in-home use. This base was not designed as a hospital bed lifting the head to relieve pressure and allow for release.
- Page 5 Important Safety & Usage Information BREAK IN PERIOD: FCC Compliance: You can speed up the break-in period by simply spending NOTE: This equipment has been tested and found to comply with the time in the adjustable bed through activities such as reading, limits for a Class B digital device, pursuant to part 15 of the FCC Rules.
-
Page 6: Parts List
Parts List Before discarding the packing materials, ensure all the parts are accounted for. All electronics and components are located in bags under the base or attached to the frame with twist ties or orange zip ties. (x6) ‡ ‡ Misc. -
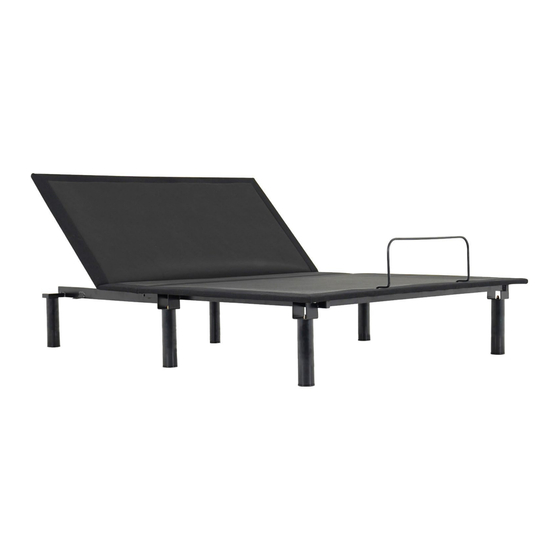
Page 7: Base Overview
Base Overview Head Motor - 7 -... -
Page 8: Electronic Overview
Electronic Overview Not to scale. For illustration purposes only. Read all instructions before beginning installation. Twin Long Overview For a split base setup, Remote Control pages 11-12. Power Supply Power Cord Splitter Cable Sync Cord Head Motor Queen/Full Overview Remote Control Power Supply Power Cord Splitter Cable... -
Page 9: Installation Guide
Installation Guide View Setup Video Always use two people when setting up the base. Uncoil the power cord and connect to the power Place the bed base box in a desired location supply. Place power supply on the ground and with the bottom of the box facing up. -
Page 10: Remote Control
Remote Control Lift the Head Section Lower the Head Section - 10 -... -
Page 11: Connecting Strap (Optional)
Connecting Strap (optional) If a split setup is being installed, optional plastic connecting straps can be used to help secure the bases together. To purchase optional accessories, please call customer service. With the bases in their desired location, slightly Slide side (a) of the connecting strap onto leg loosen both legs to allow the strap to fit on the leg bolt. -
Page 12: Syncing Two Bases (Optional)
Syncing Two Bases (optional) A Sync Cord is included with the base. Not available on Queen, Full or Full-Long size bases. The Sync Cord connects the two control boxes to a single remote for the synchronization of two bases. This process is most commonly used for syncing two connected TXL bases. Power Supply Power Cord Remote... -
Page 13: Headboard Bracket Installation (Not Included)
Headboard Bracket Installation (Not included) Headboard Brackets are an optional accessory and are not included. A hex key is included with the accessory kit to complete installation. Headboard Bracket (2)† T-Bracket (2)† Short Bolt (16)† M) Long Bolt (16)† N) Nut (16)† A. -
Page 14: Troubleshooting
Troubleshooting If one or more functions on the bed base have stopped operating: • Check under the bed base to verify that the wired connections are secure and that there are no cords or bedding obstructing the movement of the base. •... -
Page 15: 10 Year Limited Warranty
The purchaser shall pay This warranty requires notice to be given 1/5 of the current MSRP of the replacement part, or to Ergomotion of any claim for repairs or the entire adjustable base if deemed irreparable at replacement parts. - Page 16 This warranty is only valid in The United States, Canada and Puerto Rico. For all other jurisdictions, this Limited Product Warranty is valid only in the jurisdictions where the Products are sold by an Ergomotion authorized - 16 -...
- Page 17 US Customer Service ©2024 Ergomotion Inc V002_5/2024 Phone US 1-888-550-3746 US 1-805-979-9399 Email info@ergomotion.com www.ergomotion.com - 17 -...
Need help?
Do you have a question about the RIO 1.0 and is the answer not in the manual?
Questions and answers