Table of Contents
Advertisement
Quick Links
Advertisement
Table of Contents

Subscribe to Our Youtube Channel
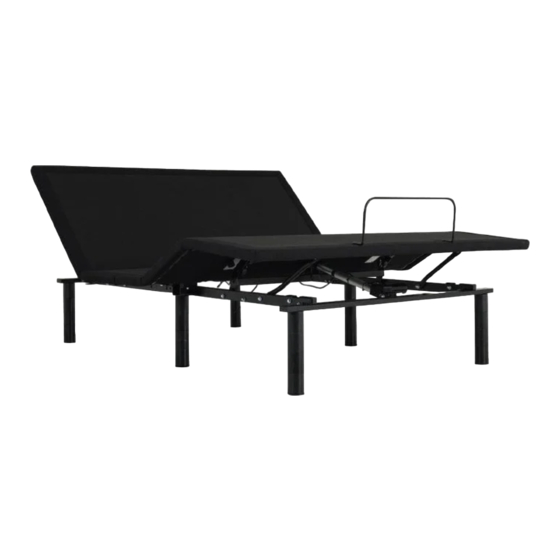
Summary of Contents for Ergomotion Rio 3.0
- Page 1 Rio 3.0 ADJUSTABLE BASE | OWNER’S MANUAL Customer Service : 1-888-550-3746...
-
Page 2: Table Of Contents
Table of contents Safety Precautions and Usage Statements . . . . . . . . . . . . . . . . . . . . . . . . . . . . . . . . . . . . . . . . . . . . . . . . . . . . . . . . . . . . . . . . . . . . . . . . . . 1-3 Parts List . -
Page 3: Safety Precautions And Usage Statements
Safety precautions and usage statements Attention: Important Safety Disclaimers Read the following information before using this product. Failure to use a surge protection device could compromise safety or cause product malfunction and could void the electrical portion of your warranty. TO REDUCE THE RISK OF SHOCK, BURNS, FIRE OR INJURY: operate the Battery Backup Box are on the Emergency Battery Backup page(s). - Page 4 To prolong the life of your fabric, protect from direct sunlight whenever All Ergomotion adjustable foundations, depending on make and model, are designed and manufactured to perform and function within designated quality control parameters. Bases are subject to meticulous and rigorous inspections during the quality control process to ensure bases will operate within these standards during normal operating use.
- Page 5 Safety precautions and usage statements minutes in an [18] minute time period or approximately 10% duty cycle. Attempting to circumvent or exceed this rating will shorten the life expectancy of the product and may void the warranty. The massage motors are not designed to operate continuously for more than 30 minutes at a time.
-
Page 6: Parts List
Parts list Before discarding the packing materials - ensure all the parts are accounted for. All electronics and components that need to be installed are located in boxes under the base or attached to the frame. Wireless Remote Control (1) Mattress Retainer Bar (1)* Legs (6) Power Cord (1) -
Page 7: Base And Remote Overview
Base and remote overview Head Motor Control Box Lifts & lowers the Lifts & lowers the head section. foot section. Underbed Underbed Lighting Lighting Underbed Lighting Zero-G® Preset On/Off One-touch Flat FavoritePosition (Programmable) Foot Motor... -
Page 8: Quick Reference Guide
Quick reference guide Not to scale. For illustration purposes only. Read all instructions before beginning installation. ELECTRONICS OVERVIEW Remote Emergency Battery Backup Strap Control Head Motor Power Cord Power Supply Input Cord Underbed Lighting Foot Motor If installing a split unit, see pages 11-12. -
Page 9: Installation Guide
Uncoil the power cord and connect to the power supply. Place power supply on the ground and extend from the base. Ensure that the power supply and all attached cords are directed toward the desired surge protector. For customer support, visit www.ergomotion.com or call: 1-888-550-3746... - Page 10 Ensure batteries are correctly installed in the back of the remote. Quickly test functions to verify proper setup before placing mattress on base. Return the base to a flat position before placing the mattress on top. For customer support, visit www.ergomotion.com or call: 1-888-550-3746...
-
Page 11: Remote Control
Remote control Remote Control arrives paired to the adjustable base. Three (3) AAA batteries are required to operate the remote. REMOTE FUNCTIONS A. Head Articulation: Raises and lowers the head end of the adjustable base. B. Foot Articulation: Raises and lowers the foot end of the adjustable base. -
Page 12: Pairing The Remote
The remote will now operate normally. Release the PAIR button on the remote. STEP 3 Test all remote functions. If the remote buttons do not impact the adjustable base movements, please repeat the process again or call Ergomotion customer service: 1-888-550-3746... -
Page 13: Connecting Strap
Connecting strap (optional) If a split setup is being installed, optional plastic connecting straps can be used to help secure the bases together. To purchase optional accessories, please call 1-888-550-3746. STEP 1 STEP 3 Re-tighten legs. Do not over tighten. Use the remaining strap and repeat on With the bases in their desired location, other end of the base. -
Page 14: Syncing Two Bases
Syncing two bases (optional) A Sync Cord is included with the base. Not available on Queen, Full or Full-Long size bases. The Sync Cord connects the two control boxes to a single remote for the synchronization of two bases. This process is most commonly used for syncing two connected TXL bases. STEP 1 Unplug the base(s) from power source. -
Page 15: Headboard Brackets
Headboard bracket installation guide (optional) Headboard Brackets are an optional accessory and are not included. A hex key is included with the accessory kit to complete installation. STEP 1 STEP 2 a. Measure the distance between the mounting holes on the headboard a. -
Page 16: Emergency Battery Backup Strap
Battery backup strap (optional) For emergency use only, in case of a power outage. Batteries are not to be used for normal operation of the bed. STEP 1 STEP 3 Connect the Battery Backup Strap to the (2) Alkaline 9 Volt batteries. Do not mix Disconnect the Power Supply from the input power cord. -
Page 17: Troubleshooting
Plug bed base into a different electrical outlet, or test current outlet with another working appliance (a grounded, electrical surge protector is recommended). If issue is not resolved by following the instructions above, locate serial number on warranty card or back of remote and call Ergomotion Customer Service: US 1-888-550-3746... - Page 18 Nationwide Customer Service ©2022 Ergomotion Inc V002_01/2023 Phone 1.888.550.3746 Email info@ergomotion.com www.ergomotion.com Serial Number:...


Need help?
Do you have a question about the Rio 3.0 and is the answer not in the manual?
Questions and answers