Table of Contents
Advertisement
Quick Links
Advertisement
Table of Contents

Subscribe to Our Youtube Channel
Related Manuals for Philco PC 3181 N


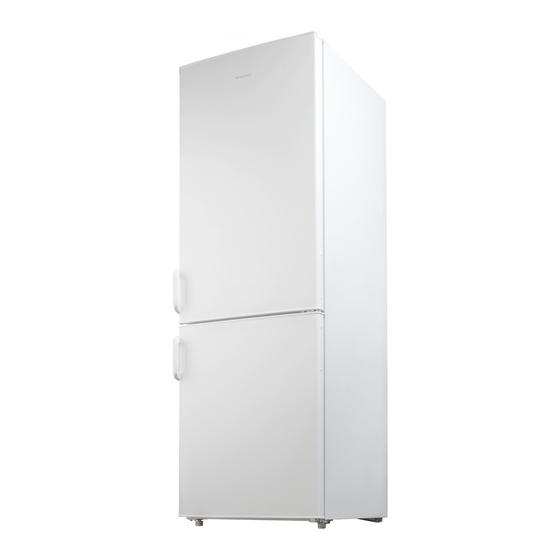
Summary of Contents for Philco PC 3181 N
- Page 1 TWO DOOR TWO DOOR REFRIGERATOR USER'S MANUAL PC 3181 N...
- Page 2 Dear customer, Thank you for buying a PHILCO brand product. So that your appliance serves you well, please read all the instructions in this user's manual.
-
Page 3: Table Of Contents
CONTENTS PART 1: BEFORE PUTTING INTO OPERATION ....................2 Safety notices ....................................2 Safety instructions for gas R600a ..............................4 PART 2: DESCRIPTION OF THE DEVICE ......................5 PART 3: INSTALLATION ............................ 6 Transport and unpacking ................................6 Placement ......................................7 ... -
Page 4: Part 1: Before Putting Into Operation
PART 1: BEFORE PUTTING INTO OPERATION Safety notice Symbols: General advice for the optimal operation of the appliance General dangers Hot surfaces Before you put the appliance into operation • Carefully study the user's manual and installation instructions before installing and using the appliance! This user's manual includes important information regarding the installation, operation and maintenance of the appliance. - Page 5 Do not place food inside the refrigerator containing fl ammable propulsion gases (e.g. sprays) and no explosives, contaminants or volatile substances. There is a danger of explosion! Do not store liquids inside bottles and cans (especially beverages containing carbon dioxide) inside the freezer compartment.
-
Page 6: Safety Instructions For Gas R600A
Technical safety The appliance contains a cooling gas, ISOBUTHAN (R600a). Only transport or move the appliance with the utmost care, prevent excessive impacts and shaking to prevent damaging the appliance. If the cooling circuit becomes damaged and the cooling gas may be escaping, there is a risk of an explosion, which may be ignited by a spark or fl ame. -
Page 7: Part 2: Description Of The Device
PART 2: DESCRIPTION OF DEVICE Outer case 12. Middle freezer drawer Air duct cover 13. Bottom freezer drawer Light cover 14. Levelling feet Decorative button 15. Refrigerator door Space for shelves 16. Egg holder The temperature dial (in the refrigerator compartment) 17. -
Page 8: Part 3: Installation
PART 3: INSTALLATION Transport and unpacking If the appliance is transported in a horizontal position the oil from the compressor may leak into the cooling circuit. For this reason, allow the appliance to rest in a vertical position for 12 hours before turning it on, so that the oil fl ows back into the compressor. -
Page 9: Placement
Installation location The installation location of the appliance must meet the requirements in the paragraph "Operating conditions" and must have a stable fl oor with a load bearing capacity corresponding to the weight of the appliance. Furthermore you must maintain distances and dimensions of the appliance, so that correct operation is ensured: Top part at least 20 cm;... -
Page 10: Cleaning Before Use
Cleaning before use Check that you have removed from the appliance all adhesive tape used to hold accessories . Then clean all the inside parts using lukewarm water with a neutral cleaning agent, vinegar or sodium carbonate – in this way you will remove the characteristic odour of new parts –... - Page 11 Tools 8mm socket wrench Philips screwdriver Spatula or a narrow fl at screwdriver NOTE: Prior to starting with the change, place the appliance on its back so as to gain access to its underside. Lay the appliance down on to a soft mat or similar material so that the cooling circuit located in the rear of the appliance is not damaged.
- Page 12 3. Using a screwdriver, screw out the special self-tapping screws, which are used for fastening the top hinge. Hold the refrigerator door with one hand so that it does not fall off . Special self-tapping Top right hinge screws Remove the axle of the top hinge, turn it around and secure it fi rmly in place. Pull out the top door upwards and place it on a soft mat with the inside part facing downwards.
- Page 13 Screw out the special self-tapping screws from the middle hinge and remove the middle hinge which is holding the bottom door. Middle hinge Special self-tapping screws Pull out the bottom door upwards and place it on a soft mat with the inside part facing downwards. Now perform the same procedure as in step 5.
- Page 14 Place the refrigerator on its back on a soft underlay. Take off both levelling feet. Remove the front foot plate and the bottom hinge by screwing out the special self-tapping screws. Front feet plate Bottom hinge Bottom part of the levelling Bottom part plate levelling...
- Page 15 12. Seat the bottom door on to the hinge pin, level and secure in place. 13. Turn the middle hinge by 180° and install on the other side in the middle section. Place the hinge pin of the middle hinge on the bottom door, level and secure in place with screws. EN - 13 Copyright ©...
- Page 16 14. Seat the top door on the hinge pin of the middle hinge. Level. Handle Handle 15. Install the top hinge on the other side in the top section. Place the hinge pin of the top hinge on the top door, level and secure in place with screws.
-
Page 17: Part 4: Operating The Appliance
PART 4: OPERATING THE APPLIANCE Setting the temperature in the refrigerator In the middle part of the refrigerator there is a temperature control dial that is used to control the temperature inside the refrigerator. You can set the temperature in the range: Cold – Mid – Colder. For standard operation we recommend that the appliance be set to the Mid temperature. - Page 18 Refrigerator accessories Refrigerator shelves The refrigerator shelves can be moved to a diff erent height if necessary by being inserted into a respective rail or taken out for easy cleaning. Shelves in the door These are used for storing smaller-sized food such as cheeses, meat, eggs and bottles. They can be installed at various heights as required.
-
Page 19: Part 5: Arrangement Of Food
PART 5: ARRANGEMENT OF FOOD Food products, which are susceptible to the absorption of odours or that release odours must always be stored in closed boxes or in appropriate packaging. Fruit, vegetables and salad products can be stored unpacked in the vegetable drawers. ... -
Page 20: Storage Of Frozen Food
Storage of frozen food All frozen food must be put into the freezer as soon as possible after being bought, so that they do not defrost and cause potential contamination. Store frozen products according to the manufacturer's instructions on the packaging. Pay increased attention to handling the drawer, so that you do not damage the cooling circuit. -
Page 21: Chart On Storing Food In The Freezer
Do not refreeze fully or partially defrosted food apart from the case where they were heat processed (cooked or fried/baked). Do not consume food that has been stored for a period longer than their expiry date. You may cause yourself food poisoning. -
Page 22: Part 6: Defrosting And Regular Maintenance
PART 6: DEFROSTING AND REGULAR MAINTENANCE For hygiene reasons, it is necessary to regularly clean the appliance (including the outside and inside accessories) at least once every two months. WARNING The appliance must not be connected to the power socket during cleaning. Danger of injury by electric shock! Before cleaning the appliance, disconnect the power plug from the power socket. - Page 23 Cleaning gasket seals Keep the door gasket seals clean. Sticky foods and beverages may cause the gasket seal to stick to the inner edge and result in damage when the door is opened. Wash the gasket seal with a soft wiping cloth dipped in warm water with a small amount of kitchen detergent.
-
Page 24: Part 7: What Should I Do When
PART 7: WHAT SHOULD I DO WHEN... If you notice problems with your appliance or if you fi nd that the appliance is not working properly, you can remedy some of the most common faults yourself prior to contacting an authorised service centre. Check the appliance and proceed according to the instructions below before contacting an authorised service centre. -
Page 25: Part 8: Information Sheet
INFORMATION SHEET: Philco Philco brand: Brand Philco Product number PC 3181 N Type of appliance 3) Energy effi ciency class (A... low electricity consumption to G high electricity consumption) Electricity consumption per 365 days 1) kWh Total available volume: l... - Page 26 INSTRUCTIONS AND INFORMATION REGARDING THE DISPOSAL OF USED PACKAGING MATERIALS Dispose of packaging material at a public waste disposal site. DISPOSAL OF USED ELECTRICAL AND ELECTRONIC APPLIANCES The meaning of the symbol on the product, its accessory or packaging indicates that this product shall not be treated as household waste.
Need help?
Do you have a question about the PC 3181 N and is the answer not in the manual?
Questions and answers