HUANUO HNCM7 Instruction Manual
Desk monitor arm
Hide thumbs
Also See for HNCM7:
- Instruction manual (8 pages) ,
- Manual (8 pages) ,
- Instruction manual (36 pages)

Related Manuals for HUANUO HNCM7


Summary of Contents for HUANUO HNCM7
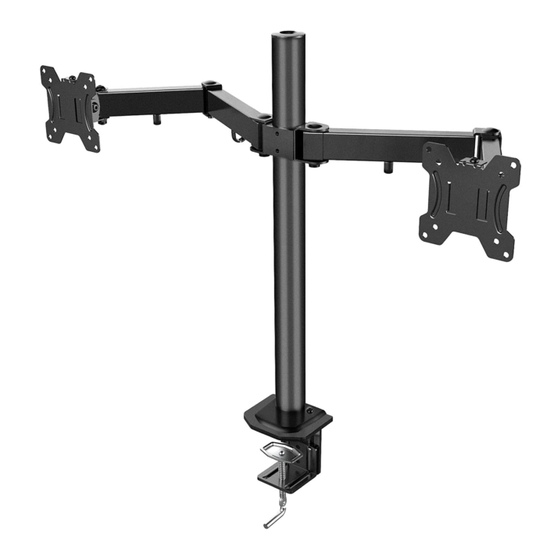
- Page 1 INSTRUCTION MANUAL Rev00(A) HNCM7 Desk Monitor Arm support@huanuo.com (US/CA) 1-800-556-0533 (UK) 44-808-196-3874 www.huanuo.com WWW.
- Page 2 If you DO NOT understand the instructions or have any questions or concerns, please contact our technical support line at 1-800-556-0533 (US/CA) / 44-808-196-3874 (UK) or customer service at support@huanuo.com. · Not all hardware included in this package will be used. CAUTION ·...
- Page 3 Contents M8 X 8mm C-Clamp Locking Plate Bottom Pad Bolt [a] x 1 [b] x 1 [E1] x 2 3/16″ (5mm) 1/8″ (3mm) Pole Large Allen Key Small Allen Key [E2] x 1 [F1] x 1 [F2] x 1 Swivel Arm Decorative Cover [D2] x 1 M4 x 12mm...
-
Page 4: Step 1 Install The Base
Step 1 Install the Base Option A: For C Clamp Mounting ″ ″ (10mm - 78mm) - Page 5 Option B: For Grommet Mounting Phillips Screwdriver (Not lncluded) Remove the pre-assembled washer and bolt on the locking plate [a]. Electric Drill (Not lncluded) 7/16 - 7/8″ 7/16 - 7/8″ (11 - 22mm) (11 - 22mm) ″ ″ (10mm - 78mm) ≥2″...
- Page 6 Secure the Swivel Arm [03] and Decorative Cover [D2] to Step 2 the Pole [01] NOTE: The bolt should be directed toward the top. Height Adjustment Slide the swivel extension arm [03] downwards to your desired height, and tighten the nuts [F1] to hold the arm in place.
- Page 7 Step 3 Attach the VESA Plates to the Monitors Select Monitor Bolts M4 x 30mm M4 x 12mm Hand thread bolts into the threaded inserts on the back of your TV to determine which bolt (M4 x 12mm or M4 x 30mm) to use. A minimum of 4-5 turns into the threading is required. Do not turn past the bottom of the hole.
- Page 8 Option B (For Curved TVs) Step 4 Hang the Monitors on the Swivel Arm 3/8″ (10mm) Wrench (Not lncluded) Hang the monitor on te head of the swivel arm using the hanging tab and nut [E3]. Tighten the nut [E3]. Make sure the nut is secured before you rotate the monitor.
- Page 9 Step 5 Alignment of Two Monitors 3/8″ (10mm) Wrench NOTE: Ignore this step (Not lncluded) if monitors are level. Loosen Tighten Remove the nut [E3] with wrench, then turn the bolt with small Allen key [F2] to raise or lower the monitor. Then retighten the nut [E3] after adjustment. Individual monitor height adjustment helps to perfectly align the monitors.
-
Page 10: Step 6 Tilt Adjustment
Step 6 Tilt Adjustment Tilt Tilt Tighten Loosen The monitor should adjust easily when moved, then stay in place. Adjust the tilt tension bolt [T] if your monitor naturally tilts up or down. -
Page 11: Step 7 Cable Management
Step 7 Cable Management Swivel Swivel Swivel Swivel Swivel NOTE: You can rotate the monitor or swivel the arm manually. Cable Tie x 6 WARNING: Ensure the monitor bolts and bolts securing the monitors to the mount are fully tightened before rotation. Step 8 Rotation Restriction WARNING: To avoid tipping, please be careful not to extend the arms too far forward or backward. - Page 12 (US/CA) 1-800-556-0533 (UK) 44-808-196-3874 support@huanuo.com WWW. www.huanuo.com 860-00889-00 Rev00...
Need help?
Do you have a question about the HNCM7 and is the answer not in the manual?
Questions and answers