Table of Contents
Advertisement
Quick Links
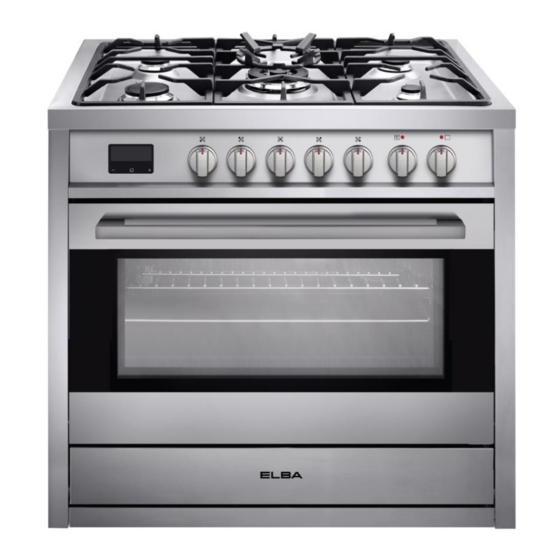
PROF. RANGE COOKER
MODEL: EPRC-H9880ST(SS)
Owner's Manual
Please read this manual carefully before
operating your set.
Retain it for future reference.
Record model number and serial number
of the set.
See the label attached on the set and
quote this information to your dealer
when you require service.
For The Warranty Terms & Conditions, Please Refer To Warranty Certificate
Advertisement
Table of Contents

Related Manuals for Elba EPRC-H9880ST


Summary of Contents for Elba EPRC-H9880ST
- Page 1 PROF. RANGE COOKER MODEL: EPRC-H9880ST(SS) Owner’s Manual Please read this manual carefully before operating your set. Retain it for future reference. Record model number and serial number of the set. See the label attached on the set and quote this information to your dealer when you require service.
-
Page 2: Table Of Contents
CONTENTS SAFETY PRECAUTIONS …………..…………………………………………………………………………………………….1 INSTRUCTIONS FOR INSTALLATION …………………………………………………………………………………………2 2.1 DIMENSIONS AND INSTALLATION………………………………………………………………………………………………2 2.2 ELECTRICAL CONNECTION…………………………………………………………………………………………………………3 2.3 ELECTRICAL FEATURES………………………………………………………………………………………………………………4 2.4 VENTILATION……………………………………………………………………………………………………………………………4 2.5 COMBUSTIBLE SURFACE……………………………………………………………………………………………………………4 2.6 GAS CONNECTION………………………………………………………………………………………………………………………4 2.7 ADAPTATION TO DIFFERENT TYPE OF GAS (NATURAL GAS)………………………………………………………5 2.8 ABNORMAL OPERATION……………………………………………………………………………………………………………5 INSTRUCTION FOR USE (HOB) ……..…………………………..…………………………………………………………6 3.1 RECOMMENDATIONS…………………………………………………………………………………………………………………7 INSTRUCTION FOR USE (OVEN) -
Page 3: Safety Precautions
Please read this instruction carefully. It is advisable to keep this instruction manual in a safe place for future reference. SAFETY PRECAUTIONS 1. Keep electrical appliances out of reach from children. Do not let them to operate the appliances without supervision. 2. -
Page 4: Instructions For Installation
INSTRUCTIONS FOR INSTALLATION DIMENSIONS AND INSTALLATION WARNING: a) Prior to installation, ensure that the local distribution conditions (nature of the gas and gas pressure) and the adjustment of the appliance are compatible; b) The adjustment conditions for the appliance are stated on marking plate; Make sure the appliance is not connected to the combustion products evacuation device. -
Page 5: Electrical Connection
The appliance is supplied with an anti-tilting chain to prevent the appliance from tilting forward and accidental damage to the gas pipe. Take the expansion with hook and make an adequate hole in the wall behind, at the same height as the chain fixing area. -
Page 6: Electrical Features
ELECTRICAL FEATURES Oven light 2 x 25W Upper heating element 2200W Bottom heating element 1800W Grill heating element 2900W Circular heating element 2 x 1250W Ventilator motor 2 x 20W VENTILATION In general, the appliance should have adequate ventilation for complete combustion of gas, proper flueing and to maintain temperature of immediate surroundings within safe limits. -
Page 7: Adaptation To Different Type Of Gas (Natural Gas)
ADAPTATION TO DIFFERENT TYPE OF GAS (NATURAL GAS) To adapt the appliance to a gas different from LPG, kindly please contact the authorized service centre for service. 1) Remove the grids 2) Remove the burner caps and burner heads. Unscrew and remove the nozzles. -
Page 8: Instruction For Use (Hob)
INSTRUCTION FOR USE (HOB) DESCRIPTION OF THE MAIN PARTS OF THE APPLIANCE 1 – Cast Iron Trivet 2 – Burner Cap 3 – Burner Base 4 – Ignition 5 – Safety Valve (Flame Failure Device) 6 – Knob DESCRIPTION OF SYMBOLS Bottom Left Burner Top Left Burner Center Burner... -
Page 9: Recommendations
RECOMMENDATIONS In case of electric power failure, it is necessary to carry out the above-described operations by putting a gas lighter or a flame near the burner (in such an event, pay the utmost attention not to burn yourself). The safety valve (for models where such item is provided) intervenes in case of accidental flame failure, blocking the gas delivery (e.g.: air draughts, spillage of liquids, etc.). -
Page 10: Instruction For Use (Oven)
INSTRUCTION FOR USE (OVEN) ELECTRIC OVEN THERMOSTAT KNOB Selection of cooking temperature is carried out by turning the knob clockwise to the required temperature, between 60℃ and MAX. The warning light will come on when the oven is heating up. When it goes out it means that it reaches the required temperature. - Page 11 LAMP The lamp of the oven is on, with no heating elements operated (electrical resistances). This function is to display the food inside the oven until the function is switched off. CONVENTIONAL HEATING The heat is provided from the top and bottom elements. The oven must be preheated before the food is placed inside.
- Page 12 DEFROSTING The fan makes the air circulate at room temperature around the food. This is recommended for the defrosting of all types of food, but in particular for delicate types of food which do not require heat such as ice cream cakes, cream or custard desserts, fruit cakes and etc.
-
Page 13: Table Of Cooking Time
to be 13:15, the oven will start automatically. When the clock turns to be 14:00, the cooking process is done. BUZZER The digital countdown timer can be set up to 23 hours 59 Minutes maximum. To set the Buzzer, press the button repeatedly until the bar of the flashes. - Page 14 Function Level Preheating Temperature Cooking Weight Knob Food to be cooked from Time Time (kg) Setting Bottom (Minutes) (ºC) (Minutes) Top Element Cooking Browning food to perfect cooking 8-10 Soles and cuttlefish Squid and prawn Kebabs Top Grilling Cod filet 10-15 Grilled vegetables Veal steak...
-
Page 15: Maintenance And Cleaning
MAINTENANCE AND CLEANING Do not use jet steam cleaner for cleaning. Before any operation disconnect the appliance from the power supply. Wash the enamel parts with lukewarm water and mild detergent. Do not use abrasive detergent to clean the appliance. Wash the burner spreader frequently with boiling water and detergent to make sure remove any deposits after cooking which could block the flame outlet. -
Page 16: Cleaning The Oven Door
CLEANING THE OVEN DOOR In any case that you need to remove the oven door for better and thorough cleaning, you are required to dissemble the oven door from the appliance. Open the door completely. Lift up and turn the small levers located on the two hinges of the oven door. -
Page 17: Technical Specifications
TECHNICAL SPECIFICATIONS NOTICE This product must not be disposed together with domestic waste. It has to be disposed at an authorized place for recycling of electrical and electronic appliances. By collecting and recycling waste, you help to save natural resources and make sure the product is disposed in an environmental friendly and healthy way.
Need help?
Do you have a question about the EPRC-H9880ST and is the answer not in the manual?
Questions and answers