Table of Contents
Advertisement
Quick Links
Advertisement
Table of Contents

Related Manuals for Genie CCTV ZW2812


Summary of Contents for Genie CCTV ZW2812
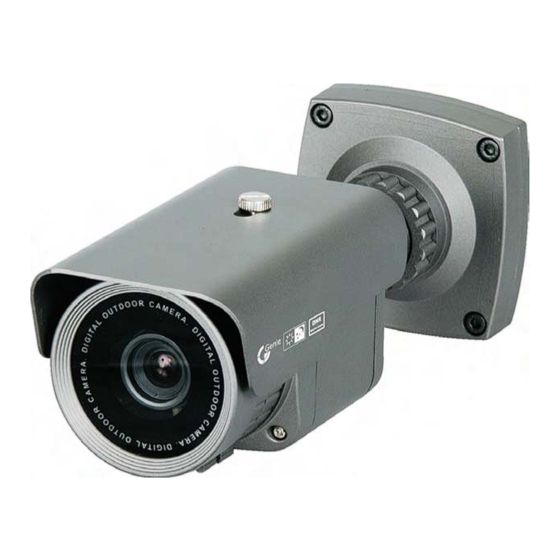
- Page 1 USER MANUAL WDR TRUE DAY&NIGHT CAMERA ZW2812...
-
Page 2: Table Of Contents
Contents About WDR/BLC/ 3 D DNR Specification Safety Instruction General Features Set Up Menu Special Menu Menu Set Up ► Menu Set Up ► Lens Set Up ► Exposure ► White Bal. ► BLC ► SDNR ► Day & Night ►... - Page 3 WDR DAY & NIGHT COLOUR CAMERA WDR DAY & NIGHT COLOUR CAMERA...
- Page 4 Wide Dynamic Range Camera OSD Control 0.00004Lux 1/3” SONY Ver cal Double Density Interline CCD Sensor NTSC=811(H) * 508/(V) / PAL=795(H) * 595(V) Total Pixels NTSC=768(H) * 494(V) / PAL=752(H) * 582(V) Effec ve Pixels 2:1 Interlace Scanning System Internal Synchronisa on Built-in (English, Japanese, Spanish) O.S.D...
- Page 5 Precautions for use Please read this manual thoroughly before using the camera to become familiar with the correct operational procedures. Cautions When Using Do not open the camera body and touch any electrical parts to avoid possible electric shocks. Do not insert objects into the camera body to prevent fire hazards and electric shock. Do not touch the camera with wet hands to avoid electric shock.
- Page 6 WDR (Wide Dynamic Range) The Genie INTUS range of camera uses very advanced WDR technology, which gives clear images even where the scene is strongly backlit. Adjustable sensitivity. 560TV Lines The combination of Sony Super HAD CCD image sensor and DNR DSP provides an excellent resolution of 560 TV Lines.
-
Page 7: Set Up Menu
SET UP MENU DEFAULT SET MENU LENS DC / MANUAL 2.8 - 12mm DC Auto IRIS Vari-Focal Lens A.FLK SHUTTER MANUAL(x256-120K) ESC(BRIGHTNESS: Level Selectable) SHUTTER :- EXPOSURE AGC: LOW AGC: OFF / LOW / HIGH SENS-UP: OFF SENS-UP: OFF / AUTO(2-256 Level Selectable) RETURN INDOOR / OUTDOOR / AWC / ATW WHITE BAL. - Page 8 SET UP MENU DEFAULT SET MENU CAMERA TITLE ON / OFF SYNC INT / ---- SENSITIVITY: AREA I AREA MODE: OFF SEL POS: L - TOP MOTION DET. X POS: Level Selectable Y POS: Level Selectable FILL RETURN AREA SEL: AREA I AREA MODE: TOP / BOTTOM / LEFT / RIGHT MASK COLOUR: GREEN / RED / BLUE PRIVACY...
-
Page 9: Exposure
Menu items can be selected by using the OSD buttons of the camera. I. Press the Set Up button. The Set Up menu will be displayed on the monitor. MAIN SETUP LENS EXPOSURE WHITE BAL BACKLIGHT SDNR DAY / NIGHT AUTO IMAGE ADJ SPECIAL... -
Page 10: Image Adj
3. Changing menu settings using the Left or Right button. Available values or Status are displayed by pressing the Left or Right buttons. Press the button until desired value / status is displayed. 4. After completing the setting move the arrow indicator to EXIT and press the SET button to EXIT NOTE Move to available submenu by moving arrow to desired feature. - Page 11 NOTE When DC is selected the brightness can be adjusted. The brightness control range is 1 ~ 70. L E N S BRIGHTNESS I---------I---------I 70 Press Set to Return 3. Press the SETUP button to return to the previous menu. This function is used to select Automatic or Manual shutter speed control.
- Page 12 EXPOSURE SETUP SHUTTER HIGH SENS - UP RETURN NOTE To produce better results with FLK, do not use it in conjunction with the WDR mode in the BACKLIGHT menu. When the SHUTTER is set to ESC and the CAMERA is using internal synchronisation, the picture may become unstable if the camera is facing a bright fluorescent light.
- Page 13 SENS - UP: At night and/or in dark conditions, the camera automatically detects the light level and maintains a clear picture when this mode is activated. OFF: Disables the SENS-UP function. AUTO: Enables the SENS-UP function. LIMIT AUTO Press SET to Return RETURN: Select Return to save the changes in the EXPOSURE menu and retun to the SETUP menu.
- Page 14 The White Balance function is used to control the “on-screen” colours. I. Move the arrow indicator to WHITE BAL on the SETUP menu screen using the Up and Down button. 2. Select the desired mode by using the Left or Right button. MAIN SETUP LENS EXPOSURE...
- Page 15 NOTE Under the following conditions the White Balance function may not operate correctly. In such case, please select the AWC mode. When the scene has a very high colour temperature.(Ex: Blue Sky, Sunset, etc.) When the scene and/or its surroundings are dark. When the camera is installed in a place with considerable changes in illumination or is facing directly into a fluorescent light source.
- Page 16 WDR ON WDR OFF . Select a mode using the Left and Right buttons then press the SET button. Select WDR to ad ust the WDR LIMIT and LE EL. LIMIT: Ad ust the WDR sensitivity by selecting LOW, MIDDLE or HIGH. LE EL: Ad ust the WDR brightness between WDR LlMIT LIMIT...
- Page 17 NOTE The WDR mode cannot be used when FLK mode is selected in the SHUTTER. The following symptoms may occur, according to the ambient illumination, when WDR is selected, if they do, set WDR to OFF. Colour or screen changes unnaturally. Noise appears within the brightest part of the screen.
- Page 18 3. Select the SDNR mode to ON and press the SET button to adjust noise reduction level. SDNR LEVEL Press SET to Return NOTE SDNR cannot be set to ON or OFF when AGC is OFF, AGC mode is in the EXPOSURE menu . When adjusting the SDNR noise reduction level, please remember that when higher SDNR levels are set noise is greatly reduced, but this can cause ghosting to occur.
- Page 19 2. Select the desired mode using the Left and Right buttons. COLOUR: The picture is always displayed in colour. B/W: The picture is always displayed in black and white. AUTO: The mode automatically switches to COLOUR in normal conditions and switches to B/W mode when ambient illumination is low.
- Page 20 I. When the SETUP menu screen is displayed, select IMAGE Adj. using the Up and Down buttons. MAIN SETUP LENS EXPOSURE WHITE BAL BACKLIGHT SDNR DAY / NIGHT AUTO IMAGE ADJ SPECIAL EXIT 2. Select the desired mode by using the Up or Down button. IMAGE SETUP I.
- Page 21 D·ZOOM LEVEL Press SET to Return SHARPNESS: Improves image clarity. The level can be adjusted to obtain an improved image. However, when the level is set too high it can distort the image or cause noise. SHARPNESS LEVEL Press SET to Return RETURN: Select Return and press SET to save the settings for the IMAGE Adj.
-
Page 22: Sync
When the SETUP menu screen is displayed, select SPECIAL using the Up and Down buttons. MAIN SETUP LENS EXPOSURE WHITE BAL BACKLIGHT SDNR DAY / NIGHT AUTO IMAGE ADJ SPECIAL EXIT Select one of the mode using the Up and Down button. SPECIAL I.CAMTITLE 2. - Page 23 NOTE When CAMERA TITLE is set to OFF, the CAMERA TITLE is not displayed on the monitor. 1-3) Press the SETUP botton. CAMERA TILE SETUP A B C D E F G H I J K L M NOPQRSTUVWXYZ a b c d e f g h i j k l m n o p q r s t u v w x y z , 0 1 2 3 4 5 6 7 8 9 ←...
- Page 24 NOTE In cases where the wrong Camera ID has been input..Move the cursor to CLR and press SETUP button to erase characters from left to right, and repeat the above steps to input the characters again. 1-5) To select the position where the Camera ID should be displayed on the screen. Move the cursor to POS and press the SET button.
- Page 25 Select a new position by using the four directional buttons. Press the SET button to confirm the position. 1-6) Move the cursor to END and press the SET button after completing the above process. 2. SYNC: -INT : Internal Synchronisation 3.
- Page 26 3-2) Set up the detection areas using the four direction buttons. SENSITIVITY: Select up to 8 MD areas. When the SENSITIVITY is set too high, motion detection sensitivity is increased and responds to even small movements. AREA MODE: Determines whether the MD area selected in SENSITIVITY is used. SEL POS: Determines which of the four vertices of each MD area is to be used.
- Page 27 4. PRIVACY Hide an area you want to hide on the screen. 4-1) When the SPECIAL menu screen is displayed press the Up and Down buttons to set to PRIVACY. PRIVACY I. AREA SEL AREA I 2. AREA MODE 3.MASK COLOUR GREY 4.
- Page 28 NOTE The chance of resolution decrease exists with the DIS function and the digital zoom. DIS does not operate if the background illumination is too low. DIS does not operate when the object pattern is monotonic, such as, blue sky or white walls. 6.
-
Page 29: Language
7. LANGUAGE: Select the menu language according to local requirements through the multi language settings. 8. RESET: Resets the camera settings to the factory defaults. 9. RETURN: Select this to save the SPECIAL menu settings and return to the SETUP menu. Press the SET button in the EXIT menu to save the current settings and exit the SETUP menu. - Page 30 * Camera Adjustment Connect Video & Power Line (AC 24V or DC 12V Regulated Power) Position the camera for the correct angle of view. Loosen the locking screws and focus the camera. Re-tighten the locking screws. WDR DAY & NIGHT COLOUR CAMERA WDR DAY &...
- Page 31 Check the power cable, power supply output and video Northing appears on connection between the camera and monitor. the screen. Are the camera lens or the lens glass dirty? Clean the lens /glass with a soft clean cloth. The image on the Adjust the monitor controls, as required.
- Page 32 Edition : GN February 2011...
Need help?
Do you have a question about the ZW2812 and is the answer not in the manual?
Questions and answers