Table of Contents
Advertisement
Quick Links
Advertisement
Table of Contents

Related Manuals for Genie CCTV GMC3CH


Summary of Contents for Genie CCTV GMC3CH
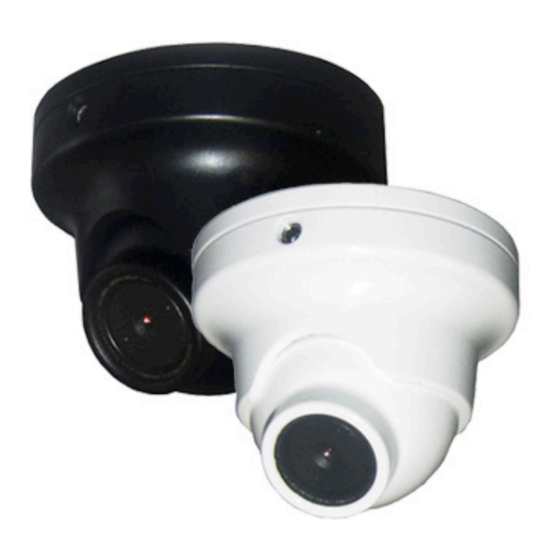
- Page 1 GMC3CH & GMC3CHIR Series Colour Micro-Cannon Vandal Cameras User Manual...
- Page 2 CAUTION RISK OF ELECTRIC SHOCK CAUTION DO NOT OPEN CAUTION RISK OF ELECTRIC SHOCK CAUTION:TO REDUCE THE RISK OF ELECTRIC SHOCK RISK OF ELECTRIC SHOCK DO NOT OPEN DO NOT OPEN DO NOT REMOVE COVER(OR BACK). CAUTION:TO REDUCE THE RISK OF ELECTRIC SHOCK NO USER-SERVICEABLE PARTS INSIDE.
-
Page 3: Table Of Contents
Contents General Features......................4 Precautions........................5 Safety Instructions ......................6 How to Set Up the Camera Menu..................7 Menu Set Up........................10 Lens ..........................11 Exposure .........................12 White Balance .........................14 Day & Night ........................15 3DNR ..........................16 Special ..........................17 Adjust..........................21 Reset ..........................21 Exit...........................21 Camera Installation......................22 Cable Connection ......................22 Package...........................23 Specification ........................23 Dimensions ........................24... -
Page 4: General Features
General Features • 700TV Lines The combination of a 960H CCD image sensor and DSP provides an excellent resolution of 700TVL • 3D-DNR Smart 3DNR prevents the image blurring of moving object and activates only if moving objects are appearing on th scene. •... -
Page 5: Precautions
Precautions Do not install or use the Do not install the camera Do not install the camera in camera in an environment under unstable lighting extreme temperature where the humidity is high. conditions. conditions. Only use the camera under conditions where temperatures are between -10°C and +50°C. -
Page 6: Safety Instructions
Safety Instructions • To avoid electrical shock, do not open the case of this product. • Only use a regulated DC12V Power Supply to operate this product, such as the Genie PSU1SM. • Do not overload electrical outlets or extension cords; this can result in a fire or electrical shock. •... -
Page 7: How To Set Up The Camera Menu
How to Set Up the Camera Menu Setup Menu Colour Micro-Cannon Vandal Cameras... - Page 8 Colour Micro-Cannon Vandal Cameras...
- Page 9 Colour Micro-Cannon Vandal Cameras...
-
Page 10: Menu Set Up
Menu Set Up Menu settings can be selected using the buttons inside the camera. 1. Press the SET button. * The Set Up menu will be displayed on the monitor. SETUP LENS DCAUTO EXPOSURE WHITE BAL DAY&NIGHT COLOR 3DNR SPECIAL ADJUST RESET EXIT... -
Page 11: Lens
Lens This function adjusts the brightness of the image being displayed on the monitor. 1. Move the cursor to LENS using the Up and Down buttons on the Set Up menu screen. 2. Select the desired lens type by pressing the Left or Right button. SETUP LENS DCAUTO... -
Page 12: Exposure
Exposure 1. On the Set Up menu, Select EXPOSURE using the Up or Down buttons. SETUP LENS EXPOSURE WHITE BAL DAY&NIGHT COLOR 3DNR SPECIAL ADJUST RESET EXIT 2. Select the desired shutter mode by pressing the Left or Right button. EXPOSURE SHUTTER AUTO... - Page 13 • Sens Up: The degree of darkness is automatically sensed and compensated for. - Off: Deactivated status - Auto: Sens Up is in automatic mode and the gain is decided by the low luminance level. SENSE-UP SENSE-UP RETURN NOTE * Sens Up mode does not work when AGC is off. •...
-
Page 14: White Balance
• D-WDR: This camera has 3D-DNR which provides intelligent light level control even when strong backlight is present. - Off: Deactivated status. - Indoor Compensation: To be used when the camera is installed internally. - Outdoor Compensation: To be used when the camera is installed externally. WDR OFF WDR ON •... -
Page 15: Day & Night
NOTE White Balance may not work correctly in the following conditions: * When there is a very high colour temperature within the subject, for example a sunset in a clear sky. * It is very dark * If the camera is pointed towards fluorescent light, or there is a drastic change in lighting, the White Balance operation may become unstable. -
Page 16: 3Dnr
3DNR 3DNR decreases noise caused by low luminance levels. 1. Move the cursor to 3DNR using the Up and Down buttons. 2. Select the mode using the Right or Left button. SETUP LENS EXPOSURE WHITE BAL DAY&NIGHT COLOR 3DNR SPECIAL ADJUST RESET EXIT... -
Page 17: Special
Special This menu is used to select additional control functions. 1. When the SETUP menu is displayed, select SPECIAL using the Up and Down buttons. 2. Select one of the modes using the Up and Down buttons. SETUP LENS EXPOSURE WHITE BAL DAY&NIGHT COLOR... - Page 18 • D-EFFECT: This function allows the video image to be manipulated. D-EFFECT FREEZE MIRROR D-ZOOM - - - SMART DZOOM - - - NEG.IMAGE RETURN - FREEZE: Causes the video image to freeze. - MIRROR: Causes the video image to be reversed vertically or horizontally. - D-Zoom: Implements a digital zoom of the image with x1~x32 magnification.
- Page 19 • SMART DZOOM: This function is interlocked with D-ZOOM to distinguish specific objects in greater detail when movement is detected in programmed areas. This function is much more effective when used with optical zoom. - DIS (Digital Image Stabiliser): DIS compensates for slight image movements in the camera moves because of environmental conditions i.e.
- Page 20 • PRIVACY: The Privacy function is used to mask certain areas of the surveillance scene. Up to 8 areas can be defined and their size is adjustable. Fifteen colours are available to differentiate areas. When RETURN is selected all changes ae saved. PRIVACY AREA AREA DISPLAY...
-
Page 21: Adjust
Adjust This function is used to adjust the video output, and to select the type of monitor where it’s being displayed. 1. When the Set Up menu is displayed select ADJUST using the Up and Down buttons. SETUP LENS EXPOSURE WHITE BAL DAY&NIGHT COLOR... -
Page 22: Camera Installation
Camera Installation 1. Loosen the two locking screws (1), using the supplied L-Wrench and remove the mounting base. 2. Attach the mounting base (2) to a suitable solid surface, such as a wall or ceiling. On partioning locate a wall stud or ceiling joist. Secure the mounting base using the supplied screws (3). Fit the camera (4) to the mounting base (2) and fix it into position using the two locking screws (1). -
Page 23: Package
1x User Manual • 1x Camera • 1x L-Wrench • 3x Screws Specification Model Number GMC3CH GMC3CHW GMC3CHIR GMC3CHIR/W Image Sensor 1/3” Colour 960H CCD Effective Pixels 976 (H) x 582 (V) Approximately 570K Pixels (PAL) Total Pixels 1020 (H) x 596 (V) Approximately 610K Pixels (PAL) -
Page 24: Dimensions
Dimensions FRONT BACK Troubleshooting Trouble Solution No video. Check the adapter and video cable between the camera and a monitor. The image on the screen is dark. Check the brightness control on the monitor. The image on the screen is dim. Check if the lens is stained. -
Page 25: Memo
Memo Colour Micro-Cannon Vandal Cameras... - Page 26 GENIE CCTV LTD. CCTV House, City Park, Watchmead, Welwyn Garden City, Hertfordshire, AL7 ILT Tel: +44 (0) 1707 330541 Fax: +44 (0) 1707 330543 www.geniecctv.com Edition. GN-July 2014...
Need help?
Do you have a question about the GMC3CH and is the answer not in the manual?
Questions and answers