Table of Contents
Advertisement
Quick Links
Doc. No. DOC1046323
PRODUCT NAME
Electric Actuator / Slider Type Belt Drive
(AC Servo 400 – 750W、Motorless)
MODEL / Series / Product number
LET-X11 Series
*The descriptions in this operation manual are for when the "AC servo motor specification" or
"motorless specification" is selected. * For details on the driver, please also check the operation
manual for each driver.
Advertisement
Table of Contents

Related Manuals for SMC Networks LET-X11 Series


Summary of Contents for SMC Networks LET-X11 Series
- Page 1 (AC Servo 400 – 750W、Motorless) MODEL / Series / Product number LET-X11 Series *The descriptions in this operation manual are for when the “AC servo motor specification” or “motorless specification” is selected. * For details on the driver, please also check the operation...
-
Page 2: Table Of Contents
Contents Safety Instructions ………………………………………………………………. 2 Product specific notes ............... 4 Wiring and cables / Common precautions ........4 Electric actuators / Common precautions ........5 Design and selection ..............5 Mounting ..................6 Handling ..................7 Operating environment ..............8 Maintenance .................. -
Page 3: Safety Instructions
Slider Type Belt Drive Safety Instructions These safety instructions are intended to prevent hazardous situations and/or equipment damage. These instructions indicate the level of potential hazard with the labels of “Caution,” “Warning” or “Danger.” They are all important notes for safety and must be followed in addition to International Standards (ISO/IEC) , and other safety regulations. - Page 4 Slider Type Belt Drive Safety Instructions Caution We develop, design, and manufacture our products to be used for automatic control equipment, and provide them for peaceful use in manufacturing business. Use in non-manufacturing business is not covered. Products we manufacture and sell cannot be used for the purpose of transactions or certification specified in the Measurement Act.
-
Page 5: Product Specific Notes
Product specific notes Product specific notes Wiring and cables / Common precautions Warning Adjusting, mounting or wiring change should never be done before shutting off the power supply to the product. Electrical shock, malfunction and damaged can result. Never disassemble the cable. Use only specified cables. Never connect or disconnect the cable or connector with power on. -
Page 6: Electric Actuators / Common Precautions
Electric actuators / Common precautions Design and selection Warning 1. Be sure to read the Operation Manual (this manual and the one for the driver: LEC series). Handling or usage/operation other than that specified in the Operation Manual may lead to breakage and operation failure of the product. -
Page 7: Mounting
Mounting Warning 1. Install and operate the product only after reading the Operation Manual carefully and understanding its contents. Keep the manual in a safe place future reference. 2. Observe the tightening torque for screws. Tighten the screws to the recommended torque for mounting the product. 3. -
Page 8: Handling
Handling Warning 1. If abnormal heating, smoking or fire, etc., occurs in the product, immediately shut off the power supply. 2. Immediately stop operation if abnormal operation noise or vibration occurs. If abnormal operation noise or vibration occurs, the product may have been mounted incorrectly. Unless operation of the product is stopped for inspection, the product can be seriously damaged. -
Page 9: Operating Environment
[Unpackaging] Caution 1. Check the received product is as ordered. If the different product is installed from the one ordered, injury or damage can result. [China Energy Label] The China Energy Label is affixed to the supported motor that is assembled to models based on “Implementation Rules for Energy Efficiency Labeling of Permanent Magnet Synchronous Motor”... -
Page 10: Maintenance
2. Store in an area that is shaded from direct sunlight and has a temperature and humidity within the specified range (-10°C to 60°C and 90%RH or less No condensation or freezing). 3. Do not apply vibration and impact to the product during storage. Maintenance Warning 1. -
Page 11: Electric Actuators / Slider Type Common Precautions
Electric actuators / Slider type Common precautions Design Warning 1. When mounting it vertically, at an angle, or in other situations where there is a height difference, install safety measures from the outside. (Latches, Movable bolts, Fall prevention devices, etc.) ・Design the structure so that the human body does not come into direct contact with the driven object or moving parts of the actuator. -
Page 12: Handling
Handling Warning 1. Do not allow the table (slider) to hit the end of stroke. If an incorrect input instruction is given, such as using it outside the specification range or changing the driver setting/origin position to give an operation instruction outside the actual stroke, the table (slider) can conflict. - Page 13 8. When mounting the actuator, use bolts with adequate size and tighten them with adequate torque. Tightening the screws with a higher torque than the maximum may cause malfunction, whilst tightening with a lower torque can cause the displacement of the mounting position or fall. Side support mounting Side support Mounting number: N...
- Page 14 9. Do not operate by fixing the table and moving the actuator body. 10. Vibration may occur during operation, this could be caused by the operating conditions. If it occurs, adjust response value of autotuning of driver to be lower. During the autotuning noise may occur, the noise will stop when the tuning is complete.
-
Page 15: Plug And Unplug Cable
Plug and unplug Cable Caution 1. Let each cable insert to connector. (Cable installation) When screwing the connector, gradually tighten the screws in a crisscross pattern. 2. Let each cable remove the connector. (Cable removal) - 14 -... -
Page 16: Precaution On Maintenance
Precaution on maintenance Warning 1. Turn off the power supply and remove the workpiece before maintenance and replacement of the product. [Maintenance frequency] Perform maintenance according to the table below. Contact SMC if any abnormality is found. Visual appearance Internal Belt Frequency check... - Page 17 Belt tension adjustment method Turn the belt tension adjustment bolt clockwise to tighten the belt. When checking the belt tension using a sonic tension meter, move the table to the measurement position L, enter the set value of the measurement position and tension setting items in Table1 to the tensiometer, and measure by flipping the belt.
-
Page 18: Product Outline
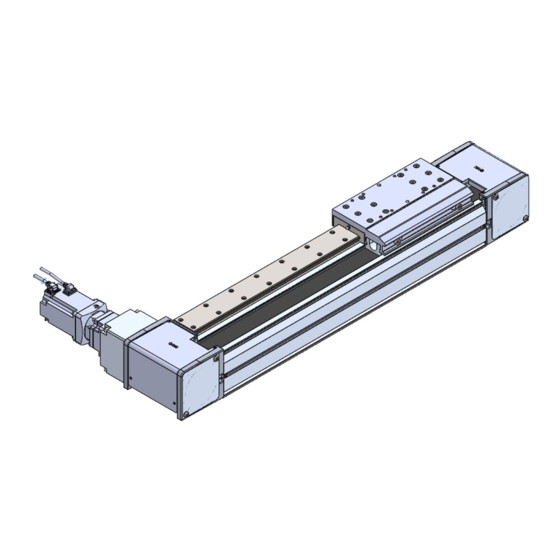
1. Product Outline 1.1 System construction - 17 -... - Page 19 - 18 -...
- Page 20 - 19 -...
-
Page 21: Features
1.2 Features Features of the electric actuator. ●Large payload/Vertical transport possible A maximum of 240 kg horizontally and a maximum of 70 kg vertically can be transported. ●Long life No belt replacement required up to nominal life. ●Light weight In the same stroke, it is less than 90% of the competition. ●Auto switch can be mounted Compatible with solid state auto switch D-M9 series. -
Page 22: How To Order
1.3 How to Order How to order is shown below. - 21 -... -
Page 23: Specification
1.4 Specification LET80-100-X11 AC servo motor (400W / 750W) Specification (without motor) Model LET80NN LET100NN 300~1000(Every 100st),1200 300~1000(Every 100st),1200 Stroke[mm] 1500~3000(Every 500st) 1500~3000(Every 500st) Horizontal Work load[kg] Vertical Speed[mm/s] 5000 Maximum acceleration / 50000 deceleration [mm/s²] ±0.08 Positioning repeatability[mm] Lead[mm] 50/5 Impact / Vibration resistance[m/s²] Drive method... - Page 24 In the case of a motorless type, only the mass of the actuator unit is used, and in the case of a motor type, the mass of the actuator unit plus the motor unit mass is used. - 23 -...
-
Page 25: Construction
1.5 Construction LET-X11 - 24 -... -
Page 26: Procedure Before Operation
2. Procedure before operation 2.1 Preparation Items to be prepared Please check on the label, and the quantity of accessories, to confirm that it is the product that was ordered. LECSA (Pulse input / Positioning) Driver Motor cable Encoder cable Lock cable DC24V Host controller,... - Page 27 LECSC-T (CC-Link) Driver Motor cable Lock cable DC24V Encoder cable Encoder cable Host controller, etc. Electric actuator Electric actuator I/O connector LECSS-T (SSCNET III / H) Driver Motor cable Lock cable DC24V Encoder cable Encoder cable Host controller, Electric actuator etc.
- Page 28 LECYM (MECHATROLINK-II) Driver Motor cable Lock cable DC24V Encoder cable Encoder cable Host controller, etc. Electric actuator Electric actuator I/O connector LECYU (MECHATROLINK-III) Driver Motor cable Lock cable DC24V Encoder cable Encoder cable Host controller, Electric actuator etc. Electric actuator I/O connector For installation and wiring, refer to the operation manual for each driver.
-
Page 29: Installation Of Electric Actuators
2.2 Installation of electric actuators Install the electric actuator at the installation location using the following method. Mounting Regarding the bolts and tightening torque to be used for mounting the workpiece/jig and mounting the main unit, please refer to “8.When mounting the actuator, use bolts with adequate length and tighten them with adequate torque."... -
Page 30: Startup
2.3 Startup When switching the power on for the first time, follow the startup procedure below. Refer to the “Driver operation manual” for wiring method and detailed procedure. Confirm that the cables to the driver and the actuator are - - - Wiring check connected correctly. -
Page 31: Gain Tuning
2.4 Gain tuning Procedure Here are the steps for basic gain tuning. Refer to the “Driver operation manual” for details and for tuning methods other than shown below. Warning A mechanical resonance may occur depending on the configuration or the mounting orientation of the transferred object. - Page 32 Revision history August 2023:Frist edition October 2023:Revision 4-14-1, Sotokanda, Chiyoda-ku, Tokyo 101-0021 JAPAN Tel: + 81 3 5207 8249 Fax: +81 3 5298 5362 http: / /www.smcworld.com Note: Specifications are subject to change without prior notice and any obligation on the part of the manufacturer. ©...
Need help?
Do you have a question about the LET-X11 Series and is the answer not in the manual?
Questions and answers