
Related Manuals for Canon FedEx Office imagePRESS C750


Summary of Contents for Canon FedEx Office imagePRESS C750
- Page 1 imagePRESS C750 & imagePRESS Server G100 Configuration and Installation Guide September 4, 2020...
- Page 2 Revision History Date Section Description 08/16/17 Release of the FedEx Office imagePRESS C750 Configuration and Installation Guide. Chapter 6 & Updated the G100 clone file name and screen capture of the clone folder layout, updated the 02/21/2018 Appendix Fiery Sample Configuration page, and inserted a Training check list to the Appendix.
-
Page 3: Table Of Contents
Contents Chapter 1: Introduction ................4 Chapter 2: Preparing the Device Being Removed ........6 Chapter 3: imagePRESS C750 Machine Configuration ......8 Chapter 4: Configuring Device Settings ..........9 Chapter 5: Center IP/Subnet Mask/Gateway .......... 19 Chapter 6: imagePRESS Server G100 Set-up ........21 Chapter 7: Registering and Executing Calibration ....... -
Page 4: Chapter 1: Introduction
Upon completion of the installation, a Fiery Configuration Page must be printed. See the procedure in Chapter 12, “Post Installation Actions.” Also, the imagePRESS C750 Post Installation Checklist, the Certification of Canon Machine Hard Disk Drive Erase, and the Training Checklist for the imagePRESS C750, must be signed by the Technician and Center Manager (or their designee). - Page 5 License Access Number (LAN) Web Access Kit (included in imagePRESS Server G100 box) Laptop with the following: imagePRESS C750 Service Manual – from support.cusa.canon.com All items below are downloaded from the Canon USA FedEx Office e-Support Major Account Site FXO Virtual Kitting Package FXO_C750_VKT_Package_09162019.zip ...
-
Page 6: Chapter 2: Preparing The Device Being Removed
Chapter 2: Preparing the Device Being Removed NOTE: If there are no Canon devices being removed, proceed to Chapter 3. Two steps are required before beginning installation of the imagePRESS C750 Secure a Fiery Configuration Page from the devices that are being removed. Make note of the IP address of the device being removed, as the device being installed will use the same IP address. - Page 7 Center Manager. It is the Technician’s responsibility to scan and e-mail the completed form to the e-mail address indicated on the form. This is to make sure that that Canon has complied with this data security requirement.
-
Page 8: Chapter 3: Imagepress C750 Machine Configuration
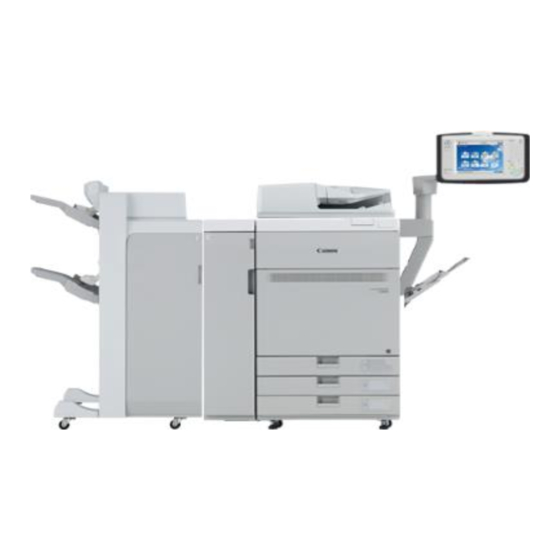
Chapter 3: imagePRESS C750 Machine Configuration Duplex Reader-K1 (INCH/A) Staple Finisher-W1 Puncher Unit–BS1 (2/3H) Stack Bypass-B1 imagePRESS Server G100 V1.2 & Control Panel Set imagePRESS C750 with imagePRESS Server G100 Configuration and Installation Guide... -
Page 9: Chapter 4: Configuring Device Settings
1. Turn ON the main power switch. 2. An error message “E612-0007” is displayed. Navigate to www.canon.com/lms/license from Internet Explorer. Enter the License Access Number located on the Certificate. 5. Follow the instructions on screen to obtain the license key. - Page 10 9. Enter the license number and press [Start]. Then, "OK" is displayed. 10. Turn OFF the main power switch. 11. Install the imagePRESS C750 Name Plate (included with Cassette 1) 12. Turn ON the Main Power Switch. 13. If an E750-0005 is displayed turn the Main Power Switch OFF then ON. Note: During the machine set up please make sure that the imagePRESS C750 emblem is placed on the front of the machine.
- Page 11 2. Enter the License Access Number located on the Certificate. 3. Follow the instructions on screen to obtain the license key. 4. Download or print the License Key once the registration is completed. 5. From the Canon UI, select [Settings/Registration]. 6. Log in. 7. Navigate to Management Settings>License/Other>Register License.
- Page 12 8. Input the received license key in the area provided. 9. Select OK to complete the procedure. imagePRESS C750 with imagePRESS Server G100 Configuration and Installation Guide...
- Page 13 FedEx Office certified firmware for the imagePRESS C750 engine is version 42.01 and the imagePRESS Server G100 firmware is version 1.21. Canon USA has produced a Firmware and Device Settings package with the Virtual Kitting tool. The package automatically installs imagePRESS C750 firmware version 42.01...
- Page 14 7. After the device is restarted, press [Auto Configuration Agent] in the Shortcut menu. 8. A message should be shown on the UI. Press [Finish] to complete the process, and then remove the USB drive. imagePRESS C750 with imagePRESS Server G100 Configuration and Installation Guide...
- Page 15 9. Change the System Manager ID/Password from [1111 / 1111] to the 4-digit center number. Note: After the package deployment process is complete, the device UI changes. The resulting screen will have four buttons, as shown in the picture below. imagePRESS C750 with imagePRESS Server G100 Configuration and Installation Guide...
- Page 16 Configuring Printer Settings A. User Mode Settings During the execution of the VKT package some user settings are transferred automatically. The highlighted settings need to be entered manually. The entire table can be used to verify other settings if desired. Note: If the center does not observe Daylight Savings Time, ensure the [Daylight Saving Time] setting is turned off.
- Page 17 Function Settings Common Paper Feed Settings For all functions set all trays Copy including the Bypass to [On] Printer [Paper Drawer Auto Access Store Selection On/Off] Files Receive/Fax Other Paper Output Settings Tray A: Tray A: Tray A: Copy 1 Copy 1 Copy Access Store...
- Page 18 B. Service Mode Settings During the execution of the VKT package some service mode settings are transferred automatically. The highlighted settings need to be entered manually. The entire table can be used to verify other settings if desired. Page on Check if Service Mode Path Level 1,2...
-
Page 19: Chapter 5: Center Ip/Subnet Mask/Gateway
Chapter 5: Center IP/Subnet Mask/Gateway Obtaining an IP Address FXO is undergoing a change of the Center IP Addresses (Re-IP). This process may not be completed by the time of your scheduled installation. There are three ways to obtain the IP Address information. 1. - Page 20 4. Select [Uninstall a Driver]. 5. Locate the printer that the C750 is replacing. Use the IP address of the replaced printer for the C750. 6. Click the cancel button to exit the app. imagePRESS C750 with imagePRESS Server G100 Configuration and Installation Guide...
-
Page 21: Chapter 6: Imagepress Server G100 Set-Up
This section will guide you through the setup of the imagePRESS Server G100 to meet the FXO Standard configuration. All files for this section can be obtained from the Canon e-Support site under the Major Accounts section > New MFP Deployment. Note: A reference configuration page with highlighted yellow sections showing FedEx Office settings is included at the end of this document. - Page 22 Preparing the USB drive Install the Fiery USB Setup tool onto your laptop computer. 1. Locate the file FieryUSBSetupTool_v2.0.21.zip 2. Extract the file to a folder on your Windows computer 3. Double click on the file FieryUSBSetupTool_v2.0.21.exe 4. Select [Run] 5.
- Page 23 7. Select the destination folder or keep the default and select [Next] 8. Click [Install] to start the installation imagePRESS C750 with imagePRESS Server G100 Configuration and Installation Guide...
- Page 24 9. Click [Finish]. The Fiery Create USB tool is now ready to use Insert a Blank USB drive in your workstation Launch the Fiery USB Setup tool from your workstation You will see the window shown below 10.
- Page 25 12. The following window is displayed. Note: Make sure the USB drive destination is correct. You will lose all data previously stored on the USB drive. 13. Once complete the USB drive is ready for the clone image. Select [Close] imagePRESS C750 with imagePRESS Server G100 Configuration and Installation Guide...
- Page 26 14. Locate the file FXO_C750_G100_Clone_08_29_2019.zip and extract the file to a folder on your Windows computer. 15. Browse to the USB stick and copy the folder “FXO_C750_G100_Clone_08_29_2019” to the USB Drive created in the step above. 16. View the contents of the USB drive on a Windows PC Note: Idlinux.sys is a system file and you may not see this file depending on your computer settings.
- Page 27 Restoring the FXO Clone image To restore the clone image 1. On a Windows computer, verify that the USB flash drive has the correct cloned image file for the G100 FXO Fiery server. (see instructions for creating the Clone image) a.
- Page 28 9. Remove the USB flash drive. 10. Reboot the G100 Fiery server from the power switch of the controller. imagePRESS C750 with imagePRESS Server G100 Configuration and Installation Guide...
- Page 29 Once enabled and the imagePRESS Server G100 is detected by the engine, the Fiery icon will appear on the Main Menu of the Canon User Interface. Please Note: It may take up to 7 minutes for the imagePRESS Server G100 to boot and be detected by the engine.
- Page 30 A. Adding the Controller to Command Workstation Note: The screen shots below may not be identical to what you find on site. The server name and IP Address framed in red may not appear as shown. 1. Launch Command Workstation by clicking the icon in the taskbar or by clicking the Windows Start button and selecting Fiery Command Workstation.
- Page 31 4. Select Administrator from the User drop down list and enter Fiery.1 as the password (the password is case-sensitive and includes a period in between the word Fiery and the number 1). Click Login. 5. The device will appear under the list of Servers with a green button to show that it is added and connected.
- Page 32 B. Configuring Manual Fiery Settings The Server name and Date & Time settings need to be manually configured. Follow the steps below to configure these settings: 1. Log in to the Fiery using Command Workstation then click [Server] [Configure] x2 2.
- Page 33 3. Select [Regional Settings] Uncheck [Set Date and Time Automatically] set the current date and time Check [Set Date and Time Automatically] [Save]. Select [Reboot] to restart the controller and apply the settings. Use the steps and images below to verify the FedEx Office Color Settings 1.
- Page 34 2. FXO Spot Colors – [FXO_Brand_Colors_C700] should be at the top with the colors shown on the right. imagePRESS C750 with imagePRESS Server G100 Configuration and Installation Guide...
- Page 35 G100 Paper Catalog Update Procedure These instructions will provide a step by step procedure to import the most currently approved version of paper catalog into a FXO G100 Fiery server. Overview 1. Unregister all Custom Media from the Auto Adjust Gradation and Auto Correct Color Tone settings.
- Page 36 d. From the Standard Media list, select [11” x 17”] [Plain 2] paper for any other paper drawer. 2. Unregister Custom Media from the Auto Gradation settings. a. Press [Settings/Registration] [Adjustment/Maintenance] [Adjust Image Quality] [Auto Adjust Gradation]. b.
- Page 37 d. From the drop-down menu, select [Standard Type]. e. Select a drawer loaded with 11” x 17”, Plain 2 paper press [Next]. f. Press [Start Printing]. g. Select another drawer loaded with 11” x 17”, Plain 2 paper press [Next]. h.
- Page 38 d. From the drop-down menu, select [Standard Type]. e. Select the pattern that has [Plain 2] specified press [Next]. f. Select a drawer loaded with Plain 2 paper press [OK]. g. Press [Start Printing]. h. Place the page on the scanner. i.
- Page 39 6. Unassign all media in all of the drawers by clicking on each drawer and selecting [Remove Association] as indicated in the image. 7. Once all of the drawers are unassigned, delete all jobs in the Held, Printed, and Archived queues. imagePRESS C750 with imagePRESS Server G100 Configuration and Installation Guide...
- Page 40 8. Delete the Paper Catalog. a. Click [Settings] in the right-hand corner of the screen. b. Click [Reset To Factory Defaults]. c. Click [Close]. Please make sure that all of the custom media has been deleted from the engine and the Fiery. If not, proceed to steps 9 and 10 below. imagePRESS C750 with imagePRESS Server G100 Configuration and Installation Guide...
- Page 41 9. If the procedure in step 8 did not remove all of the custom media, perform the steps below. a. From the Job Center, open the Paper Catalog. b. Highlight all of the custom media. c. Click [Delete]. Note: If custom media is locked, it cannot be deleted. Proceed to step 10 to remove the locked media.
- Page 42 B. Importing the FedEx Office Paper Catalog 1. Download and unzip the Paper Catalog file: FXO_C750_G100_Paper_Catalog_06-10-2020.zip from e-Support to a USB drive. 2. Launch Command Workstation and connect the Fiery controller. 3. Log on as the Administrator with the password Fiery.1 (case-sensitive). 4.
- Page 43 5. From the Import drop-down list, select [Replace Existing]. The Import Paper Catalog window opens. imagePRESS C750 with imagePRESS Server G100 Configuration and Installation Guide...
- Page 44 Ensure the Total number of papers is [99]. If any other value is shown here, contact Canon USA’s Technical Support Center at 1-800-528-2830. Note: If the engine synchronization error appears, repeat the steps in the “Unregister All Custom Media from Auto Adjust Gradation and Auto Correct...
- Page 45 7. Click [Settings] in right-hand corner of the screen. Under [Specification to use] select [JDF Based] click [Close]. This process can take up to 4 minutes, and could be interpreted as being locked up. Please wait until the change occurs, and then close the paper Catalog screen by clicking the [X] in the upper-right corner of the screen.The process is complete.
-
Page 46: Chapter 7: Registering And Executing Calibration
Chapter 7: Registering and Executing Calibration Registering Paper for Full Auto Gradation 1. Load EX32 paper into one of the paper cassettes. 2. Register the EX32 as “Plain 2” by following the steps below: a. Insert the paper and close the cassette b. - Page 47 e. Select [Plain 2 (91-105 g/m2)]. f. Press [OK] to exit the Paper Type screen g. Press [OK] to exit the Paper Settings screen. 3. Install LZX 24 lb 11x17 into another paper cassette. Register this paper as “LZX”, from the FXO Custom Media. 4.
- Page 48 10. Press [On] 11. Press [OK]. 12. Press [Register Paper to Adjust]. 13. Highlight “Paper to Adjust 1”, press [Next]. 14. Highlight “Standard”, press [Next]. 15. Highlight the cassette with the EX32 paper installed, press [Next]. 16. Press [Start Printing]. The imagePRESS prints two sheets of patches on the EX32 paper.
-
Page 49: Chapter 8: Configuring Network Scanning
Chapter 8: Configuring Network Scanning Setting up FTP Scanning to the Primary DPW: 1. From the main menu on the device, press [Show All] [Scan and Send]. 2. Press [Address Book]. imagePRESS C750 with imagePRESS Server G100 Configuration and Installation Guide... - Page 50 3. Press [Register/Edit]. 4. Pres [Register New Dest]. imagePRESS C750 with imagePRESS Server G100 Configuration and Installation Guide...
- Page 51 5. Press [File]. 6. Enter the following information in the appropriate fields using the keyboard on the copier interface. Name: NetScan Protocol: FTP Host Name: IP address of the Primary DPW. Ask the Center manager which is the Primary DPW.
- Page 52 8. Test the scan by selecting the NetScan destination from the address book. Press [OK], and them perform the scan. 9. Press the [Start] button on the main control panel to perform the scan. 10. Press [Start Sending] to send the scan to the Primary DPW 11.
-
Page 53: Chapter 9: Print Driver Installation On Workstation Using The Puma Application
Chapter 9: Print Driver Installation on WorkStation Using the PUMA Application Print Driver Installation Important: The installation is not complete until the installing Technician has installed the printer on each DPW (Digital Production WorkStation) in the FedEx Office Center. The following steps guide you through loading drivers and installing the printer via PUMA (Printer Utility Management Application). - Page 54 2. Select “Add a Driver.” In some instances this option may say Add a Printer. Note: 3. Select the “Manual Install” tab. imagePRESS C750 with imagePRESS Server G100 Configuration and Installation Guide...
- Page 55 4. Select the device to be installed from the list. The IP Address will automatically be populated. Verify that the IP Address is correct. Enter the model number as the unique identifier and click the Install button. ...
-
Page 56: Chapter 10: Com Test Verification
Chapter 10: COM Test Verification Performing a COM Test If the COM Test fails but the Network Port has been activated by FedEx Office IT, refer to the troubleshooting procedure on page six (6) of the “imageWARE Remote Activation Guide”, found on e-Support. The “imageWARE Remote Activation Guide”... -
Page 57: Chapter 11: Quality Validation Process
The process involves: A visual inspection/comparison of image quality Measurement of color quality The role of Canon Technicians in this process is to: Participate as an observer in the visual inspection/comparison Participate as an observer in the color quality measurement step (PPA Verification Print) Resolve any image quality problems that have been found. - Page 58 Validation Proof Master sample (used for visual inspection/comparison) Page 1 Page 2 imagePRESS C750 with imagePRESS Server G100 Configuration and Installation Guide...
- Page 59 The application will determine whether or not the color values measured for each patch are within the acceptable range FedEx Office and Canon USA have agreed to. In cases where Printer Color Verification Chart does not pass, the technician should take remedial steps to improve the print quality.
-
Page 60: Chapter 12: Post Installation Actions
Chapter 12: Post Installation Actions After the installation steps are completed, the Equipment Service and Support sticker and the imagePRESS C750 Paper Guidance sticker must be affixed as indicated below. Equipment Service and Support sticker Enter the serial number of the imagePRESS C750 in the appropriate field on the Equipment Service and Support sticker. - Page 61 imagePRESS C750 Paper Guidance Sticker Place the imagePRESS C750 Paper Guidance sticker on the Document Feeder top cover as shown in the picture below. imagePRESS C750 with imagePRESS Server G100 Configuration and Installation Guide...
-
Page 62: Chapter 13 Appendix
Chapter 13 Appendix The Appendix contains this information: imagePRESS C750 Post Installation Checklist Certification of Canon Machine Hard Disk Drive Erase Training Checklist for the imagePRESS C750 Sample Configuration Page imagePRESS C750 with imagePRESS Server G100 Configuration and Installation Guide... - Page 63 6. The Color Verification Measurement was successful. 7. A CP Print [Canon Engine Report], Configuration page, and PS Test page have been left in the service holder on the back of the imagePRESS C750.
- Page 64 In accordance with Master Machines Agreement Dated April 12, 2010, Section 17 (a) (iv), by and among the Parties, Canon USA and Canon Dealer Servicers hereby certify that all stored data has been purged from the Canon Machine specified below utilizing the single pass overwrite tool native to the Canon Machine.
- Page 65 Yellow highlights indicate items that should be changed from default. Some manual settings are specified during configuration. UNLESS OTHERWISE SPECIFIED, NO OTHER SETTINGS SHOULD BE CHANGED ON THE DEVICE. FIERY SERVER CONFIGURATION 09/xx/2020 xx:xx SERVER: TX1234-C0C750-1 PRINTER: Canon iPR Svr G100 V1.21 US IP ADDRESS: 10.xxx.xxx.xxx Fiery Server WSD Queue print...
- Page 66 FIERY SERVER CONFIGURATION 09/xx/2020 xx:xx SERVER: TX1234-C0C750-1 PRINTER: Canon iPR Svr G100 V1.21 US IP ADDRESS: 10.xxx.xxx.xxx Use WINS Server Print to PS error Enable IPv6 Default paper sizes IP Address(es) Print cover page fe80:0000:0000:0000:xxxx:xxxx:xxxx:xxxx/64 Convert paper sizes Protocol Setup...
- Page 67 FIERY SERVER CONFIGURATION 09/xx/2020 xx:xx SERVER: TX1234-C0C750-1 PRINTER: Canon iPR Svr G100 V1.21 US IP ADDRESS: 10.xxx.xxx.xxx Use embedded profile when present (CMYK) Calibration Info Measurement Method EFI ES-2000 Calibration page layout 51 Unsorted Patches Prepare scanner for ColorCal calibration...
- Page 68 SYSTEM UPDATES LOG 09/xx/2020 xx:xx SERVER: TX1234-C0C750-1 PRINTER: Canon iPR Svr G100 V1.21 US IP ADDRESS: 10.xxx.xxx.xxx FIERY UPDATES DATE & TIME PATCH ID NAME 01/30/2020 11:20:07 FJDF1.5.0.34_linux 01/30/2020 11:20:07 FIT101580105 01/30/2020 11:20:07 FIT101580108 01/30/2020 11:20:07 FIT101678912 01/30/2020 11:20:07 FIT101574176...
Need help?
Do you have a question about the FedEx Office imagePRESS C750 and is the answer not in the manual?
Questions and answers