Table of Contents
Advertisement
Quick Links
Page 1
Signal input:
Signal output: analog - 4-20mA ref. corrected flowrate
Remote control: external reset with clear-lock
Options:
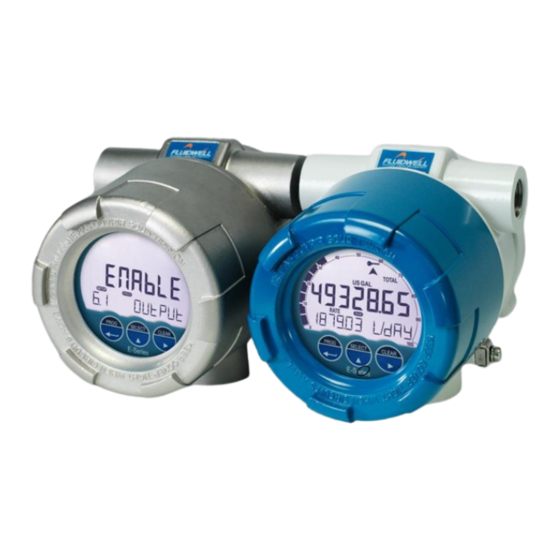
E-Series - Explosion proof indicators for hazardous areas.
E126-P-EL
EXPLOSION PROOF FLOWCOMPUTER FOR LIQUID
Temperature compensation for corrected liquid volume
flowmeter - type P: pulse, Namur and coil
temperature - type TP: PT100 2-, 3- or 4-wire
temperature - type TA: (0)4-20mA
pulse - Scaled pulse ref. corrected Total
Modbus Communication
USB Communication
FW-E126-P-EL-M_v0203_03_EN.docx
More info: www.fluidwell.com/eseries.
Advertisement
Table of Contents

Related Manuals for Fluidwell E126-P-EL


Summary of Contents for Fluidwell E126-P-EL
- Page 1 - type TA: (0)4-20mA Signal output: analog - 4-20mA ref. corrected flowrate pulse - Scaled pulse ref. corrected Total Remote control: external reset with clear-lock Options: Modbus Communication USB Communication E-Series - Explosion proof indicators for hazardous areas. FW-E126-P-EL-M_v0203_03_EN.docx More info: www.fluidwell.com/eseries.
-
Page 2: Safety Instructions
Magnetic Compatibility). • Do connect a proper grounding to the housing as indicated if the E126-P-EL is used on a ship, truck or other application with no ground. The earth lead between the housing and the removable terminal-block may never be removed. -
Page 3: About The Operation Manual
This operation manual describes the standard E126-P-EL as well as most of the options available. For additional information, please contact your supplier. A hazardous situation may occur if the E126-P-EL is not used for the purpose it was designed for or is used incorrectly. Please carefully note the information in this operating manual indicated by the pictograms: A "warning !"... -
Page 4: Table Of Contents
ABOUT THE OPERATION MANUAL........................3 WARRANTY AND TECHNICAL SUPPORT ......................3 CONTENTS MANUAL ............................4 INTRODUCTION ............................. 5 System description of the E126-P-EL ..................5 OPERATIONAL ............................7 General information ......................... 7 Control panel ..........................7 Operator information and functions ..................9 Operator Alarms ........................ -
Page 5: Introduction
SYSTEM DESCRIPTION OF THE E126-P-EL Functions and features The flow computer model E126-P-EL is an explosion proof microprocessor driven instrument for the calculation of compensated volumetric flow or mass flow for liquid applications using flow equations. This product has been designed with a focus on: •... - Page 6 3. Display information The E126-P-EL has a large LCD with all kinds of symbols and digits to display measurement units, status information, trend-indication and key-word messages. Flowrate and totals can be displayed either with the 11 small 7mm (0.28”) digits or with the 7 large 12mm (0.47”) digits.
-
Page 7: Operational
Page 7 2 OPERATIONAL GENERAL INFORMATION This chapter describes the daily use of the E126-P-EL. This instruction is meant for users / operators. • The E126-P-EL may only be operated by personnel who are authorized and trained by the operator of the facility. All instructions in this manual are to be observed •... - Page 8 PROG – SELECT – CLEAR. They operate in the same manner as the optical keys, and when pressed, the optical keys are disabled for 30 seconds to prevent any interference. Fig. 5: Control panel, Push button operation FW-E126-P-EL-M_v0203_03_EN.docx...
-
Page 9: Operator Information And Functions
For the Operator, the following functions are available: Display process values On the main screen, the primary process values of the E126-P-EL are shown. By default, Total is shown on the upper-line of the display and Flowrate on the bottom line. - Page 10 Previous Day Total, in days. Note that the entry with age ‘00’ represents the (running) Current Day Total. To return to the main display information again, press the PROG-key during 3 seconds or wait for 3 minutes. FW-E126-P-EL-M_v0203_03_EN.docx...
-
Page 11: Operator Alarms
When an internal alarm condition occurs, the alarm-flag is shown on the display. After pressing the SELECT-key several times, the display will show the alarm code. Please see Appendix B: Problem solving for an explanation of the available alarm codes. ALARM FW-E126-P-EL-M_v0203_03_EN.docx... -
Page 12: Configuration
Unlock the optical keys as described before. 3.2.1 ENTERING SETUP-LEVEL Configuration of the E126-P-EL is done at SETUP-level, which can be reached at all times while the E126-P-EL remains fully operational. At SETUP-level the display will deactivate the indicator and activate the SETUP indicator. - Page 13 The combination of the SELECT-key and CLEAR-key is used to select a negative value. When a value can also be entered as a negative number, pressing the SELECT- key and CLEAR-key simultaneously will toggle the ‘–‘ (minus) sign on and off. FW-E126-P-EL-M_v0203_03_EN.docx...
- Page 14 Please keep a record of all settings for later reference. Use the control panel to return to OPERATE-level PROG-key In order to return to the operator level, press the PROG-key for three seconds. When no keys are pressed for 2 minutes, SETUP-level will be left automatically. FW-E126-P-EL-M_v0203_03_EN.docx...
-
Page 15: Overview Functions Setup-Level
Page 15 OVERVIEW FUNCTIONS SETUP-LEVEL All settings of the E126-P-EL can be set via the control panel. As an alternative, you can also use the Remote Configuration Software which you can find on our website or through your supplier. Depending on the type of communication interface your device has, you might need a specific communication cable, which is available through your supplier. - Page 16 ADDRESS 001 – 247 MODE off – bus asc – bus rtu DATABITS 8 bits – 7 bits PARITY none – even – odd OTHERS 10.1 MODEL E126-P-EL 10.2 SOFTWARE VERSION xx.xx.xx 10.3 SERIAL NO xxxxxxx 10.4 TIME HH:MM:SS 10.5 PASSWORD 0000 –...
- Page 17 Current and Previous Day Totals will not be done at the correct time. CURRENT DAY-TOTAL This setting shows the amount of product totalized, since the last contract hour. This a ‘running’ totalizer and cannot be reset to zero. FW-E126-P-EL-M_v0203_03_EN.docx...
- Page 18 ▪ This setting does influence the update time for the analog output directly. If the output response is too slow, decrease the number of pulses. ▪ The shorter the update time, the higher the power consumption of the unit will be (important for battery powered applications). FW-E126-P-EL-M_v0203_03_EN.docx...
- Page 19 – disable When battery powered, the user can expect reliable measurement over a long period of time. The E126-P-EL has several smart power management functions to extend the (optional) battery life time significantly next to permanently disabling the optical keys. The...
- Page 20 EXPLANATION OF SETUP-MENU 4 – FLOWMETER 3.3.5 To simplify the configuration of the Flowmeter, total and flow rate settings, the E126-P-EL is equipped with an automatic unit conversion feature. This avoids different K-Factor calculations for Total and Flowrate and all configuration it done inside the Flowmeter menu. To use the automatic unit conversion, you only need to enter the (average) K-Factor and the related measurement unit.
- Page 21 FLOWMETER SIGNAL The E126-P-EL is able to handle several types of input signal. The type of flowmeter pickup / signal is selected with SETUP 4.1. The settings with LP are used to apply a build-in low-pass filter. See also chapter. 4.4.
- Page 22 Calculations are based on temperature values in Kelvin (K). The flow computer needs to know the measured temperature at minimum signal. In above example "173.15 K" must be entered. The value can range from 0.00 – 9,999.99 with two fixed decimals. FW-E126-P-EL-M_v0203_03_EN.docx...
- Page 23 From that moment, the analog value must be less than the calibrated value for a reliable measurement. ▪ DEFAULT: with this setting, the manufacturers value is re-installed. ▪ CAL SET: to select the last calibrated value. FW-E126-P-EL-M_v0203_03_EN.docx...
- Page 24 The time and measuring units (L/min for example) are dependent upon SETUP 2.1 and SETUP 2.2 and are displayed during editing. If desired, you can program the analog output 'up-side-down'. The 20mA represents the minimum flow rate. For example do enter 0 L/min. FW-E126-P-EL-M_v0203_03_EN.docx...
- Page 25 The digital (transistor) output D1 has a maximum frequency of 500Hz. • Be sure that the output frequency of the optional digital (relay) output D5 does not exceed 0.5Hz, else the relay life time and reliability will be reduced significantly. FW-E126-P-EL-M_v0203_03_EN.docx...
- Page 26 ▲-key. 3.3.10 EXPLANATION OF SETUP-MENU 9 - COMMUNICATION (OPTION) The E126-P-EL can optionally be equipped with a communication interface using the Modbus protocol (Type CB/CH/CU). Please consult Appendix C for a more detailed explanation of the protocol, data types and available registers.
- Page 27 OTHERS 10.1 MODEL For support and maintenance it is important to have information about the characteristics of the E126-P-EL. Your supplier will ask for this 10.2 SOFTWARE VERSION information in the case of a serious breakdown or to assess the 10.3...
-
Page 28: Installation
Personnel must read and understand this Operating Manual before carrying out its instructions. The E126-P-EL may only be operated by personnel who are authorized and trained by the operator of the facility. All instructions in this manual are to be observed. -
Page 29: Mechanical Installation
• Possible electrostatic hazard – clean only with a moist cloth. Use only in fixed installations and do not place in areas with rapid airflow. DIMENSIONS – ENCLOSURE 4.3.1 Fig. 9: Dimensions – Aluminum / Stainless Steel enclosures. FW-E126-P-EL-M_v0203_03_EN.docx... - Page 30 0°; 90°; 180°; 270°, so the enclosure can be installed in four positions. The enclosure can be installed on a wall by using the mounting plate (accessory) or pipe mounted with the bracket and hose clamps (accessory). Fig. 10: Installation – Plate mounted Fig. 11: Installation – Pipe mounted FW-E126-P-EL-M_v0203_03_EN.docx...
- Page 31 There may be no generation of heat in the added enclosure; • There may be no added electrical energy in the added enclosure; any energy which comes from the E-series is already taken into account in the E-series certificate. FW-E126-P-EL-M_v0203_03_EN.docx...
-
Page 32: Electrical Installation
DO NOT OPEN WHEN AN EXPLOSIVE GAS ATMOSPHERE IS PRESENT. • Electro static discharge does inflict irreparable damage to electronics! Before installing or opening the E126-P-EL, the installer has to discharge himself by touching a well- grounded object. • The E126-P-EL must be installed in accordance with the EMC guidelines (Electro Magnetic Compatibility). - Page 33 Without OR option Battery Typical 3.6V. Only use 10 mA Without OR option connector Fluidwell replacements A1/A2 11-27Vdc 25 mA AH only not suitable for OR If a combination of inputs is used, use the maximum value mentioned! The output relay (OR option) is of type SPST and has the following contact ratings: Load type &...
- Page 34 • The output is protected against overload. In case of an overload also the functionality of the E126-P-EL is affected! The voltage is selected with the two switches at the rear of the Main Electronics Module (MEM). The switches are located at the bottom center (type PD): Fig.
-
Page 35: Terminal Connectors - Main Electronics Module
Page 35 TERMINAL CONNECTORS – MAIN ELECTRONICS MODULE The following terminal connectors are available for the Main Electronics Module (MEM): Fig. 14: Terminal connectors MEM – standard and options FW-E126-P-EL-M_v0203_03_EN.docx... -
Page 36: Terminal Connections
When retransmit mode is selected in the PULSE MODE menu (SETUP 9.1), only Type OT output D1 (on terminals R1-R2) will retransmit the frequency of the flowmeter signal. In all other modes, Type OR output D5 will follow output D1. FW-E126-P-EL-M_v0203_03_EN.docx... - Page 37 (coil). The screen of the signal wire must be connected to the common ground terminal (unless earthed at the sensor itself). The sensor output of the flowmeter should match with the selected flowmeter input signal at SETUP 4.1. See paragraph 3.3.5 for more information. FW-E126-P-EL-M_v0203_03_EN.docx...
- Page 38 Fig. 18: Terminal connections – Coil signal input Pulse-signal NPN / NPN-LP The E126-P-EL is suitable for use with flowmeters which have a NPN output signal. For reliable pulse detection, the signal should be above 1.4V or below 1.0V under all circumstances. It is advised to use a sensor which is normally open and is closed for a small time (less power consumption).
- Page 39 Page 39 Pulse-signal PNP / PNP-LP The E126-P-EL is suitable for use with flowmeters which have a PNP output signal. 3.0V is offered on terminal S3 which has to be switched by the sensor to terminal S2 (SIGNAL). For reliable pulse detection, the signal should be above 1.4V or below 1.0V under all circumstances.
- Page 40 Fig. 22: Terminal connections – NAMUR signal input Active signals 8.2V and 24V The E126-P-EL is suitable for flowmeters with an Active signal. The detection levels are about 50% of the selected supply voltage; approximately 4V (ACT_8.1) or 12V (ACT_24). See paragraph 3.3.5 for more information.
- Page 41 TERMINAL E1-E2: TEMPERATURE INPUT – TYPE TA: (0)4-20MA 4.6.5 The E126-P-EL type TA requires a (0)4-20mA signal from the temperature sensor. The input is not isolated. See paragraph 3.3.6 for configuring the temperature input. When the sensor supply voltage P3 is set to 24V, this voltage can also be used to power the temperature sensor.
- Page 42 Serial communications on hardware layers RS232 (length of cable max. 5 meters), RS485 (length of cable max. 1200 meters) and USB (length of cable max. 5 meters) are possible. Make sure that the hardware layer specific requirements are met to achieve reliable communication. Read the Modbus communication protocol and Appendix C. FW-E126-P-EL-M_v0203_03_EN.docx...
- Page 43 The total loop resistance may not exceed 1000 Ohm and may not be less than 330 Ohm (at 30mA). This makes that the resistance of other loop-devices in total may not exceed 670 Ohm. E.g. 18Vdc allows 250 Ohm. Fig. 28: Terminal connections – Isolated 4-20mA analog output FW-E126-P-EL-M_v0203_03_EN.docx...
-
Page 44: Maintenance
“Safety rules, instructions and precautionary measures” in the front of this manual. • The E126-P-EL may only be operated by personnel who are authorized and trained by the operator of the facility. All instructions in this manual are to be observed. -
Page 45: Open And Close The E-Series
(7). Note that the MEM goes off. 3. Disconnect the connectors (6) from the MEM (4). 4. Protect the connectors (6, 7) against the ingress of contamination. Keep the MEM (4) in a clean and safe location. FW-E126-P-EL-M_v0203_03_EN.docx... - Page 46 2. Lock the flatcable connector (7) by hand and note that the MEM (4) comes on. 3. Hold the MEM (4) in the correct position for installation. Mind the wiring and carefully move the MEM (4) into the housing (1). FW-E126-P-EL-M_v0203_03_EN.docx...
- Page 47 5.4.6 JOB CLOSE UP 1. Do a test of the optical keys to make sure the E126-P-EL is ready for daily use. 2. Remove all tools, materials and equipment from the work area. 3. Make sure, the work area is clean.
-
Page 48: Label Information
The E-series comes in temperature class T6. T6 classified versions consume 4.5 watts or less. Fig. 29: External label Certification Data LABEL WITH THREAD SIZES. The thread sizes will be indicated on the label as per the drawings below. Fig. 30: Example external label Thread Sizes FW-E126-P-EL-M_v0203_03_EN.docx... -
Page 49: Internal Labels
Fig. 31: Example label Main Electronic Module (MEM) Label attached to the Basic Supply Module (BSM) – option PB. Fig. 32: Example Label Basic Supply Module (BSM) Label attached to the Relay Supply Module (RSM) – option (PB)-OR. Fig. 33: Example Label Relay Supply Module (RSM) FW-E126-P-EL-M_v0203_03_EN.docx... -
Page 50: Technical Specification
Terminal P3 : 8.2 / 12 / 24V DC • 8.2V DC, max. 20mA. • 12V DC, max. 30mA. • 24V DC, max. 75mA (this voltage varies depending on the input supply voltage) Terminal connections Type Removable plug-in terminal strip. Wire max. 1.5 mm and 2.5 mm FW-E126-P-EL-M_v0203_03_EN.docx... - Page 51 Note External power to sensor is required; e.g. type PD. Reset total General Terminal input to reset total remotely or to lock the “clear total” button. Type IB Internally pulled-up switch contact - NPN. Duration Minimum pulse duration 100msec. FW-E126-P-EL-M_v0203_03_EN.docx...
- Page 52 Total can be reset to zero by pressing the CLEAR-key twice Total Digits 7 digits. Unit L, m3, US gal, igal, cf, Oil bbl, kg, ton, US ton, lb or none. Decimals 0 - 1 - 2 or 3. Total can be reset to zero. FW-E126-P-EL-M_v0203_03_EN.docx...
- Page 53 Bargraph speedometer 20 blocks, each block is 5% of total span Decimals 0 - 1 - 2 or 3. Time units /sec - /min - /hr - /day. Temperature Digits 6 digits. Units Temperature: °C, °F or K Decimals FW-E126-P-EL-M_v0203_03_EN.docx...
-
Page 54: Problem Solving
Page 54 PROBLEM SOLVING In this appendix, several problems are included that can occur when the E126-P-EL is going to be installed or while it is in operation. Flowmeter does not generate pulses Check: • Signal selection SETUP 4.1. •... -
Page 55: Modbus Communication
561 in the middle and register 562 at the end (the LSW - least significant word). The following figure illustrates this and shows how to calculate the value. Datatypes The following datatypes are used for Modbus communication with the E126-P-EL: DATA TYPE NUMBER OF... - Page 56 23456,78 while communication will read a “total” of 12345678 (note that the decimals should be adapted according the setting in “total decimals” which is in this case 2). Runtime variables of the E126-P-EL – Integer based – Individual read HOLDING...
- Page 57 Note: The list of runtime variables shown above can be read as one contiguous list of registers. Unused registers return 0. Historical previous day totals of the E126-P-EL – Integer based – Contiguous read The read-out of historical previous day totals is done via 2 INDEXED variables containing the number of decimals and the value.
- Page 58 Page 58 Configuration variables of the E126-P-EL Note: All configuration variables shown below must always be read or written individually, for the indicated number of registers, in 1 single action! Total HOLDING VARIABLE TYPE VALUE / REMARKS ADDRESS REGISTER REGISTERS...
- Page 59 VALUE / REMARKS ADDRESS REGISTER REGISTERS [d] 74 40075 Thermal uint32 0.000…9999.999 *10 [h] 0x04A Expansion Representation: Fixed at 9 decimals. Multiply returned value Coefficient by 10 for original value. [d] 537 40538 T-normal uint32 0.00…9999.99 K [h] 0x219 (temp) FW-E126-P-EL-M_v0203_03_EN.docx...
- Page 60 [h] 0x096 used for indexed values [d] 149 40150 index use uint16 0=static 1=auto 2=auto [h] 0x095 increment decrement [d] 25 40026 reboot uint16 Returns 0 on read. [h] 0x019 Write 0xA50F for unit restart Write 0x5AF0 for factory settings FW-E126-P-EL-M_v0203_03_EN.docx...
- Page 61 Representation: hh:mm:ss [h] 0x0B0 Stored decimal: 23:59:59 = 235959d = 0x0003.99B7 [d] 168 40169 password uint16 0…9999 [h] 0x0A8 [d] 139 40140 keyboard uint16 0=disable 1=enable [h] 0x08B lock [d] 170 40171 tag no uint32 0...9999999 [h] 0x0AA Representation: xxxxxxx FW-E126-P-EL-M_v0203_03_EN.docx...
-
Page 62: Declaration Of Conformity
Page 62 DECLARATION OF CONFORMITY FW-E126-P-EL-M_v0203_03_EN.docx... -
Page 63: Index Of This Manual
Coil-signal power supply communication Pulse output Configuration Pulse-signal NPN/PNP 38, 39 contents Reed-switch: dimensions SETUP-level display update temperature input filter terminal connectors 35, 36 flowmeter total signal decimals flowrate decimals k-factor 17, 21, 22 decimals k-factor measuring unit Total FW-E126-P-EL-M_v0203_03_EN.docx... -
Page 64: List Of Figures E126-P-El
Page 64 LIST OF FIGURES E126-P-EL Fig. 1: Typical application for the E126-P-EL Fig. 2: Control panel, optical keys Fig. 3: Control panel, disable optical keys Fig. 4: Control panel, ON/OFF optical keys Fig. 5: Control panel, Push button operation Fig. - Page 65 Page 65 Notes: FW-E126-P-EL-M_v0203_03_EN.docx...
- Page 66 UNIT K- FACTOR TEMPERATURE – Type TP DISPLAY °C NO. OF WIRES FILTER TEMPERATURE – Type TA DISPLAY °C SPAN 100.00 OFFSET 273.15 FILTER CALIB-LO default CALIB-HI default FORMULA EQUATIONS TYPE THERM.EXP.COEFFICIENT 0.00 K T-NORMAL (TEMP) 0.00 K FW-E126-P-EL-M_v0203_03_EN.docx...
- Page 67 1000 COM MODB SPEED 9600 ADDRESS MODE bus-rtu DATABITS 8 bits PARITY none OTHERS 10.1 MODEL E126-P-EL 10.2 SOFTWARE VERSION 03:_ _:_ _ 10.3 SERIAL NO _ _ _ _ _ _ _ 10.4 TIME 00:00:00 10.5 PASSWORD 0000 enable 10.6...
- Page 68 Page 68 Fluidwell B.V. PO box 6 Voltaweg 23 Website: www.fluidwell.com FW-E126-P-EL-M_v0203_03_EN.docx 5460 AA Veghel 5466 AZ Veghel Find your nearest representative: www.fluidwell.com/representatives The Netherlands The Netherlands Copyright: 2019 - FW-E126-P-EL-M_v0203_03_EN.docx...
Need help?
Do you have a question about the E126-P-EL and is the answer not in the manual?
Questions and answers