Advertisement
Available languages
Available languages
Quick Links
American Standard is devoted to making life,
in the heart of your home, better every day...
...so, thank you for inviting us in! With the very best in kitchen
and bathroom products, we are here to help make your life
happier, healthier and simpler. Our commitment to quality,
innovation and performance has made us part of your everyday
routine for nearly 150 years, and we look forward to being a
part of your life for many years to come.
Learn more at www.AmericanStandard.com
REGISTER WARRANTY
Try the easy-scan QR code to quickly enter
your information or find your product's
detailed warranty here:
AmericanStandard-us.com/support/warranty
Registering allows you to keep your product information
safe, and us the ability to contact you in the event of a
product recall or any news about your purchase.
And if ever you have a question or need help...?
Call us at 1-855-815-0004
7302240-100 Rev. C (6/23)
765AA701/5900A05G/5900A05GT
7302240-100C
Advertisement

Related Manuals for American Standard AquaWash


Summary of Contents for American Standard AquaWash
- Page 1 American Standard is devoted to making life, in the heart of your home, better every day… …so, thank you for inviting us in! With the very best in kitchen and bathroom products, we are here to help make your life happier, healthier and simpler.
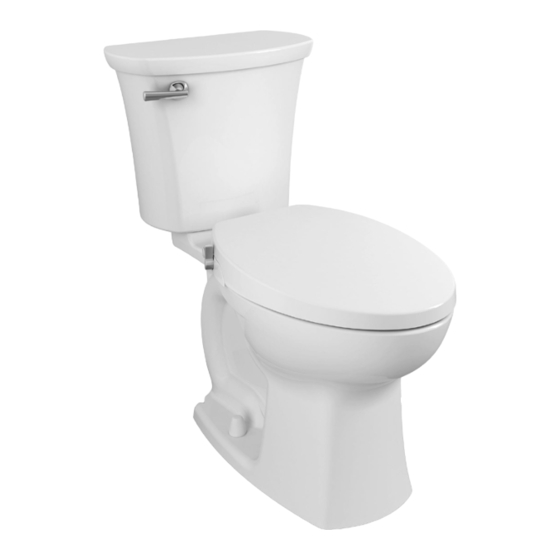
- Page 2 Chair Height Elongated Toilet Combo INSTALLATION INSTRUCTIONS Thank you for selecting American Standard – the benchmark of fine quality for over 150 years. To ensure this product is installed properly, please read these instructions carefully before you begin. Certain installations may require professional help.
- Page 3 INSIDE THE BOX Tank to Bowl Plastic Attachment Wax Ring Gasket Washers (2) Handle T-Bolts with Bolt Bowl-to- Tank Tank Retainer (2) Caps (2) Floor Knobs Bolts (2) Grommets Bolts (2) Insert (2) Nuts (2) (Apply to (Apply to Bottom Mount) Top Mount) SpaLet Seat...
- Page 4 IF REMOVING AN EXISTING TOILET Turn off water Flush to remove water from Clean flange supply tank; sponge remaining water from bowl before removing toilet CAUTION If leaving floor flange open for more than 1-2 hours, cover flange to prevent escaping sewer gasses.
- Page 5 SECURE FLANGE ATTACH WAX RING Press Firmly ring PLACE TOILET ON FLANGE ATTACH BOWL TO FLOOR KNOBS Apply weight evenly. Do not move after placement. Water tight seal may break. Hand tighten only. Do not over-tighten. 7302240-100 Rev. C (6/23)
- Page 6 ATTACH TANK TO BOWL GASKET CONNECT TANK AND BOWL Install tank grommets and Tighten handles tank bolts in bottom of tank alternately until the tank con- as shown. tacts the front and back of the bowl achieving Tank china-to-china to Bowl contact.
- Page 7 WARNING: Do not use in-tank cleaners. These products can seriously corrode fittings in the tank. This damage can cause leakage and property damage. American Standard shall not be responsible or liable for any damage caused by the use of in-tank cleaners.
- Page 8 TROUBLESHOOTING GUIDE See Step 9 For Diagram PROBLEM POSSIBLE CAUSE CORRECTIVE ACTION Does not flush a. Water supply valve a. Open valve and allow water to fill tank closed b. Shut off water supply, disconnect supply b. Supply line blocked line and inspect all gaskets and washers.
- Page 9 PARTS SEAT COVER RELEASE BUTTON WATER TANK LEVER SEAT T-SHAPED ADAPTER BIDET NOZZLE WASH NOZZLE WATER SUPPLY HOSE BOWL SHUT OFF VALVE WATER INLET HOSE WARNING Please read the instructions carefully before installing and using. The product requires a flexible supply hose. The watter shutoff valve should be near the installed product for ease of installation.
- Page 10 Wipe the bowl surface clean. Lay the Press the inserts into the toilet bowl holes. template over the top of the toilet bowl. Align the base plate to the slotted area of Position the template to how you want the the template and then place the hardware bidet seat to pair up with the bowl once onto the base plate as shown.
- Page 11 Install T-shaped adapter to the fill valve and Slide the SpaLet® seat across the base supply hose as shown. Connect the included plate until you hear a click. The SpaLet connection hose with filter on to the T-shaped seat is now assembled to the bowl. adapter and the SpaLet®...
- Page 12 OPERATION LOW FLOW WASH FUNCTION HIGH FLOW BIDET FUNCTION LOW FLOW HIGH FLOW OFF AND SELF-CLEANING Keep the knob at the 90˚ position when not in use. The wand cleans itself after each use. For additional cleaning of the wand, position the knob at 85˚ or 95˚ for a few seconds and then reposition back to 90˚.
- Page 13 CLEANING AND MAINTENANCE DO NOT USE AGGRESSIVE CHEMICALS: You will need to clean the wands when they get build up of residue and calcium. For example: hydrogen chloride, paint You can pull the wands out with your thinner, benzene, abrasive cloth or paper, finger and then with a soft bristle polishing agent, toothbrush, brush the nozzle head.
- Page 14 TROUBLESHOOTING GUIDE PROBLEM POSSIBLE CAUSE CORRECTIVE ACTION Water is too low a. Low water pressure of the unit a. During WASH/BIDET, turn the knob to a higher setting during WASH/ b. Low water pressure of water BIDET supply b. When water supply pressure is lower than 0.07 MPa (10 psi) No water comes a.
- Page 15 Register your sink at www.americanstandard.com. Please save your proof of purchase (sale receipt). If you need assistance or do not have access to our website, please contact American Standard Customer Care at: (800) 442-1902. An American Standard representative will assist in completing the warranty registration.
- Page 16 American Standard se consacre à rendre la vie au cœur de votre maison meilleure chaque jour... Merci de nous avoir invités! Avec les meilleurs produits de cuisine et de salle de bains, nous sommes là pour vous aider à rendre votre vie plus heureuse, plus saine et plus simple. Notre engagement en faveur de la qualité, de l’innovation et du...
- Page 17 Edgemere CONSIGNES D’INSTALLATION Merci d’avoir choisi American Standard, la référence en matière de qualité supérieure depuis plus de 150 ans. Pour vous assurer de l’installation adéquate de ce produit, veuillez lire ces consignes avant de commencer. Certaines installations peuvent nécessiter l’aide d’un professionnel.
-
Page 18: Table Of Contents
CONTENU DE LA BOÎTE Anneau de Cire Joint Réservoir Rondelles en Poignée de Cuvette Plastique (2) Fixation (1) Boulons en T Avec Cache Boutons Boulons du Œillets du Rondelles de Retenue Boulons (2) Cuvette Sol réservoir (2) réservoir (2) Boulons (2) Pièces de Écrous (2) (se fixent sous... - Page 19 SI VOUS ENLEVEZ UNE CUVETTE DE TOILETTE DÉJÀ EN PLACE Coupez Actionnez la chasse d’eau Nettoyez la bride. l’alimentation d’eau. pour vider le réservoir d’eau; épongez le restant d’eau de la cuvette avant d’enlever la toilette. ! PRÉCAUTION Si la bride de sol est restée ouverte plus d’une heure ou deux, recou- vrez la bride pour éviter...
-
Page 20: Fixation
FIXER L’ANNEAU DE CIRE BRIDE DE FIXATION Appuyez Fermement Anneau de Cire PLACER LES TOILETTES SUR LA BRIDE FIXER LA CUVETTE AUX BOUTONS DE SOL Appliquez une pression uniforme. Ne déplacez pas la toilette après l’avoir placée, au risque de briser le joint d’étanchéité. -
Page 21: Réservoir
FIXER LE RÉSERVOIR AU JOINT DE LA CUVETTE RACCORDER LE RÉSERVOIR ET LA CUVETTE Installez les oeillets et les boulons au fond du Serrez les réservoir écrous tour à tour comme avec l es poignées indiqué. jusqu’à obtenir un contact porcelaine à... - Page 22 AVERTISSEMENT : N’utilisez pas d’agent nettoyant dans le réservoir. Ces produits peuvent sérieusement corroder les raccords à l’intérieur du réservoir. Cette corrosion peut entraîner des fuites et des dommages matériels. American Standard ne sera en aucun cas respons- able de tout dommage causé par l’utilisation de produits nettoyants dans le réservoir.
- Page 23 GUIDE DE DÉPANNAGE Reportez-vous au schéma de l’étape 8. PROBLÈME CAUSE POSSIBLE MESURE CORRECTIVE La chasse ne a. La valve d’alimentation a. Ouvrez la vanne et remplissez le réservoir fonctionne pas d’eau est fermée. d’eau. b. La conduite d’alimenta- b. Fermez l’alimentation d’eau, débranchez tion est bloquée.
- Page 24 PIÈCES COUVERCLE DU SIÈGE BOUTON DE DÉGAGEMENT RÉSERVOIR D'EAU LEVIER SIÈGE ADAPTATEUR EN T BUSE DU BIDET BUSE DE NETTOYAGE TUYAU D'ALIMENTATION EN EAU CUVETTE SOUPAPE D'ARRÊT TUYAU D'ARRIVÉE D'EAU AVERTISSEMENT Veuillez lire attentivement les consignes avant l’installation et l’utilisation du produit. Un tuyau d’alimentation souple doit être utilisé...
-
Page 25: Boulons
Enfoncer les pièces de fixation dans les trous Essuyez la surface de la cuvette. Posez le de la cuvette de la toilette. Aligner la plaque modèle sur le dessus de la cuvette. Posi- de base avec la zone à fentes du gabarit puis tionnez le modèle à... - Page 26 Installer l’adaptateur en forme de T sur le rob- Faire glisser le siège SpaLetMD sur la inet de remplissage et le tuyau d’alimentation, plaque de base jusqu’à entendre un « clic ». comme indiqué. Raccorder le tuyau de rac- Le siège SpaLet est maintenant fixé à la cordement avec filtre fourni à...
- Page 27 FONCTIONNEMENT DÉBIT FAIBLE FONCTION DE NETTOYAGE DÉBIT ÉLEVÉ FONCTION DE BIDET DÉBIT FAIBLE DÉBIT ÉLEVÉ ARRÊT ET AUTO-NETTOYAGE Laisser la poignée à la position 90 ° lorsque le siège n’est pas utilisé. Le bras a une fonction autonettoyante qui se déclenche après chaque utilisation. Pour nettoyer davantage le bras, placer la poignée sur 85 °...
- Page 28 NETTOYAGE ET ENTRETIEN NE PAS UTILISER DE PRODUITS Les bras doivent être nettoyés lorsque des CHIMIQUES AGRESSIFS : résidus ou du calcium se sont accumulés. chlorure d’hydrogène, diluant pour pein- Vous pouvez tirer les bras pour les faire tures, benzène, tissu ou papier abrasif, sortir avec vos doigts puis, à...
- Page 29 GUIDE DE DÉPANNAGE PROBLÈME CAUSE POSSIBLE MESURE CORRECTIVE Le débit d’eau est trop a. Pression d’eau faible de l’apparei a. Pendant l’utilisation de la fonctionnalité NETTOY- faible pendant l’utili- AGE/BIDET, tourner la poignée pour un réglage b. Pression d’eau faible de sation de la fonction- supérieur.
- Page 30 Enregistrez votre lavabo au www.americanstandard.com. Conservez votre preuve d’achat (ticket de caisse). Si vous avez besoin d’aide ou n’avez pas accès à notre site Web, veuillez appeler le service à la clientèle d’American Standard au numéro suivant : 800 442-1902. Un représentant d’American Standard vous aidera à remplir l’enregistrement de la garantie.
- Page 31 American Standard se dedica a mejorar la vida, en el corazón de su hogar, cada día..así que, ¡gracias por invitarnos! Con lo mejor en productos de cocina y baño, estamos aquí para ayudarle a hacer su vida más feliz, más sana y más sencilla. Nuestro compromiso con la cal- idad, la innovación y el desempeño nos ha convertido en parte...
- Page 32 Edgemere®. INSTRUCCIONES DE INSTALACIÓN Gracias por elegir American Standard, el parámetro de excelente calidad por más de 150 años. Para asegurar la instalación adecuada de este producto, por favor lea las instrucciones con atención antes de comenzar. Algunas instalaciones pueden requerir ayuda profesional.
- Page 33 CONTENIDO DE LA CAJA Arandelas Empaque de Manija de Plásticas (2) Arillo de Acoplamiento Fijación Cera Tornillos Del Tornillos T Con Cubre Perillas De La Guías Para Tornillo Tanque (2) Sujetador (2) Pijas (2) Taza Al Piso (2) Para El Tanque (2) Perno (2) Inserción (2) Tuerca (2)
- Page 34 PARA RETIRAR UN INODORO VIEJO EXISTENTE Apague el suministro Descargue para retirar el agua Limpiar brida. de agua. del tanque; quite el agua que queda en la taza usando una esponja antes de retirar el inodoro. PRECAUCIÓN piso abierta durante más de 1-2 horas, cúbrala para evitar escapes de gases de desagüe.
- Page 35 BRIDA DE SEGURIDAD FIJAR EL ANILLO DE CERA Presionar Firmemente Arillo de Cera COLOCAR EL INODORO EN LA BRIDA FIJAR LA TAZA A LOS POMOS DEL SUELO Distribuya el peso uniformemente. Nolo mueva una vez colocado. El sello apretado del agua puede romperse. Apriete a mano No apriete de más.
- Page 36 FIJAR LA CISTERNA A LA JUNTA DE LA TAZA CONECTAR TANQUE Y TAZA Instale las guías para ornillos y los tornillos Apriete las del tanque en manijas el fondo del alternadamente mismo, como hasta que el tanque se indica. haga contacto con el frente y la parte posterior de la taza logrando un...
- Page 37 Esos productos pueden corroer seriamente los accesorios del tanque. Dicho daño puede provocar fugas y daños a la propiedad. American Standard no será responsable civil ni legal por ningún daño provocado por el uso de limpiadores dentro del tanque.
- Page 38 GUÍA DE LOCALIZACIÓN DE FALLAS Ver el paso 9 para consultar el diagrama PROBLEMA CAUSA POSIBLE MEDIDA CORRECTIVA No funciona a. La válvula de suministro a. Abra la válvula y permita que el agua llene de agua está cerrada el tanque. b.
- Page 39 PIEZAS TAPA DEL ASIENTO BOTÓN DE DESBLOQUEO TANQUE DE AGUA PALANCA ASIENTO ADAPTADOR EN FORMA DE T BOQUILLA DE BIDÉ BOQUILLA DE LAVADO MANGUERA DEL SUMINISTRO DE AGUA TAZA VÁLVULA DE CIERRE MANGUERA DE ENTRADA DE AGUA ADVERTENCIA Lea con atención las instrucciones antes de instalar y usar el producto. Este producto requiere una manguera de suministro flexible.
- Page 40 Limpie la superficie de la taza con un paño. Presione las inserciones en los orificios de Coloque la plantilla sobre la parte superior la taza del inodoro. Alinee la placa de base de la taza del inodoro. Ubique la plantilla con la zona ranurada de la plantilla.
- Page 41 Instale el adaptador en forma de T en la válvula Deslice el asiento SpaLet® a lo largo de la de llenado y la manguera de suministro, tal como placa de base hasta oír un clic. El asiento se indica. Conecte la manguera de conexión SpaLet ya está...
- Page 42 FUNCIONAMIENTO BAJO FLUJO FUNCIÓN DE LAVADO ALTO FLUJO FUNCIÓN DE BIDÉ BAJO FLUJO ALTO FLUJO APAGADO Y AUTOLIMPIEZA Mantenga la perilla en la posición de 90˚ mientras no se usa. La varilla se limpia sola después de cada uso. Para limpiar mejor la varilla, coloque la perilla a 85˚ o 95˚ durante algunos segundos y luego regrésela a 90˚.
- Page 43 LIMPIEZA Y MANTENIMIENTO NO USE SUSTANCIAS QUÍMICAS AGRESIVAS: Debe limpiar las varillas cuando tengan por ejemplo: cloruro de hidrógeno, diluy- acumulación de residuos y calcio. Jale ente de pintura, benceno, paño o papel las varillas con el dedo y luego cepille la abrasivo, agente cabeza de la boquilla usando un cepillo pulidor, fragancia,...
- Page 44 GUÍA DE LOCALIZACIÓN DE FALLAS PROBLEMA CAUSA POSIBLE MEDIDA CORRECTIVA El agua está demasi- a. Baja presión de agua de a. Durante el LAVADO/BIDÉ, gire la perilla a una con- ado baja durante el la unidad figuración más alta LAVADO/BIDÉ b.
- Page 45 Registre la lavabo en www.americanstandard.com. Guarde el comprobante de compra (recibo de compra). Si necesita asistencia o no puede acceder a nuestro sitio web, comuníquese con Atención al Cliente de American Standard llamando al: (800) 442-1902. Un representante de American Standard lo ayudará a completar la inscripción de la garantía.
Need help?
Do you have a question about the AquaWash and is the answer not in the manual?
Questions and answers