Table of Contents
Advertisement
Available languages
Available languages
INSTALLATION INSTRUCTIONS
CARE AND MAINTENANCE
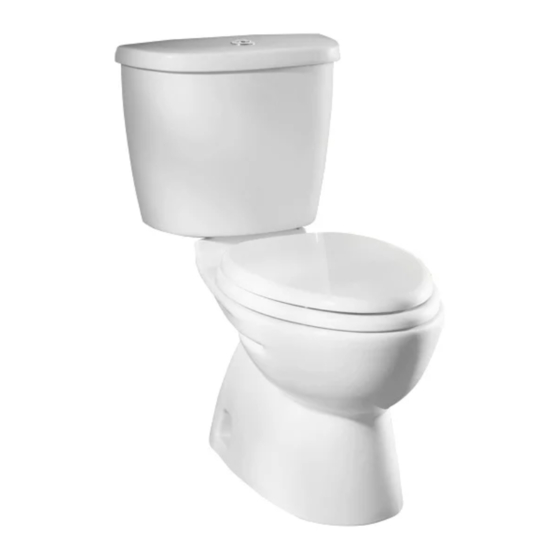
FloWise™ DUAL FLUSH 2-PIECE TOILET
Normal Height, Elongated Rim: 2479 / 2476 / 2779
Right Height™ Elongated Rim: 2480 / 2484 / 2778 / 2566
Normal Height, Round Front: 2489
Thank you for selecting American Standard - the benchmark of fine quality for over 100 years. To ensure this product is installed
properly, please read these instructions carefully before you begin. (Certain installations may require professional help.) Also be
sure your installation conforms to local codes.
CAUTION: PRODUCT IS FRAGILE. TO AVOID BREAKAGE AND POSSIBLE INJURY HANDLE WITH CARE!
!
NOTE: Pictures may not exactly define contour of china and components.
RECOMMENDED TOOLS AND MATERIALS
Putty Knife
Regular Screwdriver
Hacksaw
Wax Ring/Gasket
1
REMOVE OLD TOILET
a. Close toilet supply valve and flush tank completely. Towel or sponge remaining water from tank and bowl.
b. Disconnect and remove supply line.
NOTE: If replacing valve, first shut off main water supply!
c. Remove old mounting hardware, remove toilet and plug floor waste opening to prevent escaping sewer gases.
d. Remove closet bolts from flange and clean away old wax, putty, etc. from base area.
NOTE: Mounting surface must be clean and level before new toilet is installed!
2
ROUGHING-IN DIMENSIONS:
MODELS:
2479
2476
2779
2480
2484
2778
2566
2489
3
CLOSET
FLANGE
A
CLOSET
BOLTS
INSTALL CLOSET BOLTS
Install closet bolts in flange channel,
turn 90°, and slide into place 6"
(152mm) apart and parallel to wall.
TEMPORARILY set toilet in place.
Place tapered washer and nuts onto
the bolts as shown in Step 5. Mark bolt
length needed for bolt cap clearance.
Remove toilet. Precut the bolts to
length by twisting the nut onto the bolt
past the cut mark, then cutting the bolt
to the desired length with a hacksaw.
Unscrew the nut to repair the threads.
Re-install bolts in flange.
P r o d u c t n a m e s l i s t e d h e r e i n a r e t r a d e m a r k s o f A S A m e r i c a I n c .
© A S A m e r i c a I n c . 2 0 0 9
Adjustable Wrench
Flexible Supply Tube
DIMENSION A:
12"
(305 mm)
4
SEALANT
INSTALL WAX SEAL
Invert toilet on floor (cushion to
prevent damage), and install wax
ring evenly around waste flange
(horn), with tapered end of ring
facing toilet. Apply a thin bead of
sealant around toilet base.
Sealant
Closet Bolts
FINISHED WALL
A
FINISHED FLOOR
5
WAX RING
POSITION TOILET ON FLANGE
a. Unplug floor waste opening and install toilet on closet flange
so bolts project through mounting holes.
b. Loosely install retainer washers and nuts. Side of washers
marked "THIS SIDE UP" must face up!
Certified by
IAPMO R&T
Tape Measure
Carpenters Level
C/L
SUPPLY
AS
REQUIRED
BOLT
CAP
NUT
TAPERED
WASHER
CLOSET
BOLT
FLANGE
7301144 -1 0 0 Re v. G
Advertisement
Table of Contents

Related Manuals for American Standard FloWise 2479


Summary of Contents for American Standard FloWise 2479
- Page 1 Normal Height, Round Front: 2489 Thank you for selecting American Standard - the benchmark of fine quality for over 100 years. To ensure this product is installed properly, please read these instructions carefully before you begin. (Certain installations may require professional help.) Also be sure your installation conforms to local codes.
- Page 2 Tank Installation Kit Includes: 2 bolts, 2 rubber washers, 4 metal washers, 4 metal nuts, 2 plastic nuts, 1 large rubber gasket. RUBBER WASHER RUBBER TANK MTG. GASKET BOLT CAP BOLTS WASHER CLOSET FLANGE WASHER CLOSET BOLT WASHER INSTALL TANK a.
-
Page 3: Care And Cleaning
WARNING: Do not use in-tank cleaners. Products containing chlorine (calcium hypochlorite) can seriously damage fittings in the tank. This damage can cause leakage and property damage. American Standard shall not be responsible or liable for any tank fitting damage caused by the use of cleaners containing chlorine (calcium hypochlorite). -
Page 4: Troubleshooting Guide
This warranty shall be void if the product has been moved from its initial place of installation; if it has been subjected to faulty maintenance, abuse, misuse, accident or other damage; if it was not installed in accordance with American Standard's instructions; or if it has been modified in a manner inconsistent with the product as shipped by American Standard. - Page 5 Hauteur Normale, Devant Arrondi: Modèle 2489 Nous vous remercions d'avoir choisi American Standard - synonyme de qualité supérieure depuis plus de 100 ans. Pour s'assurer que ce produit soit bien installé, veuillez lire ces instructions attentivement avant de commencer. (Certaines installations peuvent requérir une aide professionnelle.) Assurez-vous également que votre installation se conforme aux codes locaux.
- Page 6 La trousse d’installation du réservoir comprend : 2 boulons, 2 rondelles caoutchoucs, 4 rondelles métalliques, 4 écrous métalliques, 2 écrous plastiques, 1 grand joint caoutchouc RONDELLE CAOUTCHOUC JOINT BOULONS CAOUT- DE MONTAGE CACHE-BOULON BOULONS CHOUC RONDELLE ÉCROU COLLERETTE DE PLANCHER RONDELLE ÉCROU BOULON DE TOILETTE...
-
Page 7: Entretien Et Nettoyage
Ne pas utiliser de nettoyants à l'intérieur du réservoir. Les produits contenant du chlore (hypochlorite de calcium) peuvent endommager gravement la robinetterie dans le réservoir. Ces dommages peuvent causer des fuites et des bris. American Standard n'est pas responsable des dommages à la robinetterie des réservoirs causés par l'utilisation de nettoyants contenant du chlore (hypochlorite de calcium). -
Page 8: Dépannage
GARANTIE LIMITÉE DE DEUX ANS AS AMERICA, INC. (“AMERICAN STANDARD”) Si une inspection de ce produit de plomberie AS America, Inc. (“American Standard”), à l’intérieur d’une période de deux (2) ans suite à l’achat initial, confirme un défaut de matériau ou de fabrication, American Standard réparerait ou échangerait, selon son choix, le produit pour un modèle semblable. - Page 9 Altura Normal, Frente Redondeado: Modelo 2489 Gracias por seleccionar American Standard - el parámetro de primera calidad por más de 100 años. Para asegurarse de que el producto esté instalado correctamente, por favor lea estas instrucciones cuidadosamente antes de comenzar.
- Page 10 El juego de instalación del tanque incluye: 2 pernos, 2 arandelas de goma, 4 arandelas de metal, 4 tuercas de metal, 2 tuercas de plástico, 1 empaque de hule grande. ARANDELA DE GOMA EMPAQUE TORNILLOS DE HULE DE MONTAJE TAPA DEL DEL TANQUE TORNILLO ARANDELA...
-
Page 11: Cuidado Y Limpieza
Los productos que contienen cloro (hipoclorito de calcio) pueden dañar seriamente los accesorios del tanque. Esto puede provocar fugas y daños a la propiedad. American Standard no será responsable por ningún daño en los accesorios del tanque debido al uso de limpiadores que contienen cloro (hipoclorito de calcio). -
Page 12: Solución De Problemas
GARANTÍA LÍMITADA DE DOS AÑOS DE AS AMERICA, INC. (“AMERICAN STANDARD”) Si la inspección de un producto AS America, Inc. (“American Standard”), dentro de dos años de su compra inicial, confirma que hay defectos de materiales o fabricación, American Standard reparará o tendrá la opción de cambiar el producto por un modelo similar.
Need help?
Do you have a question about the FloWise 2479 and is the answer not in the manual?
Questions and answers