Table of Contents
Advertisement
Available languages
Available languages
INSTALLATION INSTRUCTIONS
CARE AND MAINTENANCE
Clean
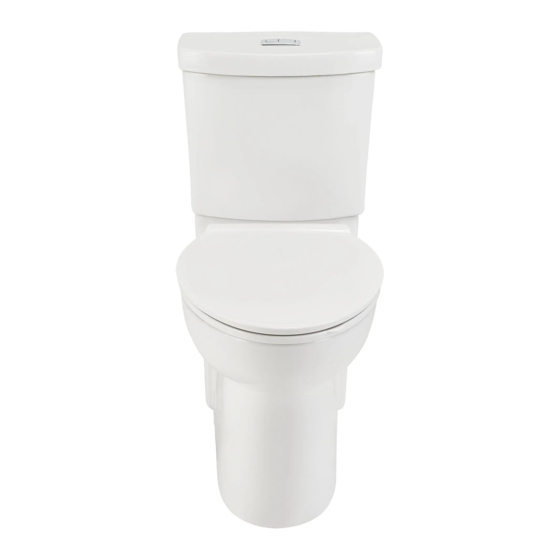
Dual Flush Concealed Trapway
®
Right Height
, Elongated Model 721AA
®
Thank you for selecting American Standard - the benchmark of fine quality for over 100 years. To ensure this product is
installed properly, please read these instructions carefully before you begin. (Certain installations may require professional
help.) Also be sure your installation conforms to local codes.
CAUTION: PRODUCT IS FRAGILE. TO AVOID BREAKAGE AND POSSIBLE INJURY HANDLE WITH CARE!
!
NOTE: Pictures may not exactly define contour of china and components.
RECOMMENDED TOOLS AND MATERIALS
Putty Knife
Regular Screwdriver
Hacksaw
Wax Ring/Gasket
1
REMOVE OLD TOILET
a. Close toilet supply valve and flush tank completely. Towel or sponge remaining water from tank and bowl.
b. Disconnect and remove supply line. NOTE: If replacing valve, first shut off main water supply!
c. Remove old mounting hardware, remove toilet and plug floor waste opening to prevent escaping sewer gases.
d. Remove closet bolts from flange and clean away old wax, putty, etc. from base area.
NOTE: Mounting surface must be clean and level before new toilet is installed!
2
ROUGHING-IN DIMENSIONS:
NOTE: Distance from wall to closet flange centerline must be as listed below:
IMPORTANT:
Water supply on the wall is required at 2-1/4" or 8" from centerline of the toilet (see rough-in). First suggested
position is hidden behind the toilet. The geometry of the toilet gives space for this installation. The second suggested position
is next to the toilet. Between these two positions, the space for the supply between wall and toilet is limited to 4-1/2". In this
case, check your supply and hose dimensions.
RIGHT HEIGHT ELONGATED 2-PIECE TOILET
FINISHED
WALL
(191mm)
12"
(305mm)
IMPORTANT: Water supply on the wall is required at 2-1/4" or 8" from centerline of the toilet (see rough-in).
First suggested position is hidden behind the toilet. The geometry of the toilet gives space for this installation.
The second suggested position is next to the toilet. Between these two positions, the space for the supply
between wall and toilet is limited to 4-1/2". In this case, check your supply and hose dimensions.
Adjustable Wrench
Flexible Supply Tube
30-1/4"
(768mm)
8-3/4"
(221mm)
C/L OF SEAT POST
HOLES 5-1/2"
(140mm) CENTERS
18-1/2"
(470mm)
16-1/2"
(419mm)
7-1/2"
13-11/16"
(347mm)
FINISHED
FLOOR
P r o d u c t n a m e s l i s t e d h e r e i n a r e t r a d e m a r k s o f A S A m e r i c a , I n c .
© A S A m e r i c a , I n c . 2 0 1 3
15-3/4"
(399mm)
14"
(356mm)
SUPPLY
AS
30-7/8"
REQUIRED
(784mm)
(position 1 or
position 2)
2-1/4"
8"
(57mm)
5-1/2"
(204mm)
(140mm)
6"
(152mm)
12-3/16"
(309mm)
Sealant
Tape Measure
Closet Bolts
Carpenters Level
BACK VIEW
(for reference)
Certified by
IAPMO R&T
7 30 2 06 8 -10 0
Advertisement
Table of Contents

Related Manuals for American Standard 721AA


Summary of Contents for American Standard 721AA
- Page 1 Certified by IAPMO R&T Thank you for selecting American Standard - the benchmark of fine quality for over 100 years. To ensure this product is installed properly, please read these instructions carefully before you begin. (Certain installations may require professional help.) Also be sure your installation conforms to local codes.
- Page 2 Press firmly. TIP: Place 2 pieces of masking tape on floor (as shown) to help with alignment in step 6. Hand Tighten Only. Apply weight evenly. Do not move after Do Not Overtighten. placement. Water tight seal may break. Tighten handles alternately Thread, then For seat installation, until tank contacts bowl.
-
Page 3: Care And Cleaning
Do not use in-tank cleaners. Products containing chlorine (calcium hypochlorite) can seriously damage fittings in the tank. This damage can cause leakage and property damage. American Standard shall not be responsible or liable for any tank fitting damage caused by the use of cleaners containing chlorine (calcium hypochlorite). -
Page 4: Repair Parts List
Set water level to mark on back of tank. In Canada: In Mexico: In the United States: AS Canada ULC American Standard B&K Mexico American Standard Brands 5900 Avebury Rd. S. de R.L. de C. P.O. Box 6820 Mississauga, Ontario... - Page 5 IAPMO R&T Nous vous remercions d'avoir choisi American Standard - synonyme de qualité supérieure depuis plus de 100 ans. Pour être sûr que ce produit soit bien installé, veuillez lire attentivement ces instructions avant de commencer. (Certaines installations peuvent requérir une aide professionnelle.) Assurez-vous également que votre installation soit conforme aux codes locaux.
- Page 6 Appuyer fermement. ASTUCE : Placer deux (2) morceaux de ruban adhésif sur le plancher (de la façon illustrée) pour vous aider avec l'alignement à l'étape 6. Serrer manuellement uniquement. Appliquer une force uniforme. Ne pas déplacer Éviter de trop serrer. après le positionnement.
-
Page 7: Entretien Et Nettoyage
Ces dommages peuvent causer des fuites et des bris. American Standard n'est pas responsable des dommages causés à la robinetterie des réservoirs par l'utilisation de nettoyants contenant du chlore (hypochlorite de calcium). -
Page 8: Pièces De Rechange
Régler le niveau de l'eau au repère au dos du réservoir. c. Niveau d'eau réglé trop haut. Au Canada : Au Mexique : Aux États-Unis : AS Canada ULC American Standard B&K Mexico Marques American Standard 5900 Avebury Rd. S. de R.L. de C. P.O. Box 6820 Mississauga, Ontario Via Morelos n°... - Page 9 IAPMO R&T Gracias por elegir American Standard - el parámetro de primera calidad por más de 100 años. Para asegurarse de que el producto esté instalado correctamente, por favor lea estas instrucciones cuidadosamente antes de comenzar. (Ciertas instalaciones pueden requerir ayuda profesional.) Asegúrese de que su instalación cumpla con los códigos locales.
- Page 10 Presione con firmeza. CONSEJO: Coloque 2 piezas de cinta adhesiva en el piso (conforme se muestra) para ayudar con la alineación del paso 6. Apriete sólo con la mano. No apriete más de Aplique peso de manera uniforme. No lo lo necesario.
-
Page 11: Cuidado Y Limpieza
No use limpiadores dentro del tanque. Los productos que contienen cloro (hipoclorito de calcio) pueden dañar seriamente los accesorios del tanque. Esto puede provocar fugas y daños a la propiedad. American Standard no será responsable por ningún daño en los accesorios del tanque debido al uso de limpiadores que contienen cloro (hipoclorito de calcio). -
Page 12: Solución De Problemas
Configure el nivel del agua en la marca de la parte posterior del tanque. En Canadá: En México: En los Estados Unidos: AS Canada ULC American Standard B&K Mexico American Standard Brands 5900 Avebury Rd. S. de R.L. de C.V. P.O. Box 6820 Mississauga, Ontario Vía Morelos #330...
Need help?
Do you have a question about the 721AA and is the answer not in the manual?
Questions and answers
How can you manually tighten this? What tool do you propose to use? Note there is NOTHING in the manual about how to attach the seat- that's really bad documentation. If we use pliers on this, we're going to damage it. There is no place for a screwdriver or similar. This seems like terrible design. What is the best way to tighten this toilet so it's usable? Is there an updated seat design for this condition?
To manually tighten the American Standard toilet seat with part number 721AA, follow these steps:
1. Position the seat properly on the toilet.
2. Tighten the seat manually by turning the fastening components by hand.
3. Avoid using excessive force to prevent damage.
4. Do not use additional tools, as manual tightening is recommended.
No additional tools are required for this process.
This answer is automatically generated
How can you tighten the seat if the bolts are loose and the seat is no longer attached tightly? Is there a way to tighten it without going underneath the toilet?
To tighten the seat on an American Standard toilet with part number 721AA without going underneath the toilet, follow these steps:
1. Align the Seat: Ensure the seat is properly positioned on the toilet.
2. Tighten Manually: Secure the seat by tightening the handles manually.
3. Avoid Over-Tightening: Do not over-tighten, as this could compromise the seal.
4. Follow Instructions: Use only manual tightening as specified in the instructions.
This method allows you to secure the seat without needing to access the underside of the toilet.
This answer is automatically generated
I didn’t get the instructions to install the toilet seat. Can you please send them.
The installation instructions for the American Standard toilet seat part number 721AA are included in the manual. You can refer to the provided instructions within the manual for proper installation. Make sure to read the instructions carefully, and ensure compliance with local codes. If additional help is required, professional assistance may be necessary.
This answer is automatically generated