
Subscribe to Our Youtube Channel
Related Manuals for AAT BLACK EDITION SOLO


Summary of Contents for AAT BLACK EDITION SOLO
- Page 1 BLACK EDITION Translation of the original user manual 2023-02 (6.1)
- Page 2 Spare parts Showroom & exhibition devices With our professional service concept Repair processing Re-use AAT proves once again its high claim of quality and off ers its clients an all-inclu- Technical information Complaints sive package.
- Page 3 On our homepage, you will also fi nd all safety-related changes which have been made to the user manual. All versions with details of the production period of the product are obtainable at: www aat-online de/de/bda/SOLO All serious incidents occurring in relation to the device must be reported to the manufacturer and to the competent authority of the Member State where the user and/or occupant is established.
-
Page 4: Table Of Contents
Table of Contents Symbols and safety instructions Explanation of the symbols on the packaging Explanation of the symbols on the device and the type plate Product description Device overview SOLO / SOLO ........8 Overview of type plate incl. -
Page 5: Symbols And Safety Instructions
Stability tests were performed under laboratory conditions. The SOLO may behave differently under real conditions compared to laboratory tests. Training may only be carried out by the manufacturer, the AAT field staff or the qualified specialist shop. CAUTION External heat sources may cause the surface temperature to rise (e.g. sunlight)! -
Page 6: Explanation Of The Symbols On The Packaging
DANGER The SOLO must not be operated in the case of severe visual impairment and/or blindness! Do not exceed the total permissible weight and the maximum person weight, as this may lead to defects or an overloading of the SOLO. Avoid driving in heavy rain, ice, snow and on unsurfaced ground (sand, mud, loose crushed rock) to prevent slipping! Do not use on escalators or travellators to avoid injuries caused by a crash or the falling out of the... -
Page 7: Explanation Of The Symbols On The Device And The Type Plate
Position: Type plate Indicates the year the medical device was manufactured. 20XX Manufacturer Position: Type plate Shows the manufacturer of the medical device (AAT Alber Antriebstechnik GmbH) Position: Type plate Serial number SOLO e.g. T1601XXXXXX / SOLO T2001XXXXXX Medical Device... -
Page 8: Product Description
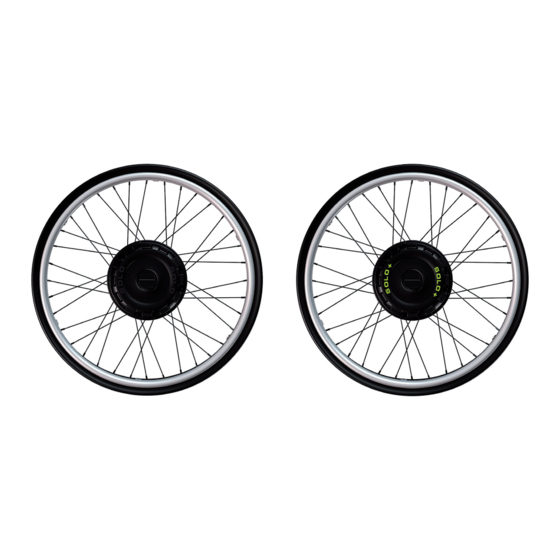
Product description 4 1 Device overview SOLO / SOLO Manufacturer’s information: For a simplifi ed assignment of the individual components, the numbers listed here are cited in full for the fi rst time in the follow- ing chapters. Interface Battery pack (Lithium-ion or lead gel) Battery bag Spiral cable... - Page 9 Operating unit Horn Speed selection fast Joystick Display Hand rest Speed selection slow ON/OFF Drive wheels Plug-in contact Catch Mounting pin Coupling disc Release device...
-
Page 10: Overview Of Type Plate Incl. Serial Number
4 2 Overview of type plate incl serial number Type plate SOLO Type plate SOLO Product / Model Max. speed Max. total weight Manufacturer address Person weight up to Symbols (refer to chapter 3) Rated slope Barcode (refer to chapter 3) Operating voltage Serial number (refer to chapter 3) Rated power of motor... -
Page 11: Intended Purpose
4 3 Intended purpose A travel drive is an electrical transport device and is attached to a manual wheelchair. The objective of the electrical transport device is to make movement with a manual wheelchair easier for a self-propelled person and to increase or fully take over the force generation for the movement of the wheelchair. This shall maintain autonomous movement and increase mobility and flexibility for the patient. -
Page 12: Medical Requirements And Indication
4 5 Medical requirements and indication The operator must be physically and mentally able to operate the product. The SOLO / SOLO+ transport device replaces the physical generation of force by the patient on a man- ual wheelchair. The use of the transport device is intended for patients who own a manual wheelchair but do no longer have sufficient physical endurance and strength to move by themselves. -
Page 13: Technical Data Solo
4 8 Technical data SOLO WARNING - Do not exceed the total permissible weight and the maximum person weight, as this may lead to defects or overloading the SOLO. NOTE - Observe the technical data. SOLO Technology Lithium-ion (ALPHA-BOX) Lead gel (BETA box) Dimensions, battery pack Refer to chapter "Dimensional drawing"... -
Page 14: Technical Data Solo
4 9 Technical data SOLO WARNING - Do not exceed the total permissible weight and the maximum person weight, as this may lead to defects or overloading the SOLO NOTE - Observe the technical data. Technology SOLO incl. lithium-ion battery pack (ALPHA-BOX) Dimensions, battery pack Refer to chapter "Dimensional drawing"... -
Page 15: Dimensional Drawing Solo/Solo
In Bearbeitung >315-1000 ±0,8 Datum Name Baugruppe Artikelnummer bearb. 19.06.2019 Kramer 040204 gepr. Benennung SOLO kpl. AAT Alber Antriebstechnik GmbH Standard Black Edition Ehestetter Weg 11 Zeichnungsnummer D-72458 Albstadt Tel.: 07431/1295-0 T1601 Fax: 07431/1295-36 Zust. Änderung Datum Name www.aat-online.de Ers. für... -
Page 16: Accessories
4 12 Accessories NOTE - Only use AAT Alber Antriebstechnik GmbH accessories. Bracket Anti-tip supports Spoke protector Motor vehicle voltage converter 12 V / 230 V Battery pack (additional) SmartControl attendant control Accessories for the operating unit Therapy tray installation... -
Page 17: Assembly
Assembly 5 1 Drive wheels CAUTION - Plug-in contacts must be dry! CAUTION - The drive wheels must be disengaged for mounting! (refer to chapter "Manual driving with drive wheels) If the original wheelchair wheels are still on the wheelchair, remove them first. Lift wheelchair Attach the mount... -
Page 18: Battery Pack
5 2 Battery pack WARNING - Never short-circuit or connect the poles of the battery pack to avoid electric shocks! CAUTION - Plug-in contacts must be dry! Establish driving mode (Fig 1 - 3, only with lithium-ion battery pack) Establish driving mode - Turn and insert the switching Tighten the screws. -
Page 19: Operating Unit
WARNING - Never use without both anti-tip supports to prevent the wheelchair from tipping backwards! WARNING - Check the anti-tip supports before initial operation to ensure safety! If there are no anti-tip supports on the wheelchair, use AAT anti-tip supports in pairs. Observe markings... -
Page 20: Starting Up
Starting up DANGER - Operation only by a single, trained person. This person must be physically and mentally able to safely operate the SOLO and may not suffer from cognitive impairments! DANGER - Never use without both anti-tip supports to prevent the wheelchair from tipping backwards! DANGER - Avoid parallel journeys on steep hillsides or rails, to prevent the wheelchair from overturning! -
Page 21: Engaging The Drive Wheels
6 1 Engaging the drive wheels Turn the coupling disc = engaged. Turn the drive wheel on the Observe the symbols. grip ring until you hear it snap = disengaged. » Repeat on the other side. 6 2 Switching on the device Switch on the SOLO. - Page 22 Warning notice Warning notice Warning notice Wheel lock Wheel lock Wheel lock Both wheels Left wheel Right wheel Warning notice Warning notice Warning notice Coupling disc Coupling disc Coupling disc Both wheels Left wheel Right wheel Warning notice Warning notice Warning notice Undervoltage Overvoltage...
- Page 23 Warning notice Warning notice Stand-up function Temperature Temperature Battery pack Drive wheels Parameterisation Battery pack being charged Error messages (Refer to chapter "Error messages") Battery pack Drive wheels Operating unit...
-
Page 24: Driving With The Solo
6 4 Driving with the SOLO DANGER - When going up a slope, reduce the speed in order to prevent the wheelchair from tilting backwards! NOTE - Please refer to the chapter on warning notices, error messages and troubleshooting! NOTE - Display lighting switches off if the operating unit has not been used for 20 seconds. NOTE - In the event of longer breaks, the automatic switch-off switches off the SOLO after 10 min. -
Page 25: Overcoming Obstacles
Activate the immobiliser Deactivate the immobiliser Press and hold the plus and Press and hold the Switch on the SOLO. minus buttons simultaneously plus and minus buttons for 2 seconds. simultaneously for 2 seconds. » The SOLO switches off. Emergency stop function When you let go of the joystick the SOLO stops automatically on the flat surface within 1 metre depending on the weight of the transported person, the ground, the terrain profile, etc. -
Page 26: Manual Driving With Quick-Release Axle Wheels
6 7 Manual driving with quick-release axle wheels CAUTION - Risk of crushing between tyre and side part / armrest! Switch off the SOLO. Remove the drive wheels. Mount the quick-release axle (Refer to chapter "Removal") wheels. Observe figure 4 - 6. Press the quick-release axle Adapt wheel. -
Page 27: Removal
Removal Removing the drive wheels Fold the release device Turn the release device. Remove the drive wheel Repeat procedure on the oth- er side. Removing the operating unit Carry out the steps listed in chapter "Operating unit" in reverse order. Removing the battery pack Carry out the steps listed in the chapter "Battery pack"... -
Page 28: Transportation
Care and maintenance WARNING - Repairs and technical safety tests are performed by the manufacturer, the AAT field staff or the authorised specialist shop! NOTE - Perform a visual inspection prior to each start-up! If parts are visibly defective or missing, contact the authorised specialist shop or the manufacturer! NOTE - It is recommended to perform a technical safety test every two years. -
Page 29: Battery Pack And Charger
9 1 Battery pack and charger DANGER - Before shipping lithium-ion batteries (repair, disposal, etc.), it is mandatory to inform your specialist dealer or the manufacturer, as there is increased danger! Special shipping conditions may require specific packaging, among other things! Your specialised dealer will receive approved transport containers on request - shipping may only be carried out via the specialised dealer! (The regulation only applies to the lithium-Ion battery pack) WARNING - Never short-circuit or connect the poles of the battery pack to avoid electric... - Page 30 Charging the lithium-ion battery pack necessary, unplug The battery pack can stay in Connect the charger. interface. the battery bag when being » Plug the charger connector charged. into the charging port of the battery pack. LED green = battery full LED orange = battery is being Check the capacity on the approx.
- Page 31 Charging the lithium-ion battery pack in a motor vehicle Deactivate the SOLO (refer Remove the battery pack. Connect voltage transformer to chapter "Deactivating the » Open Velcro and remove and charger. drive") and disconnect the battery pack. interface. » Connect charger to battery pack.
- Page 32 Charging the lead gel battery pack necessary, unplug The battery pack can stay in Connect the charger. interface. the battery bag when being » Plug the charging plug charged. connector into the socket of the battery pack. LED green = battery full LED orange = battery is being approx.
- Page 33 Charging the lead gel battery pack in a motor vehicle Unplug the interface. Remove the battery pack. Connect voltage transformer » Open Velcro and remove and charger. battery pack. » Connect charger to battery pack. Switch on the voltage LED green = battery full LED orange = battery is being converter.
-
Page 34: Cleaning And Disinfection
9 2 Cleaning and disinfection WARNING - No moisture must be allowed to enter the interior of the device! This may result in electric shocks! Use only damp cloths for cleaning the device’s surface! Never use wet cloths! WARNING - Test all safety-relevant functions after cleaning! WARNING - Do not smoke during cleaning! NOTE - Keep the away from sources of ignition. -
Page 35: Disposal
Your SOLO and its batteries are durable products. After expiry of the natural service life, you can return these components to AAT Alber Antriebstechnik GmbH or their specialist dealers for disposal. On this product you will find the symbol of the "crossed out dustbin" ac- cording to the WEEE Directive. -
Page 36: Long-Term Storage
9 5 Technical safety testing NOTE - Technical safety tests may only be performed by the manufacturer, the AAT field staff or the authorised specialist shop. NOTE - It is recommended to perform a technical safety test every two years. -
Page 37: Reuse (Change In Operator)
9 6 Reuse (change in operator) The term reuse is used when the AAT product of patient X is to be used for another patient Y. In addition, there is a reuse when a patient receives a different wheelchair and therefore requires new add-on parts. -
Page 38: 10 Warning Notices, Error Messages And Troubleshooting
10 Warning notices, error messages and troubleshooting 10 1 Warning notices Wheel lock Left drive wheel Right drive wheel Both drive wheels » Wheel and left arrow are » Wheel and right arrow are » Wheel and both arrows are flashing! flashing! flashing! - Page 39 Undervoltage Overvoltage Overload » Battery is flashing! » Battery is flashing! » Weight is flashing - Beep! » Charge the battery pack » Reduce speed (refer to » Release the joystick and (refer to chapter "Battery chapter "Driving with the continue driving taking into pack") SOLO")
-
Page 40: Error Messages
Switch off the SOLO, wait 10 sec., switch on the SOLO. Error still present? Parameter data Yes: Notify the manufacturer, the AAT field service, the authorised spe- cialist dealer. Switch off the SOLO, wait 10 sec., switch on the SOLO. -
Page 41: Troubleshooting
Is the battery pack empty? Yes: Charge! Battery pack in driving mode? No: Establish driving mode. Does the problem persist? Yes: Notify the manufacturer, the AAT field service, the authorised spe- cialist dealer. Charger still plugged in? Yes: Unplug. SOLO switched on? No: Switch it on. -
Page 42: 11 Warranty And Liability
SOLO beyond the total permissible weight. • improper charging of the battery pack. Liability As the manufacturer of the SOLO, AAT Alber Antriebstechnik GmbH is not responsible for any damages that may result if: • The SOLO was improperly handled. - Page 43 Ideen bewegen mehr EU Declaration of Conformity AAT Alber Antriebstechnik GmbH · Postfach 10 05 60 · D-72426 Albstadt · Tel.: 0 74 31.12 95-0 · Fax: 12 95-35 · www.aat-online.de · info@aat-online.de Translation of the Original EU Declaration of Conformity...
- Page 44 Ideen bewegen mehr EU Declaration of Conformity AAT Alber Antriebstechnik GmbH · Postfach 10 05 60 · D-72426 Albstadt · Tel.: 0 74 31.12 95-0 · Fax: 12 95-35 · www.aat-online.de · info@aat-online.de Translation of the Original EU Declaration of Conformity...
- Page 45 Ideen bewegen mehr EU Declaration of Conformity AAT Alber Antriebstechnik GmbH · Postfach 10 05 60 · D-72426 Albstadt · Tel.: 0 74 31.12 95-0 · Fax: 12 95-35 · www.aat-online.de · info@aat-online.de Translation of the Original EU Declaration of Conformity...
- Page 46 Ideen bewegen mehr EU Declaration of Conformity AAT Alber Antriebstechnik GmbH · Postfach 10 05 60 · D-72426 Albstadt · Tel.: 0 74 31.12 95-0 · Fax: 12 95-35 · www.aat-online.de · info@aat-online.de Translation of the Original EU Declaration of Conformity...
- Page 47 Ideen bewegen mehr EU Declaration of Conformity AAT Alber Antriebstechnik GmbH · Postfach 10 05 60 · D-72426 Albstadt · Tel.: 0 74 31.12 95-0 · Fax: 12 95-35 · www.aat-online.de · info@aat-online.de Translation of the Original EU Declaration of Conformity...
- Page 48 AAT Alber Antriebstechnik GmbH Postfach 10 05 60 72426 Albstadt · Germany Phone: +49.(0) 74 31.12 95-0 Fax: +49.(0) 74 31.12 95-35 info@aat-online.de · www.aat-online.de Serial number:...
Need help?
Do you have a question about the BLACK EDITION SOLO and is the answer not in the manual?
Questions and answers