
Related Manuals for Belling 644


Summary of Contents for Belling 644
- Page 1 Format Electric Slot-In Cookers INSTALLATION AND USER INSTRUCTIONS Models:- 646H 653H 657H You must read these instructions prior to using the appliance and retain them for future reference.
-
Page 2: Table Of Contents
Contents Introduction..................................3 Installing Your Cooker..............................4 For your own safety - Never............................6 - Always ...........................7 Know your Cooker................................8 Control Panel..................................9 Timer....................................10-14 Ceramic Hob..................................15 General Information...............................16-17 Choosing Your Utensils...............................18 Temperature Conversion Scale..........................19 Grilling...................................20-21 Top Oven Cookery Notes.............................22-23 Top Oven Temperature Charts .........................24-25 Main Oven Operation. -
Page 3: Introduction
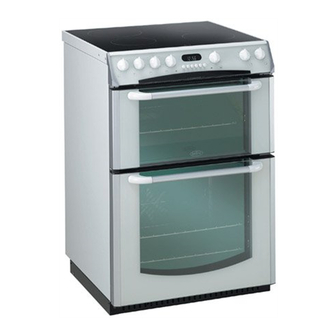
Introduction Your Belling Cooker Thank you for purchasing a new Belling Format Cooker. Its stylish and practical design will enhance your kitchen and make cooking a pleasure. It features a fan oven with a separate grill/top oven and a ceramic hob. -
Page 4: Installing Your Cooker
Your cooker is heavy, so be careful when moving or positioning it. Do not the Cooker try to move the cooker by pulling on the doors or handles. The Belling Format is designed to fit between 600mm deep cabinets, spaced a minimum of 600mm apart. - Page 5 Belling Ceramic Hob Cleaner and Conditioner supplied. This applies a thin protective film to the hob, making it easier to clean, and prolonging its life. If you require further Belling Ceramic Hob Cleaner and Conditioner, please call 01709 579907 and quote part number Belling 023.
-
Page 6: For Your Own Safety - Never
For your safety When used properly your Belling Format is completely safe, but as with any electrical appliance there are some precautions you must take in its use. Never.. Never stare at Halogen Heating Units. Never allow anyone except an authorised Belling Service Agent to service or repair your cooker. -
Page 7: Always
For your safety Always.. Always take care when touching any part of the cooker which may be hot. Use dry, good quality oven gloves when removing or replacing food or dishes. Always stand back when opening the oven door to allow any build-up of heat or steam to disperse. -
Page 8: Know Your Cooker
Know Your Cooker... -
Page 9: Control Panel
Control Panel Main Oven Oven Neon Neon Twin Main Front Rear Clock Autotimer & Rear Front Oven Circuit Oven left left Minute Minder right right Thermostat Grill Thermostat Control knobs The control knobs have been designed to be easy grip. The control knobs for the hob elements and grill can be operated in a clockwise or anti-clockwise direction. -
Page 10: Timer
Oven Timer Operation The oven timer offers you the following features: Time of Day Automatic Cooking Minute Minder The automatic timer can control the Main oven only. When the timer control has been set for the main oven it is possible to use the other oven on non automatic cooking. - Page 11 Oven Timer Operation TO SET TIME OF DAY Step 1 Make sure all oven controls are turned off. Step 2 Check the electricity supply to the cooker is turned on. 0.00 Step 3 When switched on the display will show 0.00 and AUTO symbol will be flashing intermittently.
- Page 12 Oven Timer Operation To Set Timer To Switch OFF Automatically (cont.) Step 5 Turn off the oven control. 14.23 Step 6 Press the “ ” button to cancel the bleeping. (If 2 minutes has not elapsed.) Press “ ” button again to return to Manual Operation.
- Page 13 Oven Timer Operation To Set Timer To Switch ON and OFF Automatically (cont.) The oven will no longer operate until the timer has been reset to manual operation. Step 6 Turn off the oven control. 16.20 Step 7 Press the “ ” button to cancel the bleeping sound. (If 2 minutes has not elapsed.) Press “...
- Page 14 Oven Timer Operation To Set The Minute Minder Step 1 Bell Symbol Ensure the time of day is set correctly. 0.20 Step 2 Press and release the “ ” Button. Within 5 seconds press and hold the “ ” button until the required time is set, a “Bell”...
-
Page 15: Ceramic Hob
Never use any part of the cooker but contact your Belling Service Agent. Under no circumstances should the hob be used with aluminium foil in contact with the hob surface, as damage will occur. -
Page 16: General Information
General Information Notes (Ceramic Hobs) Never Never Stare at Halogen heating units. Never Cook directly on the hob surface without a cooking utensil as this will result in damage to the surface of the hob. Never use the hob as a worktop surface as damage may occur to the smooth surface of the hob. - Page 17 General Information Notes (Ceramic Hob) IMPORTANT - As with any cooking appliance there could be some fire risk attached to the heating of oil, particularly for deep fat frying, cooking utensils containing oil must not be left unattended (eg to answer the telephone) on or in close proximity to the patterned cooking areas.
-
Page 18: Choosing Your Utensils
NEVER LET IT COOL BEFORE REMOVING. If sugar spillage has occurred, it can be removed (providing it is still hot), with a commercially available razor blade scraper. Belling provide a complete care kit for your ceramic hob - Please call 01709 579907 and quote part number Belling 024. -
Page 19: Temperature Conversion Scale
Approximate Oven Temperature Conversion Chart Conventional Fan Oven Gas Mark Oven (It is not always necessary to preheat oven) -
Page 20: Grilling
Grilling Grill Pan The grill pan handle is detachable from the pan, to facilitate cleaning and Handle storage. The handle can be either detachable from or fixed to the pan. For a fixed handle remove the screw and washers from the grill pan bracket, tilt the handle over the recess adjacent to the bracket (1), slide it towards the centre of the pan (2) and let the handle locate over the bracket (3). - Page 21 Grilling NEVER allow young children near the appliance when the grill is in use as the surfaces get extremely hot. GRILLING SHOULD NEVER BE UNDERTAKEN WITH THE GRILL/ TOP OVEN DOOR CLOSED. (See Fig.5). DO NOT LINE THE GRILL PAN WITH ALUMINIUM FOIL. The grill control is designed to provide variable heat control of either left and right grill elements on together or the left hand only, depending upon which direction the control knob is rotated.
-
Page 22: Top Oven Cookery Notes
Top Oven Cookery Notes The charts on pages 24 and 25 are a guide only, giving approximate cooking temperatures and times. To suit personal taste and requirements, it may be necessary to increase or decrease temperatures by 10°C. The Top Oven is fitted with ‘Cookclean’ sides and one rod shelf. It is heated by two elements - the grill element and an element under the floor of the oven - and has a fully variable temperature control like the main oven. - Page 23 Top Oven Cookery Notes Top Oven as a Plates and dishes placed on the floor of the Top Oven will be heated Hotcupboard when the Main Oven is in use. When the Main Oven is not in use (for instance when a meal is being cooked on the hob) place the plates and serving dishes on the rod shelf using the bottom runner and turn the Top Oven control to approximately 100°C (200°F).
-
Page 24: Top Oven Temperature Charts
Top Oven Temperature Chart Top Oven Cooking Pre- Temperature Meat Position in Oven Time (approx.) heat Beef/ Lamb 35 mins per 450g (1 lb) 170/180 (slow roasting) + 35 mins over. Beef/ Lamb 35-40 mins per 450g 190/200 (foil covered) (1 lb) Pork 40 mins per 450g (1 lb) - Page 25 Top Oven Temperature Chart Baking Top Oven Cooking Position in Pre- Temperature Food Time in mins. Oven heat Runner 1 from Scones 210/220 10-15 bottom of oven. Runner 1 from Small Cakes 180/190 20-25 bottom of oven. Runner 1 from 20-30 170/180 Victoria Sandwich...
-
Page 26: Main Oven Operation
Main Oven Turn the main oven thermostat to set the required temperature, the oven Oven Thermostat light will come on. (Not applicable to some Models). When operated an indicator light will immediately come On, and will go out when the desired temperature is reached, subsequently switching On and Off at intervals to indicate that the correct temperature is being maintained. -
Page 27: Main Oven Cookery Notes
Main Oven Cookery Notes Since a fan oven heats up more quickly, and generally cooks food at a lower temperature than a conventional oven, pre-heating the oven is often unnecessary. However, foods such as bread, scones, Yorkshire pudding, do benefit from being placed in a pre-heated oven. - Page 28 Main Oven Cookery Notes Temperature and When all three shelves (the Top oven shelf can be used in the Main oven) Time are used to cook large quantities of food for for home freezing or parties, it may be necessary to increase the cooking times given in the charts on pages 29 and 30 by a few minutes, to allow for the loss of heat due to the extra time taken to load the oven, and the larger mass of food.
-
Page 29: Main Oven Temperature Charts
Main Oven Temperature Chart Note: Where times are stated, they are approximate only. Fan Oven Baking Pre- Temperature Food Time heat Scones 210/220 9-12 mins. approx. 15-20 mins. Small Cakes 170/180 approx. 20-25 mins. 160/170 Victoria Sandwich approx. Sponge Sandwich 15-20 mins. -
Page 31: The Economy Setting
The Economy Setting The main oven has an Economy setting specially designed to reduce Economy Setting energy usage. To operate turn main oven thermostat to 90˚C. This is used for slow cooking, keeping food warm and warming plates for short periods. Extra care must be taken when warming bone china, as it may be damaged in a hot oven. - Page 32 Using the Economy Setting 1. Make sure all dishes will fit into the oven before preparing the food. Points to bear in mind when 2. All dishes cooked by the ‘Economy’ setting should be cooked for a preparing food:- minimum of 6 hours. They will 'hold' at this setting for a further hour but marked deterioration in appearance will be noticed in some cases.
-
Page 33: Care And Cleaning
Switch off the hob and use a metal spatula, palette knife or scraper to remove the spillage. TAKE CARE, as the spillage and the hob may be very hot. When the hob has cooled, clean as usual with Belling Ceramic Hob Cleaner & Conditioner. - Page 34 Care and Cleaning Conventional Grill The grill/top oven roof slides forward out of the grill compartment. Remember, never operate top oven/grill without its roof in place. The grill/top oven rod shelves and enamel parts of the oven or grill can be cleaned using household cream cleaner with a nylon pad or sponge.
- Page 35 Care and Cleaning CLEANING THE DOORS Take particular care not to damage the inner surface of the door inner glass that is coated with a heat reflective layer. Do not use scouring pads, or abrasive powder, which will scratch the glass. Ensure that the glass panel is not subjected to any sharp mechanical blows.
- Page 36 Care and Cleaning Take care during cleaning not to damage or distort the Door Seal. Rod Shelves & Meat Do not lift the Door Seal from the Oven Front frame, if necessary pan (where supplied) remove the seal by carefully unhooking the corner clips. Using a fine steel wool soap pad to remove stubborn stains from the rod shelves, meat pan and the floor of the oven.
-
Page 37: Is There Something Wrong With Your Cooker
Is there Something Wrong with your Cooker? Fault finding guide Before contacting your Belling Service Centre/Installer, check the problem guide below; there may be nothing wrong with your cooker. Problem Check Nothing works Is the main cooker wall switch turned on? -
Page 38: Cooking Results Not Satisfactory
Cooking Results Not Satisfactory? Problem Check Grilling Uneven cooking front Ensure that the grill pan is positioned centrally below the grill and back element. Fat splattering Ensure that the grill is not set too high. Baking General Uneven rising of cakes Ensure that the oven shelves are level by using a spirit level on the rod shelf and adjusting the wheels/feet. -
Page 40: Service
Model Number _____________________________________ Serial Number _____________________________________ Date of Purchase _____________________________________ In order to provide a complete service history for your Belling product, please ask the service engineer to record the appropriate details in the chart below. Authorised Stamp Date Nature of Fault... - Page 41 Format Electric Multifunction Ceramic Slot-In Cooker INSTALLATION AND USER INSTRUCTIONS Model:- 648HM You must read these instructions prior to using the appliance and retain them for future reference.
Need help?
Do you have a question about the 644 and is the answer not in the manual?
Questions and answers