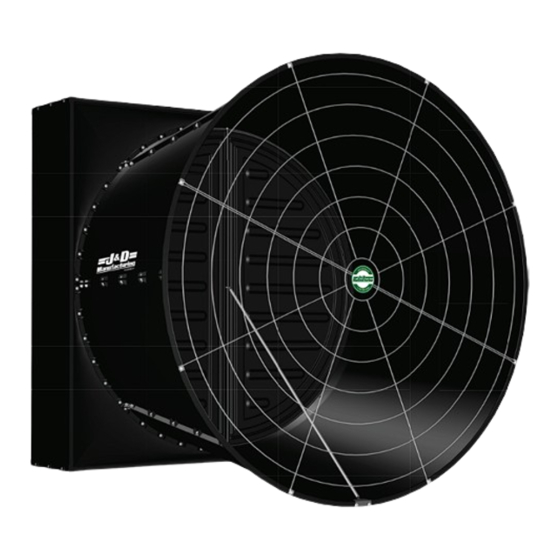
J&D MAnufacturing MAGNUM - 58" Manual
Exhaust fan
Hide thumbs
Also See for MAGNUM - 58":
- Manual (13 pages) ,
- Installation manual (14 pages) ,
- Manual (25 pages)

Subscribe to Our Youtube Channel
Related Manuals for J&D MAnufacturing MAGNUM - 58"


Summary of Contents for J&D MAnufacturing MAGNUM - 58"
- Page 1 MAGNUM - 58” EXHAUST FAN IS295-23G J&D Manufacturing • 6200 Hwy 12 • Eau Claire, WI 54701 • 1-800-998-2398 • www.jdmfg.com Page 1/24...
-
Page 2: Table Of Contents
WARRANTY Table of Contents J&D Mfg. warrants this product is free from defects in materials and workmanship under normal use for the period of three years from date of purchase. Our warranty does not cover ordinary wear and tear. Warranty ---------------------------------------------------------------------------------- Page 2 J&D Mfg can repair or replace at our option, any product or part of the product that is found to be defective. -
Page 3: Parts Legend
PARTS LEGEND (8) Cone (4) Housing Sections Corner Caps Prop Damper Door Stabilizer Assembly (4) Venturi Sections Rubber Motor (4) Housing Gasket Side Panels Damper Door (4) Motor Damper Hinge Rod (2) Front Brackets Doors Guards Back Front (2) Rear Guards RECOMMENDED TOOLS &... -
Page 4: Site Requirements
Bag 3 (Motor) Site Requirements: • Rough Opening - 65¼” W x 65¼”H Square - (8) 3/8”-16 x 3/4“ Bolts • Side-By-Side Recommended OC Dimension - Minimum 75” - (8) 3/8” Washers • Precautions should be taken in locations that receive winter precipitation accumula- tion to prevent damage to fans from roof avalanches. -
Page 5: Eye Bolt Installation
Eye Bolt Installation: • Using (28) 5/16”-18 x 7/8“ Bolts from Bag 2 (Part 1) and (28) 5/16” -18 Serrated Flange Nuts from Bag 2 (Part 2), assemble the motor mount brackets and venturi sections. • Stand the housing assembly up. —... -
Page 6: Housing Side Panel Assembly
Housing Side Panel Assembly: • Assemble (2) SS Eyebolts and (2) SS Serrated Flange Nuts #10-24 from Bag 9 (Misc. Hardware). • Start on a corner. With the front and back venturi section channels inserted into the grooves — With the flange facing up, thread (1) Serrated Flange Nut onto each Eyebolt... -
Page 7: Installing Housing Corner Caps
Installing Housing Corner Caps: Motor Installation: • Place a housing corner cap onto the housing between (2) housing side panels assembled in the NOTE: 2 person lift is recommended for handling of 105lb motor. previous step. • Using the pallet the fan came on, place the motor in the center between the pallet slats with •... -
Page 8: Prop Installation
Prop Installation: • Line up the holes of the motor mount brackets to the holes in the motor housing. • Assemble the (8) 3/8”-16 x 3/4“ Bolts and (8) 3/8” Washers from Bag 3 (Motor). • Insert the 1/4” x 2” Machine Key from Bag 9 (Misc. Hardware) into the key notch on the motor shaft. -
Page 9: Rubber Gasket Installation
Rubber Gasket Installation: Damper Door Striker Plates Installation: • Peel 1’ of the backing paper off the rubber gasket, start applying the rubber gasket at the • On the edge of the housing venturi under the just placed rubber gasket locate the 4 striker bottom (opposite from the eye hooks installed in Step 4) with the raised portion of the gasket plate grooves nearest the center of the fan venturi,(do not use the ones nearest the top or to the center and flush to the interior of the venturi, as shown below in the cutaway view. -
Page 10: Identifying The Sides Of The Damper Doors
Identifying the Sides of the Damper Doors: Attaching Magnets to Damper Door: • Back side of damper doors • With the back side of damper door facing up, locate the (4) flat raised circular feet. - Have flat raised circular feet for attaching magnets. •... -
Page 11: Assembling Damper Door
Assembling Damper Door: • Slide one end of stabilizing rod onto upper stabilizing bracket and secure with cotter pin, as shown below. • With the damper door halves front facing you assemble the door halves and insert the upper stabilizer bracket piece in the door hinge, as shown below. •... -
Page 12: Cone Assembly
Cone Assembly: Cone Installation: • Lay out the (8) cone pieces, place the (2) sections with the J&D logo across from each other • Using (2) people lift the cone assembly onto the housing assembly. as shown below. — With J&D logoed cone sections facing the sides (not the top and bottom) line up the edge of one of the cone pieces to the center line of the housing. - Page 13 • Identify the bottom left cone section. • Using the included #3 Phillips Bit from Bag 1 (Tools) and #14-10 x 2” Screws from Bag 5 (Part 1) secure each cone section EXCEPT the bottom left to the housing, as shown below. —...
-
Page 14: Preparing Cone For Damper Door Installation
Preparing Cone for Damper Door Installation: • Fold assembled damper door. • Remove the hardware holding the bottom left cone section to the other cone sections and set • Orientate folded door with the protruding pole and bracket towards you, as shown below. released cone section aside. -
Page 15: Damper Door Installation
Damper Door Installation: • Place (1) 1/2” OD 1/8” ID Nylon Spacer from Bag 9 (Misc. Hardware) onto the damper door hinge rod, as shown below. • Insert end of damper door hinge rod into the hole in cone assembly located above eye bolts, as shown below. - Page 16 • Keeping the end of the damper door hinge rod in the hole on top and the nylon spacer on the • Place the cone piece that was removed in Step 20 and secure it in place with appropriate bottom, swivel the bottom of the damper door assembly over and into the notched (half hole), hardware as indicated in previous steps.
-
Page 17: Front Guard Installation
Front Guard Installation: • Center the bottom stabilizer bracket over the bottom cone seam. • Using the mounting holes in the bracket and a 3/8”drill bit, drill two holes for the • Place front guards onto cone and align guard tabs to the mounting holes in the cone flange. mounting hardware, as shown below. -
Page 18: Damper Door Spring Installation
Damper Door Spring Installation: • Disassemble the (1) Front Guard Plate Hub w/Hardware from Bag 9 (Misc. Hardware), insert hub bolt post between the two front guard pieces, center, and secure with washer • Secure the coiled end of the (2) SS Damper Door Springs from Bag 9 (Misc. -
Page 19: Magnum Installation
Magnum Installation: • Swing the loose end of the damper door spring over to the dimpled area on the damper door edge and mark which dimple is closest to the spring end that give the least amount of tension. • From the exterior of the building insert fan into opening. Using a 1/8”... -
Page 20: Rear Guards Installation
Rear Guards Installation: • To further secure and prevent water, condensation, and ice from penetrating, use a sealant (Minimal-Expanding Foam / Polyurethane Caulk) to fill the gaps between the housing and the • Using the included #3 Phillips Bit from Bag 1 (Tools) (5) #12-11 x 5/8”... -
Page 21: Identifying Cords Coming From Motor
DISCONNECT POWER • Secure rear guard sections to each other using (4) 11” Cable Ties from Bag 9 (Misc. Hardware). BEFORE INSTALLING OR SERVICING. ALL ELECTRICAL WORK SHOULD BE COMPLETED BY QUALIFIED PERSONNEL AND MEET NATIONAL (NEC), REGIONAL AND LOCAL ELECTRIC CODES. Identify Cords Coming From Motor Control Power... -
Page 22: Single Phase Wired For 190-240V
Common Motor to Control Wiring Options If installing the Single Phase Magnum proceed to Step 37. If installing the Three Phase Magnum skip to Step 38. On/Off - No Speed Control (Fan Will Run at Full Speed) White w/Green Stripe +10V OUT Single Phase Wired for 190-240V Orange w/White Stripe... -
Page 23: Maintenance Instructions
Maintenance Instructions: • Disconnect power before cleaning or maintaining your fan in order to prevent serious injury or death. • Service and repair of fan should only be completed by a qualified technician. • For maximum efficiency and fan life, keep the following free from dirt and dust: blades, damper doors, motor and guard. - Page 24 _______________________ ____________________ _______________________ (Qty) Description (Qty) Description (Qty) Description _______________________ ____________________ _______________________ (1) Front Guard Hub Medallion (4) DD Magnets (4) Venturi Sections _______________________ ____________________ _______________________ (2) Front Guard Sections (2) Damper Doors (DD) (2) Eye-Bolts & (2) DD Springs _______________________ ____________________ _______________________...
Need help?
Do you have a question about the MAGNUM - 58" and is the answer not in the manual?
Questions and answers