
Subscribe to Our Youtube Channel
Related Manuals for J&D MAnufacturing AIRBLASTER 3 LOUVER


Summary of Contents for J&D MAnufacturing AIRBLASTER 3 LOUVER
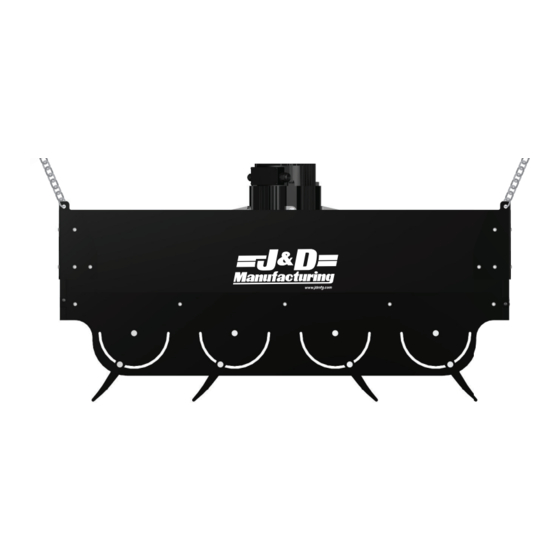
- Page 1 AIRBLASTER - 3 LOUVER & 4 LOUVER RECIRCULATION FANS 4 Louver Bi-Directional 3 Louver Uni-Directional IS297-22F J&D Manufacturing • 6200 Hwy 12 • Eau Claire, WI 54701 • 1-800-998-2398 • www.jdmfg.com Page 1/27...
-
Page 2: Table Of Contents
Table of Contents Warranty ------------------------------------------------------------------------------------------------------ Page 2 General Wiring Instructions ---------------------------------------------------------------------- Step 35 Parts Legend ------------------------------------------------------------------------------------------------ Page 3 Identify Cords Coming From Motor ----------------------------------------------------------- Step 36 Recommended Tools for Installation & Assembly (Not Provided) ------------- Page 3 Single Phase Wired for 190-240v ------------------------------------------------------------- Step 37 Bags of Included Hardware &... -
Page 3: Parts Legend
PARTS LEGEND 3 Louver Models 4 Louver Models Prop Motor (4) Housing Corner Caps (4) Motor Mount (4) Venturi Brackets Sections (2) Housing Side Panels Hanging Brackets (2) Housing Side Panels with (3) Louvers (2) Louver (4) Louvers (2) Louver J&D Logo Guides Guides... -
Page 4: Venturi & Motor Mount Bracket Assembly
Bag 3 (Motor) • Using (28) 5/16”-18 x 7/8“ Bolts from Bag 2 (Part 1) and (28) 5/16” -18 Serrated Flange Nuts from Bag 2 (Part 2), assemble the motor mount brackets and venturi sections. - (8) 3/8”-16 x 3/4“ Bolts —... -
Page 5: Housing Side Panel Assembly
Housing Side Panel Assembly: Installing Housing Corner Caps: NOTE: Panels with J&D logo should be on opposite sides of the fan with logo orientated, as • Place a housing corner cap onto the housing between (2) housing side panels assembled in the shown below. -
Page 6: Installing Hanging Brackets
Installing Hanging Brackets: Motor Installation: • Place a hanging bracket over the just installed corner cap. NOTE: 2 person lift is recommended for handling of 105lb motor • Align narrow edge of hanging bracket with edge of fan housing, as shown below. •... -
Page 7: Prop Installation
• Line up the holes of the motor mount brackets to the holes in the motor housing. Prop Installation: • Assemble the (8) 3/8”-16 x 3/4“ Bolts and (8) 3/8” Washers from Bag 3 (Motor) • Insert the 1/4” x 2” Machine Key from Bag 4 (Motor Key & Louver Hardware) into the keyway on the motor shaft •... -
Page 8: Louver Guides Installation
3 Louver Installation: If installing the 3 Louver AirBlaster proceed to Step 9. • Assemble (12) 5/16”-18 x 7/8” Bolts and (12) 5/16” Washers from Bag 4 (Motor Key & If installing the 4 Louver AirBlaster skip to Step 22. Louver Hardware) •... -
Page 9: Attaching Hanging Chain Kit
Site Requirements: Before proceeding, review the angle recommendations for hanging in Step 14 . • Structure and anchor hardware (not provided) must be rated for 350lbs If you are unable to meet the angle recommendations for hanging, Weight 350lbs skip to Step 15. If you can meet the angle recommendations for hanging proceed to 3 Louver Mounting Height Recommendations: Step 11. -
Page 10: Hanging Recommendations
3 Louver Hanging Recommendations: • Take into account recommendations from Steps 12 & 13 and the below recommended angles of the fan and chains. • Hang fan. • Attach each chain end to structure using (1) quick link • Secure by fully closing each quick link by rotating the barrel as shown in Step 11. NOTE: To ensure fan does not distort or twist, fan must be hung evenly and level from side to side, as shown below. -
Page 11: Trimming Chain To Make Stabilizing Chain Harness
Trimming Chain to Make Stabilizing Chain Harness: Installing Stabilizing Chain Harness to Fan: • Using a Bolt Cutter trim all (4) chains to 5’ in length. • Spread out the (4) Chains into a X formation. • Use a quick link to connect the end of each leg of the stabilizing chain harness to the fan. 5’... -
Page 12: How To Use The Stabilizing Chain Harness To Hang Fan
How to use the Stabilizing Chain Harness to Hang Fan: 3 Louver Mounting Height Recommendations: • On each leg of the Stabilizing Chain Harness measure 1’ from the corner and attach another quick connect, as shown below. • These quick connects will be used to attach the hanging chains at the proper location on the Must be mounted a Stabilizing Chain Harness. - Page 13 3 Louver Hanging Recommendations with Stabilizing Chain Harness: • Take into account recommendations from Steps 19 & 20 and the below recommended angles of the fan. • Hang fan. • Attach each hanging chain end (not provided) to the Stabilizing Chain Harness using the previously placed quick links from Step 18. •...
-
Page 14: Louver Guides Installation
4 Louver Guides Installation: 4 Louver Installation: • On side housing panels with J&D logo align indicated edges of louver guides, as shown below • Assemble (16) 5/16”-18 x 7/8” Bolts and (16) 5/16” Washers from Bag 4 (Motor Key & Louver Hardware) •... -
Page 15: Attaching Hanging Chain Kit
Site Requirements: Before proceeding, review the angle recommendations for hanging in Step 27. • Structure and anchor hardware (not provided) must be rated for 350lbs If you are unable to meet the angle recommendations for hanging, Weight 350lbs skip to Step 28. If you can meet the angle recommendations for hanging proceed to 4 Louver Mounting Height Recommendations: Step 24. - Page 16 4 Louver Hanging Recommendations: • Take into account recommendations from Steps 25 & 26 and the below recommended angles of the fan and chains. • Hang fan. • Attach each chain end to structure using (1) quick link • Secure by fully closing each quick link by rotating the barrel as shown in Step 24. NOTE: To ensure fan does not distort or twist, fan must be hung evenly and level from side to side, as shown below.
-
Page 17: Trimming Chain To Make Stabilizing Chain Harness
Trimming Chain to Make Stabilizing Chain Harness: Installing Stabilizing Chain Harness to Fan: • Using a Bolt Cutter trim all (4) chains to 5’ in length. • Spread out the (4) Chains into a X formation. • Use a quick link to connect the end of each leg of the stabilizing chain harness to the fan. 5’... -
Page 18: How To Use The Stabilizing Chain Harness To Hang Fan
How to use the Stabilizing Chain Harness to Hang Fan: 4 Louver Mounting Height Recommendations: • On each leg of the Stabilizing Chain Harness measure 1’ from the corner and attach another quick connect, as shown below. • These quick connects will be used to attach the hanging chains at the proper location on the Stabilizing Chain Harness. - Page 19 4 Louver Hanging Recommendations with Stabilizing Chain Harness: • Take into account recommendations from Steps 32 & 33 and the below recommended angles of the fan. • Hang fan. • Attach each hanging chain end (not provided) to the Stabilizing Chain Harness using the previously placed quick links from Step 31. •...
-
Page 20: General Wiring Instructions
General Wiring Instructions: If installing the Single Phase AirBlaster proceed to Step 37. • Wiring should only be performed by a trained electrician to prevent injury If installing the Three Phase AirBlaster skip to Step 38. or death. • Install manual disconnect switch inside building adjacent to fan. Single Phase Wired for 190-240v •... -
Page 21: Common Motor To Control Wiring Options
Common Motor To Control Wiring Options If installing the 3 Louver AirBlaster proceed to Step 40. If installing the 4 Louver AirBlaster skip to Step 44. On/Off - No Speed Control (Fan Will Run at Full Speed) White w/Green Stripe +10V OUT 3 Louver Adjustment: Orange w/White Stripe...
Need help?
Do you have a question about the AIRBLASTER 3 LOUVER and is the answer not in the manual?
Questions and answers