Table of Contents
Advertisement
Quick Links
Advertisement
Table of Contents
Troubleshooting

Related Manuals for Bionet CardioXP


Summary of Contents for Bionet CardioXP
- Page 1 CardioXP Operation Manual CardioXP Operation Manual Ver. 1.2 1/106 Version 1.2...
- Page 2 CardioXP Operation Manual Warranty This product was made through strict quality control and examination. The repair and compensation standards follow the consumer damage compensation regulations of the Ministry of Finance and Economy. The warranty for this product runs for 1 year. (2 years in EU) But the warranty for accessory runs for 6 months.
- Page 3 If you have any questions or comments relating to our products or purchasing, please contact the telephone numbers or E-mail below. You can talk to our sales people. Bionet always welcome your enquiries. Please contact us. Product and purchasing TEL: +82-2-6300-6418 ...
- Page 4 CardioXP Operation Manual Fee-based Service If you wish to make a claim when the product is damaged through misuse, we charge repair fee. Please read the manual before you make a claim. - For simple inspection without giving instruction Fee charged: From the...
- Page 5 CardioXP Operation Manual Definition of WARNING, CAUTIONS and NOTE In order to stress the contents of this manual, we define the terms as below. Please follow the warning and cautions instruction. The manufacturer or service agents are not responsible for the damage resulting from inappropriate use or carelessness.
- Page 6 CardioXP Operation Manual Environment Instructions Please do NOT use of place the product in such an environment explained below. Steamy environment. Do not use the Direct sunlight. product with wet hands. Place where the temperature and humidity condition are extreme...
- Page 7 IEC/EN60601-2-25(Safety of Electrocardiograms), UL2601-1(US General Requirements for Safety) NOTE Diagnosis of CardioXP needs to be confirmed by medical specialists. NOTE The accessories connected to analog or digital connector should be authorized in accordance with IEC standards. (E.g. IEC 950 for data processing equipment and IEC 601-1 for medical equipment) Moreover, every composition should correspond with EN 60601-1:1993.
- Page 8 CardioXP Operation Manual Safety Symbols Symbols Contents Isolated patient connection. (IEC 601-1-Type CF) ECG Signal Input Port This symbol identifies a safety note. Ensure you understand the function of this control before using it. Control function is described in the appreciate operation manual.
-
Page 9: Table Of Contents
CardioXP Operation Manual Contents 1. General Information ……………………………………………………..12 1) Overviews of the product ……………………………………………….13 2) Characteristics of the product .………………………………………..14 3) Components of the product ……………………………………………15 Basic components and accessories ……………………………………….15 Options …………………………………………………………………………….16 Main components ………………………………………………………………17 Patient signal module ………………………………………………………….21 Graphic display LCD …………………………………………………………...24... - Page 10 CardioXP Operation Manual General information ……………………………………………………………42 Patient information ……………………………………………………………..44 Printing speed setting ………………………………………………………….47 Signal gain setting ……………………………………………………………...47 Display setting …….…………………………………………………………….48 Filter setting …….………………………………………………………………..52 Printing channel setting …….…………………………………………………54 5) Display Form …………………………………………………………………58 6) Monitoring Form …………………………………………………………….59 7) Recording Form …………………………………………………………….60 10-Second ECG recording …….……………………………………………60 60- Second ECG recording …….…………………………………………...61...
- Page 11 CardioXP Operation Manual 4. ECG order management ........…………………..94 1) Display and function ………………………………………………………95 2) ECG recording ………………………………………………………………96 3) Patient information monitoring ………………………………………….96 4) Data deleting ………………………………………………………………..97 5) Environment setting ………………………………………………………..98 6) Switching menu ………………………………………………………………98 7) Data Search …………………………………………………………………98 5. System Management …………………………………………………….100 1) Maintenance and Cleaning ……………………………………………101...
-
Page 12: General Information
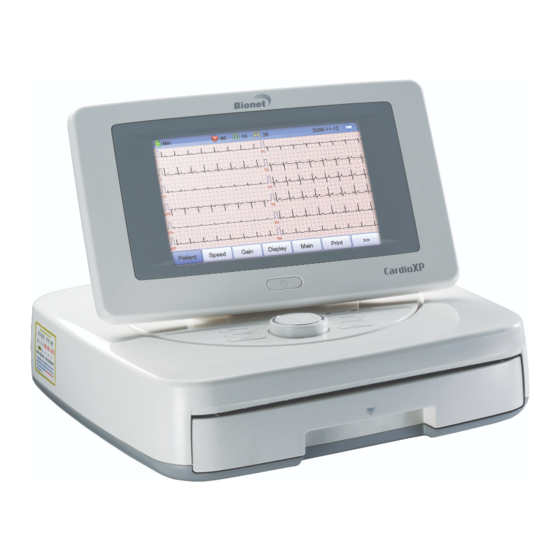
CardioXP Operation Manual 1. General Information 1) Overviews of the product 2) Characteristics of the product 3) Components of the product Basic components and accessories Options Main components Patient signal module components Graphic display LCD Operation panel 4) System installation... - Page 13 CardioXP Operation Manual 1) Overviews of the product Cardio XP is medical equipment with 12 channels to measure and record the patient’s ECG. It provides parameters for diagnosis and automatic diagnosis, but also is effective to manage the charts of the user as the user can print out the patient’s information of the record of patient’s ECG.
- Page 14 CardioXP Operation Manual 2) Characteristics of the product - 12ch ECG waveform consists of various channels, such as 3ch+1rhythm, 3 ch+3 rhythm or 6ch+1rhythm. The result is printed in the A4 size chart paper. - The rhythm of 1 channel is stored for 60 seconds and printed in the A4 size chart paper.
- Page 15 CardioXP Operation Manual 3) Components of the product These are the components of the product. Please make sure that the following basic components and accessories are supplied. Also, please check whether the components, including accessories are working well. ② ③...
-
Page 16: Options
CardioXP Operation Manual ① ④ ② ⑤ ③ ⑥ ⑦ ⑩ ⑧ ⑨ Options Battery pack (1 EA) Wireless pack & dongle (Each 1 EA) Patient’s signal module cradle (1 EA) Paper guider for Letter (1 EA) Wall panel & Paper guider (Each 1 EA) -
Page 17: Main Components
CardioXP Operation Manual Main components ▣ Upper View ① ② ③ ④ ① LCD: It shows the product’s operation state ② Power switch: It turns on or off the product ③ LED: It shows the power & battery state ④Control Unit (Key & Rotary switch): It’s to input the patient’s information and to... - Page 18 CardioXP Operation Manual ▣ Lower View ① ② ③ ① Battery Cover: to insert the batteries ② Wall Mount Panel Socket: to fix the product on the wall ③Foot Rubber ▣ Front View ① ① THERMAL PRINTER: It prints out the patient’s ECG waveform or various analysis...
- Page 19 CardioXP Operation Manual ▣ Rear View ① ② ③ ④ ⑤ ⑥ ⑦ ① AC power terminal: It can be connected to AC power supply ② Grounding terminal: It can be connected to the external grounding terminal when there is no protective earth ③...
- Page 20 CardioXP Operation Manual ▣ Left View ▣ Right View ① ② SD Card Socket: It’s for inserting SD Card USB Port: It’s for telecommunication between external USB equipments. WARNING It is strictly prohibited to open the cover because of electric shock.
-
Page 21: Patient Signal Module
CardioXP Operation Manual Patient signal module ▣ Upper View ① Patient Cable Socket: It’s to put the 11 pin patient’s cable ▣ Lower View ① ② Data Cable Socket: To pit the 8 pin data cable Wireless Pack Socket: To put the wireless pack 21/106 Version 1.2... - Page 22 CardioXP Operation Manual ▣ Front View Wireless CardioXP ① ② ③ ④ ⑤ ⑥ ⑦ LCD: It displays the ECG waveform, cable and wireless connection state and battery state Power button: It’s to turns on or off the patient signal module Lead change button: It’s to change the lead of waveform seen on LCD of...
- Page 23 CardioXP Operation Manual ▣ Rear View ▣ Left View 23/106 Version 1.2...
-
Page 24: Graphic Display Lcd
CardioXP Operation Manual ▣ Right View WARNING It is strictly prohibited to open the cover because of electric shock. Only an authorized person can disassemble the product. Graphic display LCD The front part consists of the graphic display LCD which shows the operation state of the product, power switch, LED which shows the power and battery state and the control unit (Key &... - Page 25 CardioXP Operation Manual The following is the explanation of the contents shown on the graphic display LCD. ① ② ③ ④ ⑤ ⑥ ⑦ ⑧ ⑨ ⑩ ⑪ ⑫ ⑬ ⑭ Patient’s ID Patient’s Heart beats Printing speed ECG signal size...
-
Page 26: Control Panel
CardioXP Operation Manual Control panel ② ③ ④ ⑤ ⑨ ⑧ ⑦ ⑥ Power LED: It shows the state of AC Power supply. (A green LED will be lighting when AC Power is on.) Battery LED: It shows the battery state. (When the battery is charged, a red LED will be lighting, while the battery is full, a green light will be ON.) -
Page 27: System Installation
CardioXP Operation Manual 4) System Installation Precautions for installation Precautions before use Install the product in a dry environment with the 10 ∼ 40℃ of temperature and 30 ∼ 85% of humidity. Please use the consent away from other appliances which make noise (cooling or heating appliances with large monitor). - Page 28 CardioXP Operation Manual Before use - Make sure the product is earthed correctly. - Connect every cord correctly and safely. - Please make the charge for at least 4 hours when using the charger (optional). - Double check the parts which connect to the patient’s body.
-
Page 29: Connecting Power Supply
CardioXP Operation Manual Connecting power supply AC power When AC power is connected, there is a green light in the Power LED of the front of the product, while when the battery is inserted, the mode will be converted into auto mode. -
Page 30: Connecting Patient Signal Module
When the wireless pack is not connected or is not connected properly, the wireless mode will not work. Caution Hereby, Bionet declares that this CardioXP is in compliance with the essential requirements and other Relevant provisions of directive 1999/5/EC. Power ON/OFF ... - Page 31 CardioXP Operation Manual without receiving any order from the hardware, it will be automatically turned off. Check wireless connection After checking the module is turned on, press the button for more than 2 seconds, it will automatically recognize the wireless pack and show the wireless icon.
-
Page 32: Installing The Recording Paper
CardioXP Operation Manual Installing the recording paper When pulling the printer’s handle located at the front of CardioXP, a tray will come out. Place papers upward and put the tray in. WARNING Please use the papers provided by our company, otherwise it can impact on the diagnosis when doctors examine it due to the bad printing. -
Page 33: System Setting
CardioXP Operation Manual 5) System Setting Setting Initialization Press the ESC key for 3 seconds if you want to initialize the system as it was at the time of purchasing. Then, the message as shown below will show up on the LCD for a second and the system will be initialized. -
Page 34: System Starting
CardioXP Operation Manual 6) System Starting When the power switch is on, after system version and the name of the company are displayed for about 5 seconds, the main page with menu items as shown below will come up. You can move to the main page of the chosen menu by touching the menu on the screen or rotating the key on the control panel. - Page 35 CardioXP Operation Manual Menu Description Patient To Input or check the patient’s information Speed To set up the speed for printing out the ECG waveform Gain To set up the size of the ECG waveform Display To set up the main page of the ECG...
- Page 36 CardioXP Operation Manual Menu Description << To skip to previous page >> To skip to next page Print To print out the chosen data Info To check the patient’s information Delete To delete the chosen or all data Main To skip to main page of ECG, ECG Order management...
-
Page 37: Ecg Recording
CardioXP Operation Manual 2. ECG Recording 1) Location of electrodes 2) Connecting electrodes Connecting patient cable How to attach the electrodes Trouble shooting for lead connection 3) Starting ECG recording 4) Basic setting General information Patient information Printing speed setting... - Page 38 CardioXP Operation Manual 1) Location of electrodes In order to record standard 12 lead ECG of I, II, III, aVR, aVL, aVF, V1, V2, V3, V4, V5 and V6, attach electrodes to the patient’s body as shown below. The location of limbs electrodes...
-
Page 39: Connecting Electrodes
CardioXP Operation Manual 2) Connecting electrodes * Check it out! - Before measuring, check the connection between the patient and the electrodes. - Make sure there is no mechanical danger. - Check the cable and accessories connected externally. - Check every equipment connected to the patient’s body. -
Page 40: Trouble Shooting For Lead Connection
CardioXP Operation Manual Trouble shooting for lead connection You can see the waveform of every lead on the screen. Check the lead connection and noise of the waveform. These are the cases in which the lead is connected improperly. When the lead is removed from the patient’s body ... -
Page 41: Starting Ecg Recording
CardioXP Operation Manual 3) Starting ECG recording - After connecting the lead to the patient’s body, following the instructions, turn on the power switch. - Check the setting for filter, size of signals, printing speed, channels and rhythm. Set up the new value if you want to modify them. -
Page 42: Basic Setting
CardioXP Operation Manual 4) Basic Setting General Information When the system begins, the LCD shows the patient’s information, heart beats, printing speed, size of the ECG signals, date and the state of the power supply, consecutively. They can be modified in two ways. - Page 43 CardioXP Operation Manual - Menu Skipping Please use the rotary key. The direction of the menu skipping is identical with the direction of the rotary key rotation. - Menu Selecting Please use the rotary key. It will show the menu box of the chosen menu.
-
Page 44: Patient Information
CardioXP Operation Manual Patient information [Patient] The user can input the patient’s ID, name, age, gender, height and weight. When the user selects the line of ID, NAME, Department or Room Number, a keyboard will show up in the screen. The default of every line is a blank and if there is a certain figure on the line, it should be shown exactly when loading the keyboard window. - Page 45 CardioXP Operation Manual In case of a baby under 1 year old, input his/her age by weeks or days. When the user wants to set the data after inputting, the user can press OK button on the keypad and if the user wants to cancel the setting, pressing ESC button will do it and the keypad window will disappear.
- Page 46 CardioXP Operation Manual When clicking the Smoke Line, a Smoke Setting window will show up as shown below. After input the data, when pressing OK button, the information will be saved, while pressing cancel button will cancel the setting. If you are a smoker, choose the year and input the period of smoking on the keypad then press the OK button.
-
Page 47: Printing Speed Setting
CardioXP Operation Manual Printing speed setting [speed] This is a function to adjust the width of the printing signal. The values are available in 12.5mm/sec, 25mm/sec and 50mm/sec. If you set 25mm/sec up, the ECG signal will be recorded in 25mm for one second. Thus, the width of 12.5mm/sec is half of the width of 25mm/sec and that of 50mm/sec is twice as... -
Page 48: Display Setting
CardioXP Operation Manual 10 mm/mV and the chest lead (V1, V2, V3, V4, V5, V6) into 5mm/mV. All of them can be done automatically. ‘10mm/mV’ means that the signal with 1mV will be printed out in the size of 10mm. - Page 49 CardioXP Operation Manual ‘Leads Place’ menu shows the electrodes connection. When clicking the ‘Leads Place’, you will see a page shown below. If you click the rotary or ‘ESC’ key again, the ‘Display Setup’ window will show up again. ‘Menu Style’ menu is to set up the display form of the ‘MENU’ button. When you click the menu, ‘Text’...
- Page 50 CardioXP Operation Manual - ‘Text’: The style of the ‘MENU’ button is to set up the below ‘TEXT’ form. - ‘Icon’: The style of the ‘MENU’ button is to set up the below ‘ICON’ form. In ‘Grid’ menu, ECG waveforms would look like that of ECG paper printout. When ‘Grid’...
- Page 51 CardioXP Operation Manual ‘Color setting’ menu is used to adjust the color on the screen. Default is set as ‘Back’: black, ‘Text’: yellow, ‘Cal Line’: blue and ‘Graph’: green. - ‘Back’: ECG waveform’s background color - ‘Text’: Each lead of ECG waveform’s text color - ‘Graph’: ECG waveform’s color...
-
Page 52: Filter Setting
CardioXP Operation Manual Filter setting [Filter] In addition to the ECG signals, the information such as noise, Base Line Drift of breathing or EMG signals can be recorded too. Base Line Drift is a noise created by the patient’s breathing and a phenomenon in which ECG is adapted to a huge parabola. - Page 53 CardioXP Operation Manual When you select ‘AC’ menu at the ‘Filter Setup’ page, you will see a small POP-UP menu, and it will disappear when selecting OFF, 50[Hz] or 60[Hz]. The state of the filter using will be displayed at the bottom of the printing form as ‘AC 60Hz’, ‘AC 50Hz’or ‘AC Off’.
-
Page 54: Printing Channel Setting
CardioXP Operation Manual When selecting ‘LPF’ menu at the ‘Filter Setup’ page, you will see a small POP- UP menu, and it will disappear when selecting OFF, 40Hz, 100Hz or 150Hz. Adapting a filter can distort the original signals. Therefore, use the filter only when the signals cannot be seen correctly. - Page 55 CardioXP Operation Manual You can set up the real time printing size. When you click the ‘Mon Size’ menu, ‘A4’ will be selected and when clicking it again, ‘Continue’ will be selected. Default is set as ‘Continue’. - ‘A4’: To print out the 10-second data in the form of A4 paper.
- Page 56 CardioXP Operation Manual When selecting Print menu and ‘Rec Form’ menu at the main page, you will see a small POP-UP menu at the bottom of the page. The pop-up menu will disappear, when selecting 3CH +1, 6CH +1, 12CH or 3CH +3, 60. Default is set as ‘3CH+3’.
- Page 57 CardioXP Operation Manual Default is set as ‘OFF’. Beat report will be attached to the printing form of channels of ‘3CH +1’, ‘6CH +1’, ‘12CH’ and ‘3CH +3’. It will record every important result by marking the representative waveform of each form.
-
Page 58: Display Form
CardioXP Operation Manual 5) Display Form (LCD) You can see the real time ECG signals on the screen. This function is needed to see whether the signals from every channel are correct before recording the ECG waveform and to generate the patient’s ECG for a long period of time. -
Page 59: Monitoring Form
CardioXP Operation Manual 6) Monitoring Form (Rhythm) You can print out the real time ECG signals. This function is needed to see whether the signals from every channel are correct before recording the ECG waveform and to generate the patient’s ECG for a long period of time. -
Page 60: Recording Form
CardioXP Operation Manual 7) Recording Form (Record) This function is used to save the ECG in the memory, to apply the filter the user chooses, to extract the parameters of heart beat, PR interval, QRS duration, QT/QTc and P-R-T Axes and to print out the results in accordance with the size of the signals, printing speed and channels selected. -
Page 61: 60-Second Ecg Recording
CardioXP Operation Manual 60-second ECG recording When the channel is ‘60sec’, press the ‘RECORD’ key on the control panel. Then it will generate the saving time as shown below and the 60-second data will be saved in the memory. After saving the data, it will apply the chosen filter and calculate the heart beat, the message as below will show up and printing will begin. -
Page 62: Printing Form
CardioXP Operation Manual 8) Printing Form The followings are the examples of the printing form as well as the explanation about each channel. Rhythm Printing Form - 3CH printing: To print 3 channels at the same time (I ~ III / aVR ~ aVF / V1 ~... - Page 63 CardioXP Operation Manual Rhythm Printing Form (6CH) Rhythm Printing Form (12CH) 63/106 Version 1.2...
- Page 64 CardioXP Operation Manual Record Printing Form (3CH + 1 RHY) Recording Printing Form (3 CH + 3 RHY) 64/106 Version 1.2...
- Page 65 CardioXP Operation Manual Recording Printing Form (6 CH + 1 RHY) Recording Printing Form (12 CH) 65/106 Version 1.2...
- Page 66 CardioXP Operation Manual Recording Printing Form (60 SEC) Recording Printing Form (BEAT REPORT - TEXT) 66/106 Version 1.2...
- Page 67 CardioXP Operation Manual Recording Printing Form (BEAT REPORT - VECTOR) Recording Printing Form (BEAT REPORT - GUIDE) 67/106 Version 1.2...
- Page 68 CardioXP Operation Manual * The variable of the BEAT REPORT PR: PR Interval PA: P Amplitude PD: P Duration QA: Q Amplitude QD: Q Duration RA: R Amplitude RD: R Duration SA: S Amplitude SD: S Duration QLRD: Duration between Q and Last R...
-
Page 69: Copy
CardioXP Operation Manual 9) Copy It is a function to print out the same report as the previously printed one or to print out the previously saved ECG data after modifying the information such as filter, the size of the signals, printing speed, channel or rhythm setting. - Page 70 CardioXP Operation Manual If you change the filter towards the previously saved ECG, it will adapt the new filter. When the new filter is adapted completely, it will start printing after showing the message as below. When printing is abnormal completed, the state of the system setting will be displayed after showing the message as shown below for a second.
-
Page 71: System Setup
CardioXP Operation Manual 10) System Setup When pressing the ‘>>’ button at the ECG Main page, a ‘System’ button, which allows you to select the System Setup menu, will be shown. System Setup menu consists of Basic Setup, Network Setup, Hospital Setup and Record Setup and you can change the setting at each window. - Page 72 CardioXP Operation Manual Date and Time Setting After choosing the System Setup menu, press the Basic button then the focus will go to the Date item. By using the touch screen or rotating the rotary switch, choose the Date (yyyy/mm/dd) or Time (hr/min/sec), then the keypad will show up. You can set up the information by using this keypad.
- Page 73 CardioXP Operation Manual Touch Setup This is a menu to set up the coordinates of the touchpad. When selecting the Touch menu at the Basic Setup page, system setup page will disappear and the coordinates for setting calibration will appear as shown below. Follow the instructions shown on the screen, and then the coordinates will be set up.
- Page 74 CardioXP Operation Manual Lead Fault Message setting When the connecting between the patient and Lead is improper, lead fault can occur. In that case, you can choose whether to have the lead fault message on the ECG Main page or not. You can select ON or OFF by clicking the ‘Lead Fault’...
- Page 75 CardioXP Operation Manual Pacemaker signal printing setting In case of using the pacemaker signals, you can choose whether to print out the location of the pacemaker when monitoring or recording. You can select ON or OFF by clicking the ‘Pacemaker’ item. When it is on, the location of the pacemaker will be printed out, while when it is off, it will not be printed out.
- Page 76 CardioXP Operation Manual Unit Setting This menu is to select the units for height and weight of the patient. When you click ‘Units’ button, cm/kg or Inch/Lbs will be shown. If you select Inch/Lbs unit, the patient’s height information will be expressed in *** Ft (Feet) *** Inch.
- Page 77 CardioXP Operation Manual Demo Mode Set the demonstration function on/off. If the demonstration function is set on, there is 60bpm sinus normal rhythm signal on the screen, and there is mark [DEMO] at the top of the screen. The all the functions as Rhythm, Record, Copy, Communication and etc could be tested.
-
Page 78: Network Setup
CardioXP Operation Manual Network Setup When connecting the equipment with LAN to interface with the outside PC, network setup is needed. Network IP is required and DNS is not used. When selecting the Network menu at the left side of the System Setup page, Network Setup page will show up at the right side. -
Page 79: Hospital Setup
CardioXP Operation Manual Hospital Setup When selecting the ‘Hospital’ menu at the left side of the System Setup page, Hospital Setup page will show up at the right side. You can input the information about the names of the hospitals and doctors. - Page 80 CardioXP Operation Manual When selecting the ‘Export’ menu, a small POP-UP menu as below will appear and it will disappear when selecting one of None, PC, USB or SD. When ‘PC’ is selected, the ECG data will be automatically saved to the PC and when ‘USB’...
- Page 81 CardioXP Operation Manual Auto diagnosis setting When selecting the ‘Diagnosis’ menu, a small POP-UP menu as below will appear and it will disappear when selecting one of OFF, Standard or Professional. When ‘OFF’ is selected, the content of diagnosis will not be printed out, whereas when ‘Standard’...
- Page 82 CardioXP Operation Manual ‘V Change’ menu is used to set up the V3 ~ V6 on the printing paper when diagnosing children in which the location of V3 ~ V6 electrodes need to be changed from left to right. Basically, the ‘V Change’ is set as ‘None’ and when you click this menu, a ‘Leads Change’...
- Page 83 CardioXP Operation Manual WARNING Do not touch the patient cable or the equipment when using the cardiac defibrillator. WARNING Please make sure the connector does not touch the conductive parts or the ground when connecting the electrodes or the patient cable.
-
Page 84: Ecg File Management
CardioXP Operation Manual 3. ECG file management 1) Display and function 2) Data printing 3) Patient information 4) Data deleting 5) Environment setting 6) Switching menu 7) Data search 8) Data transfer 9) Data import 84/106 Version 1.2... -
Page 85: Display And Function
CardioXP Operation Manual 1) Display and function ① ② ③ KOR-123456 John Chang 39 20080301173616 KOR-123457 Denial Seo 38 20080225114208 BER-345678 Chris Oh 35 20080208132354 BER-345679 Irina Lukashova 28 20080124153203 ④ ⑤ ⑥ ⑦ ⑧ ⑨ ⑩ ⑪ Page information - For example, [1/20] means that you see the first page among total 20 pages. - Page 86 CardioXP Operation Manual At the initial file management page, the first data of the list has the focus. The focus will automatically move to the menu bar at the bottom of the screen, when you click the data by touching the screen or rotating the rotary key on the control panel.
-
Page 87: Data Deleting
CardioXP Operation Manual 4) Data deleting When pressing the ‘Delete’ button, a small pop-up menu will show up. You can choose to press the ‘select’ or ‘all’ button. When you press the ‘Select’ button, one data will be deleted, but if you press the ‘All’... -
Page 88: Environment Setting
CardioXP Operation Manual 5) Environment setting When clicking the ‘Setup’ button at the ECG data file management page, you will see a ‘System Setup’ window as shown below. ‘PAT Info.’ menu is to set up whether the patient information is retained or not, when you move the main screen of the ECG. - Page 89 CardioXP Operation Manual Note The steps for Network & Hospital Setting are identical with the steps for ECG Main setting. When clicking the ‘Export’ button, you will see ‘Export’ window as shown below. When clicking the ‘Target’ button, a POP-UP window will show up and it will disappear when selecting one of PC, SD or USB.
-
Page 90: Switching Menu
CardioXP Operation Manual Caution - When you use external SD card, it is highly recommended to use less than 1G bytes. Otherwise it can bring about some error on exporting files. - Under 'Export’ menu window, if ‘ECG’ is selected as the ‘Format’ menu, you can select ‘All’... - Page 91 CardioXP Operation Manual 8) Data transfer You can transfer the saved data to the external device at the ECG data file management page by using the ‘NETWORK’ key on the control panel. When pressing the ‘NETWORK’ key, a message will show up, asking which menu you want to select.
- Page 92 If it is connected properly the external device (SD card or USB memory) to CardioXP, ‘Import File List’ screen will be shown as below. If it is not connected the external device (SD card or USB memory) to CardioXP, the error message will be shown as below.
- Page 93 CardioXP Operation Manual If you select the ‘Selected’ menu in the ‘Import File List’ screen, receiving a selected data from the external device and a system message will be shown as below. If you select the ‘All’ menu in the ‘Import File List’ screen, a system message with process speed will be shown as below.
- Page 94 CardioXP Operation Manual 4. ECG order management 1) Display and function 2) ECG recording 3) Patient information 4) Data deleting 5) Environment setting 6) Switching menu 7) Data search 94/106 Version 1.2...
- Page 95 CardioXP Operation Manual 1) Display and function ① ② ③ BER-345679 Irina Lukashova 28 20080124153203 BER-345678 Chris Oh 35 20080208132354 KOR-123457 Denial Seo 38 20080225114208 KOR-123456 John Chang 39 20080301173616 ④ ⑤ ⑥ ⑦ ⑧ ⑨ ⑩ ⑪ ① Page information - For example, [1/20] means that you see the first page among total 20 pages.
- Page 96 CardioXP Operation Manual At the initial file management page, the first data of the list has the focus. The focus will automatically move to the menu bar at the bottom of the screen, when you click the data by touching the screen or rotating the rotary key on the control panel.
- Page 97 CardioXP Operation Manual 4) Data deleting When pressing the ‘Delete’ button, a small pop-up menu will show up. You can choose to press the ‘select’ or ‘all’ button. When you press the ‘Select’ button, one data will be deleted, but if you press the ‘All’...
- Page 98 CardioXP Operation Manual 5) Environment setting When clicking the ‘Setup’ button at the ECG data order management page, you will see the ‘Order System Setup’ window as shown below. Note The steps for Network & Hospital Setting are identical with the steps for ECG Main setting.
- Page 99 CardioXP Operation Manual When the search takes a long time, a message will show up to let you know the process. After searching, you will see a data search result page. 99/106 Version 1.2...
-
Page 100: System Management
CardioXP Operation Manual 5. System Management 1) Maintenance and Cleaning 2) Regular Check-up 3) Trouble Shooting 100/106 Version 1.2... - Page 101 CardioXP Operation Manual 1) Maintenance and Cleaning There are many ways to clean Cardio XP, but it is better to use our recommendation to avoid damage or uncleanness. The warranty does not cover the problems resulting from the use of harmful substances (unauthorized substances).
- Page 102 CardioXP Operation Manual The battery is low. Please connect to the AC power to use. The signal is printed out with noise: Firstly, check that you set up the AC power filter. If it still makes noise with the AC power supply, please connect grounding line to the grounding electrode of the system.
-
Page 103: Specification
CardioXP Operation Manual 6. Specification ECG Leads Simultaneous 12 leads resting ECG Recording Channel 3CH+1RHY, 3CH+3RHY, 6CH+1RHY, 12CH+1RHY, 1CH 60second and Beat Report Sensitivity 2.5, 5, 10, 20, Auto (I~aVF: 10, V1~V6: 5) mm/mV Printing Speed 12.5, 25, 50 mm/sec... - Page 104 CardioXP Operation Manual Dimensions 300(W) x 299(H) x 123(D) mm , Approx. 4 kg Standard Accessory Patient signal module(1 EA), Patient cable[11 Pin](1 EA), Data cable[8 Pin](1 EA), AC Power cord (1 EA), Limbs electrodes(1 SET), Chest electrodes(1 SET), ECG chart paper(1 EA), Operation manual &...
- Page 105 CardioXP Operation Manual WARRANTY Product Name Electrocardiograph Model Name Cardio XP License Number License Date Serial Number Warranty period 1 year from the date of purchase Date of purchase (yyyy/mm/dd) Hospital: Address: Customer Name: Contact No: Seller’s Name Manufacturer’s Name Thanks for purchasing Cardio XP.
- Page 106 CardioXP Operation Manual International Sales & service Bionet Co., Ltd. : #11F, E&C DREAM TOWER Ш, 197-33, Guro-Dong, Guro-Gu, Seoul, South Korea Tel : +82-2-6300-6418 / Fax : +82-2-6300-6454 / e-mail: sales@ebionet.com Website: www.ebionet.com U.S.A sales & service representative Bionet America, Inc. : 2691, Dow Ave, Suite B Tustin, CA 92780 U.S.A.
Need help?
Do you have a question about the CardioXP and is the answer not in the manual?
Questions and answers