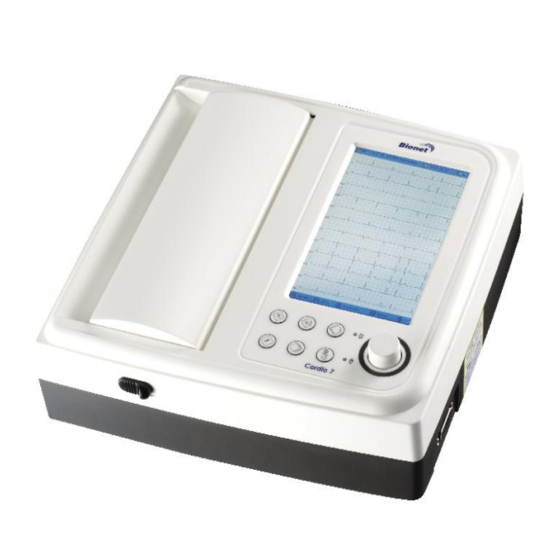
Bionet Cardio7 Operation Manual
Hide thumbs
Also See for Cardio7:
- Operation manual (89 pages) ,
- Operation manual (171 pages) ,
- Operation manual (183 pages)
Table of Contents
Advertisement
Quick Links
Advertisement
Table of Contents

Related Manuals for Bionet Cardio7


Summary of Contents for Bionet Cardio7
- Page 1 Cardio7 Operation Manual Ver. 1.24 2018.03.21 www.ebionet.com...
- Page 2 Cardio7 Operation Manual Warranty - This product was made through strict quality control and examination. - The warranty for this product runs for 4 year. The warranty for accessories runs for 90 days. - When having troubles during this period, please provide us with the model name, serial number, date of purchase and a description of the problem you are experiencing.
- Page 3 If you have any questions or comments relating to our products or purchasing, please contact the telephone numbers or E-mail below. You can talk to our sales people. Bionet always welcomes your enquiries. Please contact us. Product and purchasing - TEL: 877-924-6638 ⚫...
- Page 4 Cardio7 Operation Manual Fee-Based Service If you wish to make a claim when the product is damaged through misuse, we charge repair fees. Please read the manual before you make a claim. - For simple inspection without giving instruction or disassembling the product...
- Page 5 Cardio7 Operation Manual Definition of WARNING, CAUTIONS and NOTE In order to stress the contents of this manual, we define the terms as below . ⚫ Please follow the warning and cautions instruction. ⚫ The manufacturer or service agents are not responsible for damage resulting from inappropriate use or carelessness.
- Page 6 Cardio7 Operation Manual Environment Instructions Please do NOT use or place the product in such environments explained below. Steamy environment. Direct sunlight. Do not use the product with wet hands. Place where the temperature and humidity condition are extreme...
- Page 7 Class A buildings used for domestic purposes. Mains power should be a typical commercial or hospital environment. NOTE Diagnosis provided by Cardio7 must be confirmed by a qualified medical professional. 7 / 158 C7OMBA-1.24...
- Page 8 Cardio7 Operation Manual Safety Messages The following messages apply to the product as a whole. Specific messages may also appear elsewhere in the manual. WARNING: ACCIDENTAL SPILLS — If liquids enter a device, take the device out of service and have it checked by a service technician before it is used again.
- Page 9 Cardio7 Operation Manual WARNING: OPERATOR — Medical technical equipment such as this system must be used only by qualified and trained personnel. WARNING: SHOCK HAZARD — Improper use of this device presents a shock hazard. Strictly observe the following guidelines. Failure to do so may endanger the lives of the patient, user, and bystanders.
- Page 10 DISPOSAL — At the end of its service life, the product described in this manual, as well as its accessories, must be disposed of in compliance with local, state, or federal guidelines regulating the disposal of such products. If you have questions concerning the disposal of the product, please contact bionet or its representative. CAUTION: EQUIPMENT DAMAGE —...
- Page 11 Cardio7 Operation Manual Safety Symbols Symbols Contents ATTENTION : Consult accompanying documents Consult instructions for use: This symbol advises the reader to consult the operating instructions for information needed for the proper use of the device. Safety Sign : To signify that the instruction manual must be read.
- Page 12 Cardio7 Operation Manual Symbols Contents Spirometry Connector Local Area Network(LAN) Connector Power Off Power On Battery Operation Indicator AC Power Connection Indicator Manufacturer name and address Authorized European representative Waste of electrical and electronic equipment must not be disposed as unsorted municipal waste and must be collected separately.
-
Page 13: Table Of Contents
Cardio7 Operation Manual Contents Chapter 1. General Information ..........16 1) Product Overview ................17 2) Indication for use ................17 3) Recording ECGs During Defibrillation .......... 18 4) Product Features ................18 5) Product Configuration ..............19 Basic Components and Accessories ............. 19 Optional components .................. - Page 14 Cardio7 Operation Manual 6) Disclosure ..................... 52 7) Rhythm Mode Printing ..............53 8) Record Mode Printing ............... 54 10 seconds ECG recording ................54 9) Printing Form ..................55 10) Copy Mode Printing ................ 63 11) System Setup ..................65 Basic Setup ......................
- Page 15 Cardio7 Operation Manual 7) Data search ..................144 Chapter 5. System Management .......... 145 1) Maintenance and Cleaning ............146 2) Regular Check-up ................147 3) Trouble Shooting ................147 4) Manufacturer Declaration ............151 Chapter 6. Specification ............155 15 / 158 C7OMBA-1.24...
-
Page 16: Chapter 1. General Information
Cardio7 Operation Manual Chapter 1. General Information 1) Product Overview 2) Indications for use 3) Recording ECGs During Defibrillation 4) Product Features 5) Product Configuration Basic Components and Accessories Optional components Body Configuration Front Panel Graphic display LCD Control Panel... -
Page 17: Product Overview
ECG data to and from a central ECG cardiovascular information system is optional. The Cardio7 is intended to be used under the direct supervision of a licensed healthcare practitioner, by trained operators in a hospital or medical professional’s facility. -
Page 18: Recording Ecgs During Defibrillation
Cardio7 Operation Manual Contraindications No absolute contraindications to performing an electrocardiogram, other than patient refusal, exist. Some patients may have allergies, or more commonly, sensitivities to the adhesive used to affix the leads; in these cases, hypoallergenic alternatives are available from various manufacturers. -
Page 19: Product Configuration
Cardio7 Operation Manual 5) Product Configuration The Cardio7 system consists of the items below. Unpack the package and check the items below are included. Also, be sure to check for any damage to the body and accessories. Basic Components and Accessories ②... -
Page 20: Optional Components
Cardio7 Operation Manual Optional components ① ③ ② ① Battery (1 EA) ② Hanger (1 EA) ③ Cart (1 EA) Caution You may have distortion or signal noise when you use nonstandard or other brand accessories. We strongly recommend you use only the authorized accessories which we supply. -
Page 21: Body Configuration
Cardio7 Operation Manual Body Configuration ▣ Top View ① ② ③ ④ ⑤ ① Handle ② Printer Cover ③ Printer Cover Switch ④ LCD ⑤ Control Panel 21 / 158 C7OMBA-1.24... - Page 22 Cardio7 Operation Manual ▣ Front View ① ① Printer Cover Switch ▣ Rear View ① ② ③ ④ ⑤ ⑥ ① Protective Ground Terminal ② Power Switch ③ AC Power Connection Port ( Fuse : 250V , 5A ( High breaking type )) ④...
- Page 23 Do not use the product and immediately ask the manufacturer and the seller for repair NOTE To avoid an expected electric shock, do not open the equipment cover or disassemble the equipment. Refer servicing to Bionet, Inc. 23 / 158 C7OMBA-1.24...
-
Page 24: Front Panel
Cardio7 Operation Manual Front Panel Graphic display window Button Battery status Rotary key Power status During device boot up, you can see the system software version and the Bionet name. 24 / 158 C7OMBA-1.24... -
Page 25: Graphic Display Lcd
Cardio7 Operation Manual Graphic display LCD The following descriptions explain data on the graphic LCD. ① ② ③ ④ ⑤ ⑥ ⑦ ⑧ ① Select one ECG recording mode (10s, 1m, 3m, 5m, or 10m (seconds, minutes)) ② Displays The Heart Rate. -
Page 26: Control Panel
Cardio7 Operation Manual Control Panel ① ② ③ ⑦ ④ ⑤ ⑥ ⑧ ⑨ ▣ Button ① Print out the rhythm data on A4 size or continuous paper. 10sec. and long-term readings (1min., 3min., 5min., 10min.) are saved ② and are printed as an output form after processing. -
Page 27: Power
Cardio7 Operation Manual ▣ LED A light indicator lets you know that the battery is on and shows your current battery charging status. A red light indicator lets you know that ⑦ the battery is charging and a green light indicator lets you know the batter is fully charged. - Page 28 Cardio7 Operation Manual ▣ Display Battery Power Status : Battery Fully Charged : Battery Charge Half-Full : Battery Charge Low : Battery Almost Fully Drained ▣ Replacing Battery When replacing battery for this device, the same type of battery should be used.
-
Page 29: System Installation
V1 (C1), V2 (C2), V3 (C3), V4 (C4), V5 (C5), and V6 (C6), respectively. Paper Installation - Push the printer cover release switch to the right to open the printer door of the Cardio7. Install EKG paper with the side to be recorded appearing on top. Close the cover to finish the paper installation process. -
Page 30: System Start
Cardio7 Operation Manual 7) System Start When every preference is set, the company name will be displayed when the switch is turned on, and then after approx. 10 seconds, the initial menu selection will appear on the screen, as shown in the figure below. - Page 31 Cardio7 Operation Manual The following is the main page of ECG menu. If you remember the information shown below, it will be easier for you to use the main page of ECG. 31 / 158 C7OMBA-1.24...
- Page 32 Cardio7 Operation Manual Menu Description Recording mode (marked as 10 s, 1 m, 3 m, 5 m and 10 m unit) Heart rate mark To Input or check the patient’s information Barcode reader or USB Keyboard connection mark Replaced by the icon when a network error occurs during transfer to the PACS server.
- Page 33 Cardio7 Operation Manual The following is the main page of ECG file management, shown when selecting the ‘File’ menu. If you remember the information shown below, it will be easier for you to use the main page of ECG file management.
- Page 34 Cardio7 Operation Manual The following is the main page of ECG worklist management, shown when selecting the ‘worklist’ menu. If you remember the information shown below, it will be easier for you to use the main page of ECG worklist management.
- Page 35 Cardio7 Operation Manual The following is the initial screen of the Study Queue Data Management, which is where you will navigate to if you select the ‘Study Queue’ icon ( ). The Study Queue is managing data errors when an error occurs during transfer to the PACS server.
-
Page 36: Chapter 2. Preparation For Electrocardiography
Cardio7 Operation Manual Chapter 2. Preparation For Electrocardiography 1) Location of Electrode 2) Electrode Connection Patient Cable Connection How to Attach Electrodes Countermeasures for Bad Lead Connection 3) Starting ECG recording 4) Basic Setup General Patient Information Input Sensitivity Setup... -
Page 37: Location Of Electrodes
Cardio7 Operation Manual 1) Location of Electrodes Attach electrodes to the patient’s body to record an electrocardiogram of twelve standard leads [ I, II, III, aVR, aVL, aVF, V1, V2, V3, V4, V5, V6 ], as shown below. Limb electrodes are located as follows. -
Page 38: Electrode Connection
ECG signals. WARNING Use only electrodes and patient cables provided from Bionet, Inc. Bionet America, Inc. will take no responsibility for any accidents involving 3 party accessories. -
Page 39: Countermeasures For Bad Lead Connection
- Second case, signal conductivity between leads and the patient’s body is low. In this case, replace the electrodes. If the two above cases have been performed and the operator is still experiencing noise or lead fault conditions, the patient cable may be faulty. Please contact the Bionet service center. 39 / 158... -
Page 40: Starting Ecg Recording
LCD. - Press the ‘ESC’ key to stop the operation while printing or recording. The following buttons will be most commonly used when operating Cardio7. Print out the rhythm data on A4 size or continuous paper. 10sec. and long-term readings (1min., 3min., 5min., 10min.) are saved and are printed as an output form after processing. -
Page 41: Basic Setup
Cardio7 Operation Manual 4) Basic Setup General When turning on the system, LCD will display component values set by the current system in order of heart rate, patient information, connection status of external device, power state, size of ECG signal and output speed. - Page 42 Cardio7 Operation Manual - Menu Navigation Operate by rotating the rotary key. Menu movement will occur in the same direction as the direction of the key’s rotation. - Menu Selection Initiate by pressing the rotary key. Menu box for setting of the selected menu will be displayed.
-
Page 43: Patient Information Input
Cardio7 Operation Manual Patient Information Input In this menu, operators can input the patient’s ID, name, age, sex, height, weight, race and smoking habit. NOTE The patient's surname is available after changing the file version to 1.1 in the BMS Server settings. - Page 44 Cardio7 Operation Manual When the user selects the line of ID, NAME, Department , a keyboard will show up on the screen. The default of every line is a blank and if there is a certain figure on the line, it should be shown exactly when loading the keyboard window.
- Page 45 Cardio7 Operation Manual When the user selects the line of Age, Birth, Height or Weight, a keypad will show up on the screen. The default of every line is a blank and if there is a certain figure on the line, it should be shown exactly when loading the keypad window.
- Page 46 Cardio7 Operation Manual When clicking the Gender Line, the letter Male or Female will be shown respectively. After selecting the data which you want , input all the information of the patient. When pressing OK button, the information will be saved, while pressing cancel button will cancel the setting.
- Page 47 Cardio7 Operation Manual When clicking the Race Line, the choices of White, Asian, Black will show up. After selecting the data which you want to, input all the information of the patient. When pressing OK button, the information will be saved, while pressing cancel button will cancel the setting.
- Page 48 Cardio7 Operation Manual You can decide whether or not to smoke by clicking Smoke. The default setting for Smoke is “No.” When you have completed inputting all information, you will see the window as shown below. After checking all information then pressing OK button, the information will be saved, while pressing cancel button will cancel the setting.
- Page 49 Bionet. • Input methods supported by Bionet : International standards, USB • Products below are tested and confirmed by Bionet for Cardio7. Manufacturer Product name...
-
Page 50: Sensitivity Setup
Cardio7 Operation Manual Sensitivity Setup This is a functionality that can modify sensitivity of the output signal, when the outputting signal’s amplitude is too large and causes overlap with neighboring signals, or too small so that signal diagnosis is difficult. -
Page 51: Printing Speed Setup
Cardio7 Operation Manual Printing speed Setup This is a function to adjust the width of the printing signal. The values are available in 12.5mm/sec, 25mm/sec and 50mm/sec. If you set 25mm/sec up, the ECG signal will be recorded in 25mm for one second. Therefore, the 12.5 mm/sec width is equal to half of the 25 mm/sec width;... -
Page 52: Lcd Monitor Display
Cardio7 Operation Manual 5) LCD Monitor display Monitor mode display shows the currently measured electrocardiogram signal in real time. The monitor mode display function is used for the following two purposes: One is to check whether the signals from all channels are coming out properly; the other one is to see the status of the electrocardiogram of the patient for an extended time. -
Page 53: Rhythm Mode Printing
Cardio7 Operation Manual 7) Rhythm Mode Printing In rhythm mode printing, the measured ECG signals would be printed in real-time. Rhythm mode printing allows operators to perform the following two functions: one is to verify that signals in all channels are active before recording ECGs, and the other is to print the ECGs rhythm status of the patient for a longer duration. -
Page 54: Record Mode Printing
Cardio7 Operation Manual 8) Record Mode Printing For the record mode display, save the electrocardiogram in the memory first, and apply the filter which is set up by the user to the saved electrocardiogram, and then extract the parameters for the heart rate, PR interval, QRS duration, QT/QTc, and P-R-T axes. Then, print out the heart rate according to the sensitivity, printing speed, and channel form that are set up by the user. -
Page 55: Printing Form
Cardio7 Operation Manual 9) Printing Form In this section, descriptions and samples of various printing forms are provided. ◼ Rhythm Printing Form - 3CH printing: To print 3 channels at the same time (I ~ III / aVR ~ aVF / V1 ~ V3 /... - Page 56 Cardio7 Operation Manual (3CH) Rhythm Report Form (6CH) Rhythm Report Form 56 / 158 C7OMBA-1.24...
- Page 57 Cardio7 Operation Manual (12CH) Rhythm Report Form (3CH + 1 RHY) Record Report Form 57 / 158 C7OMBA-1.24...
- Page 58 Cardio7 Operation Manual (3 CH + 3 RHY) Record Report Form (6 CH + 1 RHY) Record Report Form 58 / 158 C7OMBA-1.24...
- Page 59 Cardio7 Operation Manual (12 CH) Record Report Form (BEAT REPORT - TEXT) Record Report Form 59 / 158 C7OMBA-1.24...
- Page 60 Cardio7 Operation Manual (BEAT REPORT - VECTOR) Record Report Form (BEAT REPORT - GUIDE) Record Report Form 60 / 158 C7OMBA-1.24...
- Page 61 Cardio7 Operation Manual * Beat Report Parameters ◼ PR : PR Interval ◼ PA : P Amplitude ◼ PD : P Duration ◼ QA : Q Amplitude ◼ QD : Q Duration ◼ RA : R Amplitude ◼ RD : R Duration ◼...
- Page 62 Cardio7 Operation Manual NOTE Dextrocardia The human heart is normally located on the left side of the chest. However, in rare cases it is located on the right side chest, which is a condition called Dextrocardia. There is potential for dextrocardia if: - P, QRS and T are all reversed on Lead I.
-
Page 63: Copy Mode Printing
Cardio7 Operation Manual 10) Copy Mode Printing Copy Mode Printing is a function to print out the same report as the previously printed report. In Copy Mode, users can also print out the same previous data but with changed settings such as filter type, sensitivity, printing speed, channel form, and rhythm number if more than one rhythm is recorded. - Page 64 Cardio7 Operation Manual If you change the filters on a previously saved ECG, it will adapt to the new filter. When the new filter is adapted completely, it will start printing after showing the message as below. When printing is abnormally completed, the state of the system setting will b e displayed after showing the message as shown below for a second.
-
Page 65: System Setup
Cardio7 Operation Manual 11) System Setup Choose the 'Setup' button on the initial ECG main screen to change preferences. Setup menu consists of Basic Setup, Network Setup, Hospital Setup, ECG Setup, Record Setup and Service Setup and you can change the setting at each window. The main page shows Basic Setup. -
Page 66: Basic Setup
Cardio7 Operation Manual Basic Setup When choosing Basic menu at the left side of the Setup page, you will see the page for Basic Setup. Basic Setup consists of Date, Time, Touch screen, Start Option, Unit, Date Type and Device Name menus. - Page 67 Cardio7 Operation Manual Setup date and time After choosing the Setup menu, press the Basic button then the focus will go to the 'Date' item. By using the touch screen or rotating the rotary switch, choose the Date (yyyy/mm/dd) or Time (hr/min/sec), then the keypad will show up.
- Page 68 Cardio7 Operation Manual Touch Setup This is a menu to set up the coordinates of the touchpad. When selecting the 'Touch' menu at the Basic Setup page, setup page will disappear and the coordinates for setting calibration will appear as shown below. Follow the instructions shown on the screen, and then the coordinates will be set up.
- Page 69 Cardio7 Operation Manual Language As shown below, when selecting 'Language menu at the Basic Setup page, you can choose the language among English, French, German, Italian, Korean, Polish, Portuguese, Rumanian, Russian, Spanish and Turkish. Select the language you want to use and click the OK button and then you can use the service in the chosen language.
- Page 70 Cardio7 Operation Manual Start Option You can set up the index page shown at the time of initial boot up, according to the common dialog. When clicking the ‘Start Option’ button, a small menu window will appear and you can select the initial page you want to have among MAIN, FILE, WORKLIST, ECG, SPIRO.
- Page 71 Cardio7 Operation Manual Units This menu is to select the units for height and weight of the patient. When you click ‘Units’ button, cm/kg or Inch/Lbs will be shown. If you select Inch/Lbs unit, the patient’s height information will be expressed in *** Ft (Feet) *** Inch.
- Page 72 Cardio7 Operation Manual Date Type As seen in the figure below, the date format on the top of the paper can be changed while printing out monitoring and recording results if you choose 'Date Type' from the Basic Setup menu. Choose the date format to be used, and then click the 'OK' button; the date format is converted to the one selected and can be seen on the output.
-
Page 73: Network Setup
Cardio7 Operation Manual Network Setup When connecting the equipment with LAN to interface with the outside PC, network setup is needed. Network IP is required and DNS is not used. When selecting the Network menu at the left side of the System Setup page, Network Setup page will show up at the right side. - Page 74 Then, input the information required and press 'OK' button to save or 'ESC' to cancel the information. The server interlocking device can be selected as BMS Server of Bionet or PACS Server. After selecting the type of interlocking server, select the 'Setting' button; an appropriate setup window to the choice of server will be displayed.
- Page 75 Cardio7 Operation Manual BMS Server Setting IP setup on BMS Server-installed PC can be performed by choosing either Automatic IP (DHCP) or Fixed IP (Manually) in 'Configure’ setup. The patient's surname is available after changing the file version to 1.1 in the BMS Server settings.
- Page 76 Cardio7 Operation Manual Upon completion of BMS Server IP setup, the Ping Test can be conducted to check successful network connection. If choosing ‘Ping’ button, “Ping : 100% Succeeded” message will be shown for a successful connection, whereas “Ping : Failed” message will be shown for connection failure.
- Page 77 When selecting the PACS Server, the additional information should be set through the Settings Menu. The screen for related settings such as the AE Title, IP and Port of Cardio7, Worklist Server and Store Server will appear. When the input window of each item is selected, the keyboard window will appear;...
- Page 78 Cardio7 Operation Manual When successful, the “Verify : Success” message will appear; when it has failed, “Verify : C-Echo Failed” will appear. Set the PACS option by pressing the More button when connection to the server is confirmed. Spiro Exam Code Enter the Exam Code of FVC, SVC and MVV for the Spiro test.
- Page 79 Cardio7 Operation Manual Data Range The range of dates when the worklist is brought can be set at the Worklist Server. You can choose appropriate one from the options such as “Today,” “Yesterday,” “Tomorrow” , “One Week” and "A Week ago".
- Page 80 Cardio7 Operation Manual Data Format Set the data format for the file to be transferred to the PACS Server. You can select either “JPEG,” “PDF” or “RAW” after checking the format supported by the PACS Server. Retry Count Select the number of Retransmission attempts when a communication error occurs during transfer of data to the PACS Server.
- Page 81 Cardio7 Operation Manual Character Set By selecting the Character Set, multiple selections of language are available; it should be selected according to the character set in order to present contents such as patient information by language when transferring a DICOM file to the PACS Server.
- Page 82 Cardio7 Operation Manual Wireless Network Setting 1) Connect the USB wireless LAN card to the USB port of Cardio7, and check whether or not the wireless icon ( ) appears in the Status bar on the top of the screen.
- Page 83 Cardio7 Operation Manual Refresh : AP re-searching << : Page up >> : Page down Connect : Attempting to connect Close : Closing the window 4) Select the AP to be connected by using the rotary key or touching.
- Page 84 Cardio7 Operation Manual 5) After clicking the Key Value input line by using the rotary key or touching, enter the security key. 6) Upon the completion of input, click the "OK" button; Connection will be attempted and the message describing the connection status will appear.
-
Page 85: Hospital Setup
Cardio7 Operation Manual Hospital Setup When selecting the ‘Hospital’ menu at the left side of the Setup page, Hospital Setup page will show up at the right side. You can input the names of the hospital and doctor. When clicking the area to input the information, the keypad will show up. Then you can input the information required and press OK button to save or ESC to cancel the information. -
Page 86: Ecg Setup
Cardio7 Operation Manual ECG Setup When selecting the ‘ECG’ menu at the left side of the Setup page, ECG Setup page will show up at the right side. 86 / 158 C7OMBA-1.24... - Page 87 Cardio7 Operation Manual Printing channel setting [Print Setup] [Monitoring Form] Set up real time-printout form. Click ‘Mon Form,’ and then a POP-UP window for channel list will be displayed. Default is set as ‘12CH’. - 3CH printing: To print 3 channels at the same time (I ~ III / aVR ~ aVF / V1 ~ V3 / V4 ~ V6) If you want to change the channel, press ‘RHYTHM’...
- Page 88 Cardio7 Operation Manual [Monitoring Size] You can set up the real time printing size. When you click the ‘Mon Size’ menu, ‘Report’ will be selected and when clicking it again, ‘Continue’ will be selected. Default is set as ‘Continue’. - ‘Report’...
- Page 89 Cardio7 Operation Manual [Grid] If general fax paper is used for printout, it needs to be marked with a grid. A 5mm X 5mm grid must be in a solid line with the point mark on the 1mm X 1mm location. If using standard ECG recording paper instead of general fax paper(thermal paper), undo the grid marking setup as the recording paper will already have it.
- Page 90 Cardio7 Operation Manual [Recording Form] You can set up the recording form. If you choose the ‘Rec Form’ menu, a small POP-UP menu will appear below; once you choose either 3CH+1, 6CH+1, 12CH or 3CH+3, the POP-UP menu will disappear. The default is ‘3CH+3'.
- Page 91 Cardio7 Operation Manual The set value will be displayed on the screen, and when you choose ‘3CH+1’, 3 Channels + 1 Rhythm Report will be shown at the top of the printing form, ‘6CH+1’ for 6 Channels + 1 Rhythm Report, ‘12CH’ for 12 Channels Rhythm Report, ‘3CH+3’ for 3 Channels + 3 Rhythm Report will be shown.
- Page 92 Cardio7 Operation Manual [Print Line] You can set the line thickness of the printouts. Three setting options are available; “Thin”, “Normal” and “Thick”. 92 / 158 C7OMBA-1.24...
- Page 93 Cardio7 Operation Manual [Beat Form] You can set up the additional beat report printing . When you select the ‘Beat Form’ menu, a small POP-UP menu will appear at the bottom and it will disappear when choosing OFF, Text, Vector or Guide.
- Page 94 Cardio7 Operation Manual [Rhythm] You can set up the rhythm leads for printing out the diagnosis of 3CH+1, 6CH+1, 3CH+3 and Long Time(1,3,5,10 Minute). You can choose 3 rhythm leads and when ‘3CH+3’ is chosen, you can use all of the 3 leads, while when ‘3CH+1’, ‘6CH+1’ or ‘Long Time’ is chosen, you can use the first value only.
- Page 95 Cardio7 Operation Manual [Preview] After performing measurements by using keys such as RECORD, AUTO and NET, the device can automatically show the outcome to the user. This function can be turned On or Off in this window. When the preview setting is set to “On”, the “Preview” screen will appear following data collection with RECORD, AUTO and NET keys.
- Page 96 Cardio7 Operation Manual - The first page: ECG 0 - 6 seconds signal data, ID, Name, and Diagnosis - The next page: ECG 6 - 10 seconds signal data, ID, Name, Filter setup, Rhythm parameter values Note The preview screen will be shown with output speed set to 25mm/sec.
- Page 97 Cardio7 Operation Manual [Quick Print] Set up the Quick Print Options. Output time can be saved by using the buffering function during selection of 0 - 10 seconds. Note If setting up as ON, diagnosis button should be used only after signalling is stabilized.
- Page 98 Cardio7 Operation Manual [Filter Setup] The signal output generated by the device may contain extra unwanted signals in addition to the EKG wave such as AC noise, base line drift caused by respiration, noise generated by an electrical field nearby, etc. Applying filters could help to reduce or remove those unwanted signals from the output of the device.
- Page 99 Cardio7 Operation Manual Base line drift is caused by the patient’s breathing. It can be seen as ECG signals being overlapped on a large parabola. The BASE LINE filter provides 0.05Hz, 0.1Hz and 0.2Hz, and its set values will appear as Base:0.05Hz, Base:0.1Hz and Base:0.2Hz at the bottom of the Output Form.
- Page 100 Cardio7 Operation Manual There are three types of an AC power noise filter; 60Hz, 50Hz and OFF. When set to OFF, the filter will not be applied. If the filter is set to 50Hz or 60Hz, then the AC filter will remove 50Hz or 60Hz power noise correspondingly.
- Page 101 Cardio7 Operation Manual If the recorded EKG signal contains a lot of noise, Low Pass Filter (LPF) may help to clear it. For Low Pass Filter, 40Hz, 100Hz, 150Hz and OFF option is offered. Here, 40Hz option means the filter will remove any unwanted signal with frequencies above 40Hz. Low Pass Filter values will appear on the bottom of the printout form;...
- Page 102 Cardio7 Operation Manual Select 'ON' when applying ‘EMG’ filter; otherwise, select 'OFF.' Setup values will be shown on the bottom of the printout form as ‘EMG:On’ or ‘EMG:Off’ when applying the filter. 102 / 158 C7OMBA-1.24...
- Page 103 Cardio7 Operation Manual Lead fault Signal Display Setting When the connection between the patient and Leads is improper, lead fault can occur. In that case, you can choose whether to have the lead fault message on the ECG Main page or not. Selecting ‘Lead Fault’ menu will switch between ON and OFF in the menu, with ON turning on the message display and OFF switching off the message display.
- Page 104 Cardio7 Operation Manual The following message for Lead Fault will be shown with affected channels: Note If ‘RA’ Lead becomes Fault, the wave types of all Leads will not be indicated. If ‘LA’ Lead becomes Fault, the wave types of I and V1-V6 Leads will not be indicated.
- Page 105 Cardio7 Operation Manual Pacemaker signal printing In case of using the pacemaker signals, you can choose whether to print out the location of the pacemaker when monitoring or recording . You can select ON or OFF by clicking the ‘Pacemaker’ item. When it is on, the location of the pacemaker will be printed out, while when it is off, it will not be printed out.
- Page 106 Cardio7 Operation Manual QRS Sound Setup In this menu, users can set the device to ring an alarm sound when a QRS beat has generated while it is in waiting mode. Users can either set the alarm ON or OFF by selecting the menu with ON turning on and OFF turning off the alarm sound.
- Page 107 Cardio7 Operation Manual Method of Leads Place ‘Leads Place’ menu shows how to connect electrodes on the graphic display. Focusing on and selecting ‘Leads Place’ menu will bring the screen shown below. At that time, enter the screen-touch, rotary or 'ESC' key; and then the 'how to connect electrodes' screen will disappear while going back to the ‘ECG Setup’...
- Page 108 Cardio7 Operation Manual Demo Mode Setting This menu puts Cardio7 in demo mode. When it is set to ON, 60bpm Sinus Normal Rhythm signal will be displayed on the device and DEMO sign will appear on the upper part of the LCD screen.
-
Page 109: Record Setup
Cardio7 Operation Manual Record Setup When selecting the ‘Record’ menu at the left side of the Setup page, the record setup page will show up at the right side. Record Setup menu consists of the ‘AUTO’ key on the control panel setup item and auto diagnosis setup item. - Page 110 Cardio7 Operation Manual When the ‘Print Out’ menu has the focus, click it to set up ‘Yes’ or ‘No’. When ‘Yes’ is selected, you can operate the ECG test by pressing the ‘AUTO’ key on the control panel and the ECG data will b e automatically print out, but when ‘No’...
- Page 111 Cardio7 Operation Manual When selecting the ‘Export’ menu, a small menu window as below will appear and it will disappear when selecting one of None, Server, USB. If it is ‘None,’ ECG data will not be externally transferred; if is 'USB,' ECG data will be automatically saved to the external USB memory.
- Page 112 Cardio7 Operation Manual Auto diagnosis setting ‘When selecting the ‘Diagnosis’ menu, a small menu window as below will appear and it will disappear when selecting one of OFF, Standard or Professional. When ‘OFF’ is selected, the content of diagnosis will not be printed out, whereas when ‘Standard’...
- Page 113 Cardio7 Operation Manual When selecting the ‘ST Level’ menu, a small menu window as below will appear and it will disappear when selecting one of AUTO, 60msec or 80msec. When ‘AUTO’ is selected, J Point associated with ST Level will be automatically set up at the time of printing.
- Page 114 Cardio7 Operation Manual ‘V Change’ menu is used to set up the V3 ~ V6 on the printing paper when diagnosing children in which the location of V3 ~ V6 electrodes need to be changed from left to right. Basically, the ‘V Change’ is set as ‘None’ and when you click this menu, a ‘Leads Change’...
- Page 115 Cardio7 Operation Manual Long Time setting Duration of Arrhythmia and HRV recording can be set up. It can be selected as 1, 3, 5 or 10 min. NOTE - For Arrhythmia and HRV, only 3, 5 or 10 min are available.
- Page 116 Cardio7 Operation Manual Arrhythmia setting When performing Long Time recording, arrhythmia printout options can be configured. If 'Arrhythmia’ option is selected as ON, printout will be performed; if OFF, it will not be performed. 116 / 158 C7OMBA-1.24...
- Page 117 Cardio7 Operation Manual setting When performing Long Time recording, HRV printout options can be configured. If 'HRV’ option is selected as ON, printout will be performed; if OFF, it will not be performed. 117 / 158 C7OMBA-1.24...
- Page 118 Use the electrodes same as the provided ones or with biocompatibility certificate authorized by the international standard. Caution When the patient, who had an operation to have a heart assist device, uses Cardio7, it should be done under the supervision of a health care professional. 118 / 158 C7OMBA-1.24...
-
Page 119: Service Setup
‘User Security Set’ and ‘Manufacture Set’ will appear. At ‘User Security Set’ setup, it is possible to change Factory Setting and User Password. At ‘Manufacture Set’ setup, it is possible to change Upgrade and Device Options; please contact the Bionet Service Center. 119 / 158 C7OMBA-1.24... - Page 120 Cardio7 Operation Manual Factory(Reset Settings) In order to reset to factory conditions, press the ‘Factory’ button and enter the Password. Reset will proceed, with the message below appearing on the LCD screen for 1 second. The initialized values are as follows.
- Page 121 Cardio7 Operation Manual Rec Form 3ch + 3 Paper Size Print Line Normal Beat Form Rhythm II, V1, V5 Base Filter For ENG and KOR language, ‘60Hz’ AC Filter For other languages, ‘50Hz’ Low Pass Filter 150Hz EMG Filter ECG Store...
- Page 122 Cardio7 Operation Manual Data Erase All data in Files and Worklist will be deleted. 122 / 158 C7OMBA-1.24...
- Page 123 Cardio7 Operation Manual Change PW User Password can be configured. User Password is the number entered for Factory and Data Erase. The password should be a 4-digit number. NOTE The default User Password is ‘1234’. If you forget the password, enter ‘1234’ and reset.
-
Page 124: Chapter 3. Ecg File Management
Cardio7 Operation Manual ECG file management Chapter 3. 1) Display and function 2) Data printing 3) Data deleting 4) System Setup 5) Switching menu 6) Patient information 7) Data search 8) Data transfer 9) Data import 124 / 158 C7OMBA-1.24... -
Page 125: Display And Function
Cardio7 Operation Manual 1) Display and function ⓛ ② ③ ④ ⑤ ⑥ ⑦ ⑧ ⑨ ⑩ ① Page information - For example, [1/20] means that you see the first page among total 20 pages. 1 Page contains 24 lines of Data. -
Page 126: Data Printing
Cardio7 Operation Manual ⑦ Button to print out the chosen saved data ⑧ Button to delete the data ⑨ Button to set up the environment of ‘File Management’ ⑩ Button to move to other main screen from ‘File Management’ At the initial file management page, the first data of the list has the focus. The... -
Page 127: Data Deleting
Cardio7 Operation Manual 3) Data deleting When pressing the ‘Delete’ button, a small pop-up menu will show up. You can choose to press the ‘select’ or ‘all’ button. When you press the ‘Select’ button, one data will be deleted, but if you press the ‘All’... -
Page 128: System Setup
Cardio7 Operation Manual 4) System Setup When clicking the ‘Setup’ button at the ECG data file management page, you will see a ‘System Setup’ window as shown below. ‘PAT Info.’ menu is to set up whether the patient information is r etained or not, when you move the main screen of the ECG. - Page 129 Cardio7 Operation Manual When clicking the ‘Export’ button, you will see ‘Export’ window as shown below. When clicking the ‘Target’ button, a POP-UP window will show up and it will disappear when selecting one of BMS Server or USB. - BMS Server/PACS Server : To save the data in the BMS Server or PACS Server.
-
Page 130: Switching Menu
Cardio7 Operation Manual When clicking the ‘Format’ button, a line window will show up and it will disappear when selecting EKG/FVC/SVC/MVV, MFER(ECG), XML(ECG), JPEG, PDF. ‘Format’ menu is used to select the user’s options when transferring the data. - EKG/FVC/SVC/MVV: To save the data by type of ‘***.ekg' / ‘***.fvc' / ‘***.svc' / ‘***.mvv'... -
Page 131: Patient Information
Cardio7 Operation Manual 6) Patient information When selecting a saved data at the ECG file management page by using a rotary key or a touch screen, the focus will appear at the data list. Press the ‘Info’ button. Then you will see a ‘Patient Information’ window as shown below. -
Page 132: Data Search
Cardio7 Operation Manual 7) Data search When clicking the ‘Search’ button at the ECG data file management page, you will see a ‘Patient Search’ window as shown below. If you rotate the rotary key, the ‘search condition’ button will have focus. Press the ‘Find’ button after inputting the information about ID, Name, Date or Age. -
Page 133: Data Transfer
Cardio7 Operation Manual 8) Data transfer You can transfer the saved data to the external device at the ECG data file management page by using the ‘NETWORK’ key on the control panel. When pressing the ‘NETWORK’ key, a message will show up, asking which menu you want to select. - Page 134 Cardio7 Operation Manual NOTE When transmitting multiple sets of data to PC after saving, a network error could occur which may cause transmission halt and subsequent loss of data. Therefore, we recommend users to practice following procedures to minimize such loss.
-
Page 135: Data Import
Cardio7 Operation Manual 9) Data import You can import the saved data from the external device at the ECG data file management page by using the ‘RECORD’ key on the control panel. When pressing the ‘RECORD’ key, 'Import File List’ screen will be shown as below. - Page 136 If 2 different USB memory devices are connected, a system message window prompting you to select one of them will appear. If the external device is not connected to Cardio7, the error message will be shown as below. If you select the ‘Selected’ menu in the ‘Import File List’ screen, after receiving the selected data from the external device a system message will be shown as below.
- Page 137 Cardio7 Operation Manual If you select the ‘All’ menu in the ‘Import File List’ screen, a system message with progress speed will be shown as below. After receiving all data from the external device, a system messa ge will be shown as below.
-
Page 138: Chapter 4. Ecg Work List Management
Cardio7 Operation Manual ECG work list management Chapter 4. 1) Display and function 2) ECG Test 3) Data deleting 4) System Setup 5) Switching menu 6) Patient information 7) Data search 138 / 158 C7OMBA-1.24... -
Page 139: Display And Function
Cardio7 Operation Manual 1) Display and function ⓛ ② ③ ④ ⑤ ⑥ ⑦ ⑧ ⑨ ⑩ ① Page information - For example, [1/20] means that you see the first page among total 20 pages. 1 Page contains 24 Data. -
Page 140: Ecg Test
Cardio7 Operation Manual ⑦ Go to test window for the requested choice of data ⑧ Button to delete the data (After interlocking with the PACS Server, press the ‘Update’ button) ⑨ Button to set up the environment of ‘Worklist Management’... -
Page 141: Data Deleting
Cardio7 Operation Manual 3) Data deleting When pressing the ‘Delete’ button, a small pop-up menu will show up. You can choose to press the ‘select’ or ‘all’ button. When you press the ‘Select’ button, one data will be deleted, but if you press the ‘All’... -
Page 142: System Setup
Cardio7 Operation Manual 4) System Setup When clicking the ‘Setup’ button at the ECG data worklist management page, you will see the ‘worklist System Setup’ window as shown below. Note The steps for Network, Hospital and Service Setting are identical with the steps for ECG Main setting. -
Page 143: Switching Menu
Cardio7 Operation Manual 5) Switching menu When selecting the Main button at the main page of the ECG file management, a line window will show up. You can choose ECG or FILE to go to the chosen page. The patient’s information of selected data does not transmit, when moving to other main screen. -
Page 144: Data Search
Cardio7 Operation Manual 7) Data search When clicking the ‘Search’ button at the ECG data order management page, you will see a ‘Patient Search’ window as shown below. If you rotate the rotary key, the ‘search condition’ button will have focus. -
Page 145: Chapter 5. System Management
Cardio7 Operation Manual Chapter 5. System Management 1) Maintenance and Cleaning 2) Regular Check-up 3) Trouble Shooting 4) Manufacturer Declaration 145 / 158 C7OMBA-1.24... -
Page 146: Maintenance And Cleaning
Cardio7 Operation Manual 1) Maintenance and Cleaning There are many ways to clean Cardio7, but it is best to use our recommendation to avoid damage or sanitary issues. The warranty does not cover problems resulting from the use of harmful substances (unauthorized substances). -
Page 147: Regular Check-Up
Connect the external USB keyboard to the USB port before you turn on the power of Cardio7. If you connect the external USB keyboard to the USB port after you turn on the power of Cardio7, you should turn off the power of Cardio7 and turn on again. - Page 148 System message Cause Solution Please contact CS (Customer Please check Internal coin battery Support) team of Bionet to date and time discharged. replace old coin type battery with new one When wrong network Address is not Check the right network address...
- Page 149 Cardio7 Operation Manual There is no Access There is no wireless access Point. Please Check AP and retry point detected. check the AP Fail, connecting. When wireless AP - Press Retry button Do you want to connection is failed - Retry after checking AP...
- Page 150 Cardio7 Operation Manual When file transmission to Retry after checking network Fail to send Image PACS store server conditions failed When there is connection Fail to connect Check network condition with failure between PACS Store Server PACS store server store server and device...
-
Page 151: Manufacturer Declaration
Guidance and manufacturer’s declaration – electromagnetic emissions The Cardio7 is intended for use in the electromagnetic environment specified below. The customer or the user of the Cardio7 should assure that it is used in such an environment. Emissions test Compliance... - Page 152 Guidance and manufacturer’s declaration – electromagnetic immunity The Cardio7 is intended for use in the electromagnetic environment specified below. The customer or the user of the Cardio7 should assure that it is used in such an environment. IMMUNITY IEC 60601...
- Page 153 Guidance and manufacturer’s declaration – electromagnetic immunity The Cardio7 is intended for use in the electromagnetic environment specified below. The customer or the user of the Cardio7 should assure that it is used in such an environment. IEC 60601 Compliance...
- Page 154 RF transmitters, an electromagnetic site survey should be considered. If the measured field strength in the location in which the Cardio7 is used exceeds the applicable RF compliance level above, the Cardio7 should be observed to verify normal operation. If abnormal performance is observed, additional measures may be necessary, such as re-orienting or relocating the Cardio7.
-
Page 155: Chapter 6. Specification
Cardio7 Operation Manual Chapter 6. Specification ECG Leads Simultaneous 12 leads resting ECG Recording Channel 3CH+1RHY, 3CH+3RHY, 6CH+1RHY, 12CH, 1CH Long Time(1min, 3min, 5min,10min) and Beat Report Gain 2.5, 5, 10, 20, Auto (I~aVF: 10, V1~V6: 5) mm/mV Printing Speed 5, 12.5, 25, 50, 100 mm/sec... - Page 156 Cardio7 Operation Manual Safety Conformity Class I, Type CF defibrillation-proof applied part. Environmental Operating temperature: 5 ~ 40℃ Operating humidity: 10~90% RH Atmospheric pressure: 70 ~ 106KPa Dimensions 300(W) x 299(H) x 123(D) mm , Approx. 3.5 kg ( Main Body )
- Page 157 Name: Contact No: Seller’s Name Manufacturer’s Name ※ Thanks for purchasing Cardio7. ※ This product is a medical machine. ※ This product meets the strict quality requirements thoroughly. ※ The repairing and compensation standards follow the consumer damage compensation regulations of the Ministry of Finance and Economy.
- Page 158 Cardio7 Operation Manual International Sales & service Bionet Co., Ltd. : 5F, Shinsegae I&C Digital Center 61 Digital-ro 31 gil, Guro-gu, SEOUL 08375, REPUBLIC OF KOREA Tel : +82-2-6300-6410 / Fax : +82-2-6499-7789 / e-mail: sales@ebionet.com Website: www.ebionet.com U.S.A sales & service representative Bionet America, Inc.
Need help?
Do you have a question about the Cardio7 and is the answer not in the manual?
Questions and answers