Table of Contents
Advertisement
Quick Links
Advertisement
Table of Contents

Related Manuals for Kogan KA12LDGFRYC


Summary of Contents for Kogan KA12LDGFRYC
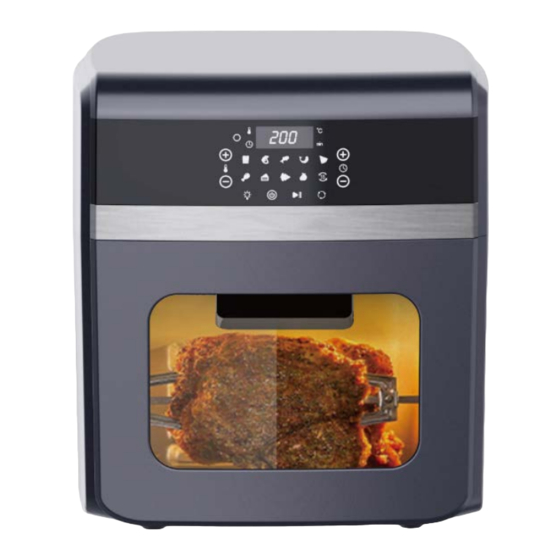
- Page 1 12L XXXL DIGITAL AIR FRYER OVEN KA12LDGFRYC...
-
Page 2: Table Of Contents
Safety & Warnings Components Overview Before First Use Operation Cleaning & Care Troubleshooting Specifications Notes... -
Page 3: Safety & Warnings
Contact help.Kogan.com for examination, repair, or adjustment. • The use of accessory attachments not recommended by Kogan.com may cause injury. • Do not use outdoors. • Do not let the cord hang over the edge of tables or countertops or come into contact with hot surfaces. - Page 4 • Oversize foods and utensils must not be inserted into the appliance, as they may present a risk of fire or electric shock. • A fire may occur if the appliance is covered, or touching flammable materials such as curtains, draperies, or walls when in operation. Do not store any items on top of the appliance when in operation.
- Page 5 • During the cooking process, the fry basket and other accessories will become very hot. When you remove it to check on the progress, make sure you have a trivet or a heat- resistant surface nearby to set it down on. Never place the fry basket directly on a countertop or table.
-
Page 6: Components
COMPONENTS Air fryer Baking tray Rolling cage Drip tray Rotisserie spit assembly Spit removal tool Air Fryer / Control Panel Allows you to control the functions of the unit. Baking Tray Can be used not only for dehydration but also to cook crispy snacks or reheat items like pizza. - Page 7 Note: Ensure roast or chicken is not too large to rotate freely within the oven. Chicken 2kgs roast: up to 2.5-3kgs (depending on the diameter of the meat. Up to 15cm diameter). Spit Removal Tool Use to remove cooked roasts and chicken that have been prepared using the rotisserie or skewer methods.
-
Page 8: Overview
OVERVIEW Control Panel Power/Stop Button Once the unit is plugged in, the power button will light up. Press the power button once will cause the full panel to be illuminated. Pressing the power button at any time during the cooking process will shut down the unit, causing the display to turn off immediately the running light to go dark within 20 seconds. - Page 9 Rotation Button Select this function when cooking anything using the rotisserie spit. This function can be used with any of the presets. The icon will blink during operation. Temperature Control Buttons These buttons enable you to raise or lower cooking temperature in 5°C increments ranging from 80-200°C.
-
Page 10: Before First Use
BEFORE FIRST USE Read this user guide material along with all warning stickers and labels. Remove all packing materials, labels and stickers. Wash all parts and accessories used in the cooking process with warm soapy water. Note: Only the accessories are dishwasher safe. Wipe the inside and outside of the cooking unit with a clean, moist cloth. -
Page 11: Operation
OPERATION Placing Drip Tray into Unit Insert drip tray into the bottom of the unit. Using the drip tray in place will make for an easy clean-up. Placing Baking Trays into unit Place the baking trays into the side grooves of the unit. Place baking trays closer to the top heating element for faster cooking and added crisp. - Page 12 Repeat steps 3-6 in a uniform manner around the skewer rack. Ensure skewers are evenly spaced. Tighten the set screws to ensure everything is securely in place. Use caution while inserting the spit into the unit to prevent being poked by the Skewer ends.
- Page 13 Removing Rolling Cage & Rotisserie Spit from Unit Open the door of the unit to pause cooking cycle or turn unit off by pressing the power button. Insert spit removal tool beneath the rotisserie shaft. Lift the right side of the spit removal tool at a slight angle to clear the bracket, then shift to the right until the left side of the shaft slides out of the rotisserie shaft socket.
- Page 14 Using the Fry Basket With the latch off the basket handle, compress the handle and place it between the slots on the fry basket and release the handle. Close the latch on the basket handle over the top of the handle, pressing down on the latch to ensure that it is completely secure.
- Page 15 Cooking Presets Cooking time for whole roasted chicken will vary with weight. Use a meat thermometer to check internal temperature as per chart below. Preset Button Temperature Time 8. French Fry 200°C 15 mins 9. Steaks/Chops 175°C 25 mins 10. Fish 165°C 15 mins 11.
- Page 16 Manual Cooking Once you are familiar with your air fry oven, you may want to experiment with your own cooking times and temperatures. WARNING: Never use a cooking vessel filled with cooking oil or any other liquid with this unit! Fire hazard or personal injury could result. Place the ingredients on a baking tray, on one of the rotisserie accessories or in the fry basket.
- Page 17 Cooking Chart The table below will help you select the correct temperature and time for best results. As you become more familiar with the air fryer cooking process, you may adjust these settings to suit your own personal tastes. Food Item Min-Max Time Temperature...
- Page 18 Use baking Cake 1 1/4 cups 20-25 mins 160°C Use baking Quiche 1 1/2 cups 20-22 mins 182°C tin/oven dish Using baking Muffins 1 1/4cups 15-18 mins 200°C Use baking Sweet Snacks 1 1/2cups 20mins 160°C tin/oven dish Frozen Onion 15 mins 200°C Rings...
-
Page 19: Cleaning & Care
CLEANING & CARE Cleaning • Clean the air fryer after each use. • The fry basket and other accessories are made of durable stainless steel and are dishwasher safe. • Never use abrasive cleaning materials or utensils on these surfaces. •... -
Page 20: Troubleshooting
Raw fries have too much sticks smaller. Add a bit Fries are not crispy water. more oil. Blanch cut potatoes. Display shown Possible cause Solution Broken circuit of the Contact help.Kogan.com thermal sensor for support. Short circuit the thermal Contact help.Kogan.com sensor for support. -
Page 21: Faq
What happens if the unit still does not work after I have tried all the troubleshooting suggestions? Never attempt a home repair. Contact help.Kogan.com for support. -
Page 22: Specifications
SPECIFICATIONS Supply power 220-240V 50/60Hz Rated Power 1800W Capacity Temperature 80~200°C Display LED Touch Screen... -
Page 23: Notes
NOTES... - Page 24 Need more information? We hope that this user guide has given you the assistance needed for a simple set-up. For the most up-to-date guide for your product, as well as any additional assistance you may require, head online to help.kogan.com...
Need help?
Do you have a question about the KA12LDGFRYC and is the answer not in the manual?
Questions and answers