Advertisement
Advertisement
Table of Contents

Related Manuals for Kogan KABIOV9F72A


Summary of Contents for Kogan KABIOV9F72A
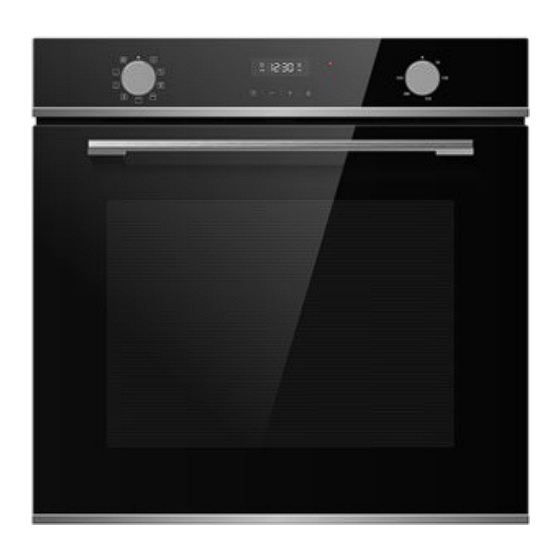
- Page 1 60CM ELECTRIC BUILT IN OVEN (9 FUNCTIONS) KABIOV9F72A...
-
Page 2: Table Of Contents
Safety & Warnings Installation Before First Use Operation Functions Cleaning & Care Specifications Troubleshooting Notes... -
Page 3: Safety & Warnings
Kogan.com. If the appliance is defective, unplug the appliance from the power or switch off the circuit breaker in the fuse box and contact help.Kogan.com for support. • The cord insulation on electrical appliances may melt when touching hot parts of the appliance. - Page 4 Risk of Burns • The appliance becomes very hot. Never touch the interior surfaces of the appliance or the heating elements. • Always allow the appliance to cool down. • Keep children at a safe distance. • Accessories and ovenware become very hot. Always use oven gloves to remove accessories and ovenware.
- Page 5 Hazard Due to Magnetism Permanent magnets are used in the control panel and in the control elements. They may affect electronic implants, e.g. heart pacemakers or insulin pumps. Wearers of electronic implants must stay at least 10 cm away from the control panel. Causes of Damage •...
- Page 6 Efficient Energy Use • Remove all accessories which are not necessary during the cooking and baking process. • Do not open the door during the cooking and baking process. • If you open the door during cooking and baking, switch the mode to ‘Lamp’ (without changing the temperature setting).
-
Page 7: Installation
INSTALLATION WARNING: • Damage may occur because of incorrect installation. If you are not confident installing this appliance, consult a qualified trade professional. • To avoid overheating do not install this appliance behind a decorative door. • While installing the appliance, wear protective gloves to prevent getting cut by sharp edges. - Page 8 Min.35 Min.35 Min.585 Max.595 Min.35 Min. Min.35...
- Page 9 • Use the baking tray for cooking liquids or foods with juice. • Only use the original accessories, or those recommended by Kogan.com. Note: The accessories may deform when they become hot. This does not affect their function.
- Page 10 Figure 1 Figure 2 Figure 3 Figure 4...
- Page 11 Fan Forced Cooling System • The fan forced cooling system automatically activates during operation when the door is opened to prevent hot air flowing directly into your face by pushing it downwards. • When the door is closed, the fan forced cooling system is inactive (Figure 5). •...
- Page 12 Change the Power Cord WARNING: It is strongly recommended to have a licenced electrician change the power cord. Position A shows the terminal box position on the outer casing. Disconnect the power. Use a small flat screwdriver to open 1 and 2. Use a Phillips head screwdriver to remove screws 3, 4, 5 and 6.
-
Page 13: Before First Use
BEFORE FIRST USE • Before using the appliance to prepare food for the first time, you must clean the cavity and accessories. • Remove all stickers, surface protection foils and transport protection parts. • Remove all accessories and the rails from the cavity. •... -
Page 14: Operation
OPERATION Note: Depending on the appliance model, individual details and colours may differ. Control Panel Knobs Indicator Controls Knobs • Turn the knobs to set the heating mode. • Each knob is well fitted with the nearby silk-screening icons on the control panel glass so that you can easily operate your appliance with your fingers. - Page 15 Selecting a Heating Mode The default operating mode is off. To select a mode, use the left ‘Mode’ knob. There is a pointer on the knob; turn this knob to point it at the mode you would like to choose. Temperature Setting To select a temperature for cooking, use the right ‘Temperature’...
- Page 16 Set an Alarm Press the ‘Clock’ button. The alarm indicator will flash and ‘0:00’ will display. Press the ‘+’ and ‘-’ buttons to adjust the timer between 0:01-23:59. Press to increase or decrease 1 minute and hold for 3 seconds for quick-adjust. Wait for 5 seconds to confirm the timer setting.
- Page 17 Lock • Press and hold the ‘Lock’ button for 3 seconds to activate the lock function. The lock indicator will illuminate solidly. • When a button is pressed and the oven is locked, the buzzer will sound, and the lock indicator will flash for 3 seconds.
- Page 18 Changing Modes During Cooking WARNING: During operation, the oven and cavity become very hot. Never touch the interior surfaces of the appliance or the heating elements. Use oven gloves to remove accessories or ovenware from the cavity and allow the appliance to cool down. Keep children at a safe distance to avoid the injury.
-
Page 19: Functions
FUNCTIONS Heating Mode Temp (°C) Description Light up the cavity without switching any Lamp heating elements on. Defrost Gently defrost frozen food. • For roasting poultry, fish, and larger pieces of meat. Double Grill 50~250 • The heating elements and the fan switch on + Fan and off alternately. - Page 20 Notes • To defrost large portions of food, it is possible to remove the side rails and place the tin on the cavity floor. • When warming tableware, it is beneficial to remove the side rails, set the mode to ‘Double Grill + Fan’...
- Page 21 Cooking Guidelines Note: • P.H.T. refers to preheat time. • B.T. refers to baking time. Duration in Cake Form Level Mode Temp (°C) Minutes Sponge Cake Conventional Tray (Simple) with Fan Sponge Cake Tray Conventional (Simple) Sponge Cake Conventional Round with Fruit with Fan Sponge Cake...
- Page 22 Hefe Zopf Conventional Tray (Callah) with Fan Small Cakes Tray Conventional (20) Small Cakes P.H.T.: 10:00 Tray 2 + 4 Conventional (40) B.T.: 34:00 Butter Yeast P.H.T.: 8:00 Tray Conventional Cake B.T.: 30:00 P.H.T.: 8:00 Shortbread Tray Conventional B.T.: 13:00 Shortbread (2 Conventional p.h.t:8:20...
- Page 23 Duration in Meat Form Level Mode Temp (°C) Minutes Beef Double Grill Tenderloin Tray with Fan (1.6kg) Meatloaf (1kg) Tray Conventional L2: Rack Double Grill Chicken (1kg) Tray L1: Tray with Fan Fish (2.5kg) Tray Conventional Tomahawk Tray Conventional Ribs Pork Roast Tray Conventional...
- Page 24 CLEANING & CARE Risk of Surface Damage • Do not use the following: Harsh or abrasive cleaning agents. Cleaning agents with a high alcohol content. Hard scouring pads or cleaning sponges. High-pressure cleaners or steam cleaners. Special cleaners for cleaning the appliance while it is hot. •...
- Page 25 • Clean using hot soapy water and a dish cloth, then dry with a soft cloth. Door handle • If descaler touches the door handle, wipe it off immediately to prevent staining. • Clean using hot soapy water and a dish cloth, then dry with a soft cloth.
- Page 26 • Always keep the appliance clean and remove dirt immediately so that stubborn deposits of dirt do not build up. • Clean the cavity after each use. This will ensure that dirt cannot be baked on. • Always remove flecks of limescale, grease, starch and albumin (e.g. egg white) immediately.
- Page 27 Removing the Oven Door: Open the oven door fully. Fold open the two locking levers on the left and right. Close the door as far as far as possible. With both hands, grip the door on the left and right side and pull it upwards.
- Page 28 Removing the Door Cover The plastic inlay in the door cover may become discoloured. To carry out thorough cleaning, you can remove the cover. Press on the right and left side of the cover. Remove the cover. After removing the door cover, the other parts of the door can be easily taken off for cleaning.
- Page 29 Rails • To clean the rails and cavity, you can remove the rails. • To remove the rails, pull it away from the wall of the cavity, then pull it outwards and out of the cavity. Remove the Telescopic Runners Firmly push one end of the telescopic runner upwards.
- Page 30 Insert the Telescopic Runners Place points A and B of the telescopic runner horizontally on the outer wire. Rotate the telescopic runner 90° anti-clockwise (clockwise for the right side). Push the telescopic runner forward. Ensure point C is buckled onto the lower wire and the point D is buckled onto the upper wire.
- Page 31 Screw the glass cover back in. Remove the towel and switch on the circuit breaker. Note: • If the glass cover is damaged, contact help.Kogan.com for support. • Use a dry cloth when handling the lamp. This will increase the service life of the lamp.
- Page 32 SPECIFICATIONS Mass of the oven 33kg No. of cavities Heat source Electric Usable volume ECelectric, cavity (conventional) 0.93kWh/cycle ECelectric, cavity (forced air) 0.78kWh/cycle EEI cavity 91.5 Energy efficiency class (A+++ to D)
- Page 33 TROUBLESHOOTING Problem Possible Cause Solution Check the circuit breaker in the fuse Faulty fuse. box. The appliance Check whether the kitchen light or does not work. Power outage. other kitchen appliances are working. Knobs can be removed. Simply Knobs have fallen Knobs have been place knobs back in their support in out of the support...
- Page 34 The food is not A temperature Double check the temperatures. sufficiently cooked different from the in the time given by recipe is used. the recipe. The ingredient Double check the recipe. quantities are different to the recipe. Uneven browning. The temperature Double check the recipe and setting is too high, or settings.
- Page 35 The cake is too Use a lower shelf level and a lower temperature (this may lead brown on the top. to a longer cooking time). The cake is too Set the temperature 10°C higher (this may lead to a shorter dry.
- Page 36 • When the oven settings are not specified in the recipe, you can determine them by selecting the settings indicated for the weight of the roast and adjusting the cooking time slightly How do I as needed. This ensures that the roast cooks properly based determine the on its size and the recommended settings provided by the oven settings...
- Page 37 NOTES...
- Page 40 Need more information? We hope that this user guide has given you the assistance needed for a simple set-up. For the most up-to-date guide for your product, as well as any additional assistance you may require, head online to help.kogan.com...
Need help?
Do you have a question about the KABIOV9F72A and is the answer not in the manual?
Questions and answers