Sign In
Upload
Download
Table of Contents
Contents
Add to my manuals
Delete from my manuals
Share
URL of this page:
HTML Link:
Bookmark this page
Add
Manual will be automatically added to "My Manuals"
Print this page
×
Bookmark added
×
Added to my manuals
Manuals
Brands
Belling Manuals
Cookers
G755
Installation and user instructions manual
Belling G755 Installation And User Instructions Manual
Slot-in natural gas double cavity cooker
Hide thumbs
1
Table Of Contents
2
3
4
5
6
7
8
9
10
11
12
13
14
15
16
17
18
19
20
21
22
23
24
page
of
24
Go
/
24
Contents
Table of Contents
Bookmarks
Table of Contents
Table of Contents
Introduction
Installing Your Cooker
For Your Own Safety - Never
Always
Know Your Cooker / Specification
Using the Timer (G756 & 758 Only)
Button LED Clock/Minute Minder
Minute Minder Operation
Know Your Control Panel
Using the Hob
General Notes on Safety
The Hob Glass Lid / Burner Operation / Advice on Pan Suitability
Energy Saving Tips
Safety Requirements for Deep Fat Frying IMPORTANT
Safety Advice in Case of a Chip Pan Fire / Choosing Your Utensils
Using the Grill
G755 & 757 Grill Operation/G756 Grill Operation
Grilling Guidelines / Use of Grill Pan Handle
Using the Ovens
Shelf Positions/Use of the Ovens/Oven Lamp Operation (G756 & 758 Only)
Temperature Conversion
Main Conventional Oven Cooking Guide
Top Conventional Oven Cooking Guide (G756 & 758 Only)
Care and Cleaning/Replacing the Oven Lamp
Something Wrong with Your Cooker
Service
Advertisement
Quick Links
1
Something Wrong with Your Cooker
Download this manual
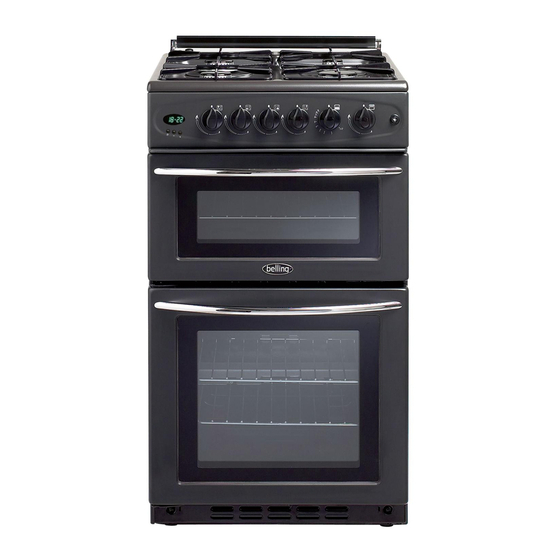
G755, G756, 757 & 758
Slot-in Natural Gas Double Cavity Cooker
INSTALLATION AND USER INSTRUCTIONS
Note:
These appliances are supplied for use with the category of gas specified
(Natural Gas I
H) and cannot be converted to any other gas.
2
Table of
Contents
Previous
Page
Next
Page
1
2
3
4
5
Advertisement
Table of Contents
Need help?
Do you have a question about the G755 and is the answer not in the manual?
Ask a question
Questions and answers
Related Manuals for Belling G755
Cookers Belling G950 Installation And User Instructions Manual
100cm gas range cooker gas hob with gas ovens & grill (32 pages)
Cookers Belling G756 Installation And User Instructions Manual
Slot-in natural gas double cavity cooker (24 pages)
Cookers Belling Baby Belling 121R Installation And User Instructions Manual
Belling cooktop user manual (9 pages)
Cookers Belling 321R Installation And User Instructions Manual
Belling cooktop user manual (9 pages)
Cookers Belling 100 Users Manual & Installation Handbook
Belling cooktop user manual (35 pages)
Cookers Belling COUNTRY CLASSIC 100 E Users Manual & Installation Handbook
Belling cooktop user manual (31 pages)
Cookers Belling FSE 60 DOP Installation And User Manual
Belling fan user manual (37 pages)
Cookers Belling FSE60DOMW Users Manual & Installation Handbook
Belling fse60domw electric cooker stainless steel (32 pages)
Cookers Belling FSE 60 MF User's Manual & Installation Instructions
(44 pages)
Cookers Belling RICHMOND 1100 DF Service Manual
(82 pages)
Cookers Belling DB4 90E Service Manual
(71 pages)
Cookers Belling 644 Installation And User Instructions Manual
Electric slot-in cookers (41 pages)
Cookers Belling 640SS Installation And User Instructions Manual
Electric slot-in cooker (24 pages)
Cookers Belling platinum db2 Installation & User's Instructions
Natural gas (35 pages)
Cookers Belling 100 EI User Manual
(29 pages)
Cookers Belling 637 Installation And User Instructions Manual
Format electric slot-in cookers (44 pages)
This manual is also suitable for:
G756
G757
G758
Table of Contents
Print
Rename the bookmark
Delete bookmark?
Delete from my manuals?
Login
Sign In
OR
Sign in with Facebook
Sign in with Google
Upload manual
Upload from disk
Upload from URL


Need help?
Do you have a question about the G755 and is the answer not in the manual?
Questions and answers