Table of Contents
Advertisement
Quick Links
INTRODUCTION
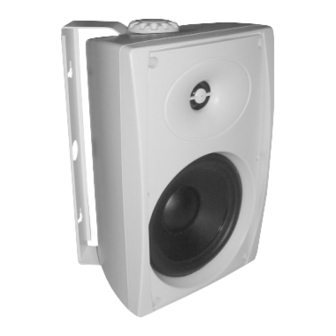
The Sound Advance Prommercial SM516 is designed for a wide range
of indoor and outdoor commercial applications. When properly
installed, this product will provide years of high quality sound
reproduction.
To obtain the full potential of this Sound Advance speaker, please read
all instructions before starting the installation.
PARTS LIST
Each Sound Advance SM516 speaker package includes the following items:
(2) Sound Advance SM516 speakers
(4) Bracket knobs
(2) C-shaped mounting brackets
INSTALLING THE SPEAKERS
Step 1
Remove the speakers from the shipping
carton. Loosen the two knobs on each
speaker and remove the brackets.
SM516
Step 2
Run wire from your amplifier to the
speaker locations.
Typical wire gauge and lengths used in 70
volt systems:
18 gauge x 10 watt load = 2200 feet
18 gauge x 20 watt load = 1100 feet
18 gauge x 50 watt load = 550 feet
18 gauge x 100 watt load = 275 feet
Note: When using the speakers in an 8-
ohm system use the Wire Gauge Chart on
page 2 as a reference.
Step 3
Mount the C-brackets to the wall surface.
The holes in the brackets are 5-7/8" apart
center-to-center. Use the included stainless
steel screws if you are mounting the
speakers outdoors. Run the speaker wires
through the wire holes in the C-brackets.
I N S T A L L A T I O N
S M 5 1 6
P R O M M E R C I A L
Step 4
Connect the wire from your amplifier to the terminals on the back of the
speaker. Double check the polarity of the speaker wires, amplifier + to
speaker + and amplifier – to speaker –.
Once the wires are connected you can set the rotary switch located on
the back of the speaker to the appropriate output level.
The combined wattage requirements of the speakers should not exceed
80% of the amplifiers rated output. Following this rule will increase the
reliability of your installation.
Here is an example:
A system uses 24 SM516 speakers set on their 2-watt taps.
24 speakers x 2-watt tap = 48 watts
48 watts / .80 = 60 watts (use this size amplifier)
SM516
Step 5
Install the speaker onto the bracket. Screw
the bracket knobs into the cabinet. Point
the speaker towards the listening area.
Once the angle of the speaker has been
determined tighten the bracket knobs
securely.
I N S T R U C T I O N S
®
S P E A K E R
Transformer Tap Switch
70 volt - 16W, 8W, 4W and 2W
100 volt - 16W, 8W, 4W and 2W
8 Ohm
Advertisement
Table of Contents

Summary of Contents for Sound Advance SM516
-
Page 1: Parts List
INTRODUCTION The Sound Advance Prommercial SM516 is designed for a wide range of indoor and outdoor commercial applications. When properly installed, this product will provide years of high quality sound reproduction. To obtain the full potential of this Sound Advance speaker, please read all instructions before starting the installation. - Page 2 WIRE GAUGE AND QUALITY When using the SM516 in an 8-ohm system the total wire resistance should be less than 10% of the speaker impedance. The SM516 speaker is nominally an 8-ohm speaker, so your total wire resistance should be no more than 0.8 ohms.
- Page 3 Polar Response Horizontal 125 to 1k dBSPL -180 -150 -120 Polar Response Vertical 125 to 1k dBSPL -180 -150 -120 Impedance 20 Hz Polar Response Horizontal 2k to 16k Curve Freq dBSPL 125.00 250.00 500.00 1.00K -180 dBSPL Curve Freq 125.00 250.00 500.00...
-
Page 4: Limited Warranty
SOUND ADVANCE PROMMERCIAL SM516 Tweeter 5/8" (16mm) Polycarbonate dome Woofer 5-1/4" (133mm) Polypropylene cone with a rubber surround Frequency Range 65Hz – 20kHz ±10dB Nominal Sensitivity 88dB 1w/1m Nominal Coverage angle 90.0 degrees vertical 90.0 degrees horizontal Directivity Factor 2.94 averaged from 500 Hz to 4 kHz Directivity Index 3.50 averaged from 500 Hz to 4 kHz...


Need help?
Do you have a question about the SM516 and is the answer not in the manual?
Questions and answers