
Related Manuals for Soleus Air KFHHP-12


Summary of Contents for Soleus Air KFHHP-12
-
Page 1: Summary And Features
SOLEUSAIR Summary and features Model Remarks 1Ph,115V,60Hz,R410A KFIHP-09 KFHHP-12 1Ph,208-230V,60Hz,R410A... -
Page 2: Specifications And Technical Parameters
Specifications and technical parameters Model Function Rated Voltage Frequency(Hz) Rated Capacity (Btu/h) Rated Input (W) (High/Standard) Rated Current (A) Air Flow Volume (m /h) (H/M/L) Dehumidifying Volume (l/h) Model of Indoor Unit Fan Motor Speed (r/min) (H/M/L) Output of Fan Motor (w) Input Power of Heater (w) Fan Motor Capacitor (uF) Fan Motor RLA(A) - Page 3 Model of Outdoor Unit Compressor Manufacturer/trademark Compressor Model Compressor Type L.R.A. (A) Compressor RLA(A) Compressor Power Input(W) Overload Protector Throttling Method Starting Method Working Temp Range ( ) Condenser Pipe Diameter (in) Rows-Fin Gap(in) Coil length (l) x height (H) x coil width (L)(in(i( Fan Motor Speed (rpm) Output of Fan Motor (W)
- Page 4 Swing Motor Model Output of Swing Motor (W) Fuse (A) Sound Pressure Level dB (A) (H/M/L) Dimension (W/D/H)( in) Dimension of Package (W/D/H)( in) Net Weight /Gross Weight (lb) KFHHP-12 COOLING 208V 230V 60HZ 13200 1450/1100 KFHHP-12ID 1350/1200/1110 0.152 Cross flow fan – 1 φ3.63—24.3...
- Page 5 Model of Outdoor Unit Compressor Manufacturer/trademark Compressor Model Compressor Type L.R.A. (A) Compressor RLA(A) Compressor Power Input(W) Overload Protector Throttling Method Starting Method Working Temp Range ( ) Condenser Pipe Diameter (in) Rows-Fin Gap(in) Coil length (l) x height (H) x coil width (L)(in(i( Fan Motor Speed (rpm) Output of Fan Motor (W)
-
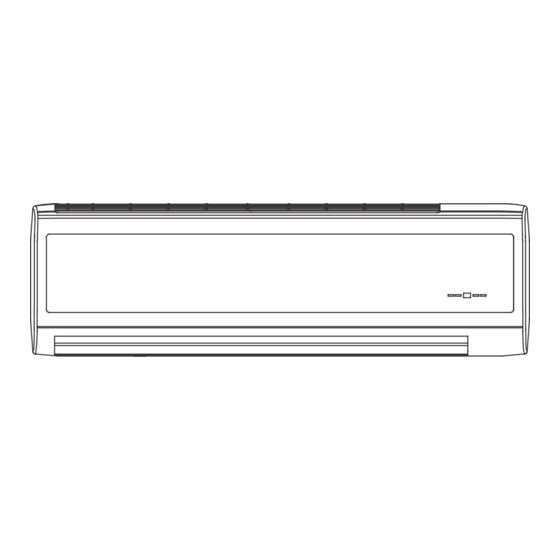
Page 6: Part Name
Part name Air inlet Indoor Unit wrapping tape Receiving window Front panel Guide louver Air outlet LED board Wireless remote controll Outdoor Unit Air inlet Drainage hose Connecting pipe and connection wir Air outlet... - Page 7 SOLEUSAIR Overall and Installing Dimension O verall and Installing Dimension of Indoor Unit Air inlet grill Left piping hole Right piping hole Top view Unit mm Rear view Wall-mounting plate...
- Page 8 O verall and Installing Dimension of Outdoor Unit Unit: mm Bolt Wrench...
-
Page 9: Circuit Diagram
SOLEUSAIR Circuit Diagram KFIHP-09 INDOOR UNIT These circuit diagrams are subject to change without notice. Please refer to the ones stuck on the machines. - Page 10 SOLEUSAIR Circuit Diagram KFHHP-12 INDOOR UNIT OUTDOOR UNIT These circuit diagrams are subject to change without notice. Please refer to the ones stuck on the machines.
-
Page 11: Function Manual And Operation Method Of Remote Controller
6 6 6 6 6 Function manual and operation method of remote controller Function manual of remote controller This function manual is applicable to D.C. Variable Frequency 6.1.1 Temperature parameters Room set temperature (T Room ambient temperature (T 6.1.2 Fundamental functions After powered on, no matter when the compressor is started, the time interval between two startups cannot be less than 3 minutes. - Page 12 60sec at the original speed and then stop. In this mode, the temperature setting range is 16 ~30 . The air conditioner will adjust the running frequency of the compressor automatically according to the change of ambient temperature. When the unit is turned off in HEAT mode, or switched to other mode from HEAT mode, the four-way valve will be powered off 2min later after the compressor stops.
- Page 13 The unit is turned on or off according to the timer set by the remote controller. 6.1.3.6 Sleep control When the air conditioner is in COOL or DRY mode, after Sleep mode has been set properly, the preset T be increased by 1 after the sleep program has run for 1 hour, and T hours.
- Page 14 6.1.3.7 Indoor fan control Use the remote controller to set the indoor fan running at HIGH, MED or LOW speed. At this time the fan will run at high, medium or low speed. It can also be set to AUTO and the indoor fan will select fan speed(HIGH, MED or LOW) automatically according to ambient temperature.
-
Page 15: Disassembly Procedures
7 7 7 7 7 Disassembly procedures Disassembly procedures for indoor unit Operation procedures/pictures 8.1.1 Disassembling the front panel and electric box cover Unloose the clasps on both sides and lift the panel upward. Unplug the two connecting terminals of the display and slide out the rear clasp from the groove to take off the front panel.(you can use panel support bar to support the panel) Screw off the fixing screws of... - Page 16 Operation procedures/pictures Disassembling the front panel body Unclench the 3 screw covers and screw off the 3 pieces of screws that fix the panel body. Unloose the front and rear clasps to take off the panel body. As shown in Fig.7-4 Disassembling the electric box cover Unloose the 3 clasps to take off the electric box cover.
- Page 17 Operation procedures/pictures Disassembling the electric box 7.1.7 Screw off the two pieces of screws that fix the electric box and unloose the clasp. Pull out the tube sensor, unloose the grounding nut and unplug the motor connecting terminal take out the electric box. As shown in Fig 7-8 ||||||||| Disassembling the evaporator assy...
- Page 18 Disassembly Procedures for Outdoor Unit Operating Procedures / Photos Disassemble Top Cover and Handle Use screwdriver to unscrew the screw at the handle, and remove the handle. Unscrew the three screws around the top cover, and remove the top cover. (refer to Figure 7-13) Disassemble Rear Grill Screw out the 4 self tapping screws on...
- Page 19 Operating Procedures / Photos Disassemble electric install plate Screw out the 3 bolts that fixing on electric install plate, plug out lead inserter of compressor and fan to take off electric install plate. (refer to Figure 7-16,7-17) Disassemble Right Side Plate Screw out the 5 bolts on rear side plate can take off right side plate.
- Page 20 Operating Procedures / Photos Disassemble Motor and Motor Support Unscrew the four tapping screws fixing the motor, and remove the motor. Unscrew the two tapping screws fixing the motor support, and lift the motor support to remove it. (refer to Figure 7-20) Disassemble 4-Way Valve Screw off the holding nut of the 4-way valve coil and remove the coil.
- Page 21 Operating Procedures / Photos Disassemble Valves Unscrew the two screws fixing the big valve, unsolder the soldering point between the big valve and the return-air duct and remove the big valve. (Note: when unsoldering the soldering point, use wet cloth to completely wrap the big valve to prevent valve body from being harmed by high temperature.) Unscrew the two screws fixing the small valve,...
- Page 22 SOLEUSAIR Exploded View and Components and Parts List Exploded View of Components and Parts of Indoor Unit KFIHP-09 KFHHP-12ID...
- Page 23 Components and Parts List of Indoor Unit Description Wall-Mounting Frame Rear Case Evaporator Assy Cross-Flow Fan Ring of Bearing Drain Hose Water Tray Swing Louver Swing Linkage Front Grill Front Case Screw Cap Air Filter Panel Panel Remote Control Light Cover Display Board Display Cover Shield Board...
- Page 24 Components and Parts List of Indoor Unit Description Wall-Mounting Frame Rear Case Evaporator Assy Cross-Flow Fan Ring of Bearing Drain Hose Water Tray Swing Louver Swing Linkage Front Grill Front Case Screw Cap Air Filter Panel Panel Remote Control YB1B4F Light Cover Display Board Display Cover...
- Page 25 Exploded View of Outdoor unit KFIHP-09OD...
- Page 26 Description Front Panel Clap Board Reactor Box C PFC Inductance 0.8mH/20A Drainage Connecter Reactor Support Assy Overload Protector Compressor C-6RZ092H1AB Compressor Gasket Bolt Valve Support Right Side Plate Assy Valve 1/2" Valve 1/4" Capillary Assy One Way Valve 4-Way Valve 4-way Rever-sing Valve Component Electric Cover Assy 4-way Valve Coil...
- Page 27 Exploded View of O u t door Unit KFHHP-12OD...
- Page 28 Components and Parts List of O u t door Unit Description Front Panel Clap Board Reactor Box C PFC Inductance 0.8mH/20A Drainage Connecter Reactor Support Assy Overload Protector Compressor C-6RZ092H1AB Compressor Gasket Bolt Valve Support Right Side Plate Assy Valve 1/2" Valve 1/4"...
-
Page 29: Troubleshooting
Insulation malfunction of line or componen in the air conditioner. Insulation breakdow occurs after radiation, which causes shor circuit or electricity leakage. Measure insulating resistance or use one-by-on elimination method;... - Page 30 Flashing or awning can be installed appropriately. If the max. cooling capacity cannot be satisfied, replacement of the air conditioner is recommended. Maintain a certain degree of indoor sealability. Try not to use appliance with high amount of heat.
- Page 31 Abnormal power supply of outdoor unit When unit is Damage of outdoor main control board cooling or heating, both compressor and outdoor fan don't Breakage of outdoor power module Improper setting of temperature Breakage of outdoor fan motor When unit is cooling or Wrong wire connection heating, the...
- Page 32 Blockage or breakage of drainage hose Water leakage Wrap of refrigerant pipe connector is not tight enough Fan of indoor unit contacts other parts There is foreign substance in indoor unit Compressor shakes too much Touch of pipeline of outdoor unit Abnormal sound and shake Touch of inner plates...
-
Page 33: Malfunction Display Section
D.C. Variable Frequency Series When malfunction or protection occurs in the air conditioner, corresponding code will be displayed on the screen of the indoor unit and the indicator of outdoor unit will blink accordingly as well. When protection or malfunction... - Page 34 (Mainboard) Red light blinks 3 times (Mainboard) Red light blinks 4 times (Mainboard) Red light blinks 5 times Indicator display of outdoor unit (Mainboard) Red light blinks 6 times (Mainboard) Red light blinks 7 times (Mainboard) Red light blinks 8 times (Mainboard) Green light blinks Note: Malfunction display : blind 0.5s;...
- Page 35 7. Module protection (H5): Handling method: Check if the voltage between power module P and N is too low and if the current is too high. In normal condition, voltage between P and N should be about 320V. Normal Temperature of power module is too high, which causes overheating protection Protection is still displayed Confirm the setting status of outdoor unit (cooling)
Need help?
Do you have a question about the KFHHP-12 and is the answer not in the manual?
Questions and answers