Table of Contents
Advertisement
Advertisement
Table of Contents

Related Manuals for Soleus Air KFHHP-22-ID


Summary of Contents for Soleus Air KFHHP-22-ID
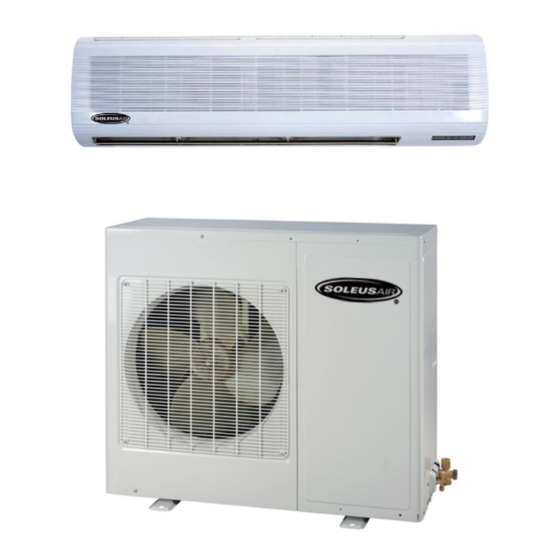
- Page 1 Wall Mounted Mini Split Heat Pump Air Conditioner OPERATING AND INSTALLATION MANUAL Model: KFHHP-22-ID / KFHHP-22-OD Indoor Unit. Outdoor Unit. Thank you for selecting Soleus Air. To ensure proper operation, please read this manual and keep it for future reference.
-
Page 2: Table Of Contents
Electrical Schematic Diagram (Indoor Unit)…………………………...……………...………….22 Electrical Schematic Diagram (Outdoor Unit)………..……………………….……………………23 WARRANTY…………………………………………………………………………………………24 Danger Caution. Thank you for selecting Soleus Air. To ensure proper operation, please read this manual and keep it for future reference. TABLE OF CONTENTS This mark indicates a direction/procedure that... -
Page 3: Operation And Maintenance
Warning Touching metal parts after removing filter can ★ cause an electric shock. Don’t operate the air conditioner with web ★ hands. It can cause an electric shock. If your air conditioner malfunctions, ★ discontinue use and call your authorized dealer. -
Page 4: Instructions Before Use
◆Instructions before Use Don’t attempt to repair the air conditioner by ★ yourself. There are no user replaceable parts. Please contact your authorized dealer. Be sure to turn the power off when not using the ★ air conditioner for a long time. -
Page 5: Description Of Air Conditioner Components
◆Description of Air Conditioner Components On/Off Switch Air intake Air outlet Signal Sensor - 3 - On/Off Switch Connecting Pipe / Line set... -
Page 6: Remote Control Operation
◆Remote Control Operation Function-Remote control Note: • Don't drop the remote control. • Don't place the remote control in a location exposed to direct sunlight. • When the unit is restarted after stopped, it will automatically resume its last running mode, and the outdoor unit will start there after. - Page 7 ◆Remote Control Operation (Continued) Liquid Crystal Display. It shows all set contents. ON/OFF Button Press ON. Press OFF. T-ON Button. When pressing this button once, enter into T-ON setting, the icon of T-ON flash, every press of TIME+, the time of T-ON will be increased 1min.
-
Page 8: How To Insert Batteries
◆Remote Control Operation (Continued) The General Procedure: 1. Press ON/OFF button to start the unit. 2. Press MODE button to select the suitable operation mode. 3. Press SWING button to swing. It will stop when pressed again. 4. Press FAN button to set desired fan speed. 5. -
Page 9: User Notices
Don’t leave windows and doors open for a long ★ time while operating the air conditioner. It can decrease the air conditioning efficiency. Don’t use the air conditioner for other purposes, ★ such as drying clothes, preserving foods, etc. The airflow direction can be adjusted. -
Page 10: Care And Maintenance
Never sprinkle water on the indoor unit and the outdoor unit for cleaning because it can cause an electric shock. Volatile Liquid (e.g. thinner or gasoline) will damage the air conditioner. (So wipe the units with a dry soft cloth, or a cloth slightly moistened with water or cleanser.) Take down the surface panel and clean it (Take it down before cleaning) 1. -
Page 11: Trouble-Shooting
2. Turn main power off. 3. Clean dust from the outdoor unit. ◆Trouble Shooting Warning: Don’t attempt to repair the air conditioner by yourself; it can cause an electric shock or fire. Please check the following items before calling your service technician. Problem Won’t start immediately... -
Page 12: Trouble-Shooting
Sound of water flow can be heard during operation. Mist is emitted during cooling operation. Creaking noise can be heard when start or stop the unit. Air conditioner does not operate at all. Cooling (Heating) efficiency is not good. Remote control is not operating... -
Page 13: Specifications And Technical Data
When the unit is restarded after it stopping, it can automatically resume the last running mode, and the outdoor unit starts later. Working temperature range Maximum cooling Minimum cooling Maximum heating Minimum heating KFHHP-22-ID / KFHHP-22-OD 22000 / 6450 (2250-7000) 24200 / 7100 (1650-8500) Indoor unit :46.38” × 8.98” ×12.83” Outdoor unit:37.40” × 16.54” × 33.07” 26.25 0.21 Φ9.52(3/8”) -
Page 14: Installation
Installation Services ◆Installation Diagram Important Notes The installation must be done by trained and qualified service personnel. - 12 -... -
Page 15: Installation Location
◆Installation Location Indoor Unit 1. The inlet and outlet should not be covered so that the outflow air can reach all parts of the room. 2. Install in a location from which the condensation water can be drained out conveniently. 3. - Page 16 ◆Installation 1. Always mount the rear panel horizontally. Because the mouth of drainage pipe is at the left side and the left side of the rear panel is better to adjust slightly lower. 2. Fix the rear panel on the selected location with screws supplied with the unit.
-
Page 17: Installation
◆Installation Note: The power of indoor unit is supplied by the outdoor. A breaker needs to be installed for safety. Operation Procedures: 1. Open the surface panel. 2. Open the cover and cover plate of electric box. (Right figure) 3. Remove the receiving window as shown in the below left figure. -
Page 18: Electric Wiring
◆Installation Note: Wiring must be done by a certified technician according to the local rules & regulations. The connecting wire should be correctly connected to circuit interface. Otherwise, it can cause a fire, electricity leakage and so on. The diagram is shown as below: 1. -
Page 19: Wiring Of Outdoor Unit
◆Installation Operation Procedures: • Open the cover of outdoor unit. • The connecting wire led from the terminal board of indoor unit should be connected correctly. • The connecting wire should be a little longer so that it can easily maintained. 1. -
Page 20: Install The Indoor Unit
◆Installation 1. Remove the front side plate. 2. Break through the hole for wires and put on the rubber bushing. 3. Pull all wires through the rubber bushing. 4. Remove the wire clamp and connect the end of the power connection cord with screws to the wiring terminal board according to the “WIRING DIAGRAM”... -
Page 21: Install The Outdoor Unit
◆Installation Install the connection pipe: • Align the center of the piping flare with the valve. • Screw in the flare nut by hand and then tighten the nut with spanner and torque wrench refer to right figure. Note: Exceeding tightening torque will damage the flare nut. Tightening Torque Table Hex Nut Diameter (mm) φ12... - Page 22 ◆Installation 1. Connect charging hose of manifold value to charging end of low pressure valve (both high/low pressure valves must be tightly shut). 2. Connect joint of charging hose to vacuum pump. 3. Fully open handle of Lo manifold valve. 4.
-
Page 23: Test Operation And Check After Installation
(4) All the impurities such as scraps must be cleared from the unit. 2. Test Operation Method (1) Switch on power and press “ON/OFF” button on the remote control to run the air conditioner. (2) Press “MODE” button and check the operation condition of COOL, HEAT, SWING mode and so forth. -
Page 24: Electrical Schematic Diagram
Electrical Schematic Diagram ◆Electrical Schematic Diagram (Indoor Unit) Please Help Insert Diagram in here. - 22 -... -
Page 25: Electrical Schematic Diagram (Outdoor Unit)
◆Electrical Schematic Diagram (Outdoor Unit) Please Help Insert Diagram in here. - 23 -... -
Page 26: Warranty
Soleus International Inc. warrants the accompanying Soleus Air Wall Mounted Mini Split Heat Pump Air Conditioner (KFHHP-22-ID/KFHHP-22-OD) to be free of defects in material and workmanship for the applications specified in its operation instruction for the period of parts specified below.
Need help?
Do you have a question about the KFHHP-22-ID and is the answer not in the manual?
Questions and answers