Advertisement
Table of Contents
- 1 Table of Contents
- 2 Foreword
- 3 Iso Symbols
- 4 General Information
- 5 Operating Instructionsf
- 6 Prior to Starting I
- 7 Emergency Stopping P
- 8 Monitoring During Operation SF
- 9 Decommissioning
- 10 Maintenance
- 11 Routine Maintenance
- 12 Lubrication
- 13 Electrical System
- 14 Fault Finding
- 15 Options
- 16 As Required
- Download this manual
Manual Closed Out
Machine no longer in production
This manual contains
important safety information
and must be made available to
personnel who operate and
maintain this machine.
Doosan purchased Bobcat Company from Ingersoll-Rand Company in
2007. Any reference to Ingersoll-Rand Company or use of trademarks,
service marks, logos, or other proprietary identifying marks belonging
to Ingersoll-Rand Company in this manual is historical or nominative
in nature, and is not meant to suggest a current affiliation between
Ingersoll-Rand Company and Doosan Company or the products of
either.
P90 P101 P110 P130
HP95 P150 P180
HP140 7/51
OPERATION AND MAINTENANCE MANUAL
P90
SERIAL No :
SERIAL No :
P101
P110
SERIAL No :
P130, HP95
SERIAL No :
P150
SERIAL No :
P180, HP140
SERIAL No :
7/51
SERIAL No :
C.C.N. : 89297972 GB
DATE : MARCH 2001
Revised (10-12)
210000
–>
210000
–>
312200
–>
312200
–>
402000
–>
415000
–>
415000
–>
Advertisement
Table of Contents

Related Manuals for Ingersoll-Rand P101


Summary of Contents for Ingersoll-Rand P101
- Page 1 415000 –> Doosan purchased Bobcat Company from Ingersoll-Rand Company in 2007. Any reference to Ingersoll-Rand Company or use of trademarks, service marks, logos, or other proprietary identifying marks belonging C.C.N. : 89297972 GB to Ingersoll-Rand Company in this manual is historical or nominative...
- Page 3 DECLARE THAT, UNDER OUR SOLE RESPONSIBILITY FOR MANUFACTURE AND SUPPLY, THE PRODUCT(S) P90 P101 P110 P130 HP95 P150 P180 HP140 7/51 TO WHICH THIS DECLARATION RELATES, IS (ARE) IN CONFORMITY WITH THE PROVISIONS OF THE ABOVE DIRECTIVES USING THE FOLLOWING PRINCIPAL STANDARDS.
-
Page 4: Table Of Contents
FAULT FINDING OPTIONS Lubricator. Safety. General Information. Operating Instructions. Maintenance. Fault Finding. Cold Start Aid. Safety. General Information. Operating Instructions. Maintenance. Fault Finding. Generator. Safety. General Information. Operating Instructions. Maintenance. Fault Finding. P90 P101 P110 P130 HP95 P150 P180 HP140 7/51... -
Page 5: Foreword
Is not approved by Ingersoll–Rand, b) May impair the safety of users and other persons, and 3. Submissions of proof that maintenance intervals have been c) May prejudice any claims made against Ingersoll–Rand. followed. P90 P101 P110 P130 HP95 P150 P180 HP140 7/51... - Page 6 Ingersoll–Rand branch or distributor. Where climatic conditions dictate that the other Ingersoll–Rand Compressor Fluids (XHP505 or Performance 500) must be used, the extended warranty will apply if the above conditions are met. P90 P101 P110 P130 HP95 P150 P180 HP140 7/51...
-
Page 7: Iso Symbols
WARNING – Before connecting the tow bar WARNING – For operating temperature WARNING – Flammable liquid. or commencing to tow consult the below 0{C, consult the operation and operation and maintenance manual. maintenance manual. P90 P101 P110 P130 HP95 P150 P180 HP140 7/51... - Page 8 Do not open the service valve before the Do not exceed the trailer speed limit. No naked lights. airhose is attached. Use fork lift truck from this side only. Emergency stop. Tie down point P90 P101 P110 P130 HP95 P150 P180 HP140 7/51...
- Page 9 On (power). Off (power). Read the Operation and Maintenance manual When parking use prop stand, handrake and before operation or maintenance of this Compressor oil filling wheel chocks. machine is undertaken. P90 P101 P110 P130 HP95 P150 P180 HP140 7/51...
- Page 10 If the discharged air is to be ultimately released into a confined DO NOT ATTEMPT TO SLAVE START A FROZEN BATTERY space, adequate ventilation must be provided. SINCE THIS MAY CAUSE IT TO EXPLODE. P90 P101 P110 P130 HP95 P150 P180 HP140 7/51...
- Page 11 When raising towing eye, set rear joint first, then front joint. set engine electrical system. P90 P101 P110 P130 HP95 P150 P180 HP140 7/51...
- Page 12 Ensure that the effective cable length is as short as possible, whilst an accidental separation of the towing vehicle from the trailer. still allowing enough slackness for the trailer to articulate without the handbrake being applied. P90 P101 P110 P130 HP95 P150 P180 HP140 7/51...
-
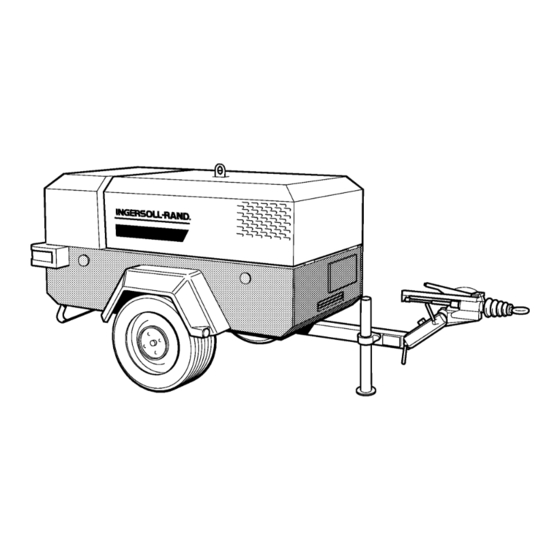
Page 13: General Information
GENERAL INFORMATION P90/P101 FIXED HEIGHT RUNNING GEAR Unbraked version (M&E) P90/P101 FIXED HEIGHT RUNNING GEAR Braked version (M&E) P90 P101 P110 P130 HP95 P150 P180 HP140 7/51... - Page 14 GENERAL INFORMATION P90/P101 VARIABLE HEIGHT RUNNING GEAR Unbraked version (M&E) P90/P101 VARIABLE HEIGHT RUNNING GEAR Braked version (M&E) P90 P101 P110 P130 HP95 P150 P180 HP140 7/51...
- Page 15 GENERAL INFORMATION P110/P130/HP95 P101WDG/P110WDG/P130WDG FIXED HEIGHT RUNNING GEAR Braked version (M&E) P110/P130/HP95 P101WDG/P110WDG P130WDG VARIABLE HEIGHT RUNNING GEAR Braked version (M&E) P90 P101 P110 P130 HP95 P150 P180 HP140 7/51...
- Page 16 GENERAL INFORMATION P150 FIXED HEIGHT RUNNING GEAR Braked version (M&E) P150 VARIABLE HEIGHT RUNNING GEAR Braked version (M&E) P90 P101 P110 P130 HP95 P150 P180 HP140 7/51...
- Page 17 GENERAL INFORMATION P180, HP140, 7/51 FIXED HEIGHT RUNNING GEAR Braked version (M&E) P180, HP140, 7/51 VARIABLE HEIGHT RUNNING GEAR Braked version (M&E) P90 P101 P110 P130 HP95 P150 P180 HP140 7/51...
- Page 18 –1 Speed at full load. 2900 revs min To start the compressor in ambient temperatures below –10{C, the (P90, P101, P130 & HP95) cold start kit option will be required. In addition, to start the compressor in ambient temperatures –1 Speed at full load.
- Page 19 WHEELS AND TYRES (P180, HP140 & 7/51) (P90 & P101) Fuel tank capacity 42 litres Number of wheels. 2 x 4 (P90, P101, P110, P130 & HP95) Tyre size. 145 R13 Fuel tank capacity 70 litres –2 Tyre pressure. 2,4 bar (35 lbf in (P150, P180, HP140 &...
- Page 20 FIXED HEIGHT RUNNING GEAR Braked version (M&E) (P180, HP140 & 7/51) Further information may be obtained by request through Shipping weight. 890 kg Ingersoll–Rand customer services department. Maximum gross weight. 1050 kg P90 P101 P110 P130 HP95 P150 P180 HP140 7/51...
-
Page 21: Operating Instructionsf
(to walls, floors etc.). Adequate clearance needs to be allowed around and above the machine to permit safe access for specified maintenance tasks. P90 P101 P110 P130 HP95 P150 P180 HP140 7/51... -
Page 22: Prior To Starting I
45 and a sulphur content not greater than 0,5%. CAUTION: When refuelling:– switch off the engine. do not smoke. extinguish all naked lights. do not allow the fuel to come into contact with hot surfaces. wear personal protective equipment. P90 P101 P110 P130 HP95 P150 P180 HP140 7/51... -
Page 23: Emergency Stopping P
CAUTION: To ensure an adequate flow of oil to the compressor at low Turn the start switch to the 0 (off) position. temperature, never allow the discharge pressure to fall below 3,5 bar . P90 P101 P110 P130 HP95 P150 P180 HP140 7/51... -
Page 24: Decommissioning
Do not allow lubricants or coolants to be released into land surfaces or drains. Do not destroy batteries or components containing asbestos without containing the materials safely. Do not dispose of a complete machine without documentation relating to instructions for its use. P90 P101 P110 P130 HP95 P150 P180 HP140 7/51... -
Page 25: Maintenance
Adjust separator. and grease the linkages. Check the towing eye bolts under the bellows cover (If applicable). Earth leakage Test the operation of the device. circuit breaker (WDG)(Socket panel). P90 P101 P110 P130 HP95 P150 P180 HP140 7/51... -
Page 26: Routine Maintenance
At twelve month intervals, test the air discharge temperature switch machine to run. by removing it from the machine and immersing in a bath of heated oil. The switch should operate at 120{C. Replace the switch. P90 P101 P110 P130 HP95 P150 P180 HP140 7/51... - Page 27 Replace the drop–tube and reconnect all hoses and tubes to the element by turning it in a counter–clockwise direction. separator tank cover plate. Inspection Replace the compressor oil (refer to LUBRICATION later in this Examine the filter element. section). P90 P101 P110 P130 HP95 P150 P180 HP140 7/51...
- Page 28 VENTILATION chafing. Any suspect parts should be replaced before the machine is Always check that the air inlets and outlets are clear of debris etc. put back into service. P90 P101 P110 P130 HP95 P150 P180 HP140 7/51...
- Page 29 CAUTION: Check the wheel nut torque 20 miles (30 kilometres) after refitting the wheels (Refer to the TORQUE SETTING TABLE later in Adjust nuts B and lock with the equaliser C parallel to the axle. this section) . P90 P101 P110 P130 HP95 P150 P180 HP140 7/51...
-
Page 30: Lubrication
Wheel bearings should be packed with grease every 6 months. The or has suffered long shutdown periods, then more frequent service type of grease used should conform to specification MIL–G–10924. intervals will be required. P90 P101 P110 P130 HP95 P150 P180 HP140 7/51... - Page 31 Separator tank to frame 18–22 24–30 Euro–Loc adaptor to separator tank 58–67 78–91 Service pipe (–20jic) 106–133 143–180 Exhaust flange to manifold 17–21 23–28 Sight glass 40–50 54–68 Wheel nuts 50–80 67–109 P90 P101 P110 P130 HP95 P150 P180 HP140 7/51...
- Page 32 ELECTRICAL SYSTEM 88126537–C Rev 00 P90, P101, P110, P130, P150, P180, HP95, HP140, 7/51 07/97 P90 P101 P110 P130 HP95 P150 P180 HP140 7/51...
-
Page 33: Electrical System
Relay, safety shut-down Relay, start inhibit Relay, oil temperature switch (engine) Relay, low fuel Key–switch Solenoid, fuel Solenoid, load Air temperature switch (airend) Air temperature switch (discharge) Oil temperature switch (engine) P90 P101 P110 P130 HP95 P150 P180 HP140 7/51... - Page 34 ELECTRICAL SYSTEM Plug Black Light (right hand) Green Fog light Pink Light (left hand) Brown Orange Purple Grey Blue White Yellow P90 P101 P110 P130 HP95 P150 P180 HP140 7/51...
- Page 35 PIPING AND INSTRUMENTATION SYSTEM Air discharge Oil cooler Minimum pressure valve Oil filter Pressure gauge Thermostatic valve Separator tank Safety valve Compressor Engine Air/oil P90 P101 P110 P130 HP95 P150 P180 HP140 7/51...
-
Page 36: Fault Finding
Perforated Replace the separator element. discharge Faulty Check the regulation system. separator air. regulator element. valve. Pressure in Check the minimum pressure valve the system is or sonic orifice. too low. P90 P101 P110 P130 HP95 P150 P180 HP140 7/51... - Page 37 Replace the safety valve if faulty. to load when solenoid. electrical circuit by feeling for DO NOT ATTEMPT A REPAIR. the load movement whilst depressing the button is load button. pressed. P90 P101 P110 P130 HP95 P150 P180 HP140 7/51...
- Page 38 FAULT CAUSE REMEDY Engine fails Cold start Replace the relay. No oil flow. Incorrect Reverse nylon tube relay faulty. to start. connection. connections to the lubricator. P90 P101 P110 P130 HP95 P150 P180 HP140 7/51...
-
Page 39: Options
OPTIONS 93165348 Revision 00 07/94 Pink Cold start device Brown Lamp, cold start Orange Pushbutton, cold start Purple Pre–heat coil Pre–heat relay Grey Blue Option White Black Yellow Green P90 P101 P110 P130 HP95 P150 P180 HP140 7/51... - Page 40 Any warnings necessary have been suitably displayed (where applicable). CAUTION: Do not start or stop the machine with the compressor/generator mode switch in the Generator position. Ensure compressor / generator mode switch is set to compressor. P90 P101 P110 P130 HP95 P150 P180 HP140 7/51...
- Page 41 CAUTION: To ensure an adequate flow of oil to the compressor at low Turn the start switch to the 0 (off) position. temperature, never allow the discharge pressure to fall below 3,5 bar . P90 P101 P110 P130 HP95 P150 P180 HP140 7/51...
- Page 42 30 milliamperes on the controlled. connected appliance or in the connections to the generator. Ensure all earth connections are secure and regularly maintained. For alternator maintenance refer to Mecc Alte operation and maintenance manual. P90 P101 P110 P130 HP95 P150 P180 HP140 7/51...
-
Page 43: As Required
4 General Information ). Drive belt is Re–tension the drive belt. not tensioned correctly. Drive pulley is Check the drive pulley and tighten loose on the as required. drive shaft. P90 P101 P110 P130 HP95 P150 P180 HP140 7/51... - Page 44 OPTIONS P90, P101, P110, P130, P150, P180, 7/51 D.C. Control Circuit Schematic Diagram. P90 P101 P110 P130 HP95 P150 P180 HP140 7/51...
- Page 45 OPTIONS P90, P101, P110, P130, P150, P180, 7/51 D.C. Control Circuit Schematic Diagram. Battery Black D1–3 Diode Green Fuse, control Light green Pink Kit–Cold start aid Brown (Option) Orange Alternator Purple Hourmeter Lamp, alternator charge Grey Blue Lamp, cold start...
- Page 46 Switch Socket outlet 32A Circuit breaker Socket outlet 16A Socket outlet 16A Circuit breaker Valve, solenoid Voltmeter Circuit breaker Fuse Voltmeter Fuse Alternator Voltmeter Contactor See DC control circuit schematic Pushbutton P90 P101 P110 P130 HP95 P150 P180 HP140 7/51...
- Page 47 Switch, start Socket outlet 32A Circuit breaker Socket outlet 16A Socket outlet 16A Circuit breaker Valve, solenoid Voltmeter Circuit breaker Fuse Voltmeter Fuse Alternator Voltmeter Contactor See DC control circuit schematic P90 P101 P110 P130 HP95 P150 P180 HP140 7/51...
- Page 48 Circuit breaker Socket outlet 32A Socket outlet 16A Socket outlet 16A Circuit breaker Valve, solenoid Voltmeter Circuit breaker Fuse Voltmeter Fuse Alternator Voltmeter Contactor See DC control circuit schematic Pushbutton Resistor P90 P101 P110 P130 HP95 P150 P180 HP140 7/51...
- Page 49 Switch, start Socket outlet 16A Socket outlet 16A Circuit breaker Socket outlet 16A Valve, solenoid Circuit breaker Voltmeter Fuse Voltmeter Alternator Fuse Contactor Voltmeter Pushbutton See DC control circuit schematic Resistor P90 P101 P110 P130 HP95 P150 P180 HP140 7/51...
- Page 52 Printed in the United Kingdom...
Need help?
Do you have a question about the P101 and is the answer not in the manual?
Questions and answers