
Related Manuals for Schacht LADYBUG


Summary of Contents for Schacht LADYBUG
- Page 1 LB6601 LB6605 LADYBUG SPINNING WHEEL & ssembly AintenAnce ArrAnty Find out more at schachtspindle.com Schacht Spindle Company 6101 Ben Place Boulder, CO 80301 303.442.3212 © 2021 Schacht Spindle Company, Inc. 10.21...
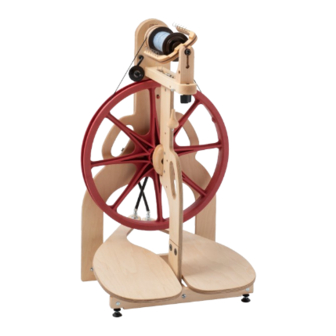
- Page 2 medium flyer bobbin whorl orifice & front rear legs* bearing & rear bearing front maiden tensioner mother-of-all drive (MOA) wheel front maiden knob Scotch tension peg upper front leg* lower front leg left right treadle treadle treadle support bar with adjustable feet fast whorl &...
- Page 3 WHERE’S MY LADYBUG? the box. Somewhere on your Ladybug spinning Remove any remaining packing wheel, you’ll find your very own ladybug. material from the wheel. She’s there cheering you on, going to Be careful not to cut the drive band spin-ins with you, or just keeping you company as you spin quietly at home.
- Page 4 ssembly It will be easiest to assemble your wheel on a table. Cover the table to protect it from scratches. INSTALL THE TREADLE ASSEMBLY Orient the treadle assembly with the treadle bar at the front of the wheel and narrow ends of the treadles at the back, as treadle assembly shown in Figure 1.
- Page 5 Attach the shorter treadle to the closer 1/4" USS footman: place a 5/16" split lock washer washer and a 1/4" USS washer on a 5/16-25 x 7/8" hex bolt. From underneath the treadle, treadle insert the hex bolt through the hole at the 1/4"...
- Page 6 Scotch tension and the medium whorl on the flyer shaft. (The fast whorl is attached to the back of the Ladybug’s rear leg.) If you want to spin with double drive right away, read through “Installing the Flyer” and “Spinning in Double Drive Mode.”...
- Page 7 Loosen the front maiden knob just enough to allow the front maiden to move. Slide the rear bearing front maiden as far forward as possible on drive band the mother-of-all (MOA). Insert the flyer orifice into the front bearing, moving the front maiden back as front needed.
- Page 8 cord slips and won’t wind up, you can make a double knot about 1" from the end of the knot. Do not cut the cord. Now you can start spinning. To increase the take-up of your yarn onto the bobbin, adjust the Scotch tension peg to stretch the spring.
- Page 9 SPINNING IN DOUBLE DRIVE MODE rear bearing For double drive spinning, slip the poly drive band band off the drive wheel; either wrap it around the front leg or completely remove it from the spinning wheel (see “Replacing front the Poly Drive Band”). bearing Add a bobbin and your preferred front...
-
Page 10: Maintenance
CARRYING HANDLES FIGURE 11: ADJUSTING THE FRONT FEET The Ladybug has a handle on the front leg and each of the back legs. To transport your wheel, pick it up by whichever handle is most comfortable. You can now carry the wheel as if it were a briefcase. -
Page 11: Lubricating Moving Parts
LUBRICATING MOVING PARTS rear front Your wheel was lubricated and tested at bearing bearing the factory before it shipped, but it may have sat unused for a while since then. Before spinning, and for every few hours of spinning, oil it with a medium-weight oil such as 20- or 30-weight SAE motor oil. -
Page 12: Two Year Limited Warranty
Spindle Company’s obligation under this Warranty shall be limited to the repair or replacement of any part or parts which may prove defective within two (2) years following the date of original purchase by the consumer, and which Schacht Spindle Company’s examination shall disclose to our satisfaction to be thus defective.
Need help?
Do you have a question about the LADYBUG and is the answer not in the manual?
Questions and answers