Table of Contents
Advertisement
Quick Links
Advertisement
Table of Contents

Related Manuals for Gaggenau BOP 220 1 2 Series


Summary of Contents for Gaggenau BOP 220 1 2 Series
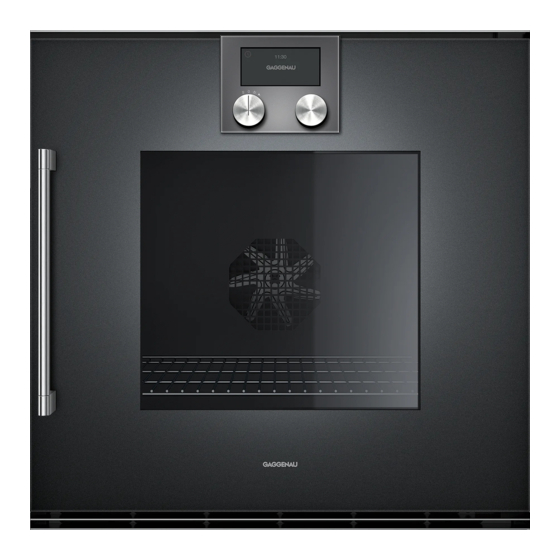
- Page 1 Instruction manual BOP 220/221 1.2 Oven...
-
Page 2: Table Of Contents
Table of contents Instruction manual Starting recipes I ntended use Change recipe Deleting recipes I mportant safety information C hildproof lock C auses of damage Activate the child lock Deactivating the child lock E nvironmental protection H ome Connect Saving energy Environmentally-friendly disposal Setting up Remote Start... -
Page 3: I Ntended Use
I ntended use Additional information on products, accessories, replacement parts and services can be found at www.gaggenau.com and in the online shop www.gaggenau.com/zz/store R ead these instructions carefully. Only then I n t e n d e d u s e will you be able to operate your appliance safely and correctly. - Page 4 Intended use Always slide accessories into the cooking compartment correctly. See description of accessories in the instruction manual.
-
Page 5: I Mportant Safety Information
Important safety information I mportant safety information Warning – Risk of fire! Risk of burns! I m p o r t a n t s a f e t y i n f o r m a t i o n Bulbs become very hot when switched on. - Page 6 Important safety information Risk of electric shock! Warning – Risk of serious damage to Do not use any high-pressure cleaners or ▯ health! steam cleaners, which can result in an electric shock. The appliance will become very hot during the Risk of electric shock! pyrolytic cleaning cycle.
-
Page 7: C Auses Of Damage
Causes of damage C auses of damage E nvironmental protection C aution! T he sections below list a number of energy-saving tips C a u s e s o f d a m a g e E n v i r o n m e n t a l p r o t e c t i o n and provide information on disposing of your appliance. -
Page 8: F Amiliarising Yourself With Your Appliance
Familiarising yourself with your appliance F amiliarising yourself with your appliance U se this section to familiarise yourself with your new F a m i l i a r i s i n g y o u r s e l f w i t h y o u r a p p l i a n c e appliance. -
Page 9: Symbols
Familiarising yourself with your appliance All versions of the appliance are operated in an identical Call up long-term timer manner. ° Demo mode Network connection (Home Connect) -------- Colours and display Colours The different colours are used to guide the user in the relevant setting situations. -
Page 10: Activating The Appliance
Different things can be displayed in standby mode. By touching the symbol, you can call up additional The default setting is the GAGGENAU logo and the information. For example, information on the type of time. heating set or on the current temperature of the cooking –... -
Page 11: Accessories
Familiarising yourself with your appliance Position Function/type of heating Temperature Application 50–300 °C Energy-saving hot air mode for cakes, meat, bakes and gratins. Residual heat is optimally used. Conveni- Eco hot air* Default temperature 170 °C ence functions remain switched off (e.g. the interior lighting). -
Page 12: B Efore Using The Appliance For The First Time
Once the appliance has been connected to a power compartment: Always leave the cover in during normal supply, the GAGGENAU logo will appear first for operation without the additional heating element. approximately 30 seconds. The "Initial settings"... -
Page 13: Setting The Date
Operating the appliance Confirm with ™. O perating the appliance Setting the date C ooking compartment O p e r a t i n g t h e a p p l i a n c e The preset date appears in the display. The day setting Warning –... -
Page 14: Switching On
Timer functions Switching on T imer functions Set the required heating mode using the function selector. The chosen heating mode and the default Y ou use the timer menu to make the following settings: temperature are displayed. T i m e r f u n c t i o n s Š... -
Page 15: Stopwatch
Timer functions The timer menu closes and the time begins to count The timer menu is closed and the timing begins. The down. The Š symbol and the countdown appear in the symbol and the elapsed time are shown in the display. display. -
Page 16: End Of Cooking Time
Timer functions End of cooking time Set the desired cooking time using the rotary selector. You can delay the cooking time end to a later time. Example: it is 14:00. The dish requires a cooking time of 40 minutes. You want it to be ready at 15:30. Enter the cooking time and delay the cooking time end until 15:30. -
Page 17: L Ong-Term Timer
Long-term timer To terminate the whole procedure: L ong-term timer Set the function selector to 0. W ith the appliance in hot air mode, this function keeps L o n g - t e r m t i m e r the temperature between 50 and 230 °C. -
Page 18: I Ndividual Recipes
Individual recipes Turn the function selector to the required type of I ndividual recipes heating. Use the rotary selector to set the required Ž temperature. symbol will be displayed. I t is possible to save up to 50 individual recipes. You I n d i v i d u a l r e c i p e s Touch the symbol. -
Page 19: Starting Recipes
Individual recipes Cancel with and exit the menu. Press briefly: moves the cursor right Press and hold: shift to normal characters Press twice: accepts the change Deleting recipes Deletes letters Set the function selector to any type of heating. Save with ™. symbol is displayed. -
Page 20: C Hildproof Lock
Childproof lock C hildproof lock H ome Connect T he appliance has a childproof lock to prevent children T his appliance can be networked and controlled C h i l d p r o o f l o c k H o m e C o n n e c t operating it accidentally. -
Page 21: Remote Start
Home Connect Select the Home Connect app and install it on your If the display shows "Network connection successful", mobile device. the connection process is complete. Follow the instructions in the app. Launch the app and set up Home Connect access. The app will guide you through the registration process. -
Page 22: Home Connect Settings
Home Connect Home Connect settings Home Connect can be adapted to your specific needs at Note: You will find the Home Connect settings in the any time. basic settings for your appliance. Which settings the display shows will depend on whether Home Connect has been set up and whether the appliance is connected to your home network. -
Page 23: Declaration Of Conformity
2014/53/EU. A detailed RED Declaration of Conformity can be found online at www.gaggenau.com on the product page for appliance in the additional documents. Hereby, BSH Hausgeräte GmbH declares that the ap- pliance with Home Connect functionality is in compli-... -
Page 24: B Asic Settings
- Date + GAGGENAU logo the desired display. - Clock + date The selection is displayed. - Clock + date + GAGGENAU logo Display Reduced*/Standard If the 'Reduced' setting has been selected, only the most important information will be shown on the display after a short time. - Page 25 Basic settings Date Current date Sets the date. You can switch between year/ month/day using the symbol C. Temperature unit °C* / °F Setting the temperature unit Weight unit kg*/oz. Set the weight unit Language German* / French [...] / English Select the language for the text display Note: The system will restart if the language is...
-
Page 26: C Leaning And Maintenance
Cleaning and maintenance Area Cleaning products C leaning and maintenance Stainless steel Hot soapy water: Clean using a dishcloth and then dry with a soft cloth. Remove splashes and patches of limescale, W ith thorough care and cleaning your appliance will C l e a n i n g a n d m a i n t e n a n c e grease, starch and albumin (e.g. -
Page 27: P Yrolytic Self-Cleaning
Pyrolytic self-cleaning Removing the insert grids P yrolytic self-cleaning Place a dishcloth in the cooking compartment to protect the enamel from scratches. Undo the knurled nuts (Fig. A). Warning – Risk of fire! P y r o l y t i c s e l f - c l e a n i n g Remove the insert grids (Fig. -
Page 28: Starting The Pyrolytic Self-Cleaning Function
Pyrolytic self-cleaning Starting the pyrolytic self-cleaning Cleaning accessories with pyrolytic function self-cleaning Gaggenau baking trays and grill trays are coated with a Set the function selector to S. pyrolysis-resistant enamel. However, for an optimum œ ™ symbol is displayed. Press to confirm. -
Page 29: W Hat To Do In The Event Of A Fault
What to do in the event of a fault Warning – Risk of electric shock! W hat to do in the event of a fault Incorrect repairs are dangerous. Repairs may only be carried out and damaged power cables replaced by one of our trained after-sales technicians. -
Page 30: A Fter-Sales Service
After-sales service Pull out the bulb. Insert the new bulb. A fter-sales service Tilt the lamp cover up and screw it back on. Switch the circuit breaker back on. O ur after-sales service is there for you if your appliance A f t e r - s a l e s s e r v i c e needs to be repaired. -
Page 31: T Ables And Tips
Tables and tips – Open the door of the preheated oven for a short T ables and tips time only when placing food inside the cooking compartment. – The figures given for the level refer to the rack level N otes T a b l e s a n d t i p s (counting from the bottom) in appliances with –... -
Page 32: Side Dishes And Meals
Tables and tips Meal Accessories Level Temperature Type of Cooking time Comments in °C heating (mins) Vegetable skewers Wire rack + 3 (4) Shorten the wooden skewers or leave grill tray them to soak in water overnight to pre- vent them from charring. Recipe tip: Peppers, onions, sweetcorn (pre-cooked), cherry tomatoes, cour- gettes... - Page 33 Tables and tips ▯ ▯ Another highly versatile oven-cooked side dish is Use a heat-resistant baking dish or tin for small cheese. It is a very good addition to vegetarian portions (2 - 3 people) and place it on the wire rack. dishes in particular;...
- Page 34 Tables and tips Meal Accessories Level Temperature Type of Cooking Comments in °C heating time (mins) Oven-baked cheese, Baking tray 2 (3) After 10 minutes, cut a cross into the soft fresh cheese and break open. If possible, the dish should be not much larger than the cheese so that the cheese does not run.
-
Page 35: Fish
Tables and tips Meal Accessories Level Temperature Type of Cooking Comments in °C heating time (mins) Quiche Tart tin or 2 (3) 20 + 20 Pre-bake the base for 20 minutes, pour the dish mixture onto the base and then bake for a further 20 minutes. - Page 36 Tables and tips ▯ ▯ For small portions (two to three people), it is a good If the joint of meat has become too dark in colour idea to use a heat-resistant baking dish or tin so and the skin is burnt in places, reduce the set that the food does not begin to burn or dry out.
- Page 37 Tables and tips Meal Accessory/ Level Tempera- Type of Cooking Comments ture heating time in °C (mins) Rolled roasting joint Glass dish/ 2 (3) 230 / 180 65 - 70*** grill tray Wire rack + 2 (3) 230 / 180 75 - 80*** grill tray Veal...
-
Page 38: Poultry
Tables and tips Meal Accessory/ Level Tempera- Type of Cooking Comments ture heating time in °C (mins) Meatballs, lightly Baking tray 2 (3) Recipe tip: Place meatballs made from fried (25 g each) minced lamb or rabbit on skewers and serve greaseproof with mint yoghurt or fig mustard. -
Page 39: Grilling And Roasting
Tables and tips Meal Accessories Level Temperature Type of Cooking Comments in °C heating time in min. Chicken leg Wire rack + 3 (4) 30** After the leg is turned, the side with more Grill tray skin should be at the top. This makes it 3 (4) 30** nice and crispy. -
Page 40: Baked Items
Tables and tips Dish Accessories Level Recom- Type of Cooking Comments mended heating time tempera- (mins) ture in °C Spare ribs, Wire rack + 3 (4) Recipe tip: Place in a mixture of oil, mustard, grill tray balsamic vinegar, honey, garlic, Worcester 3 (4) sauce, tomato purée and Tabasco sauce. - Page 41 Tables and tips ▯ ▯ If the cake collapses, use less liquid or set the If the cake does not come away from the tin when temperature 10 °C lower. Do not open the oven you are trying to turn it out, carefully slide a knife door too soon.
- Page 42 Tables and tips Dish Accessories Level Temperature Type of Cooking Comments in °C heating time (mins) Apple pie 20 cm 160** 90–105 Preheat springform (in accordance with cake tin EN60350-1) 20 cm 160** 90–100 Preheat (Appliance width: springform 60 cm) cake tin Apple pie 20 cm...
- Page 43 Tables and tips Dish Accessories Level Temperature Type of Cooking Comments in °C heating time (mins) Waffle biscuits Baking tray 2 (3) 8–10 Shape the waffle biscuits whilst they are still hot, e.g. into ice cream cones or small greaseproof rolls for dessert.
-
Page 44: Desserts
Tables and tips Dish Accessories Level Temperature Type of Cooking Comments in °C heating time (mins) Baguette, Baking tray 2 (3) 10–12 pre-baked greaseproof paper Ciabatta, Baking tray 2 (3) 12–14 pre-baked 2 (3) 12–14 greaseproof paper Flatbread Baking tray 2 (3) 15–20 The cooking time depends on the size and... -
Page 45: Preserving
Tables and tips ▯ Oven-cooked desserts are generally eaten warm, and are particularly enjoyable during the cooler months. Dish Accessories Level Temperature Heating Cooking Comments in °C function time in min. Apple crumble Ovenproof 2 (3) 35 - 40 Apple bake with a crumble topping; equally dish delicious with berries or mirabelles. -
Page 46: Disinfecting
Tables and tips Dish Accessories Level Temperature Heating Cooking Comments in °C function time in min. Fruit Wire rack 1 (2) 150 - 160 35 - 40 In sealed jars Vegetables Wire rack 1 (2) 190 - 200 60 - 120 In sealed jars Disinfecting ▯... -
Page 47: Acrylamide In Foodstuffs
Tables and tips ▯ The temperatures and times specified in the cooking table are average values. In addition, always follow the manufacturer's instructions for pre-cooked and frozen products. Meal Accessory/ Level Tempera- Type of Cooking Comments ture heating time in °C (mins) Bread rolls, fresh Baking... - Page 48 BSH Hausgeräte GmbH Carl-Wery-Straße 34 81739 München, GERMANY www.gaggenau.com Valid within Great Britain: Imported to Great Britain by BSH Home Appliances Ltd. Grand Union House Old Wolverton Road Wolverton, Milton Keynes MK12 5PT United Kingdom...
Need help?
Do you have a question about the BOP 220 1 2 Series and is the answer not in the manual?
Questions and answers