
Related Manuals for Woodbridge T-0047


Summary of Contents for Woodbridge T-0047
- Page 1 INSTALLATION AND CARE GUIDE WOODBRIDGE ® ® ® SCC Accredited CB-P/S ANSI ACCREDITED LISTED ISO/IEC 17065 OCPS Product Certification Body Accrédité #1000 20200818 REV. 1 www.woodbridgebath.com...
-
Page 2: Tools Required For Installation
WOODBRIDGE READ ALL INSTRUCTIONS BEFORE UNPACKING THE PRODUCT THIS This products must be installed by a fully insured and licensed plumber only. Installation of any our product by anyone other than fully insured and licensed plumber shall void limited warranty. We recommends that such licensed plumber have experience in the installation of products. -
Page 3: Dimensions/Technical Data
WOODBRIDGE DIMENSIONS/TECHNICAL DATA 28 1/2" 14 1/4" 2 1/2" 7 1/4" 20 3/8" 2" 5 1/2" Rough-in 12" Standard IMPORTANT INFORMATION Measurements are ± www.woodbridgebath.com... - Page 4 WOODBRIDGE WATER SUPPLY LOCATION & TECHNICAL INFORMATION Side View Back View Threaded 15" Floor 12" Rough-in 4 1/2" 12" Standard 10" Side View You may connect water supply line to the fill valve. With this model the shut-off valve may be located anywhere outside of 41/2"...
- Page 5 IMPORTANT! Shut off main water supply prior to installation! REMOVE OLD TOILET 1. Shut off water supply line. If you do not have shut-off valve near the toilet shut off main water supply line. 2. Flush the old toilet and make sure that tank is empty. 3.
-
Page 6: Installation Instructions
WOODBRIDGE INSTALLATION INSTRUCTIONS INSTALL NEW TOILET Step 1. Lift and carefully put the toilet over the closet flange inside the outline made by template so the closet bolts can go through the mounting Bathroom holes in the toilet's base. Once the bowl is in the position... -
Page 7: Base Installation
WOODBRIDGE ADJUSTMENT & MAINTENANCE (DUAL FLUSH VALVE) Important Note: This page is for reference only. All adjustments are already made by manufacturer. 1. BASE INSTALLATION Gasket Check the dual flush Install the base with the Install a body of the flush... -
Page 8: Water Level Adjustment
WOODBRIDGE ADJUSTMENT & MAINTENACE (FILL VALVE) Important Note: All adjustments are already made by manufacturer. Instructions: 95mm When valve installed, the critical level mark on fill valve (identified by C.L. mark on 58mm valve body) shoud be at least 1" above top of the over flow pipe. - Page 9 WOODBRIDGE CLEANING & TROUBLESHOOTING (FILL VALVE) FILL VALVE CLEANING Shut off water supply line Carefully, take out the filter Use water to wash and clean Re-install the filter and before filter cleaning. from inlet by using pliers. the filter and adapter from any re-connect the water supply debris.
- Page 10 When using electrical products, especially when children are present, basic safety precautions shouldalways be followed, including the following: 1.The appliance is not to be used by persons (including children) with reduced physical, sensory or mental capabilities, or lack of experience and knowledge, unless they have been given supervision or instruction.
-
Page 11: Important Safety Instructions
WOODBRIDGE IMPORTANT SAFETY INSTRUCTIONS CAUTION – Indicates that failure to follow the instruction may cause body injury or property damage. 1. Do not install or use the product in wet places as steam room etc.This product must be connected to properly grounded power outlet socket. - Page 12 WOODBRIDGE TECHNICAL SPECIFICATION Rating pressure AC 110-120V,50/60Hz Rating power 1050-1250W Main Unit Minimum water pressure 0.07MPa (20L/min. flowing pressure). Water pressure range Maximum water pressure 0.8MPa (Hydrostatic pressure) Electrical wire length is about 1.8m Container capacity 600ml Heating power 1000W...
-
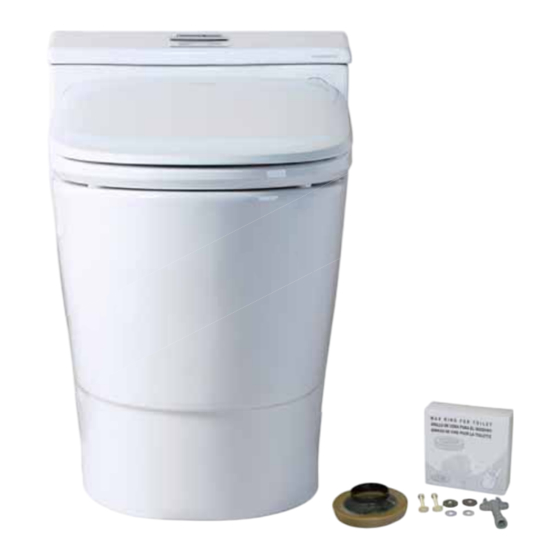
Page 13: Packaging List
WOODBRIDGE PACKAGING LIST Components Name Release button Leakage protection plug Infrared receiver Buffer Power cord Water supply pipe Nozzle baffle Drying Seat baffle Nozzle Rear cleaning Front cleaning The remote control Whole set of product www.woodbridgebath.com... - Page 14 WOODBRIDGE MAIN UNIT IDENTIFICATION Main Unit Knob Instructions (Knob Applies) Back Front 1. When people is seated, turn Rear Cleaning Knob forward to start rear Rear Cleaning Knob 2. During rear cleaning, turn the knob forward, the washing position moves forward, otherwise, the washing position moves backward.
-
Page 15: Technical Specification
WOODBRIDGE INSTALLATION LNSTRUCTION Technical Specification Rated voltage 110-120V,50/60Hz Rated power 960W Main Unit The minimum necessary pressure 0.08MPa (hydrostatic pressure), Water pressure the maximum water pressure 0.8MPa (hydrostatic pressure) range Power Cord length is about 1.6m 1400W(120V) Heating power Water... -
Page 16: Packing List
WOODBRIDGE Packing List 1.Remote control Remote control rack Remote control Batteries (3) The remote 2.Remote control rack control Expansion screws (2) assembly 3.Expansion screws (2) 4.Batteries (3) Screws 1.Base plate Fixed piece 2.Screws (2) Base plate assembly Floor 3.Fixed piece (2) Expansion nut 4.Expansion nut (2) -
Page 17: Installation Instruction
WOODBRIDGE INSTALLATION INSTRUCTION Product Size and Installation Preparation Tool 130-190mm 403mm + 380mm Phillips screwdriver Wrench Tape measure * Tips: Please confirm this seat fitting your current toilet. Installation of Main Unit * This product has been tested for water flow before leaving the factory. There may be a small amount of residual water dripping out when removing the product, which is not a malfunction. - Page 18 WOODBRIDGE Installation of Water inlet pipe and Tee joint Connect to Water supply pipe Current toilet water supply pipe Connect to main unit Connect to the Water Inlet pipe angle valve Tee Joint Angle Valve ① Connect Tee joint to angle valve; (The original Tee joint should be removed);...
-
Page 19: Preparation For Start-Up
WOODBRIDGE DAILY MAINTENANCE Preparation for Start-Up 1. Turn on the angle valve Check the tightness of the threaded connection to ensure that there is no water leakage. Turn the angle valve counterclockwise to adjust the opening to the maximum. (Tips: when the valve is opened for the first time, the angle valve handle has a large torque) Angle valve 2. -
Page 20: Daily Maintenance
Daily Maintenance Maintenance of Main Unit 1.Turn off the power during maintenance of this machine. 2. Wipe the dirty area with a soft cloth that is wrung out of water. 3. After wiping, please turn on the power again. Neutral cleaner Tips: Do not rinse the surface of the product directly with water during maintenance. - Page 21 WOODBRIDGE TROUBLESHOOTING GUIDE Self-cleaning Waterway Maintenance Current-limiting shaft Current-limiting nut Self-cleaning waterway maintenance: When the self-cleaning waterway is blocked, Note: there is no water coming out during self-cleaning Cut off power prior to discharging process. the water. 1. Turn off the angle valve.
-
Page 22: Troubleshooting Guide
WOODBRIDGE Troubleshooting Guide Problem Cause Solution Solve the problem of bending of Water inlet hose bent to cause water inlet hose blocking No Water from Inlet valve is off Turn on the inlet valve Nozzle Connect water supply and Water supply is cut off... - Page 23 Troubleshooting Guide Problem Cause Solution Solve the problem of bending of Water inlet hose bent to cause water inlet hose blocking No Water from Inlet valve is off Turn on the inlet valve Nozzle Connect water supply and Water supply is cut off wait for the water Water inlet hose bent to cause Solve the problem of bending of...
-
Page 24: Remote Control Illustration
USER MANUAL BID 02 WOODBRIDGE Remote Control Illustration Thank you for choosing our product.Please read the instructions carefully before installation and keep it available for future maintenance or reference. Customer Service Phone: 562-229-0088. (Monday - Friday 9 AM - 5 PM Pacific Time) Or Email: help@woodbridgebath.com... -
Page 25: Installation Preparation
WOODBRIDGE REMOTE CONTROL ILLUSTRATION Installation Preparation 安装准备 Remote control installation Remote control hanger installation (1) Place the remote control hanger upright on the (2) Put the expansion tube into the wall hole pre-installed area of the wall and mark the location and the hanger is tight against the wall. - Page 26 WOODBRIDGE REMOTE CONTROL ILLUSTRATION Installation Preparation Remote control installation Remote control hanger installation (Only for the hanger matching with fixing board and foam gasket.) (1) Clean and dry the pre-installed area of the (2) Remove the adhesive tape on the back remote control rack on the wall.
- Page 27 WOODBRIDGE REMOTE CONTROL ILLUSTRATION Usage Instruction Remote control illustration Rear cleaning/massage Water increasing Nozzle moving forward Front cleaning/massage Water reducing Nozzle moving backward Drying Auto rear cleaning Auto front cleaning Indicator light(only Stop/Energy saver visible when the light is on)
-
Page 28: Usage Instruction
WOODBRIDGE Usage Instruction Rear/Front cleaning ·Press “Rear cleaning/massage” button, the indicator light is on showing current water temperature level, it starts rear cleaning; Press again “Rear cleaning/massage” button to shift to massage to massage cleaning (nozzle moves forward and backward to expand cleaning area). The cleaning will last for a circle and stop automatically, while it will stop immediately if the user presses “STOP”... - Page 29 WOODBRIDGE Usage Instruction Water volume adjustment · Presss “+” or “- ” button when it is under function of rear cleaing or front cleaning, the indicator light will be on showing current water volume level, adjust water volume by levels.
-
Page 30: Energy Saver
WOODBRIDGE Usage Instruction Energy saver Keep pressing “STOP” button for more than 3S to enter energy saving mode, the indicator light will be off and energy saving light will be on. Keep pressing “STOP” button again for more than 3S to exit energy saving mode, the indicator light will be on and energy saving light will be off. -
Page 31: Temperature Adjustment
WOODBRIDGE REMOTE CONTROL ILLUSTRATION Usage Instruction Temperature adjustment · Water temperature adjustment Short press the “WATER TEMP” button to adjust the water temperature. The indicator will show the water temperature level if it’s on. When the indicator is off, the water level is 0. Short press this button to adjust water temperature level from 0 to 5 in cycle. -
Page 32: Other Operations
WOODBRIDGE REMOTE CONTROL ILLUSTRATION Usage Instruction Other Operations User Code · The user code needs to be set to avoid disturbance from remote controls when more than one smart toilets are used in the house. Turn on the toilet for setting while turning off others.Press user code combination buttons (Press “STOP”...
Need help?
Do you have a question about the T-0047 and is the answer not in the manual?
Questions and answers